
Introduction
Thank you for choosing the MATICOD LED TV Backlight Strip. This product is designed to enhance your viewing experience by providing ambient lighting behind your television, reducing eye strain, and creating an immersive atmosphere. This manual provides detailed instructions for setup, operation, and maintenance.
Safety Information
- Ensure the power source is compatible with the LED strip's requirements (USB 5V).
- Do not expose the LED strip to water or excessive moisture. This product is for indoor use only.
- Avoid bending the LED strip sharply, as this may damage the circuit.
- Keep out of reach of children.
- Do not attempt to repair or modify the LED strip. Contact customer support if issues arise.
Package Contents
- 1 x 16.4ft RGB 5050 LED Light Strip
- 1 x USB Power Cable with 3-Key Controller
- 1 x 24-Key Remote Control
- 1 x User Manual
Setup Instructions
Follow these steps for proper installation of your LED TV backlight strip:
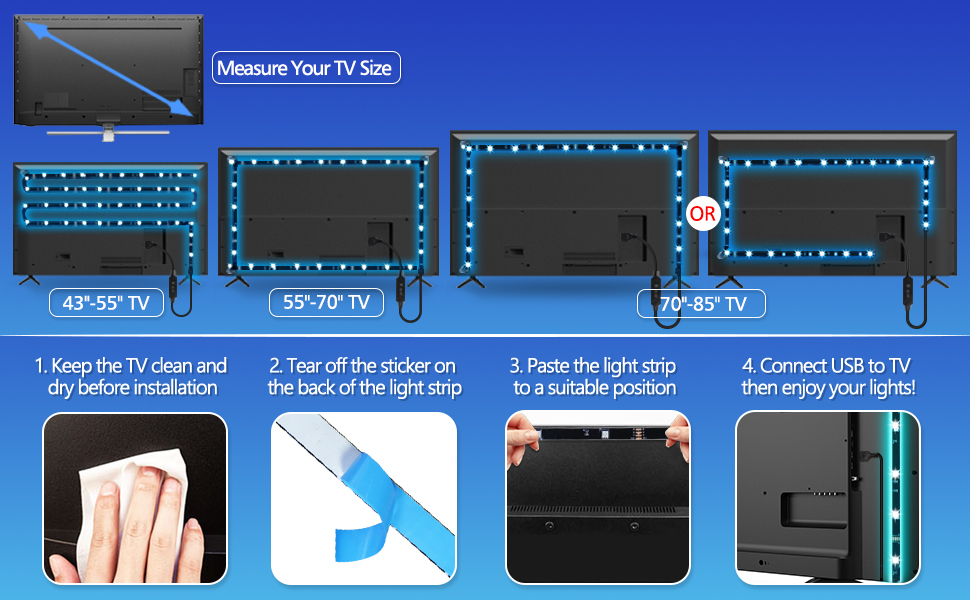
- Prepare the Surface: Ensure the back of your TV is clean, dry, and free of dust. Use a soft cloth to wipe the surface.
- Measure Your TV: The 16.4ft strip is suitable for 55-70 inch TVs. Plan the layout before peeling the adhesive.
- Apply the LED Strip: Carefully peel off the protective paper from the back of the LED strip. Begin applying the strip from one corner of your TV, pressing firmly as you go. For corners, gently bend the strip to follow the TV's edge. Do not fold sharply.


- Connect to Power: Plug the USB connector of the LED strip into a USB port on your TV or a compatible USB power adapter (5V). The lights will turn on automatically when the TV is powered on.

Operating Instructions
Your MATICOD LED TV Backlight Strip offers multiple control options:

1. Bluetooth App Control
Download the free "duoCo Strip" app from the Apple App Store or Google Play. Once installed, connect the TV LED backlight to a USB power source and enable Bluetooth on your smartphone. The app will automatically detect the device, allowing you to:
- Choose from over 16 million colors.
- Select from up to 21 dynamic lighting modes.
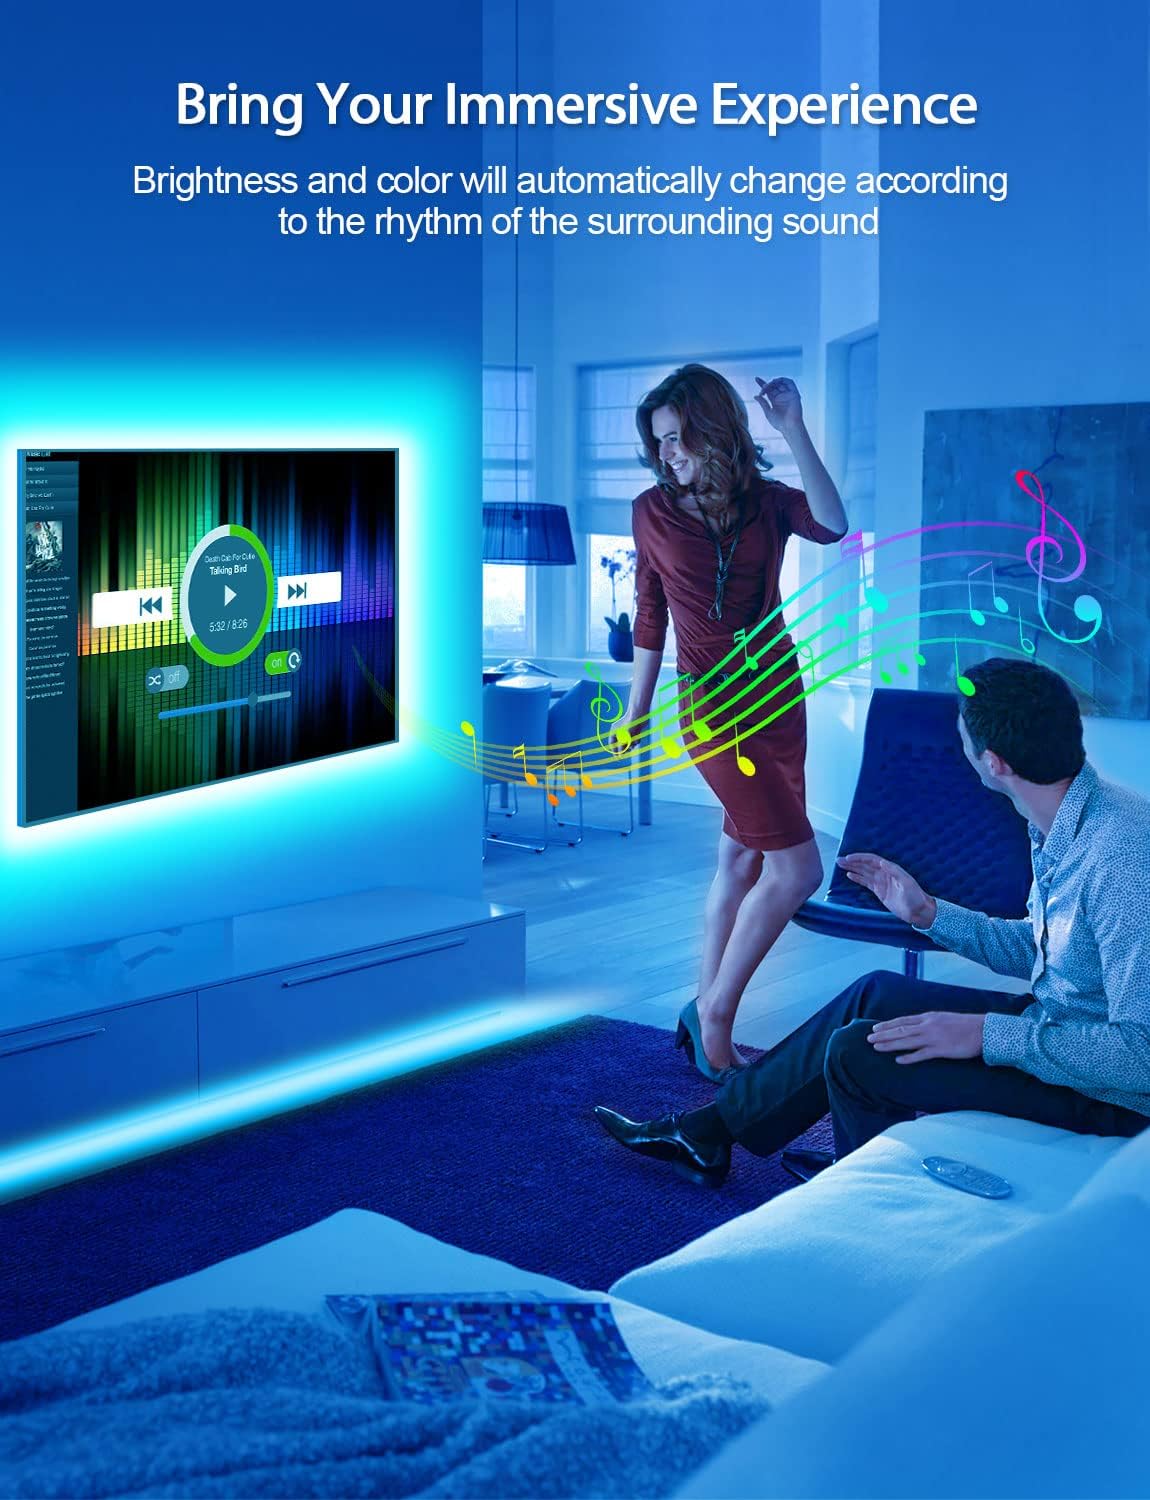
- Activate Music Sync mode, where lights change with surrounding sounds.
- Set timing modes for automatic on/off.
- Utilize Mic mode for sound-reactive lighting.

2. 24-Key Remote Control
The included remote control provides convenient access to essential functions:
- Turn lights On/Off.
- Select static colors (Red, Green, Blue, Yellow, Cyan, Purple, White).
- Adjust brightness.
- Change dynamic modes and speed.
- Set timer functions (1H, 2H, 3H).
3. 3-Key Controller
The inline 3-key controller on the USB cable offers basic control without the app or remote:
- Power On/Off.
- Cycle through colors.
- Change dynamic modes.
Key Features
- Ambient Lighting: Provides a comfortable viewing experience in the dark, reducing visual fatigue and enhancing the overall ambiance of your space.
- Music Sync: Features a built-in high-sensitivity microphone that allows the LED lights to automatically change colors and patterns in sync with surrounding sounds and music.
- RGB 5050 LED Beads: Utilizes advanced 5050 model LED lamp beads for brighter, more colorful lighting effects and a wider range of dynamic change modes.
- Easy Installation: The light strip comes with pre-applied adhesive, eliminating the need for additional glue. Simply peel and stick to any smooth, dry, and clean surface.
Maintenance
- Cleaning: Gently wipe the LED strip with a dry, soft cloth to remove dust. Do not use liquid cleaners.
- Adhesion: If the strip begins to peel, re-secure it with additional adhesive tape (not included) to prevent damage.
- Storage: If removing the strip for storage, carefully peel it off and roll it loosely. Store in a cool, dry place.
Troubleshooting
| Problem | Possible Cause | Solution |
|---|---|---|
| Lights do not turn on. | No power or loose connection. | Check USB connection. Ensure TV USB port is active or try a different USB power source. |
| Remote control not working. | Battery depleted or remote sensor blocked. | Replace remote battery. Ensure no obstructions between remote and the 3-key controller's sensor. |
| App cannot connect to lights. | Bluetooth is off or app issue. | Ensure Bluetooth is enabled on your device. Restart the app and try reconnecting. Ensure the lights are powered on. |
| Lights flicker or change erratically. | Unstable power supply or interference. | Try a different USB power source. Ensure no strong electromagnetic interference nearby. |
Specifications
- Brand: MATICOD
- Model Number: SKS-DS-03
- Light Source Type: LED (5050 RGB)
- Light Color: RGB (16 Million Colors via App)
- Item Length: 16.4 Feet
- Power Source: Corded Electric (USB 5V)
- Wattage: 5 watts
- Number of Light Sources: 90
- Control Method: App, Remote, 3-Key Controller
- Indoor/Outdoor Usage: Indoor
- Item Weight: 3.84 ounces
Warranty and Support
MATICOD products are designed for quality and reliability. For any questions, technical support, or warranty claims, please refer to the contact information provided with your purchase or visit the official MATICOD website. Please retain your proof of purchase for warranty purposes.