
1. Introduction
Thank you for purchasing the SmallRig Super Clamp Ball Head Magic Arm with GoPro Adapter, Model 3757B. This versatile mounting solution is designed to securely attach various camera accessories to a wide range of surfaces. Please read this manual carefully to ensure proper installation and operation.

Figure 1.1: SmallRig Super Clamp Ball Head Magic Arm with GoPro Adapter (Model 3757B)
1.1 Package Contents
- Crab-type Clamp x 1
- Ball Head Magic Arm x 1
- Action Camera Adapter x 1
2. Product Features
- Removable Action Camera Adapter: The clamp includes a dedicated adapter for action cameras, compatible with models like GoPro Hero 12/11/10/9 Black and DJI Osmo Action 3 camera cages.
- Wide Compatibility: Equipped with 1/4"-20 and 3/8"-16 screw holes, allowing quick and secure attachment of various accessories such as action cameras, monitors, LED lights, and microphones.
- Durable Construction: Manufactured from aerospace-grade aluminum alloy and stainless steel, with CNC machining for enhanced robustness and durability.
- Protective Design: Features a built-in anti-slip cushion to protect mounted camera accessories and improve overall clamp stability.
- High Load Capacity: Supports a maximum load of 3.5 kg (7.7 pounds), suitable for most camera accessories.
- Adjustable Clamp Range: The clamp can securely grip rods with diameters from 14mm to 60mm and flat surfaces with a maximum thickness of 65mm. This allows attachment to round pipes, tables, handlebars, tripods, and stabilizer handheld rings.
- Anti-twist Ball Head: The ball head features a hexagonal hole at its base for reinforced tightening with a hex wrench. Its 360-degree adjustable design incorporates a helical structure for enhanced stability.

Figure 2.1: Detailed view of product features including removable adapter, anti-slip pads, and adjustment knob.
3. Installation and Setup
3.1 Attaching the Clamp
- Identify the desired mounting surface (e.g., rod, table edge, tripod leg).
- Open the clamp by rotating the large thumb screw counter-clockwise.
- Position the clamp jaws around the surface. Ensure the anti-slip pads make full contact.
- Rotate the large thumb screw clockwise to tighten the clamp securely. Verify that the clamp is firmly attached and does not move.

Figure 3.1: The clamp supports objects from 14mm diameter to 65mm thickness.
3.2 Mounting Accessories
- The magic arm features a 1/4"-20 screw at the top. Attach your camera, monitor, or LED light by screwing it onto this thread.
- For action cameras, attach the included action camera adapter to the 1/4"-20 screw on the magic arm. Then, mount your action camera to the adapter.
- Utilize the additional 1/4"-20 and 3/8"-16 screw holes on the clamp body for mounting other accessories directly, if needed.

Figure 3.2: The clamp offers multiple mounting points including 1/4"-20 and 3/8"-16 screw holes, and an action camera mount.
4. Operation
4.1 Adjusting the Ball Head
- Loosen the thumb lever on the magic arm to adjust the angle of the attached accessory.
- The ball head allows for 360-degree rotation, providing flexibility in positioning.
- Once the desired angle is achieved, tighten the thumb lever firmly to lock the ball head in place.

Figure 4.1: The 360-degree adjustable ball head allows for flexible positioning of accessories.
4.2 Load Capacity Considerations
The maximum load capacity for this product is 3.5 kg (7.7 pounds). Ensure that the total weight of your mounted equipment does not exceed this limit to maintain stability and prevent damage.

Figure 4.2: The clamp can support devices up to 3.5 kg, including cameras, monitors, and LED lights.
5. Maintenance
To ensure the longevity and optimal performance of your SmallRig Super Clamp, follow these maintenance guidelines:
- Regularly inspect all screws and connections for tightness. Use a hex wrench to tighten any loose screws, especially those on the ball head.
- Keep the clamp clean by wiping it with a soft, dry cloth. Avoid using abrasive cleaners or solvents.
- Store the clamp in a dry environment when not in use.
- Do not disassemble the original small screws on the ball head magic arm. Disassembly or replacement of these screws may compromise the product's integrity and stability.
6. Troubleshooting
6.1 Clamp or Ball Head Loosening
If the clamp or ball head becomes loose during use, especially under vibration or heavy loads:
- Immediately re-tighten the main thumb screw on the clamp and the thumb lever on the ball head.
- For the ball head, use a hex wrench to ensure the internal hexagonal screw is securely fastened.
- Always verify the stability of the setup before and during operation, particularly when mounting valuable equipment.
- Ensure the mounted surface is within the specified diameter/thickness range (14-60mm for rods, up to 65mm for flat surfaces) for optimal grip.
7. Specifications
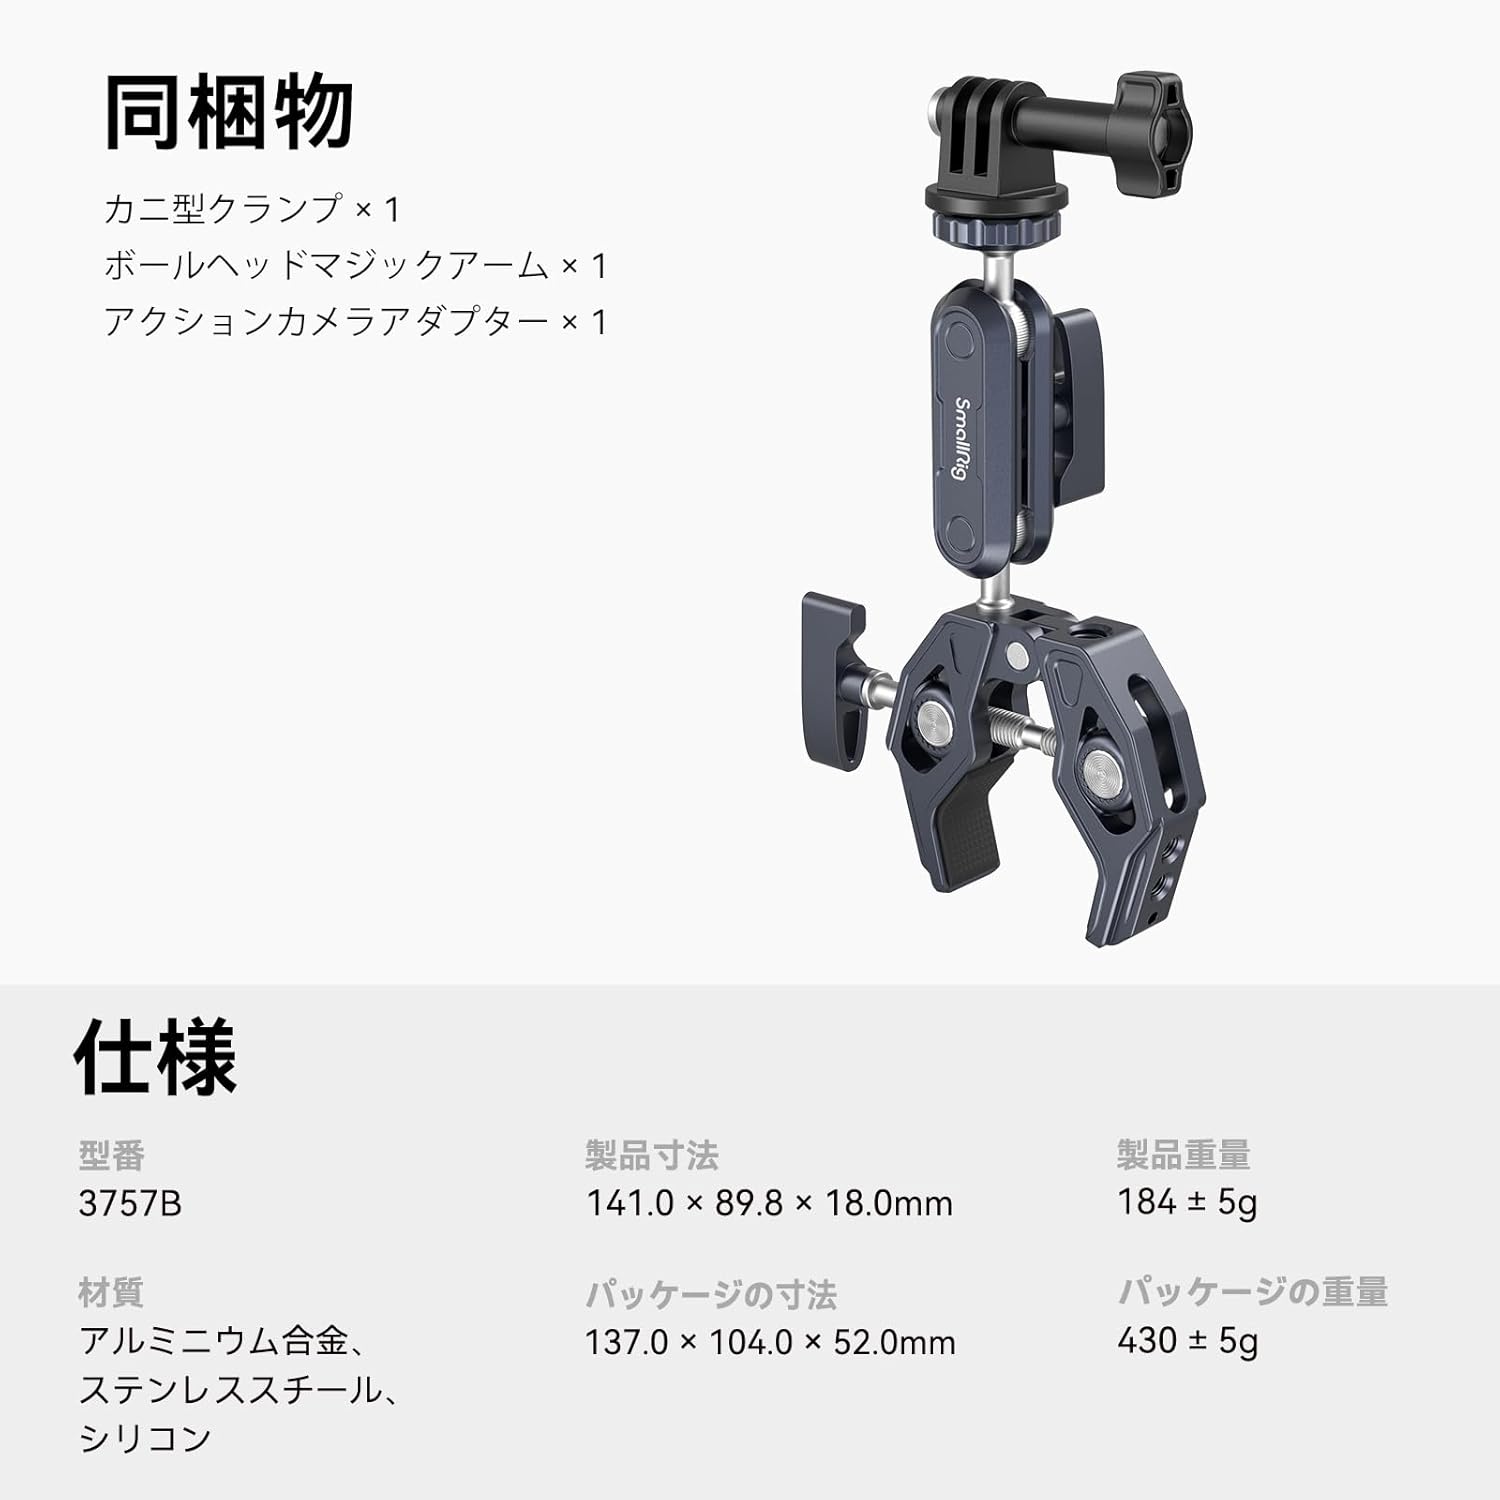
Figure 7.1: Product specifications and package contents.
| Attribute | Detail |
|---|---|
| Model Number | 3757B |
| Product Dimensions | 141.0 x 89.8 x 18.0 mm |
| Product Weight | 184 ± 5 g |
| Material | Aluminum Alloy, Stainless Steel, Silicone |
| Max Load Capacity | 3.5 kg (7.7 lbs) |
| Clamp Range (Rod) | 14 mm to 60 mm diameter |
| Clamp Range (Flat Surface) | Up to 65 mm thickness |
| Screw Mounts | 1/4"-20, 3/8"-16 |
8. Warranty and Support
SmallRig products are manufactured to high-quality standards. For warranty information or technical support, please refer to the official SmallRig website or contact your local distributor. Keep your purchase receipt as proof of purchase.


