1. Introduction
The ASUS SIMPRO Dock 2 is a versatile docking station designed to expand the connectivity options of compatible laptops. It provides a wide array of ports for connecting external displays, USB devices, network, and power, streamlining your workspace and enhancing productivity. This manual provides essential information for setting up, operating, and maintaining your SIMPRO Dock 2.
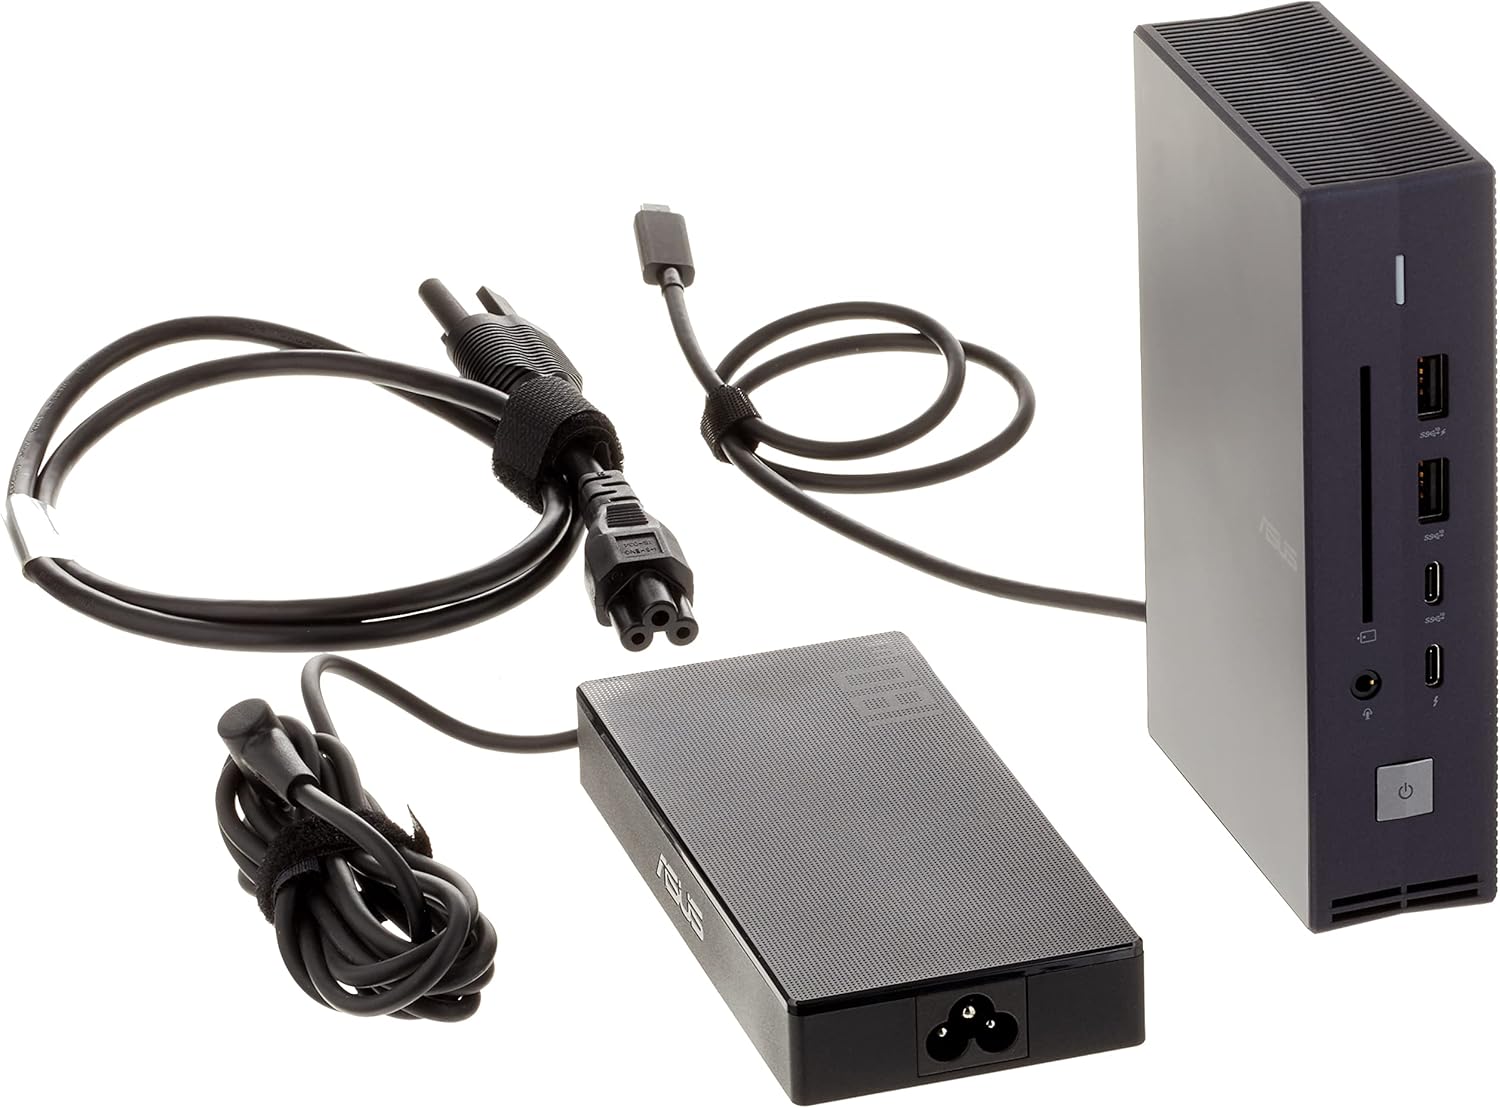
2. Package Contents
Verify that all items are present in your package. If any item is damaged or missing, contact your retailer.
- ASUS SIMPRO Dock 2
- Power Adapter
- Thunderbolt Cable (60cm)
3. Product Overview
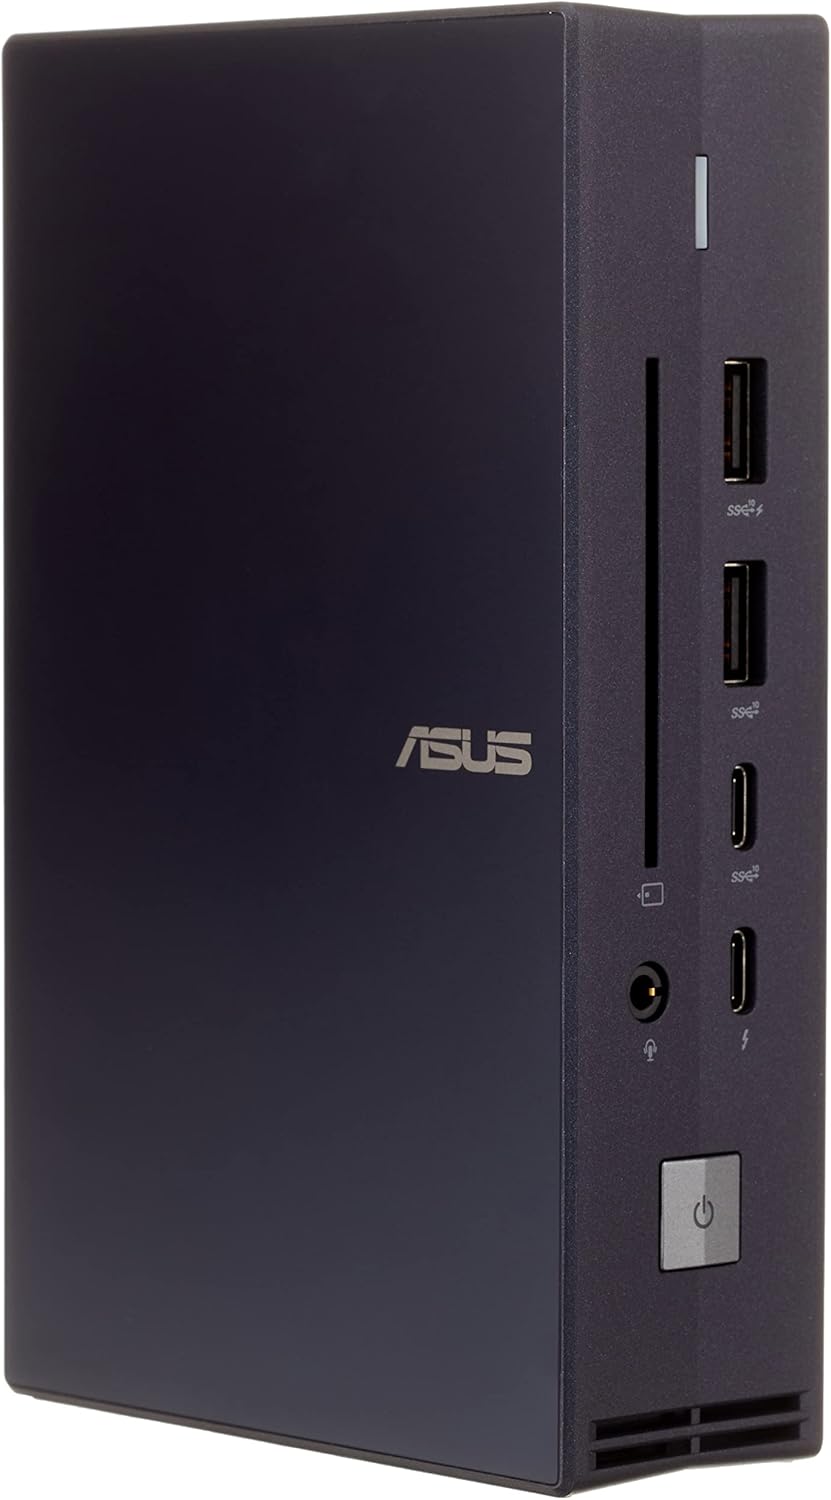
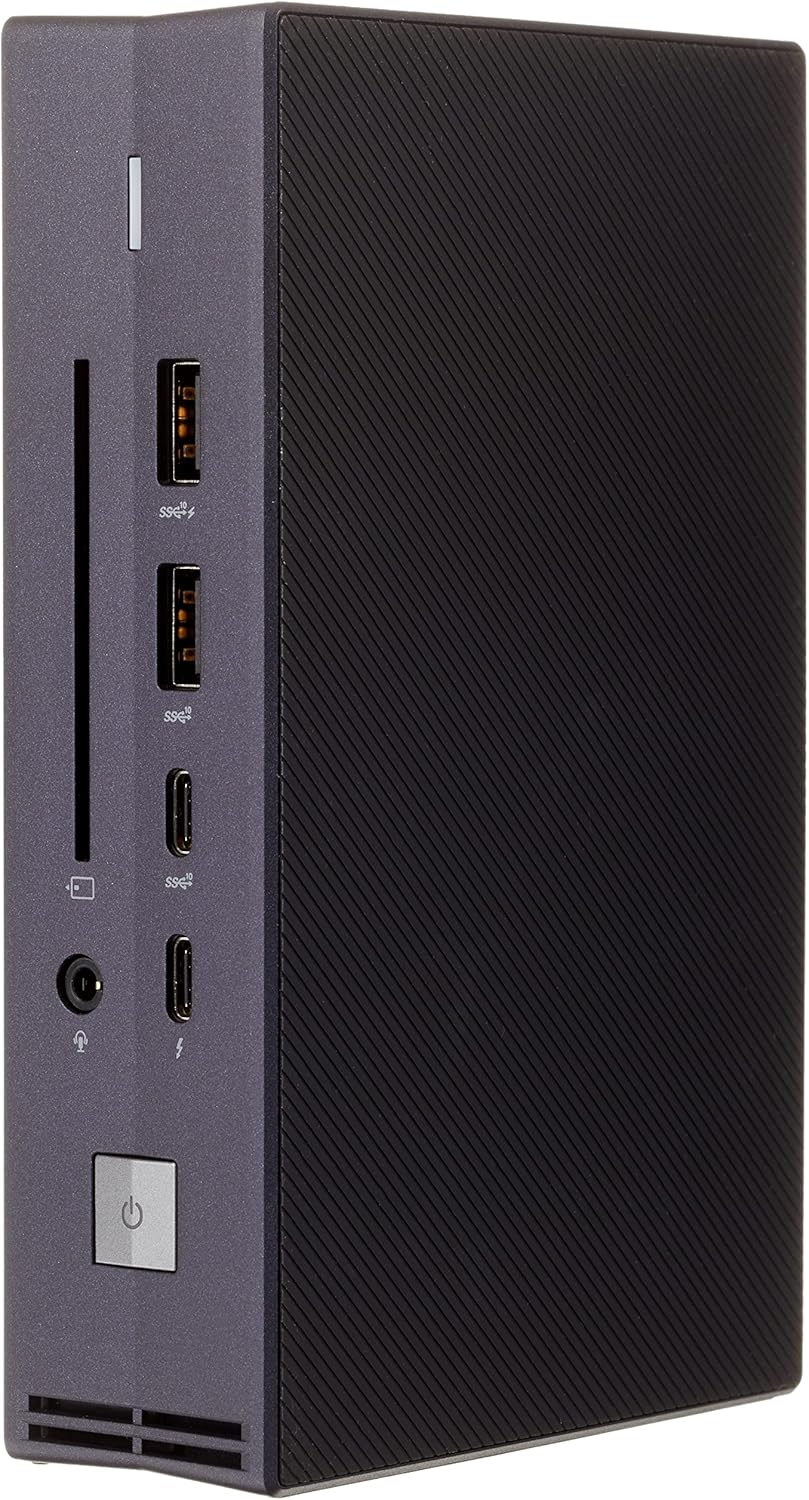
3.1 Front Panel
- Audio Combo Jack: For connecting headphones or a headset.
- Thunderbolt 3 Port: High-speed data transfer and display output.
- USB 3.2 Gen 2 Type-C Port: For connecting USB-C devices.
- USB 3.2 Gen 2 Type-A Port (supports fast charging): For connecting USB-A devices and fast charging compatible devices.
- USB 3.2 Gen 2 Type-A Port: For connecting USB-A devices.
- Smart Card Reader: For inserting smart cards.
- Power Button and Status Indicator: To power on/off the dock and indicate operational status (for Expertbook).
3.2 Rear Panel
- USB 3.2 Gen1 Type-A Port: For connecting USB-A devices.
- DP 1.4 Port: DisplayPort for connecting external monitors.
- HDMI 2.0 Port: HDMI for connecting external monitors.
- VGA Port: VGA for connecting older external monitors.
- RJ45 Giga-Lan Port: Gigabit Ethernet port for wired network connection.
- Kensington Lock Slot: For securing the device with a compatible lock.
- DC Jack (6 phi): Power input for the dock.

4. Setup Instructions
- Connect Power: Plug the power adapter into the DC Jack (6 phi) on the rear panel of the SIMPRO Dock 2, then connect the power adapter to an electrical outlet.
- Connect to Laptop: Use the provided Thunderbolt cable to connect the Thunderbolt 3 port on the front panel of the SIMPRO Dock 2 to a compatible Thunderbolt 3 port on your laptop. The dock will provide charging functionality to your laptop through this connection.
- Connect Peripherals:
- Displays: Connect your external monitors to the DP 1.4, HDMI 2.0, or VGA ports on the rear panel.
- USB Devices: Connect your USB devices (e.g., keyboard, mouse, external drives) to the available USB 3.2 Gen 2 Type-A, USB 3.2 Gen 2 Type-C (front), or USB 3.2 Gen1 Type-A (rear) ports.
- Network: Connect an Ethernet cable from your router or network switch to the RJ45 Giga-Lan port on the rear panel for a wired internet connection.
- Audio: Connect headphones or a headset to the Audio Combo Jack on the front panel.
- Power On: Press the Power Button on the front panel of the SIMPRO Dock 2. The status indicator will illuminate.
Note: The ASUS SIMPRO Dock 2 is compatible with specific ASUS SKUs including P2451FA, P2451FB, B9450FA, B9450CEA, and BR1100.
5. Operating Instructions
- Power Management: The dock's power button controls its own power state. When connected to a compatible laptop via Thunderbolt, it can also provide power to the laptop.
- Display Configuration: Once external monitors are connected, your operating system should automatically detect them. You may need to adjust display settings (e.g., resolution, extended/duplicate mode) within your laptop's display settings.
- USB Device Usage: Connect any USB device to the available USB ports. The USB 3.2 Gen 2 Type-A port on the front panel supports fast charging for compatible devices.
- Network Access: After connecting an Ethernet cable, your laptop should automatically establish a wired network connection.
- Smart Card Reader: Insert a smart card into the designated slot for authentication or data access as required by your system or applications.
6. Maintenance
- Cleaning: Use a soft, dry cloth to clean the exterior of the dock. Avoid using liquid cleaners or solvents, as they may damage the finish or internal components.
- Ventilation: Ensure the dock is placed in a well-ventilated area to prevent overheating. Do not block any ventilation openings.
- Storage: When not in use for extended periods, store the dock in a cool, dry place away from direct sunlight and extreme temperatures.
- Cable Management: Keep cables organized and free from kinks or excessive bending to prevent damage.
7. Troubleshooting
- No Power:
- Ensure the power adapter is securely connected to both the dock and a working electrical outlet.
- Check if the power button on the dock has been pressed.
- No Display Output:
- Verify that the Thunderbolt cable is securely connected between the dock and your laptop.
- Ensure display cables (DP, HDMI, VGA) are firmly connected to both the dock and the monitors.
- Check your laptop's display settings to ensure external monitors are detected and configured correctly.
- Try updating your laptop's graphics drivers.
- USB Devices Not Working:
- Ensure USB devices are properly connected to the dock's USB ports.
- Try connecting the USB device directly to your laptop to rule out device issues.
- Restart your laptop and the dock.
- No Network Connection:
- Check the Ethernet cable connection between the dock and your network source.
- Verify your laptop's network settings.
- Ensure your router or modem is functioning correctly.
8. Specifications
| Feature | Specification |
|---|---|
| Model Number | 90NX0460-P00080 |
| Dimensions (LxWxH) | 14.8 x 2.21 x 11.5 inches (Product) / 6.36"L x 3.9"W x 1.59"H (Dock Unit) |
| Weight | 3.76 pounds |
| Color | Black |
| Front Panel Ports | 1 x Audio Combo Jack, 1 x Thunderbolt 3, 1 x USB 3.2 Gen 2 Type-C, 1 x USB 3.2 Gen 2 Type-A (supports fast charging), 1 x USB 3.2 Gen 2 Type-A, 1 x Smart Card Reader, 1 x Power Button |
| Rear Panel Ports | 1 x USB 3.2 Gen1 Type-A, 1 x DP 1.4, 1 x HDMI 2.0, 1 x VGA, 1 x RJ45 Giga-Lan, 1 x Kensington Lock, 1 x DC Jack (6 phi) |
| Total USB Ports | 5 |
| Total HDMI Ports | 1 |
| Hardware Interface | USB, VGA |
| Compatible Devices | P2451FA, P2451FB, B9450FA, B9450CEA, BR1100 |
| Wattage | 120W |
9. Warranty Information
ASUS products are manufactured to the highest quality standards. For specific warranty terms and conditions applicable to your region and product, please refer to the warranty card included with your purchase or visit the official ASUS support website. Keep your proof of purchase for warranty claims.
10. Support
For technical support, driver downloads, FAQs, and further assistance, please visit the official ASUS support website. You can typically find support resources by searching for your product model number (90NX0460-P00080) on the ASUS support portal.
Online Support: www.asus.com/support/


