1. Introduction
The Kenmore KW3050 all-purpose wet/dry canister vacuum is designed for versatile cleaning tasks around the house, garage, or workshop. It effectively handles both dry debris and liquid messes. This compact and portable vacuum offers maximum suction power for various surfaces including carpets, hard floors, and more. Its design prioritizes ease of use with features like swiveling casters for maneuverability, an extended telescoping wand for reach, and convenient on-board tool storage.
2. Important Safety Instructions
Before operating this appliance, please read all instructions carefully. Failure to follow these instructions may result in electric shock, fire, and/or serious injury.
- Always unplug the vacuum cleaner from the electrical outlet before cleaning or servicing.
- Do not pick up flammable or combustible liquids, such as gasoline, or use in areas where they may be present.
- Do not pick up anything that is burning or smoking, such as cigarettes, matches, or hot ashes.
- Do not use without filters in place.
- Keep hair, loose clothing, fingers, and all parts of body away from openings and moving parts.
- Use extra care when cleaning on stairs.
- Do not use to pick up water on electrical outlets.
- Store the vacuum indoors in a cool, dry area.
3. Package Contents
Your Kenmore KW3050 Wet Dry Canister Vac includes the following components:
- Kenmore KW3050 Wet Dry Canister Vac Unit
- 7-foot Hose
- Telescoping Wand
- Crevice Tool
- Dusting Brush
- Multi-Surface Floor Nozzle
- Bare Floor Brush
- Cartridge Filter & Filter Retainer (for dry pickup)
- Foam Wet Filter (for wet pickup)
- Dust Bags (for dry pickup)
- Tool Caddy (for on-board storage)

Image: Included accessories for the Kenmore KW3050 Wet Dry Canister Vac, featuring a round dusting brush, crevice tool, multi-surface floor nozzle, and bare floor brush.
4. Assembly
Follow these steps to assemble your Kenmore KW3050 Wet Dry Canister Vac:
- Attach Casters: Insert the four swiveling casters into the designated slots on the bottom of the vacuum unit until they click securely into place.
- Install Filters: For dry pickup, ensure the cartridge filter and filter retainer are correctly installed. For wet pickup, replace the cartridge filter with the foam wet filter. Refer to the filter installation diagram in your quick start guide for detailed instructions.
- Connect Hose: Insert the larger end of the 7-foot hose into the suction port on the front of the vacuum unit. Ensure it is firmly twisted or pushed into place.
- Attach Wand and Nozzle: Connect the telescoping wand to the smaller end of the hose. Attach your desired cleaning nozzle (e.g., multi-surface floor nozzle, bare floor brush) to the end of the telescoping wand.
- Attach Tool Caddy: Secure the tool caddy to the side of the vacuum unit for convenient storage of accessories.

Image: The Kenmore KW3050 vacuum unit with its base and casters assembled, ready for hose attachment.

Image: The flexible hose securely connected to the main unit of the Kenmore KW3050 vacuum.
5. Operation
5.1 Dry Pickup
For dry debris, ensure the cartridge filter and a dust bag are installed. Connect the appropriate nozzle (multi-surface for general cleaning, bare floor brush for hard surfaces, crevice tool for tight spots, dusting brush for delicate surfaces) to the telescoping wand. Plug the vacuum into a 120V outlet and press the power button to start. The 2-stage 5 peak HP motor provides powerful suction for carpets and hard floors.

Image: A woman using the Kenmore KW3050 to clean dry debris from both hard floors and carpets, demonstrating its versatility for whole home cleaning.
5.2 Wet Pickup
Before wet pickup, remove the cartridge filter and dust bag, and install the foam wet filter. Do not use the dust bag for wet pickup. Use the multi-surface floor nozzle or bare floor brush for liquid spills. The 4-gallon capacity allows for significant liquid collection before needing to empty.
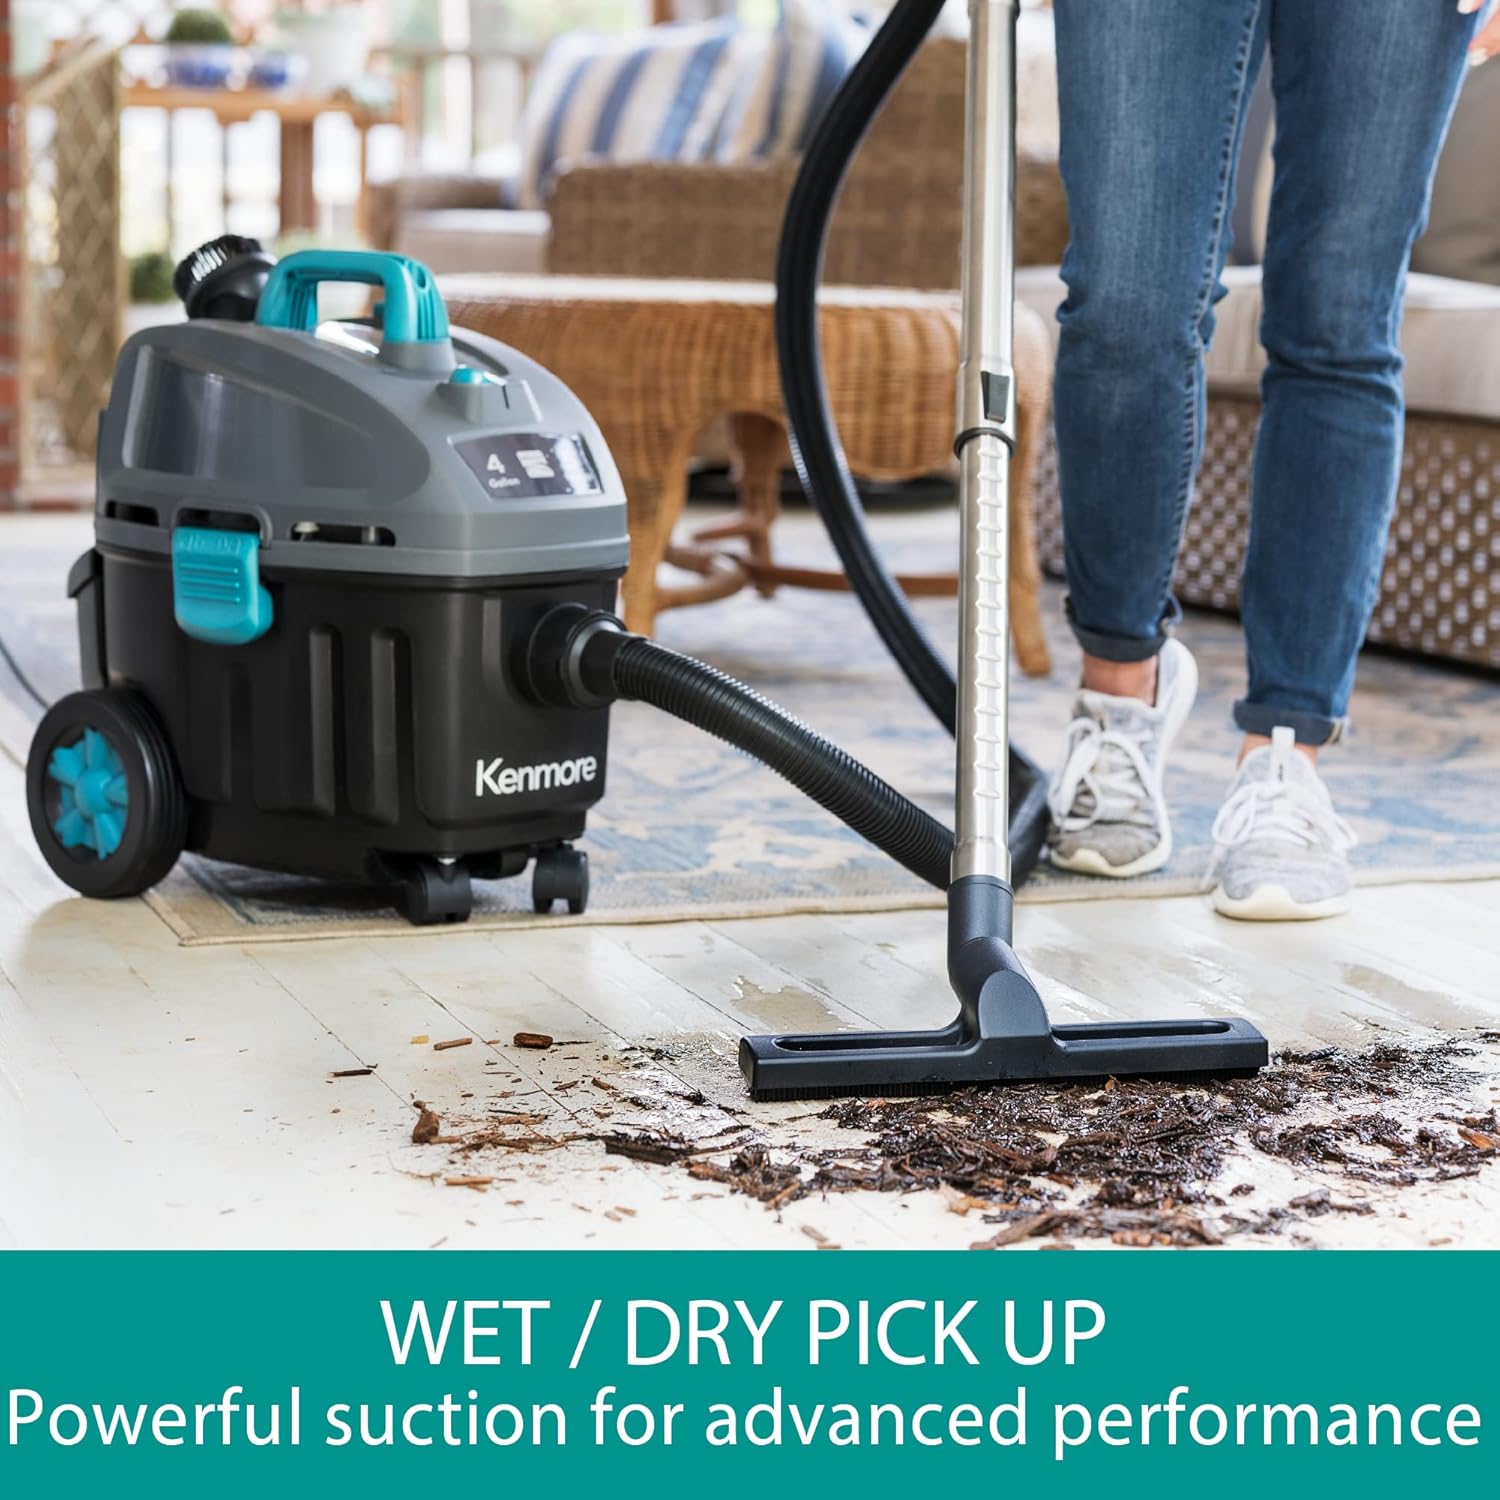
Image: A woman demonstrating the wet pickup capability of the Kenmore KW3050 on a patio, highlighting its powerful suction for advanced performance.
5.3 Using Attachments
- Telescoping Wand: Extend the wand for floor-to-ceiling cleaning, reaching high areas or under furniture.
- Crevice Tool: Ideal for narrow spaces, corners, and edges in your home or vehicle.
- Dusting Brush: Use for delicate surfaces, upholstery, and vents.
- Multi-Surface Floor Nozzle: Suitable for general cleaning on both carpets and hard floors.
- Bare Floor Brush: Specifically designed for effective cleaning on hard floor surfaces.

Image: A woman extending the telescoping wand of the Kenmore KW3050 to clean high windows, illustrating its reach for floor-to-ceiling cleaning.

Image: A woman utilizing the Kenmore KW3050 with a crevice tool to thoroughly clean the interior of a car, showcasing its versatile tools for various messes.
5.4 Blower Function
The Kenmore KW3050 also features a blower function. To use, disconnect the hose from the suction port and connect it to the blower port located on the rear of the motor head. This allows you to clear debris from workshops, garages, or outdoor areas.
6. Maintenance
6.1 Emptying the Tank
When the tank is full (for wet pickup) or the dust bag is full (for dry pickup), turn off and unplug the vacuum. Release the latches on the side of the unit and lift off the motor head. Carefully empty the contents of the tank or replace the dust bag. Reattach the motor head and secure the latches.
6.2 Filter Cleaning and Replacement
- Cartridge Filter (Dry): For optimal performance, clean the cartridge filter regularly by tapping it gently to remove dust or by rinsing it with water. Ensure it is completely dry before reinstallation. Replace the filter every 3-6 months depending on usage.
- Foam Wet Filter (Wet): After wet pickup, rinse the foam filter with water and allow it to air dry completely before storing or using for subsequent wet pickups.
- Dust Bags: Replace dust bags when full to maintain suction power and prevent motor strain.

Image: Replacement dust bags and a HEPA filter for Kenmore vacuums, essential for maintaining cleaning performance.
7. Storage
Store the Kenmore KW3050 in a clean, dry indoor area. Utilize the on-board tool caddy to keep all accessories organized and within reach. The 18-foot retractable cord can be neatly stored around the top handle for compact storage.
8. Troubleshooting
| Problem | Possible Cause | Solution |
|---|---|---|
| Vacuum will not start | No power to outlet; Power cord not plugged in; Power switch off | Check power supply; Plug in power cord; Turn power switch ON |
| Loss of suction | Hose or attachments clogged; Filter dirty/clogged; Dust bag full; Tank full (wet pickup) | Check and clear clogs; Clean or replace filter; Replace dust bag; Empty tank |
| Motor overheating | Clogged filter or hose; Full dust bag/tank | Check and clear clogs; Clean/replace filter; Replace dust bag/empty tank; Allow motor to cool |
9. Specifications
- Model Name: KW3050
- Capacity: 4 Gallons
- Motor Horsepower: 5 Peak HP (2-Stage Motor)
- Power Source: Corded Electric
- Voltage: 120 Volts
- Wattage: 840 watts
- Amperage: 7 Amps
- Hose Length: 7 Feet
- Cord Length: 18 Feet (retractable)
- Filter Type: HEPA Filter
- Product Dimensions: 17.3"L x 13.3"W x 20"H
- Item Weight: 18.92 pounds
- Noise Level: 72 Decibels
- Recommended Uses: Wet/Dry, Hard Floor, Carpet, Stairs
10. Warranty & Support
The Kenmore KW3050 Wet Dry Canister Vac comes with a 1-year manufacturer's warranty. For warranty claims, technical support, or replacement parts, please refer to the contact information provided in your product's original packaging or visit the official Kenmore website.
11. Official Product Video
Video: Official video demonstrating the features and use of the Kenmore KW3050 Wet/Dry Shop Vacuum.


