
1. Introduction
This manual provides detailed instructions for the safe and effective use of your SUNAPEX 30W 12V Solar Battery Charger Maintainer. This device is designed to charge and maintain 12V rechargeable batteries, preventing discharge and ensuring optimal battery health for various applications.
2. Safety Information
Please read all safety instructions before operating the device. Failure to follow these instructions may result in electric shock, fire, or serious injury.
- Ensure the solar panel is clean and free of debris for optimal performance.
- Do not attempt to open or modify the solar panel or its integrated controller.
- Connect the charger only to 12V rechargeable batteries. Connecting to other voltage systems may cause damage.
- Always connect the positive (+) terminal of the charger to the positive (+) terminal of the battery and the negative (-) terminal of the charger to the negative (-) terminal of the battery. Incorrect polarity can damage the battery and charger.
- Keep the device away from flammable materials and excessive heat sources.
- The integrated controller provides overcharge, short circuit, reverse polarity, and backflow protection. However, always exercise caution during installation and operation.
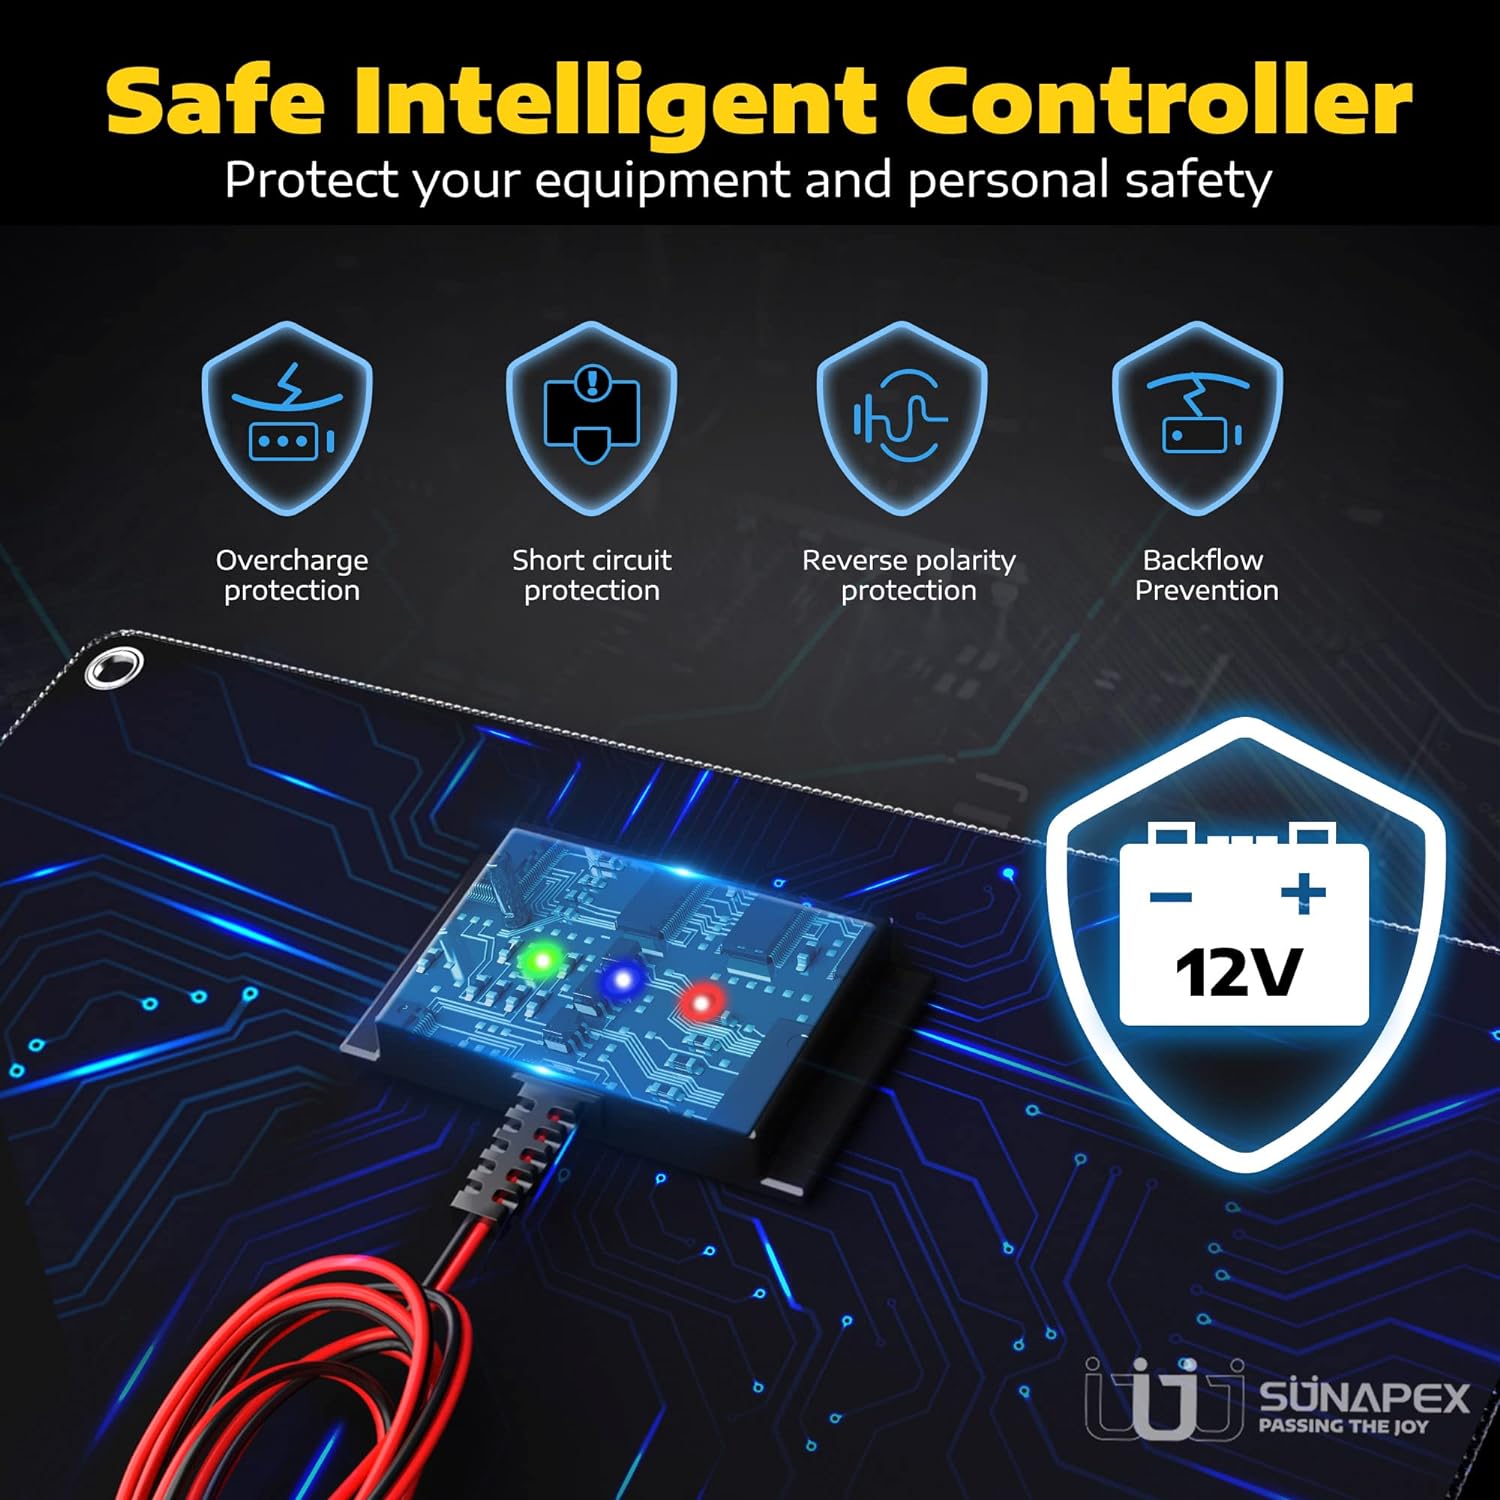
Image: The intelligent controller features multiple protection mechanisms to safeguard your equipment and personal safety.
3. Package Contents
Verify that all items are present in your package:
- 1 x SUNAPEX 30W Solar Panel
- 1 x Cigarette Lighter Adapter
- 1 x Alligator Clip Cable
- 1 x O-Ring Terminal Cable
- 1 x Instruction Manual (this document)

Image: All components included with the SUNAPEX 30W Solar Battery Charger Maintainer.
4. Product Overview
The SUNAPEX 30W Solar Battery Charger Maintainer utilizes high-efficiency monocrystalline solar cells to convert sunlight into electrical energy. It is designed for 12V battery systems and includes an integrated charge controller to prevent overcharging and ensure safe operation.
Key Features:
- High-Efficiency Monocrystalline Cells: Provides faster charging compared to other solar panel types of the same size.
- Built-in Charge Controller: Prevents overcharging, short circuits, reverse polarity, and battery drain.
- IP67 Waterproof Rating: Ensures durability and functionality in various weather conditions.
- Versatile Connectivity: Includes cigarette lighter plug, alligator clips, and O-ring terminals for multiple connection options.
- LED Indicators: Visual feedback for sunlight exposure, charging status, and full charge.

Image: Monocrystalline solar cell technology for enhanced charging efficiency.

Image: The solar panel is designed to be waterproof, suitable for outdoor use.
5. Setup and Installation
The SUNAPEX solar charger offers flexible installation options for various vehicles and applications.
5.1. Choosing a Location
Position the solar panel in a location that receives maximum direct sunlight throughout the day. For vehicles, common locations include the dashboard, windshield (using suction cups), or exterior surfaces (using carabiners or permanent mounting).
5.2. Connection Methods
The charger provides three connection options for compatibility with most 12V batteries.
- Cigarette Lighter Plug: For vehicles with an active 12V cigarette lighter socket. Ensure the socket is powered when the vehicle is off.
- Alligator Clips: For direct connection to battery terminals. Connect the red clip to the positive (+) terminal and the black clip to the negative (-) terminal.
- O-Ring Terminals: For semi-permanent connection to battery terminals. Connect the red O-ring to the positive (+) terminal and the black O-ring to the negative (-) terminal.
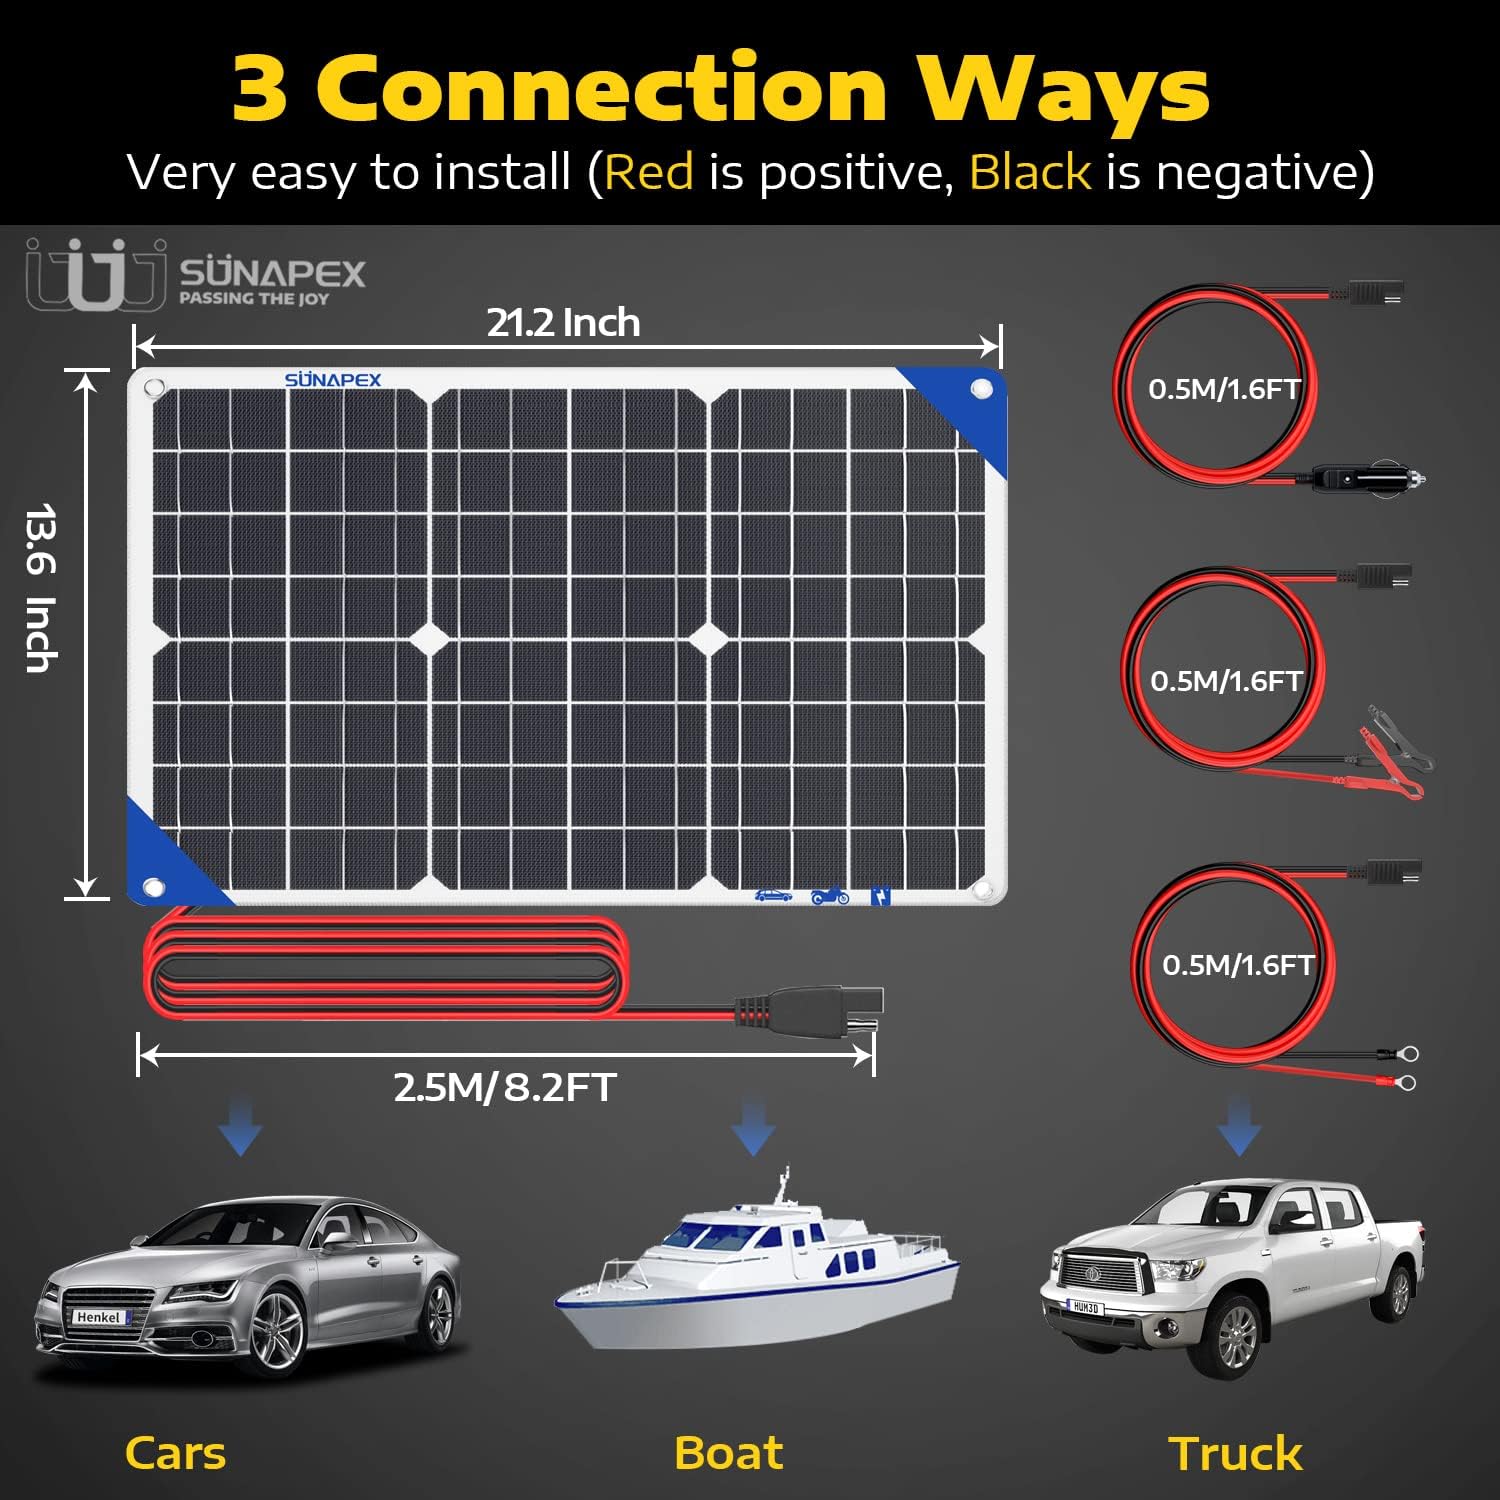
Image: Three common connection methods for the solar battery charger.

Image: Visual representation of connecting the solar panel using alligator clips, cigarette lighter, and O-ring terminals.
5.3. Mounting the Panel
The panel is lightweight and flexible, allowing for easy placement. Use the included suction cups to attach it to a car window or the carabiners to hang it in a suitable position.
6. Operating Instructions
Once connected and exposed to sunlight, the solar panel will begin charging your 12V battery.
6.1. Battery Compatibility
This charger is compatible with most 12V battery types, including:
- Sealed Lead-Acid (SLA)
- Lithium (Li)
- LiFePO4
- GEL
- AGM
- Flooded (FLD)

Image: The solar charger is compatible with multiple 12V battery chemistries.
6.2. Charging Status Indicators
The integrated controller features three LED indicator lights to provide visual feedback on the charging process:
- Blue Light: Indicates sufficient sunlight exposure for charging.
- Red Light: Indicates the battery is currently charging.
- Green Light: Indicates the battery is fully charged. The controller will automatically stop charging and resume when the voltage drops.

Image: LED indicators provide real-time charging status.

Image: Detailed view of the LED indicator states for different operational conditions.
7. Maintenance
To ensure the longevity and optimal performance of your SUNAPEX solar charger, follow these simple maintenance guidelines:
- Regularly clean the surface of the solar panel with a soft, damp cloth to remove dust, dirt, or debris that may obstruct sunlight.
- Inspect cables and connectors periodically for any signs of wear, damage, or corrosion. Replace any damaged components immediately.
- Ensure connections to the battery are secure and free from loose contacts.
- Store the solar panel in a cool, dry place when not in use for extended periods.
8. Troubleshooting
If you encounter issues with your solar charger, refer to the following common problems and solutions:
- No Lights/Not Charging:
- Ensure the solar panel is exposed to direct sunlight.
- Check all connections for proper contact and correct polarity.
- Verify the battery is a 12V rechargeable type.
- Inspect cables for damage.
- Red Light On, but Battery Not Fully Charging:
- Ensure the panel is receiving adequate sunlight for a sufficient duration. Charging time varies based on sunlight intensity and battery state.
- The battery may be severely discharged or damaged. Consult a professional for battery assessment.
- Green Light Not Appearing:
- The battery may not have reached a full charge state yet. Continue charging.
- Ensure the battery is capable of holding a full charge.
If problems persist, please contact SUNAPEX customer support.
9. Specifications
| Feature | Specification |
|---|---|
| Brand | SUNAPEX |
| Model | 30W |
| Maximum Power | 30 Watts |
| Output Voltage | 12 Volts |
| AC Adapter Current | 1.66 Amps |
| Material | Monocrystalline Silicon, ETFE |
| Product Dimensions | 13.7"L x 1.5"W x 14.96"H |
| Item Weight | 2 Pounds |
| Efficiency | High Efficiency |
| Special Feature | Portable, Short Circuit Protection |
| Upper Temperature Rating | 140 Degrees Fahrenheit |
10. Warranty and Support
SUNAPEX offers a one-year warranty for this solar panel. Lifetime technical support is also provided. For any inquiries, technical assistance, or warranty claims, please contact SUNAPEX customer service. Our team is available 24/7 to ensure prompt responses and support.
For further assistance, please visit the official SUNAPEX store: SUNAPEX Store