1. Introduction
This manual provides essential information for the safe and efficient installation, operation, and maintenance of your Topsolar 200W (2x100W) Monocrystalline Solar Panel Kit. This kit is designed for off-grid 12V/24V solar systems, suitable for various applications including RVs, caravans, marine vessels, campers, and remote power needs. It features high-efficiency monocrystalline solar cells and a durable construction for extended outdoor use.
2. Safety Information
- Electrical Hazard: Solar panels generate electricity when exposed to light. Always handle wiring with care and ensure connections are secure.
- Overcharging Protection: The included charge controller is crucial for preventing battery overcharging. Ensure it is correctly connected before connecting the solar panels to the battery.
- Physical Damage: While durable, solar panels contain glass and can be damaged by impact. Handle with care during installation and transport.
- Ventilation: Ensure adequate ventilation around the charge controller and battery to prevent overheating.
- Professional Installation: If you are unsure about any part of the installation process, consult a qualified electrician or solar professional.
3. Package Contents
Verify that all components are present in your package:
- 2 x 100W Monocrystalline Solar Panels
- 1 x 30A 12V/24V Solar Charge Controller
- 2 sets of Z Mounting Brackets
- 1 pair of Solar Cables (with MC4 connectors)
- 1 pair of 2-in-1 Connectors
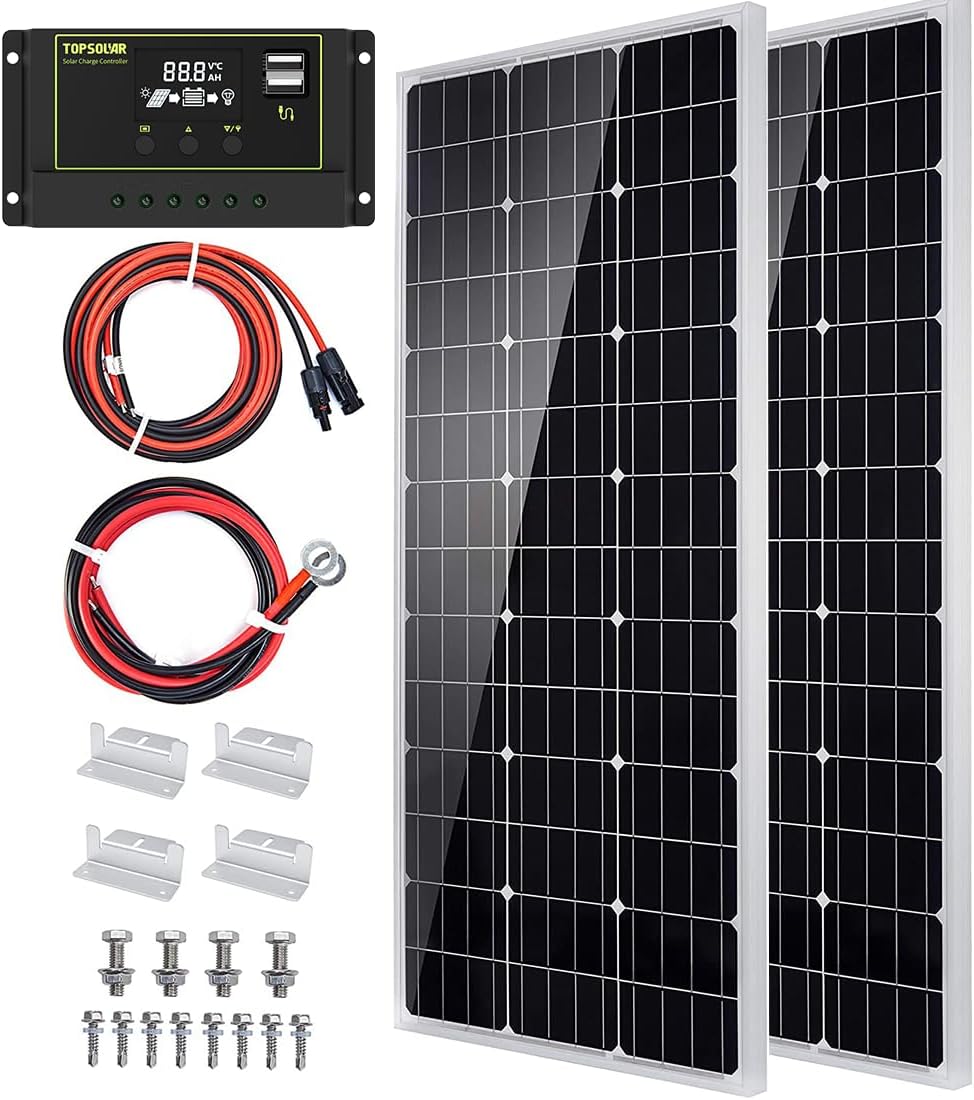
Image 3.1: All components included in the Topsolar 200W Solar Panel Kit.
4. Setup Instructions
Follow these steps for a basic setup of your solar panel system:
- Connect the Charge Controller to the Battery: First, connect the positive and negative terminals of your 12V or 24V battery to the corresponding battery terminals on the 30A solar charge controller. Ensure a secure connection. The charge controller supports GEL, SEALED, and FLOODED (Wet Cell) battery types.
- Connect Solar Panels to the Charge Controller: Next, connect the solar panels to the charge controller using the provided solar cables and 2-in-1 connectors. The panels can be connected in series for 24V systems or parallel for 12V systems. The cables from the solar panel's junction box simply click into the charge controller's solar input terminals.
- Connect Inverter (Optional): If using a power inverter, connect it to the battery terminals. This step is typically performed after the solar panels and charge controller are properly connected and the battery is charging.
The installation process is designed for ease of use, requiring minimal tools. The wires for the charge controller are secured with a Phillips head screwdriver.

Image 4.1: Diagram illustrating the connection sequence from solar panel to charge controller and battery.

Image 4.2: Close-up of the IP67 waterproof MC4 connectors and IP65 waterproof junction box for secure and weather-resistant connections.
5. Operating Instructions
Once installed, your Topsolar 200W kit will automatically begin charging your battery when exposed to sunlight. The 30A solar charge controller regulates the voltage and current from the solar panels to prevent overcharging and extend battery life. The system is capable of producing approximately 800Wh per day under 4 hours of full sunshine conditions.
The charge controller features a display that shows charging status and battery voltage. Refer to the charge controller's specific manual for detailed information on its display and settings.

Image 5.1: The Topsolar 30A Solar Charge Controller, featuring a digital display for monitoring system status.
6. Maintenance
Regular maintenance ensures optimal performance and longevity of your solar panel kit:
- Panel Cleaning: Periodically clean the surface of the solar panels with a soft cloth and water to remove dust, dirt, and debris that can reduce efficiency. Avoid abrasive materials or harsh chemicals.
- Connection Inspection: Regularly check all electrical connections (panel to controller, controller to battery) for tightness and corrosion. Loose connections can lead to power loss or safety hazards.
- Physical Inspection: Inspect the solar panels and mounting brackets for any signs of physical damage, such as cracks in the glass or bent frames.
- Battery Health: Monitor your battery's health and charge levels. Ensure it is not consistently over-discharged or overcharged.
7. Troubleshooting
If you encounter issues with your Topsolar 200W Solar Panel Kit, consider the following:
- No Power Output: Ensure the solar panels are receiving direct sunlight and are not shaded. Check all cable connections for proper seating and tightness. Verify the charge controller is powered on and displaying information.
- Battery Not Charging: Confirm the charge controller is correctly configured for your battery type (GEL, SEALED, FLOODED). Check for any error codes on the charge controller display. Ensure the battery terminals are clean and free of corrosion.
- Inconsistent Controller Performance: If the charge controller is not regulating properly or providing clear indications, double-check all wiring according to the diagram. Ensure the controller is installed in a well-ventilated area.
- Reduced Efficiency: Clean the solar panel surfaces. Ensure there are no obstructions (leaves, snow, etc.) blocking sunlight.
- Battery Draining with Inverter: Some inverters consume power even on standby. If experiencing battery drain, consider disconnecting the inverter when not in use or using a timer for its operation.
8. Specifications
| Feature | Specification |
|---|---|
| Brand | Topsolar |
| Model Number | TOPSP-100W |
| Material | Aluminum (Frame) |
| Product Dimensions (each panel) | 43.7"L x 17.7"W x 1.18"H |
| Efficiency | High Efficiency (up to 22% with monocrystalline cells) |
| Maximum Power | 200 Watts (2 x 100W panels) |
| Maximum Voltage | 12 Volts (System) |
| AC Adapter Current (Charge Controller) | 20 Amps (30A controller included) |
| Item Weight | 30.1 pounds |

Image 8.1: Detailed dimensions of a single Topsolar 100W solar panel.

Image 8.2: Exploded view showing the construction layers of the Topsolar solar panel, including the anti-corrosion frame, tempered glass, EVA film, TPT backsheet, and high-efficiency solar cells.
9. Warranty and Support
Topsolar is committed to providing quality service. If you encounter any problems with your product, please contact us. We will endeavor to provide a satisfactory solution.


