
1. Product Overview
The MANSNIX M500 Pro Lux Series Smart Motorized Blackout Roller Shades offer a convenient and efficient solution for window treatments. Designed for ease of use and installation, these shades provide complete light blockage, privacy, and thermal insulation. They are operated via remote control and can be integrated with smart home systems through an optional hub for app and voice control.

Image 1.1: MANSNIX Smart Motorized Blackout Roller Shade, showcasing its sleek design and remote control functionality.
Key Features
- Easy No-Drill Installation: Patented design allows for quick, tool-free setup, adjustable within 0.5 inches. Ideal for renters or those avoiding wall damage.
- Battery Powered: Operates on AA batteries (included) with a 4-6 month battery life, easily accessible for replacement.
- Wireless & Smart Control: Includes a 1-channel remote. Upgrade options include a 15-channel remote for group control or a smart hub for app/voice control.
- 100% Blackout Fabric: Three-layer textured fabric provides complete light blockage, UV protection, thermal insulation, and enhanced privacy.
- Durable Material: Constructed from Polyester and Polyvinyl Chloride (PVC) with a Jacquard fabric finish.
2. Setup and Installation
Package Contents

Image 2.1: All components included in the MANSNIX Smart Motorized Blackout Roller Shade package, including the shade, valance, remote, and installation kit.
Ensure all components are present before beginning installation:
- Roller Shade (1)
- Valance Cover (1)
- Remote Control (1)
- Installation Kit (brackets, screws, anti-slip pads, Allen wrench)
- AA Batteries (6)
Battery Installation
The shades are powered by 6 AA batteries. The battery compartment is located on the top rail for easy access. Insert the batteries according to the polarity markings.
Video 2.1: M500 Pro Lux Series Installation Guide, demonstrating the battery insertion and initial setup steps.
No-Drill Installation Steps
The MANSNIX shades feature a patented no-drill design for quick and easy installation. Ensure your window frame depth is at least 1.5 inches for inside mount.
- Unlock Device: Unlock the no-drill device counterclockwise and position it tightly against the wall or window frame.
- Secure Opposite Side: Push up the other side of the shade until the rod is level and secure.
- Lock Device: Make sure the blinds are fixed and stable, then lock the no-drill device clockwise.
- Apply Pads: Apply the provided anti-slip pads to the top rail for enhanced stability.
- Attach Cover: Securely attach the valance cover to the top rail.

Image 2.2: Visual guide for the no-drill installation process, showing how to unlock, secure, and lock the shade within the window frame.
Video 2.2: MANSNIX No-drill Smart Shades Presentation and Installation, providing a comprehensive walkthrough of the setup.
Measuring Guide (Inside Mount)
For optimal fit, measure your window carefully:
- Window Depth: Must be ≥ 1.5 inches.
- Window Width: Minimum of the inner frame widths (W1, W2, W3).
- Window Height: Minimum of the inner frame heights (H1, H2, H3).
The motorized blinds can be lowered down to a maximum of 72 inches. The default height can be adjusted to any position less than 72 inches using the remote control.

Image 2.3: Detailed measuring guide for inside mount installation, illustrating how to measure window width, height, and depth.
Size Selection Recommendation

Image 2.4: Chart providing recommended shade sizes based on actual window width for optimal fit and function.
3. Operation Guide
Remote Control Functions
The included 1-channel remote control allows for basic operation of your motorized shades. An optional 15-channel remote is available for controlling multiple shades or groups of shades.

Image 3.1: Illustration of the remote control, highlighting buttons for up, down, stop, and channel selection.
- Up Arrow: Raises the shade.
- Down Arrow: Lowers the shade.
- Pause/Stop Button: Stops the shade at its current position.
- Channel Button (15-channel remote): Selects the channel for individual or group control.
Setting Upper and Lower Limits
To ensure proper operation, set the upper and lower travel limits for your shade. Refer to the detailed instructions in the Quick Installation Guide for precise steps. This typically involves:
- Emitter Quick Matching: Pair the remote with the shade motor.
- Set Upper Limit: Use the remote to move the shade to the desired uppermost position and confirm.
- Set Lower Limit: Use the remote to move the shade to the desired lowermost position and confirm.
Video 3.1: Guide on how to match the blinds with the remote and adjust the upper and lower travel limits for precise control.
Smart Control (Optional Hub)
For advanced control features, an optional smart bridge/hub is required. This allows for integration with various smart home platforms.
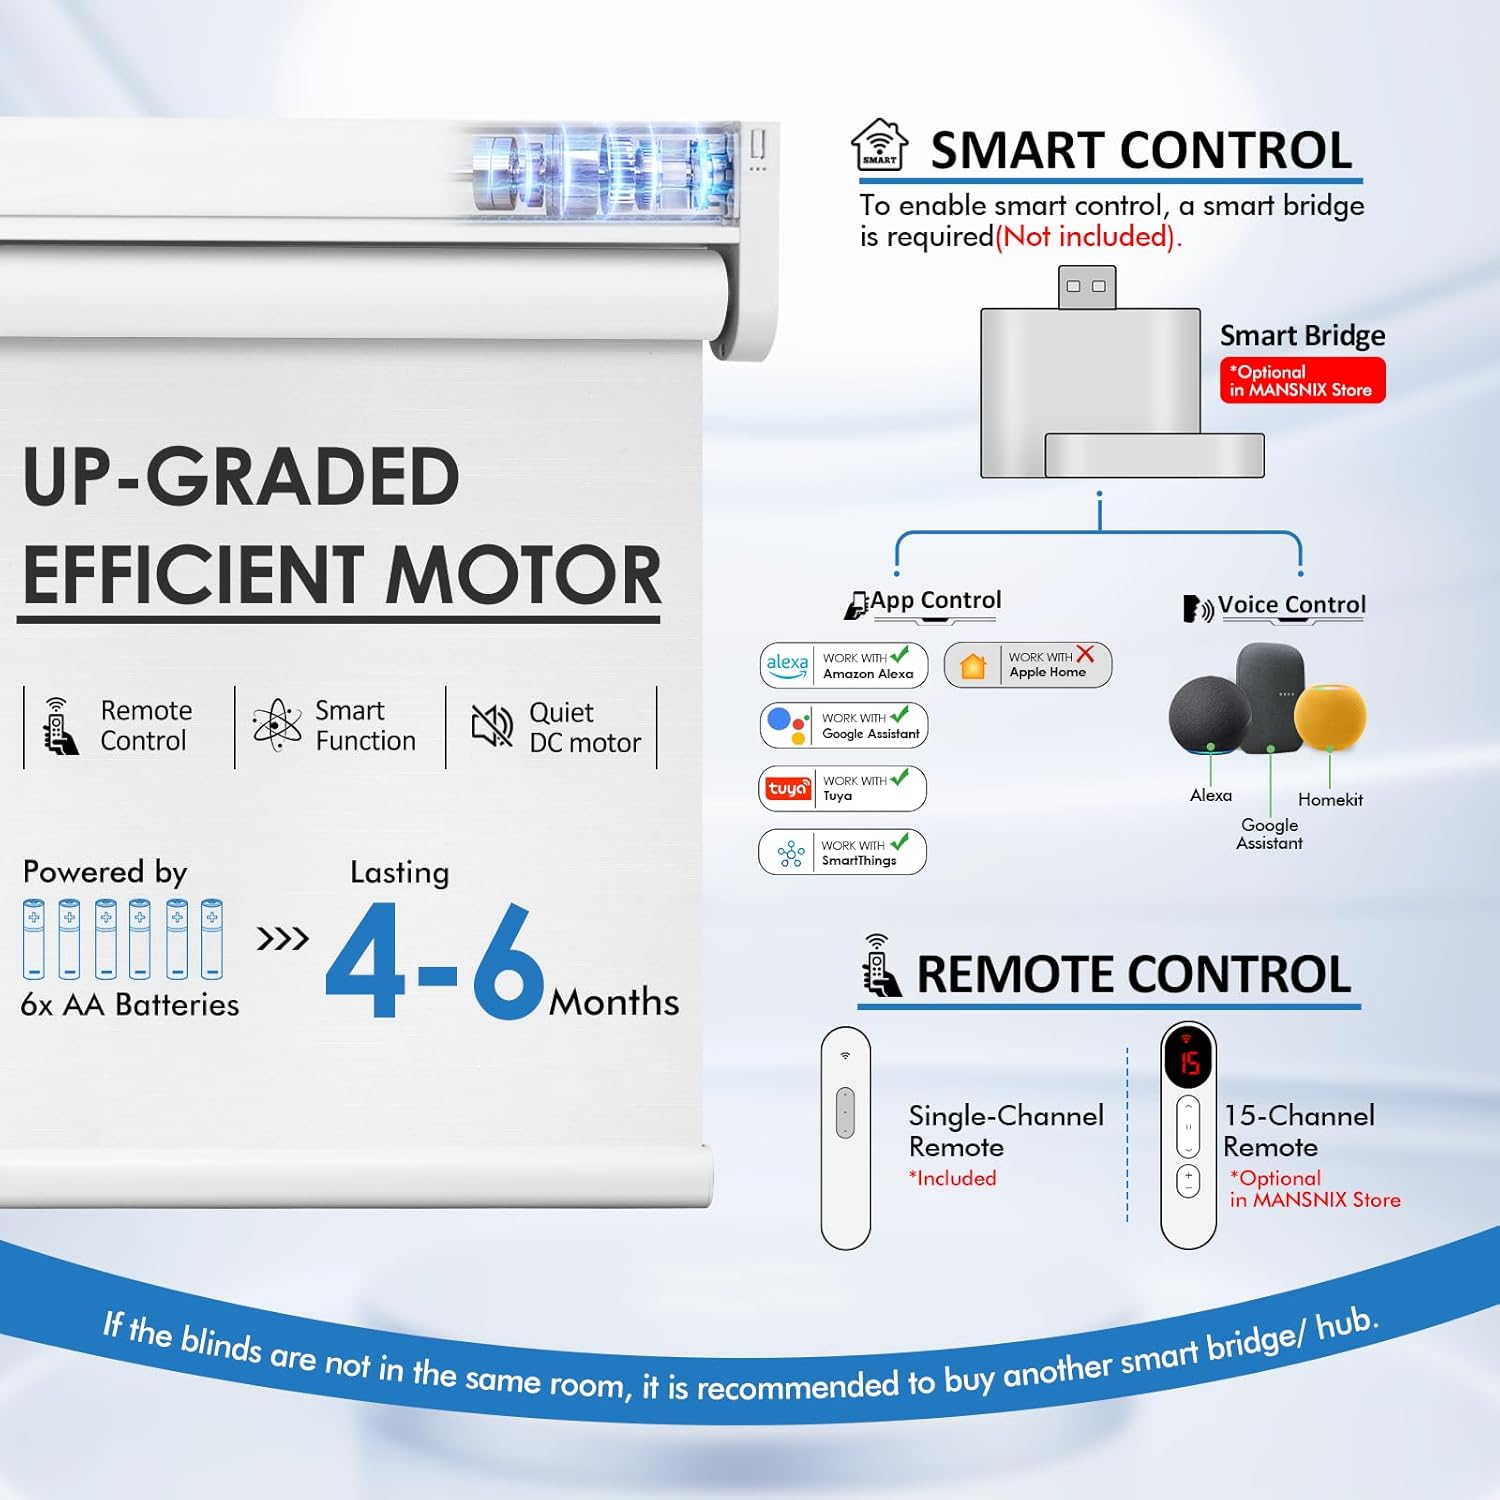
Image 3.2: Diagram illustrating how the smart bridge enables app and voice control for the motorized shades.
- App Control: Manage your shades from anywhere using a smartphone app.
- Voice Control: Compatible with voice assistants like Amazon Alexa and Google Assistant.
- DIY Scenes: Create customized schedules and routines for your shades based on time, weather, or other triggers.
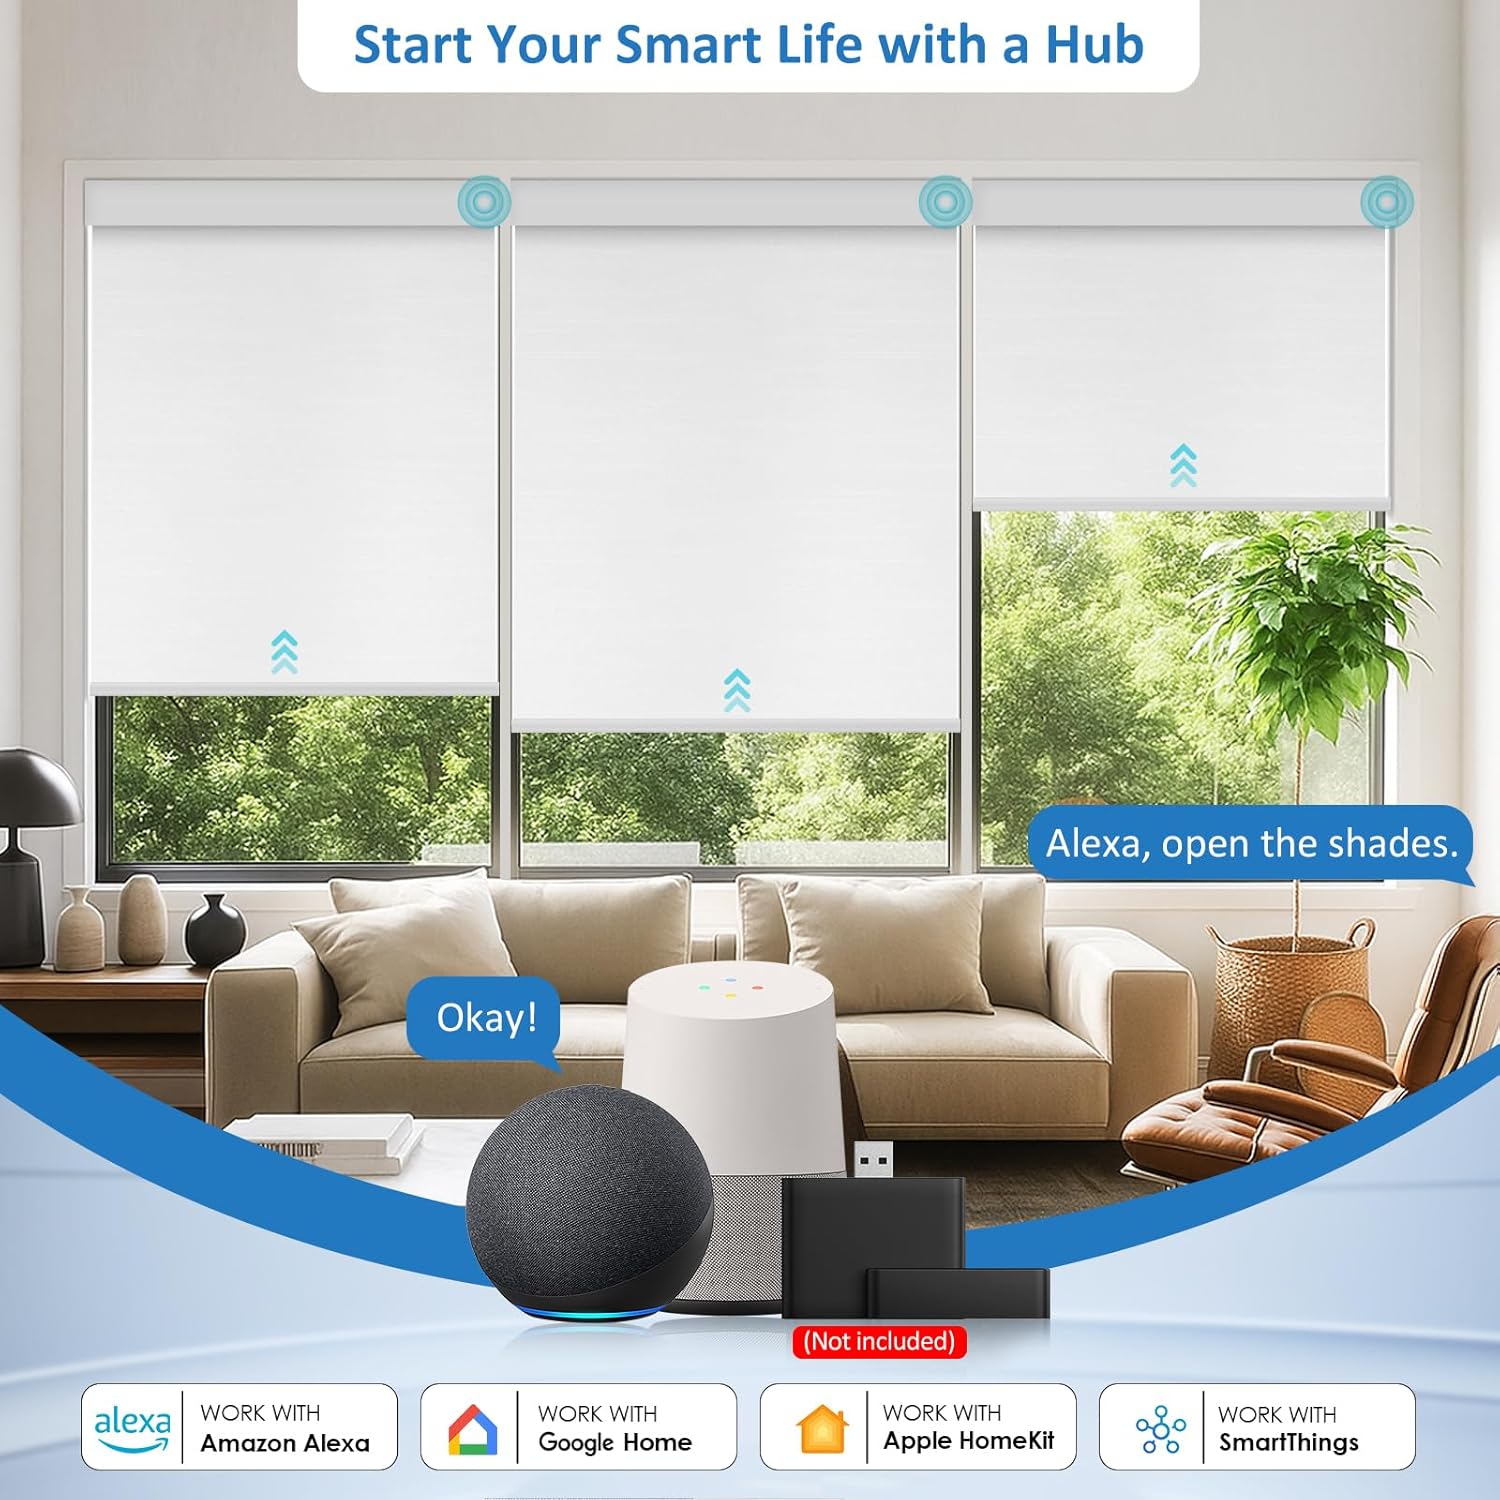
Image 3.3: Visual representation of smart home integration, showing compatibility with Alexa, Google Home, and other platforms via an optional hub.
4. Care and Maintenance
To maintain the appearance and functionality of your MANSNIX Smart Motorized Blackout Roller Shades, follow these simple care instructions:
- Cleaning: Use a feather duster or a soft, dry cloth to gently remove dust from the fabric. For stubborn spots, lightly dab with a damp cloth and mild soap, then blot dry. Avoid harsh chemicals or abrasive cleaners.
- Battery Replacement: Replace the 6 AA batteries every 4-6 months, or when the remote control indicator shows low battery. Ensure correct polarity when inserting new batteries.
- Motor Care: The motor is designed for durability. Do not attempt to pull the shade by hand, as this may damage the internal mechanism.
5. Troubleshooting
If you encounter issues with your MANSNIX Smart Motorized Blackout Roller Shades, consider the following:
- Shade Not Responding: Check if the remote control batteries need replacement. Ensure the remote is paired correctly with the shade.
- Difficulty Setting Limits: Carefully review the Quick Installation Guide for the precise sequence of button presses required to set upper and lower limits. Incorrect timing or sequence can prevent successful programming.
- Shade Stops Unexpectedly: This could indicate low battery power. Replace the AA batteries.
- Noise During Operation: A minimal noise level is normal for motorized shades. If the noise is excessive or unusual, ensure the shade is installed correctly and not obstructed.
- Smart Control Issues: If using an optional hub, ensure the hub is properly connected to your network and the shade is correctly paired with the app.
6. Product Specifications
| Feature | Detail |
|---|---|
| Brand | MANSNIX |
| Model Number | M500 Pro Lux Series |
| Material | Polyester, Polyvinyl Chloride (PVC) |
| Fabric Type | Jacquard Fabric |
| Product Dimensions | 72"L x 46"W (for 46"W x 72"H variant) |
| Color | White (for this variant) |
| Opacity | Blackout |
| Operation Mode | Automatic |
| Control Type | Remote Control, Voice Control (via Hub), App Control (via Hub), DIY Scene (via Hub) |
| Power Source | 6 AA batteries (included) |
| Battery Life | 4-6 months (approx.) |
| Special Features | Eco-Friendly, Fade Resistant, Motorized, Thermal Insulation, UV Protection |
| Mounting Type | Inside Mount (No-Drill) |
| Item Weight | 5.84 pounds |
7. Warranty and Customer Support
MANSNIX is committed to customer satisfaction. Your motorized roller shades are covered by the following:
- 60-Day Repair and Replacement Policy: For any initial defects or issues.
- 2-Year Warranty: Covers manufacturing defects and ensures long-term product reliability.
For further assistance, please refer to the contact information provided with your product packaging or visit the official MANSNIX store on Amazon.

