
1. Introduction
This manual provides comprehensive instructions for the setup, operation, and maintenance of your Ivation 24-Inch Oversized Digital LED Wall Clock. Please read this manual thoroughly before using the product to ensure proper function and longevity.
The Ivation Oversized Digital LED Wall Clock features a large, easy-to-read display, adjustable brightness, and convenient remote control operation. It is designed for indoor use and can be mounted on a wall or placed on a shelf.
2. Product Overview
Key Features:
- Large Digital Display: 24-inch wide display with jumbo 3.25-inch digits for enhanced visibility.
- Adjustable Brightness: 6 levels of adjustable brightness to suit various lighting conditions.
- Time Memory: Built-in battery retention preserves time and settings during power outages.
- Versatile Mounting: Designed for both shelf placement and wall mounting.
- Remote Control: Full-function remote for convenient adjustment of settings.
- AM/PM Indicator: Clearly displays AM or PM for 12-hour format.
- Durable Construction: Features a durable aluminum frame.
- Silent Operation: Operates silently without ticking sounds.
Package Contents:
- Ivation 24-Inch Oversized Digital LED Wall Clock
- Remote Control
- 10-Foot AC Power Adapter
- Mounting Hardware (screws and anchors)
- User Manual
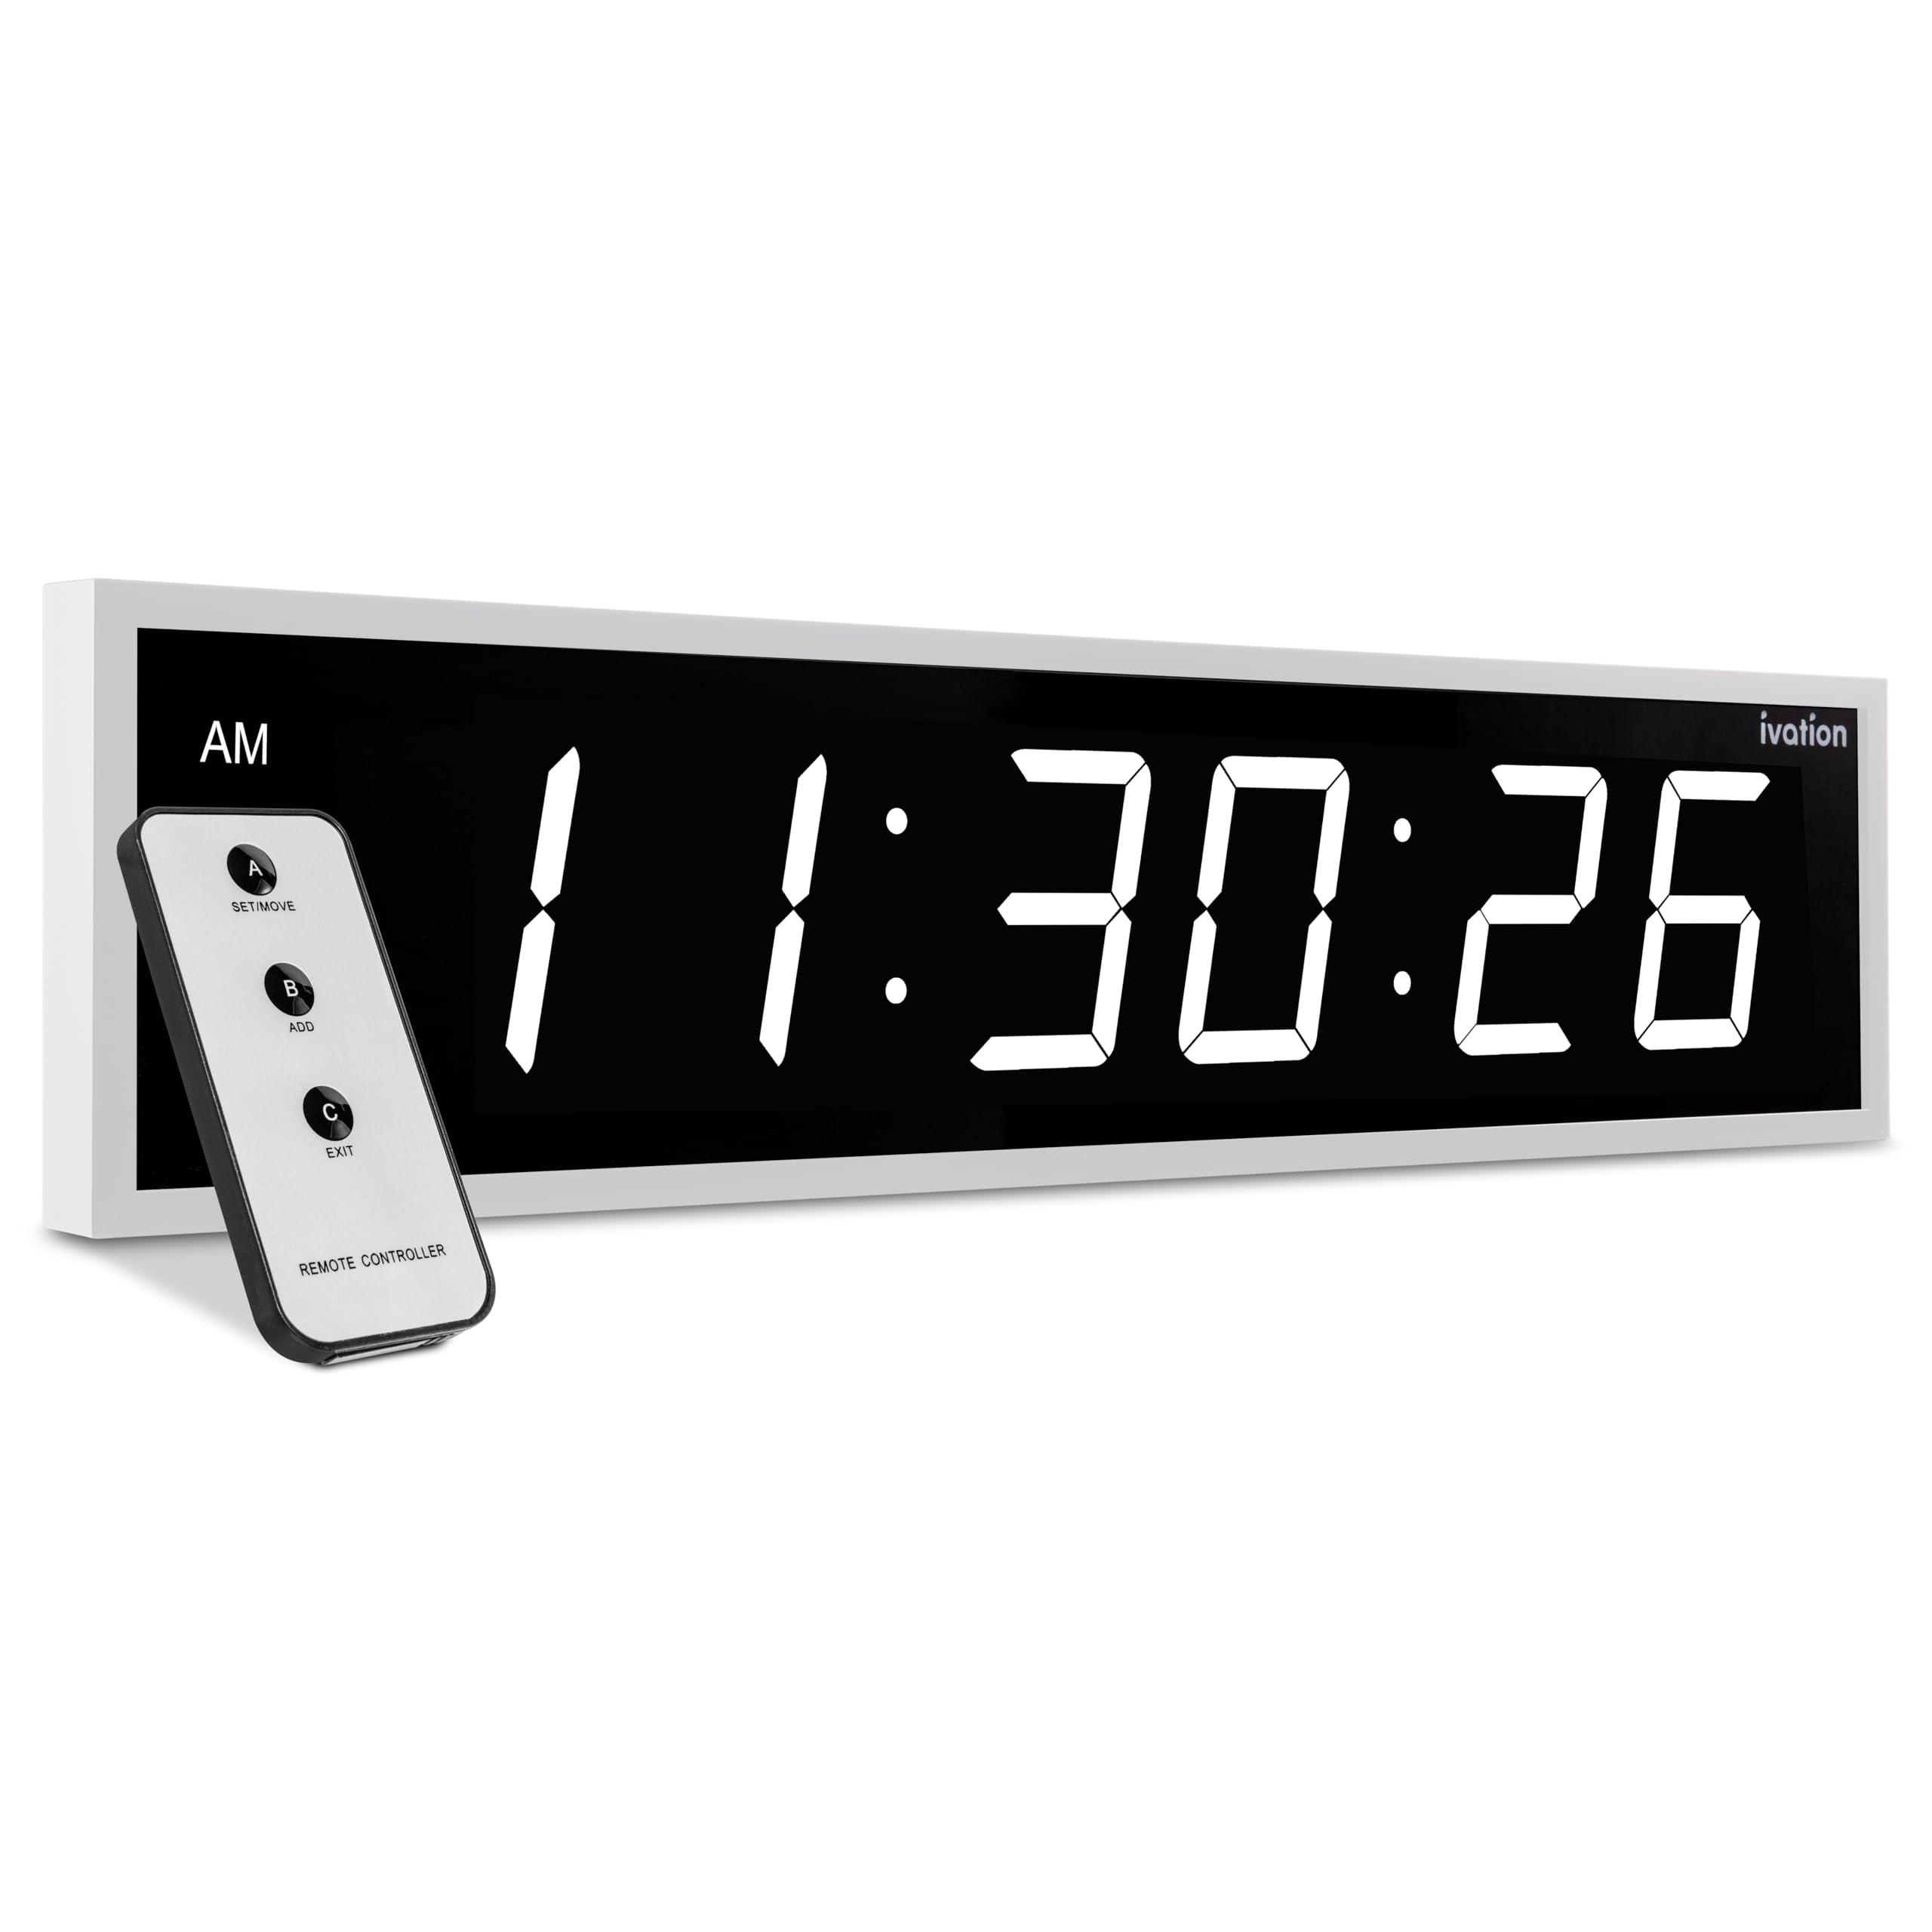
Figure 1: Ivation 24-Inch Oversized Digital LED Wall Clock (White)
3. Setup
Unpacking:
- Carefully remove all components from the packaging.
- Inspect the clock and accessories for any signs of damage.
- Retain packaging for future storage or transport.
Power Connection:
- Connect the 10-foot AC power adapter to the power input port on the back of the clock.
- Plug the adapter into a standard electrical outlet. The clock display will illuminate.
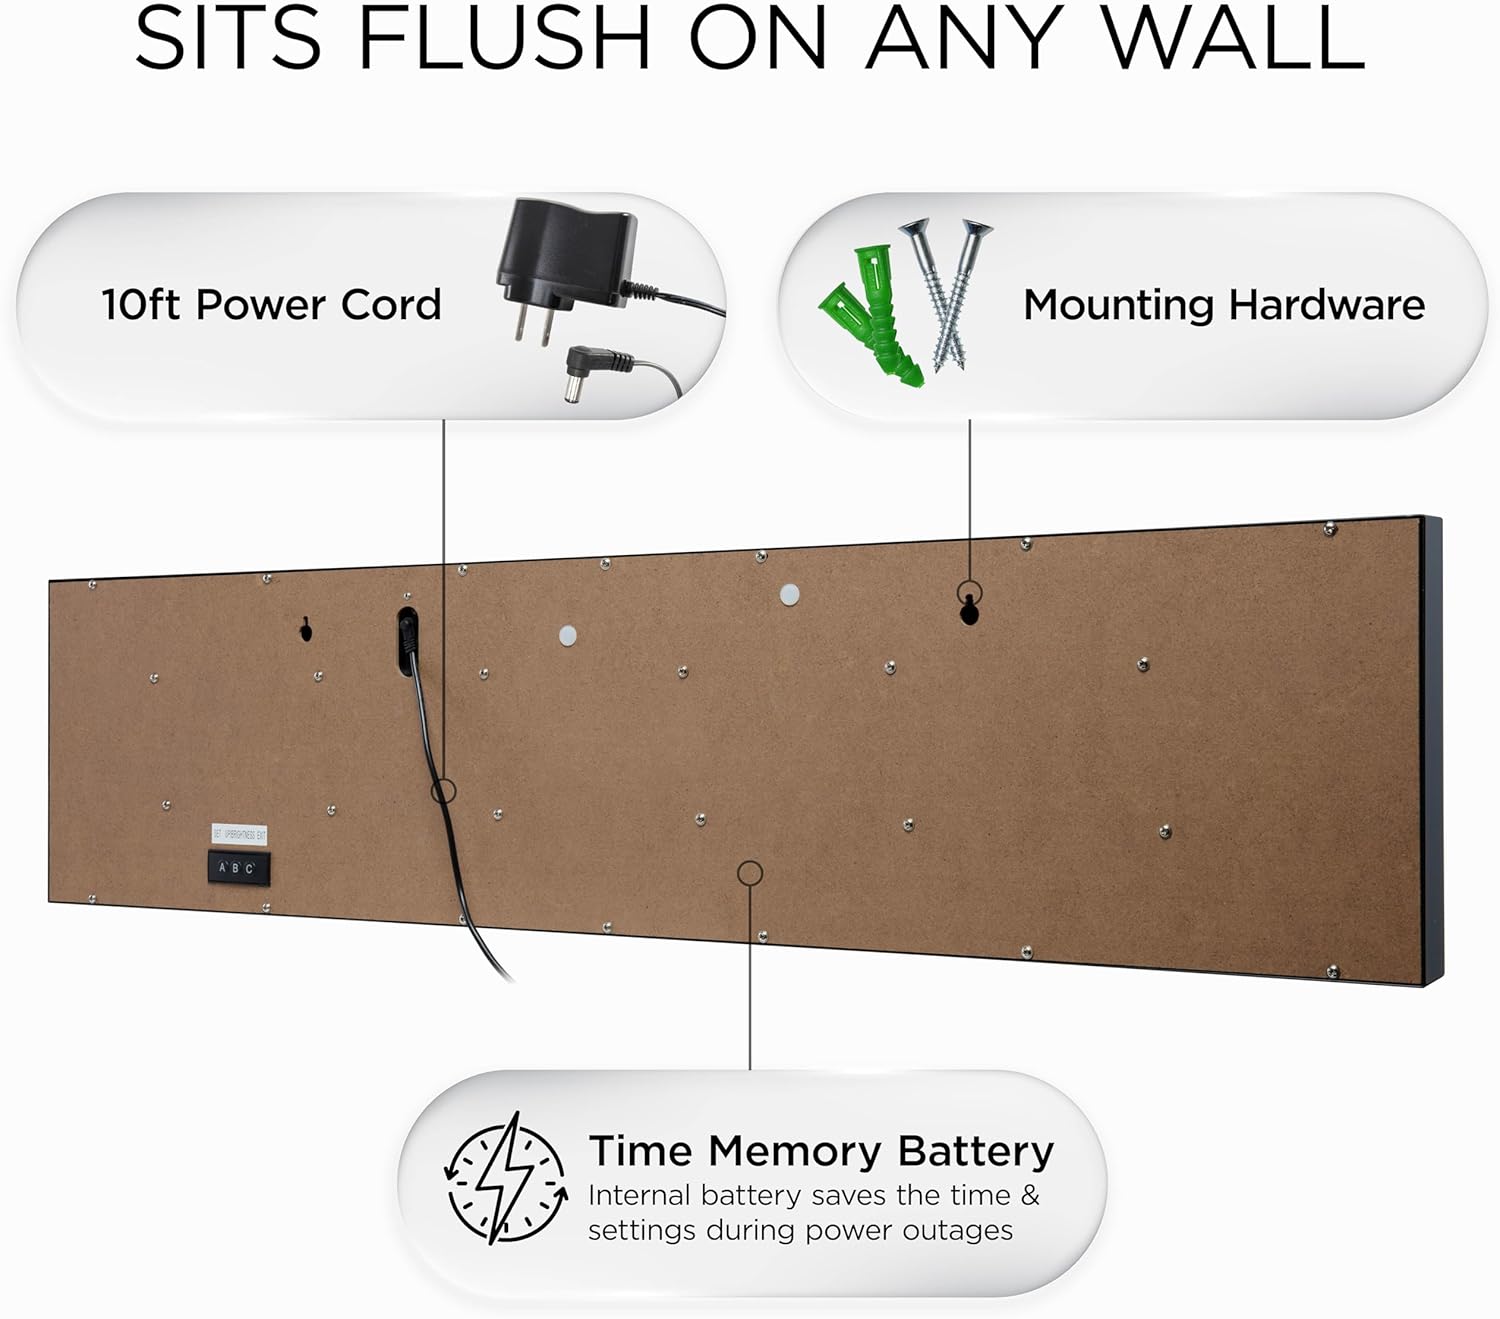
Figure 2: Rear view of the clock with power cord and mounting hardware.
Mounting Options:
The clock can be placed on a flat surface or mounted on a wall.
- Shelf Placement: Simply place the clock on a stable, flat surface.
- Wall Mounting: Use the included mounting hardware (screws and anchors) with the pre-drilled holes on the back of the clock. Ensure the wall can support the weight of the clock and that the power cord can reach an outlet.

Figure 3: Clock dimensions, showing 24 inches width and 6 inches height.
4. Operating Instructions
Setting the Time:
The clock can be set using the remote control or the manual buttons on the back.
- Using the Remote Control:
- Press the 'SET/MOVE' button (A) to enter time setting mode.
- Use the number buttons to input the desired time.
- Press 'ADD' (B) to confirm each segment (hour, minute, second).
- Press 'EXIT' (C) to save and exit setting mode.
- Using Manual Buttons: On the back of the clock, locate the 'SET UP/BRIGHTNESS EXIT' buttons (A, B, C). These correspond to the remote control functions for setting the time and adjusting brightness.

Figure 4: Remote control for the Ivation clock.
Adjusting Brightness:
The clock features 6 adjustable brightness levels.
- Press the 'Brightness' button on the remote control to cycle through the 6 brightness levels.
- Alternatively, use the corresponding button on the back of the clock.

Figure 5: Features like adjustable brightness and time memory.
Time Memory Function:
The clock is equipped with a built-in battery that retains the current time and settings in the event of a power interruption. This ensures that you do not need to reset the clock after a power outage.
Video 1: Overview of the Ivation Oversized LED Clock, demonstrating its features and size.
5. Maintenance
- Cleaning: Use a soft, dry cloth to clean the clock's display and frame. Avoid abrasive cleaners or solvents that may damage the surface.
- Storage: If storing the clock for an extended period, disconnect it from power and store it in its original packaging in a cool, dry place.
6. Troubleshooting
| Problem | Possible Cause | Solution |
|---|---|---|
| Clock does not power on. | Power adapter not connected or outlet not functioning. | Ensure the power adapter is securely plugged into the clock and a working electrical outlet. |
| Display is too dim or too bright. | Brightness level needs adjustment. | Use the remote control or manual buttons to adjust the brightness to one of the 6 available levels. |
| Time is incorrect after a power outage. | Internal time memory battery may be depleted or not functioning. | Reset the time manually. If the issue persists, contact customer support. |
| Remote control is not working. | Remote battery is low or line of sight is obstructed. | Replace the remote control battery. Ensure there are no obstructions between the remote and the clock's sensor. |
7. Specifications
- Brand: Ivation
- Model Number: JID0124WHT
- Color: White
- Display Type: Digital LED
- Product Dimensions: 24" W x 6" H (60.96 cm x 15.24 cm)
- Item Weight: 1.77 Kilograms (3.9 lbs)
- Power Source: Corded Electric (10-foot AC adapter included)
- Mounting Type: Wall Mount, Shelf Mount
- Special Features: Silent Clock, Time Memory, 6 Brightness Levels, Remote Control
- Indoor/Outdoor Usage: Indoor Only
- Frame Material: Durable Aluminum
8. Warranty and Support
This Ivation product comes with a limited warranty. For specific details regarding warranty coverage, please refer to the warranty card included with your purchase or visit the official Ivation website.
For technical support, troubleshooting assistance, or to inquire about replacement parts, please contact Ivation Customer Service. Contact information can typically be found on the product packaging or the official Ivation website.


