
Introduction
This manual provides comprehensive instructions for the Innomaker Raspberry Pi Industrial Camera Module, featuring the STARVIS IMX462 Color CMOS Sensor. This 2MP camera module is designed for various Raspberry Pi models, offering high-quality imaging capabilities for industrial and general-purpose applications.
Key features include:
- Sensor Type: STARVIS IMX462LQR Color CMOS Active Pixel type Solid-state Image Sensor with Square Pixel Array.
- Effective Pixels: 2 MP (1920x1080).
- Sensor Size: Diagonal 6.46 mm (Type 1/2.8).
- Frame Rate: Up to 60 frames per second (fps).
- Connectivity: Direct connection to the Raspberry Pi's CSI connector.
- Driver: Utilizes a built-in driver compatible with IMX290.
- Lens: Wide-angle lens with adjustable focal distance. Field of View (FOV): D=148 degrees, H=118 degrees.

Figure 1: Innomaker Raspberry Pi Industrial Camera Module IMX462.
Setup Instructions
1. Hardware Connection
The CAM-MIPI462RAW module connects directly to the Camera Serial Interface (CSI) port on your Raspberry Pi board. Ensure your Raspberry Pi is powered off before making any connections.
- Locate the CSI connector on your Raspberry Pi. This is typically a long, narrow slot.
- Gently pull up the tabs on each end of the CSI connector.
- Insert the ribbon cable from the camera module into the slot, ensuring the blue side of the cable faces away from the connector (towards the Ethernet port on most Raspberry Pi models).
- Push the tabs back down to secure the ribbon cable.
- Connect the other end of the ribbon cable to the camera module in the same orientation.

Figure 2: Camera module connected to a Raspberry Pi, illustrating compatibility with various models.
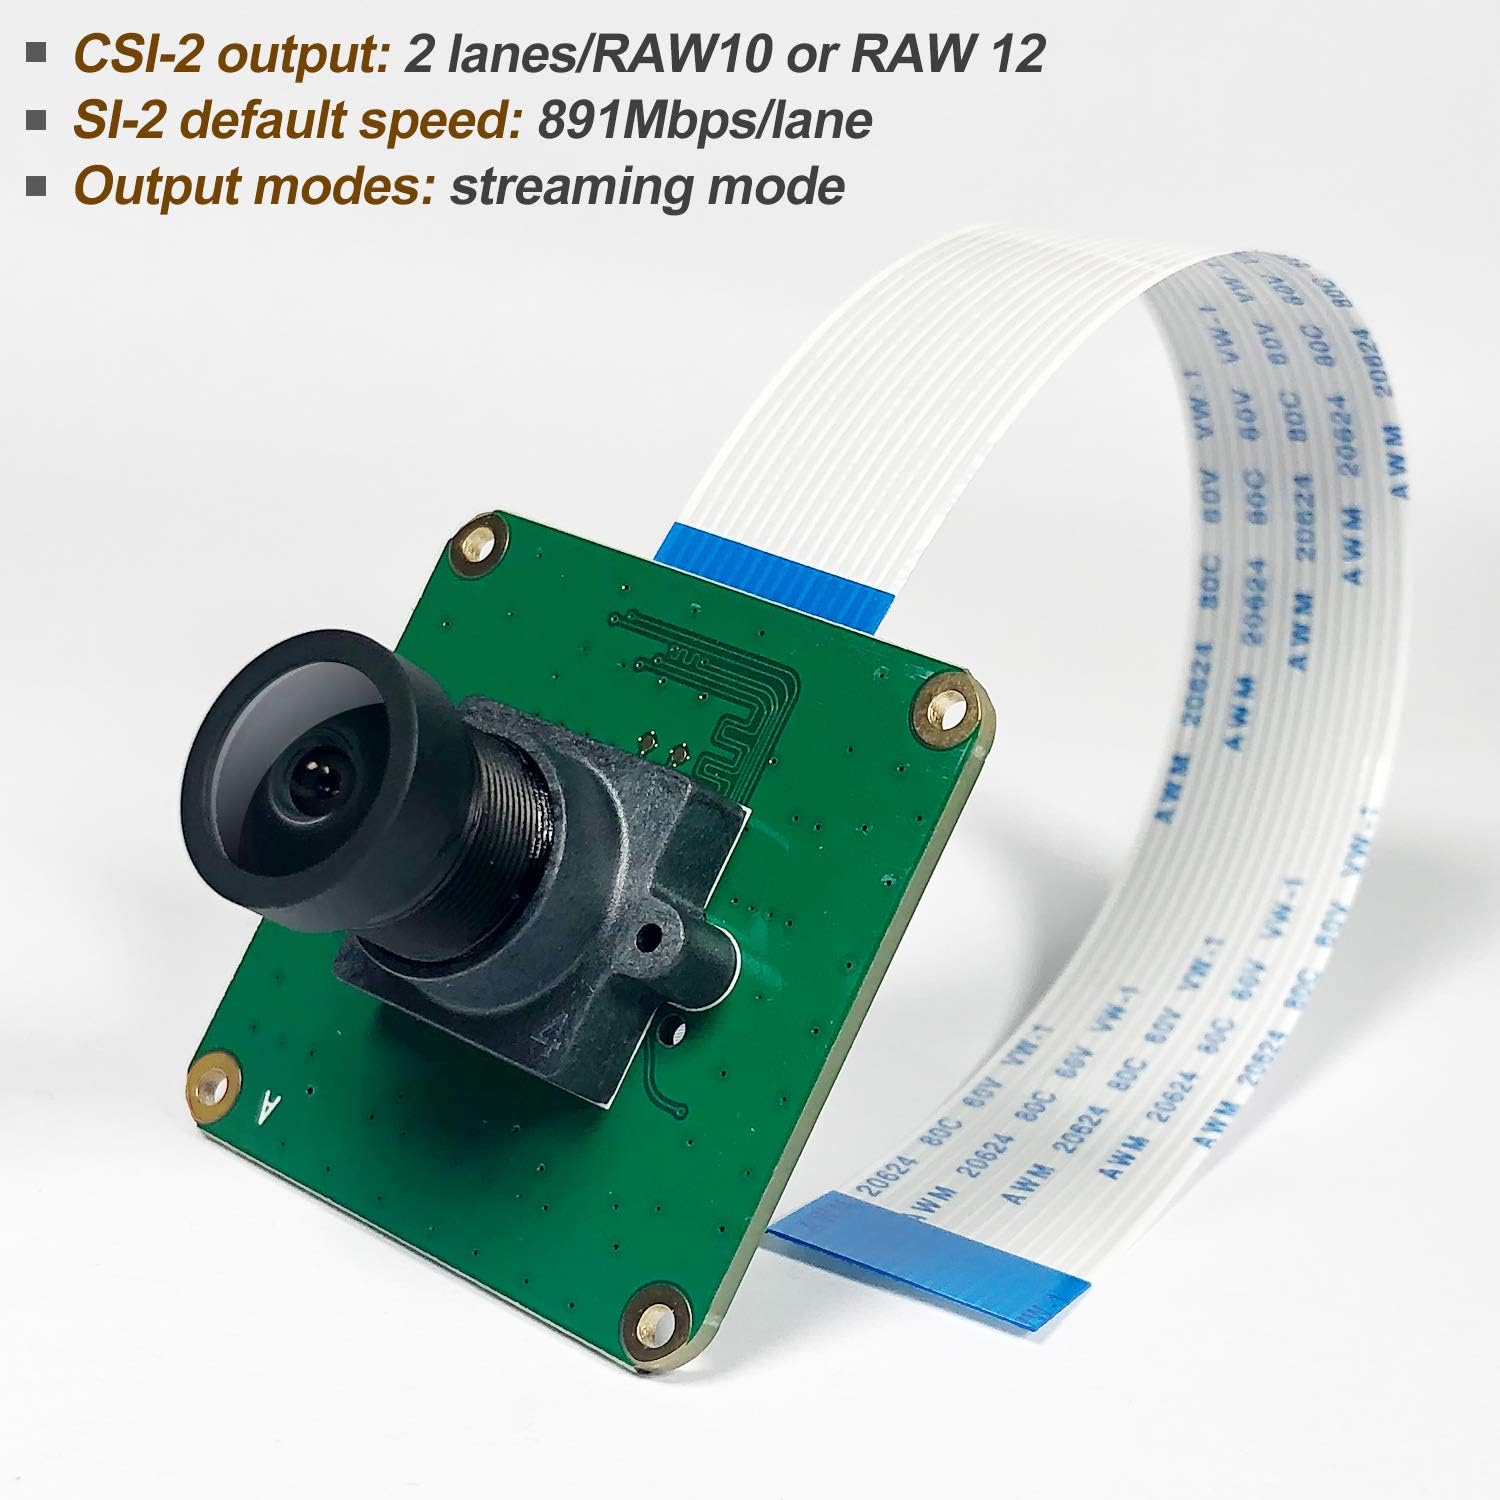
Figure 3: Detailed view of the camera module's CSI-2 output interface and ribbon cable connection.
2. Software Configuration
The camera module requires specific software configuration on your Raspberry Pi. The following steps outline the general process. Refer to the official Innomaker documentation or the Raspberry Pi camera guide for the most up-to-date and detailed instructions.
- Update Your System: Open a terminal on your Raspberry Pi and run:
sudo apt-get update && sudo apt-get upgrade - Enable Camera Interface:
- For older Raspberry Pi OS versions (e.g., Buster), enable the camera interface via
sudo raspi-configunder Interface Options. - For newer Raspberry Pi OS versions (e.g., Bullseye) using
libcamera, ensure the camera is detected and configured. The IMX462 module uses a built-in driver compatible with IMX290. You may need to adddtoverlay=imx290,clock-frequency=74250000to/boot/config.txt.
- For older Raspberry Pi OS versions (e.g., Buster), enable the camera interface via
- Install libcamera (if applicable): If using a newer OS, ensure
libcameratools are installed:sudo apt-get install libcamera-apps - Reboot: After making configuration changes, reboot your Raspberry Pi:
sudo reboot
Video 1: Installation and basic setup demonstration for a similar Innomaker camera module (IMX327). The steps for connecting and configuring the IMX462 are largely identical.
Operating Instructions
1. Basic Image Capture (libcamera)
Once configured, you can capture images and video using libcamera commands:
- Capture a still image:
libcamera-still -o image.jpg - Record a video:
(Records for 10 seconds)libcamera-vid -t 10000 -o video.h264 - Preview the camera feed:
libcamera-hello
2. Adjusting the Lens
The camera module features a wide-angle lens with adjustable focal distance. To adjust focus, gently rotate the lens barrel until the desired clarity is achieved. The lens is also replaceable, allowing for customization with other compatible lenses.
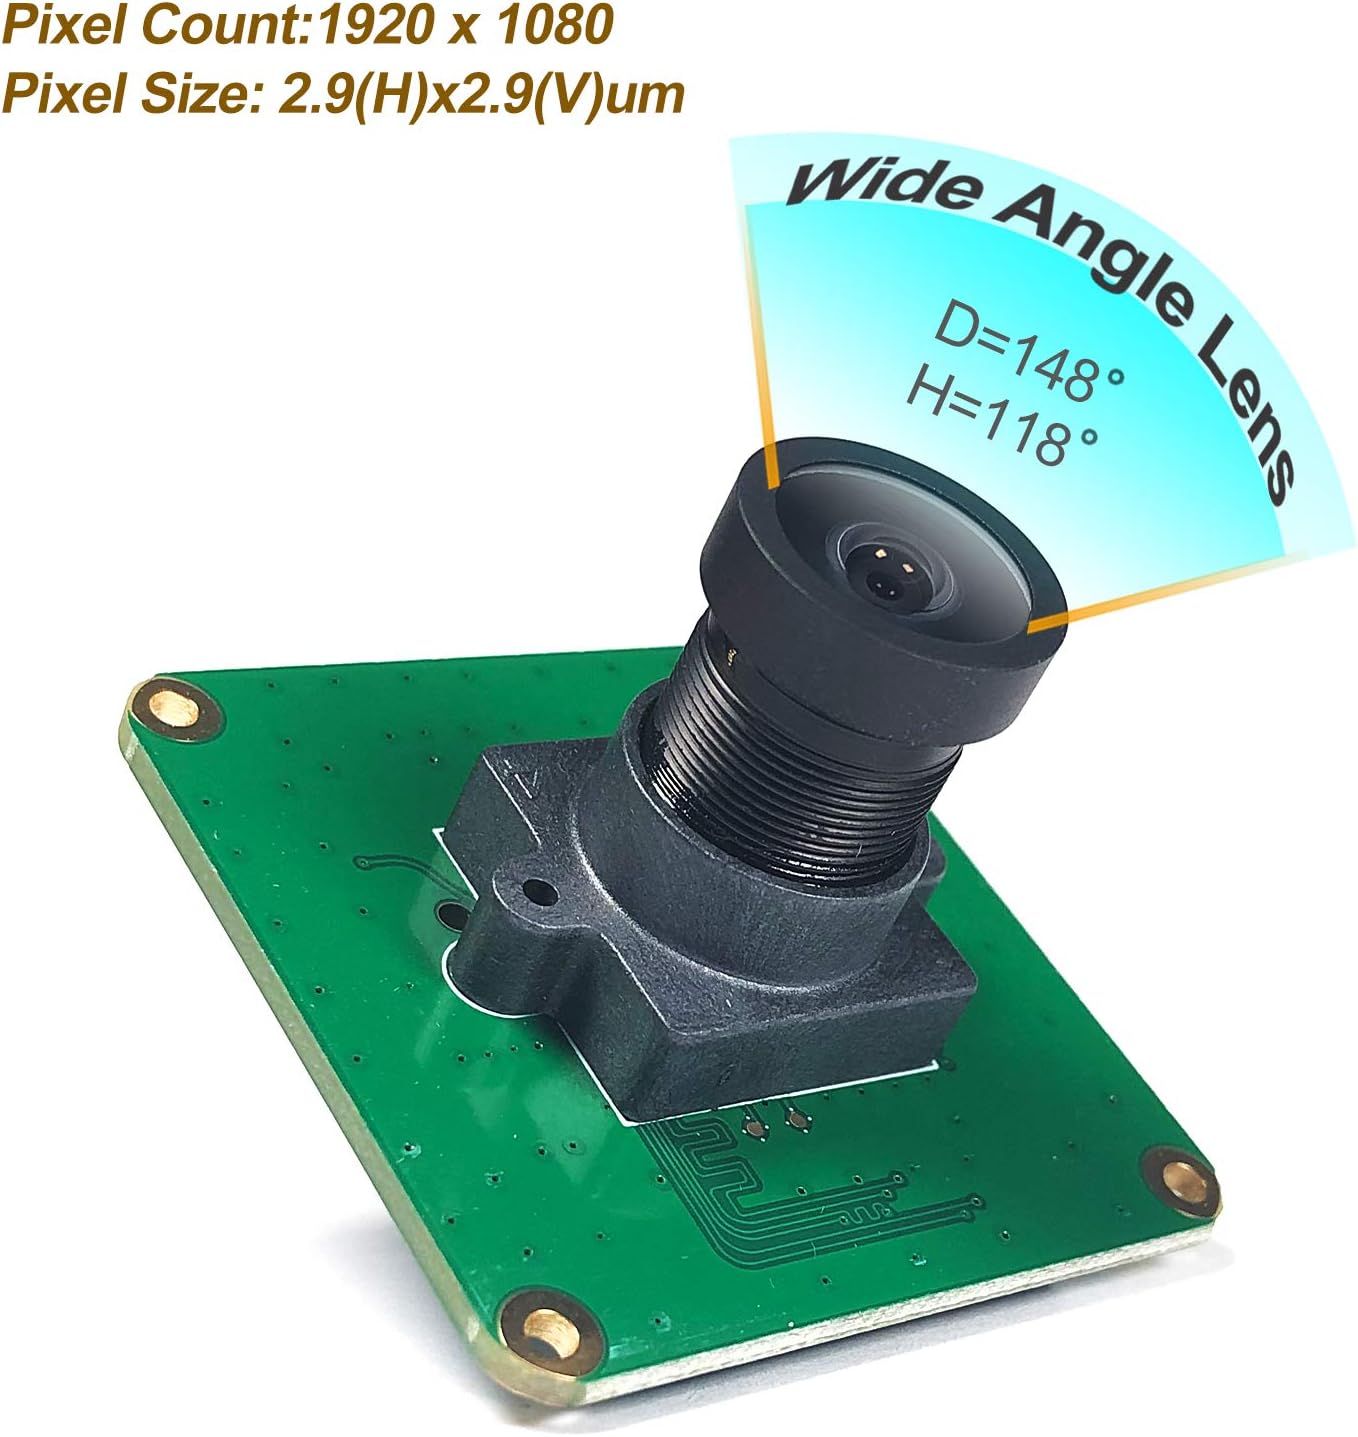
Figure 4: Wide-angle lens specifications, showing a diagonal FOV of 148 degrees and horizontal FOV of 118 degrees.

Figure 5: The camera module's lens can be unscrewed and replaced for different optical properties.
Maintenance
- Cleaning: Use a soft, lint-free cloth to gently clean the lens. Avoid abrasive materials or harsh chemicals.
- Storage: Store the camera module in a dry, dust-free environment when not in use.
- Handling: Always handle the camera module by its edges to avoid touching the sensor or delicate components. Static electricity can damage electronic components; take appropriate precautions.
- Firmware Updates: Regularly update your Raspberry Pi OS to ensure you have the latest drivers and software for optimal camera performance.
Troubleshooting
- Camera not detected:
- Ensure the ribbon cable is correctly inserted into both the camera module and the Raspberry Pi's CSI port, with the blue side facing away from the connector.
- Verify that the camera interface is enabled in
raspi-configor that the correctdtoverlayis added to/boot/config.txt. - Check for system updates and ensure
libcamera-appsare installed. - Reboot the Raspberry Pi after any configuration changes.
- Poor image quality:
- Adjust the lens focus by gently rotating the lens barrel.
- Ensure adequate lighting in the environment.
- Check camera settings (brightness, contrast, exposure) using
libcameraoptions or a compatible application. - Clean the lens if smudges or dust are present.
- No video output:
- Confirm the display is correctly connected and functioning.
- Verify that the camera is properly initialized and streaming using appropriate commands.
Specifications
| Feature | Detail |
|---|---|
| Brand | Innomaker |
| Model Name | CAM-MIPI462RAW |
| Sensor Type | STARVIS IMX462LQR Color CMOS Active Pixel Sensor |
| Effective Pixels | 2 MP (1920x1080) |
| Sensor Diagonal | 6.46 mm (Type 1/2.8) |
| Max Frame Rate | 60 fps |
| Connectivity | CSI-2 (2 lanes/RAW10 or RAW12) |
| Default Speed | 891 Mbps/lane |
| Output Modes | Streaming mode |
| Lens Type | Wide-angle, adjustable focal distance, replaceable |
| Field of View (FOV) | Diagonal: 148 degrees, Horizontal: 118 degrees |
| Operating System Compatibility | Debian (Raspbian), supports Bullseye libcamera |
| Item Weight | 1.41 ounces |
| Package Dimensions | 4.17 x 2.99 x 1.73 inches |
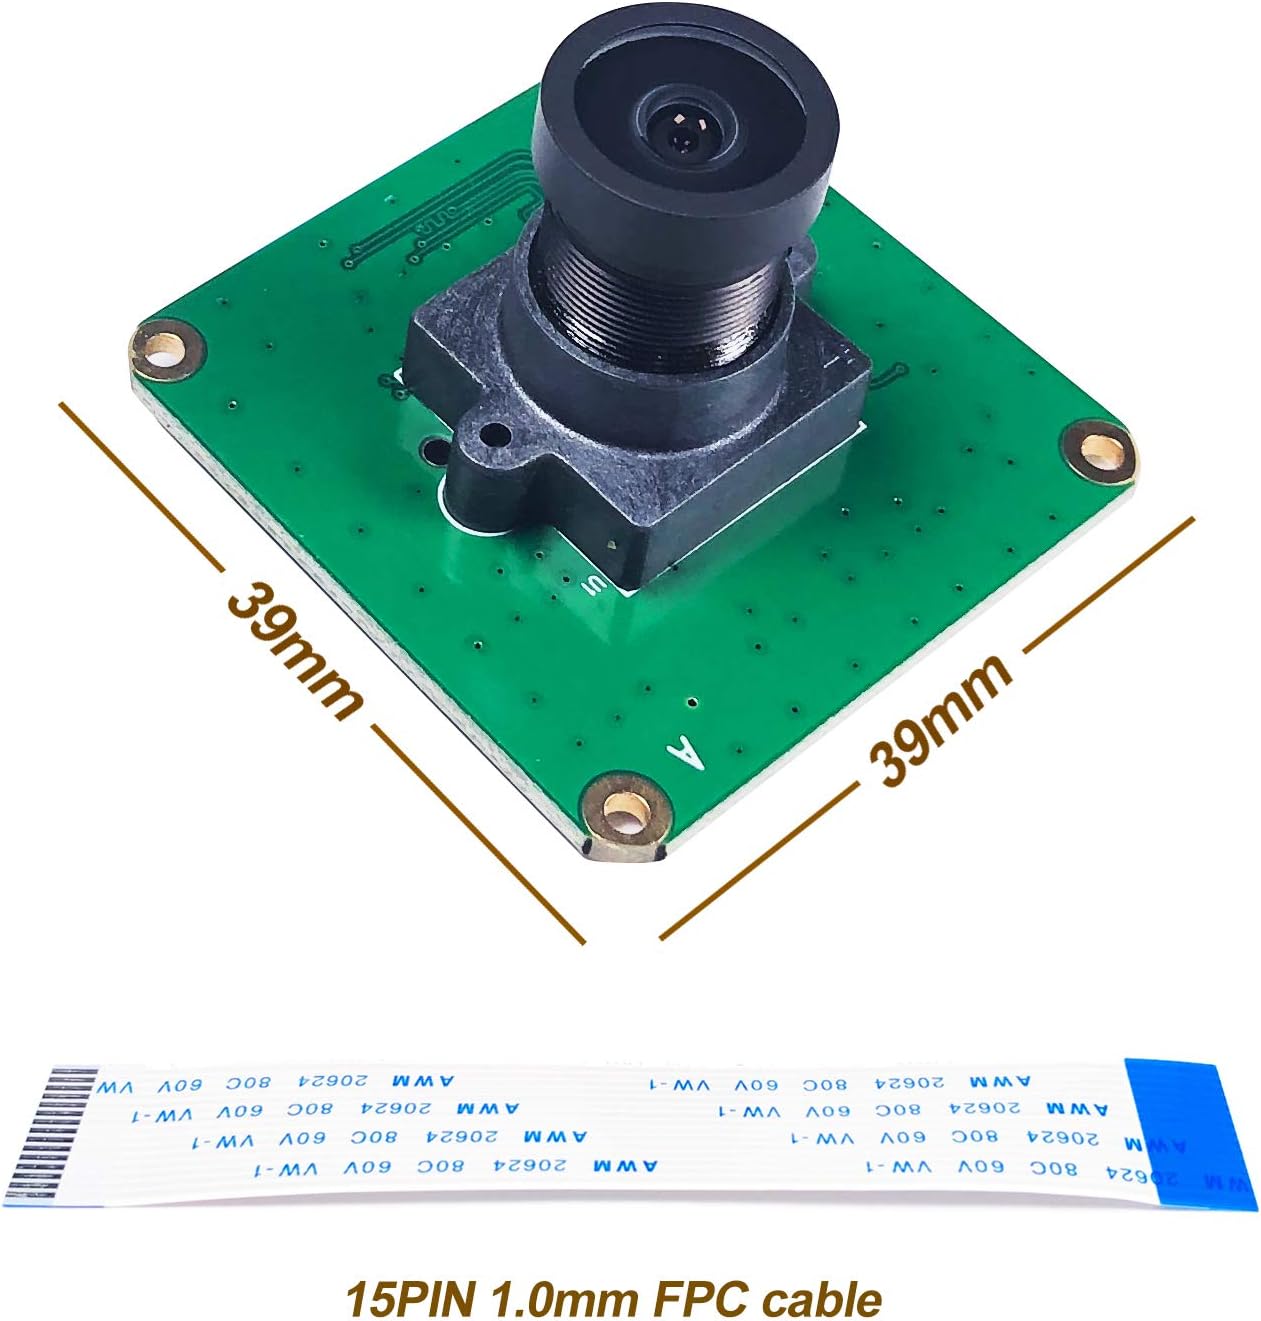
Figure 6: Physical dimensions of the camera module and the included FPC cable.
Warranty Information
Please refer to the manufacturer's official website or the product packaging for detailed warranty terms and conditions. Typically, Innomaker products come with a standard manufacturer's warranty covering defects in materials and workmanship.
Protection plans may be available for extended coverage. For specific details, consult your purchase documentation.
Support
For technical assistance, additional resources, or custom-design services, please visit the official Innomaker website or contact their support team.
Online Resources:
- Innomaker Store: InnoMaker Amazon Store
- Manufacturer's Website: Refer to product packaging or search online for "Innomaker official website".
The product comes with a user manual and test demo. Friendly technology support is available.


