
LNEX CTM12-10
LNEX Solar Charge Controller User Manual
Model: CTM12-10
1. Introduction
This manual provides comprehensive instructions for the installation, operation, maintenance, and troubleshooting of your LNEX Solar Charge Controller. Designed for efficiency and durability, this intelligent regulator is suitable for various battery types and outdoor environments.

2. Key Features
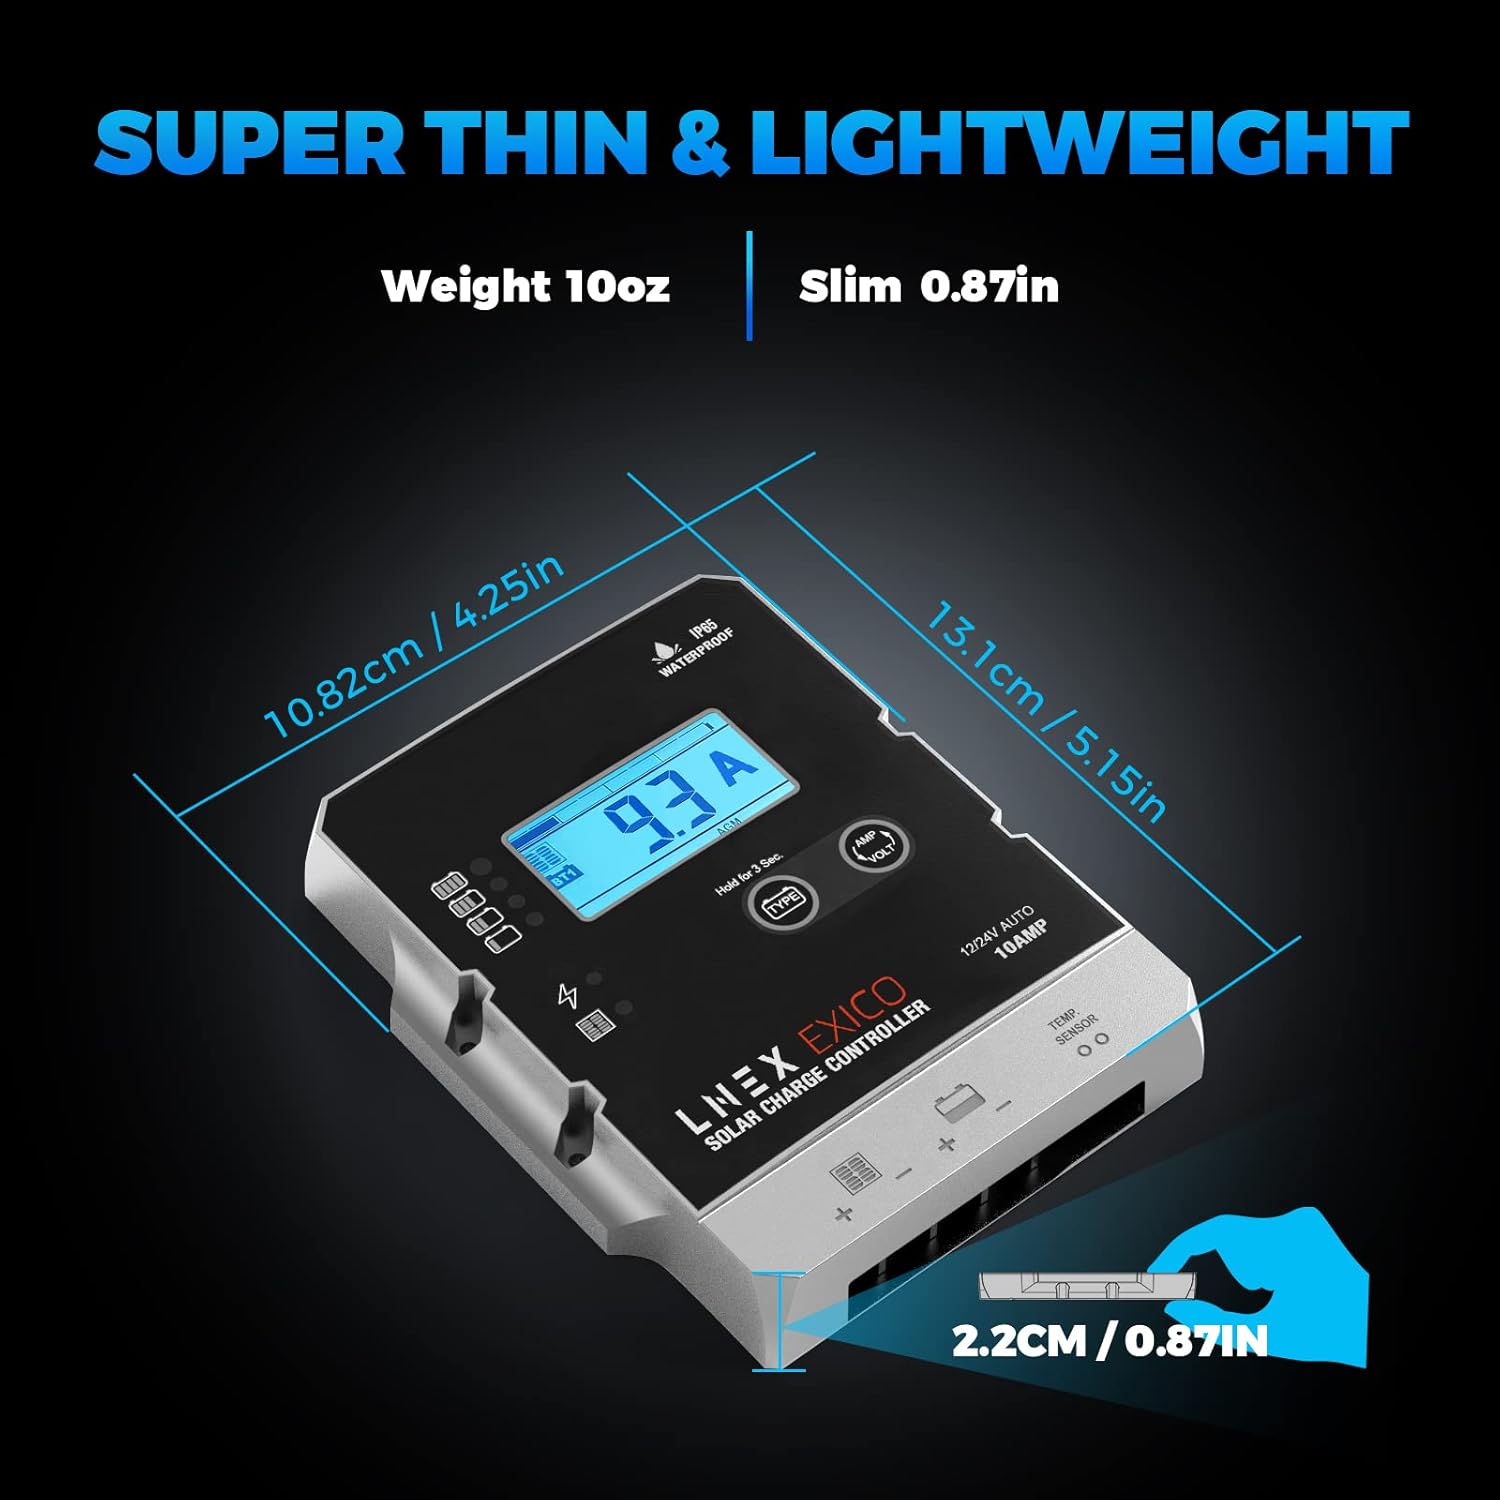
- Super Thin & Waterproof (IP65): Engineered for outdoor use, this controller features an IP65 waterproof rating, ensuring full operation even when exposed to water spray, rain, or condensation. Its ultra-thin design maximizes solar power utilization with high efficiency and no additional self-power consumption.
- 5-Stage PWM Technology: Equipped with advanced smart PWM technology, it provides 5-stage charging (Soft Start, Bulk, Absorption, Float, and Equalization) to extend battery life and enhance system performance. Automatic equalization occurs every 28 days for calcium/EFB batteries.
- Visual Solar Monitor: A backlit LCD display and multiple LED indicators allow real-time monitoring of solar current, battery voltage, and overall system status. The auto-memory function restores the last selected mode.
- 12V/24V Auto-Detection: Automatically detects 12V or 24V DC system voltages and is compatible with a wide range of battery types, including LiFePO4, LTO, GEL, AGM, Lead-Acid, and Calcium/EFB batteries. Ideal for deep cycle, starter, marine, car, RV, and powersport applications.
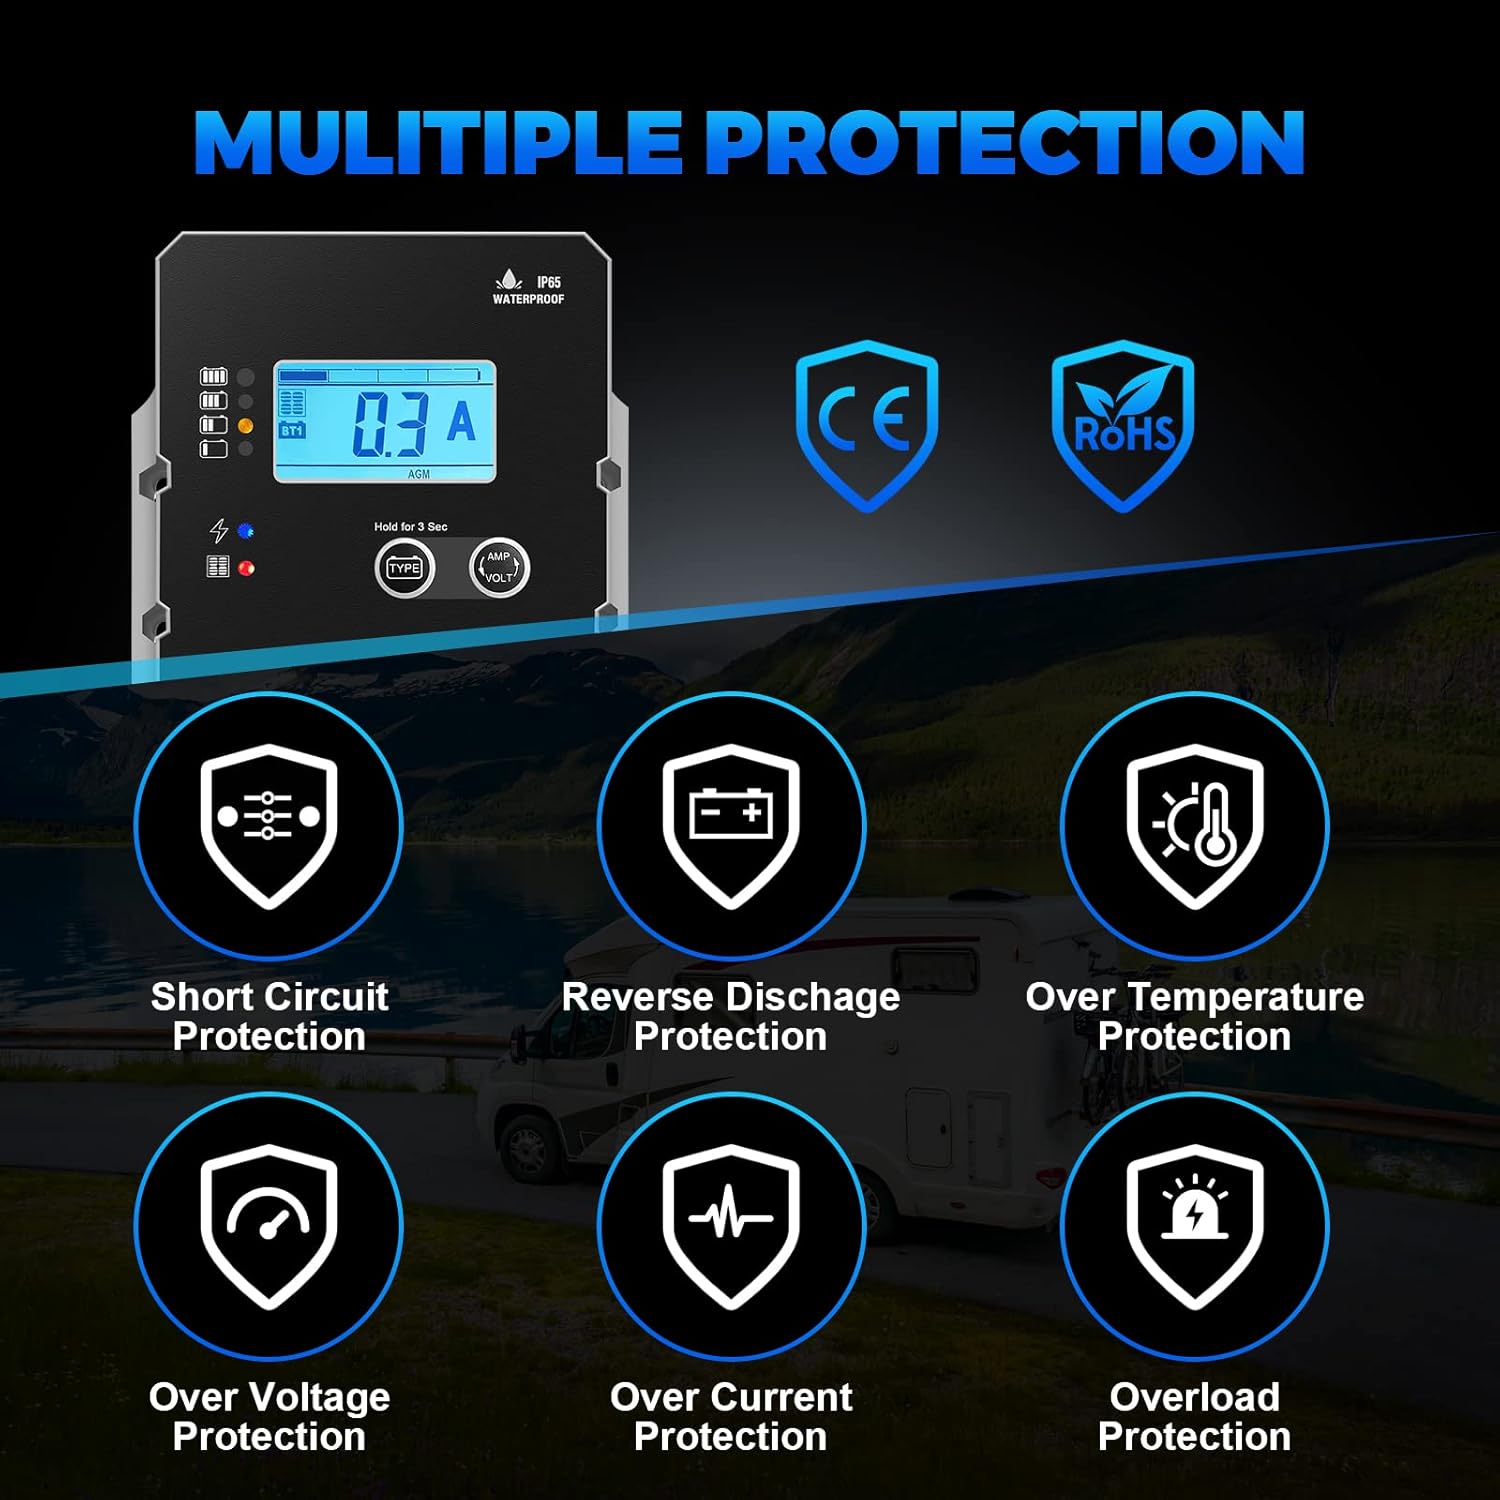
- Multi-Protection: Built-in safeguards against over-temperature, over-voltage, over-current, over-charging, over-discharging, overload, and short-circuit conditions ensure maximum protection for your battery and system.

3. Setup and Installation
Follow these steps for proper installation of your solar charge controller. Ensure all connections are secure and correct to prevent damage.
- Prepare Components: Gather your solar panel, battery, and the LNEX solar charge controller. An optional power inverter may also be used.
- Connect Battery: First, connect the battery to the charge controller. Ensure correct polarity (positive to positive, negative to negative).
- Connect Solar Panel: Next, connect the solar panel to the charge controller. Again, observe correct polarity.
- Connect Load (Optional): If using a DC load directly from the controller, connect it now. For AC loads, connect an inverter to the battery, then your AC devices to the inverter.
- Temperature Sensor: Connect the optional temperature sensor to the designated port on the controller. This helps optimize battery charging performance based on ambient temperature.


Setup Overview Video
This video provides a visual overview of the LNEX 12V/24V PWM Waterproof Solar Charge Controller, demonstrating its features and potential setup scenarios.
4. Operating Instructions
The LNEX Solar Charge Controller features an intuitive LCD display and LED indicators for easy operation and monitoring.
LCD Display and Buttons:
The backlit LCD displays real-time data such as current, voltage, and battery type. Use the "TYPE" button to select battery type and the "AMP/VOLT" button to cycle through display modes (Amps, Volts, Amp-hours, Temperature).

LED Indicators:
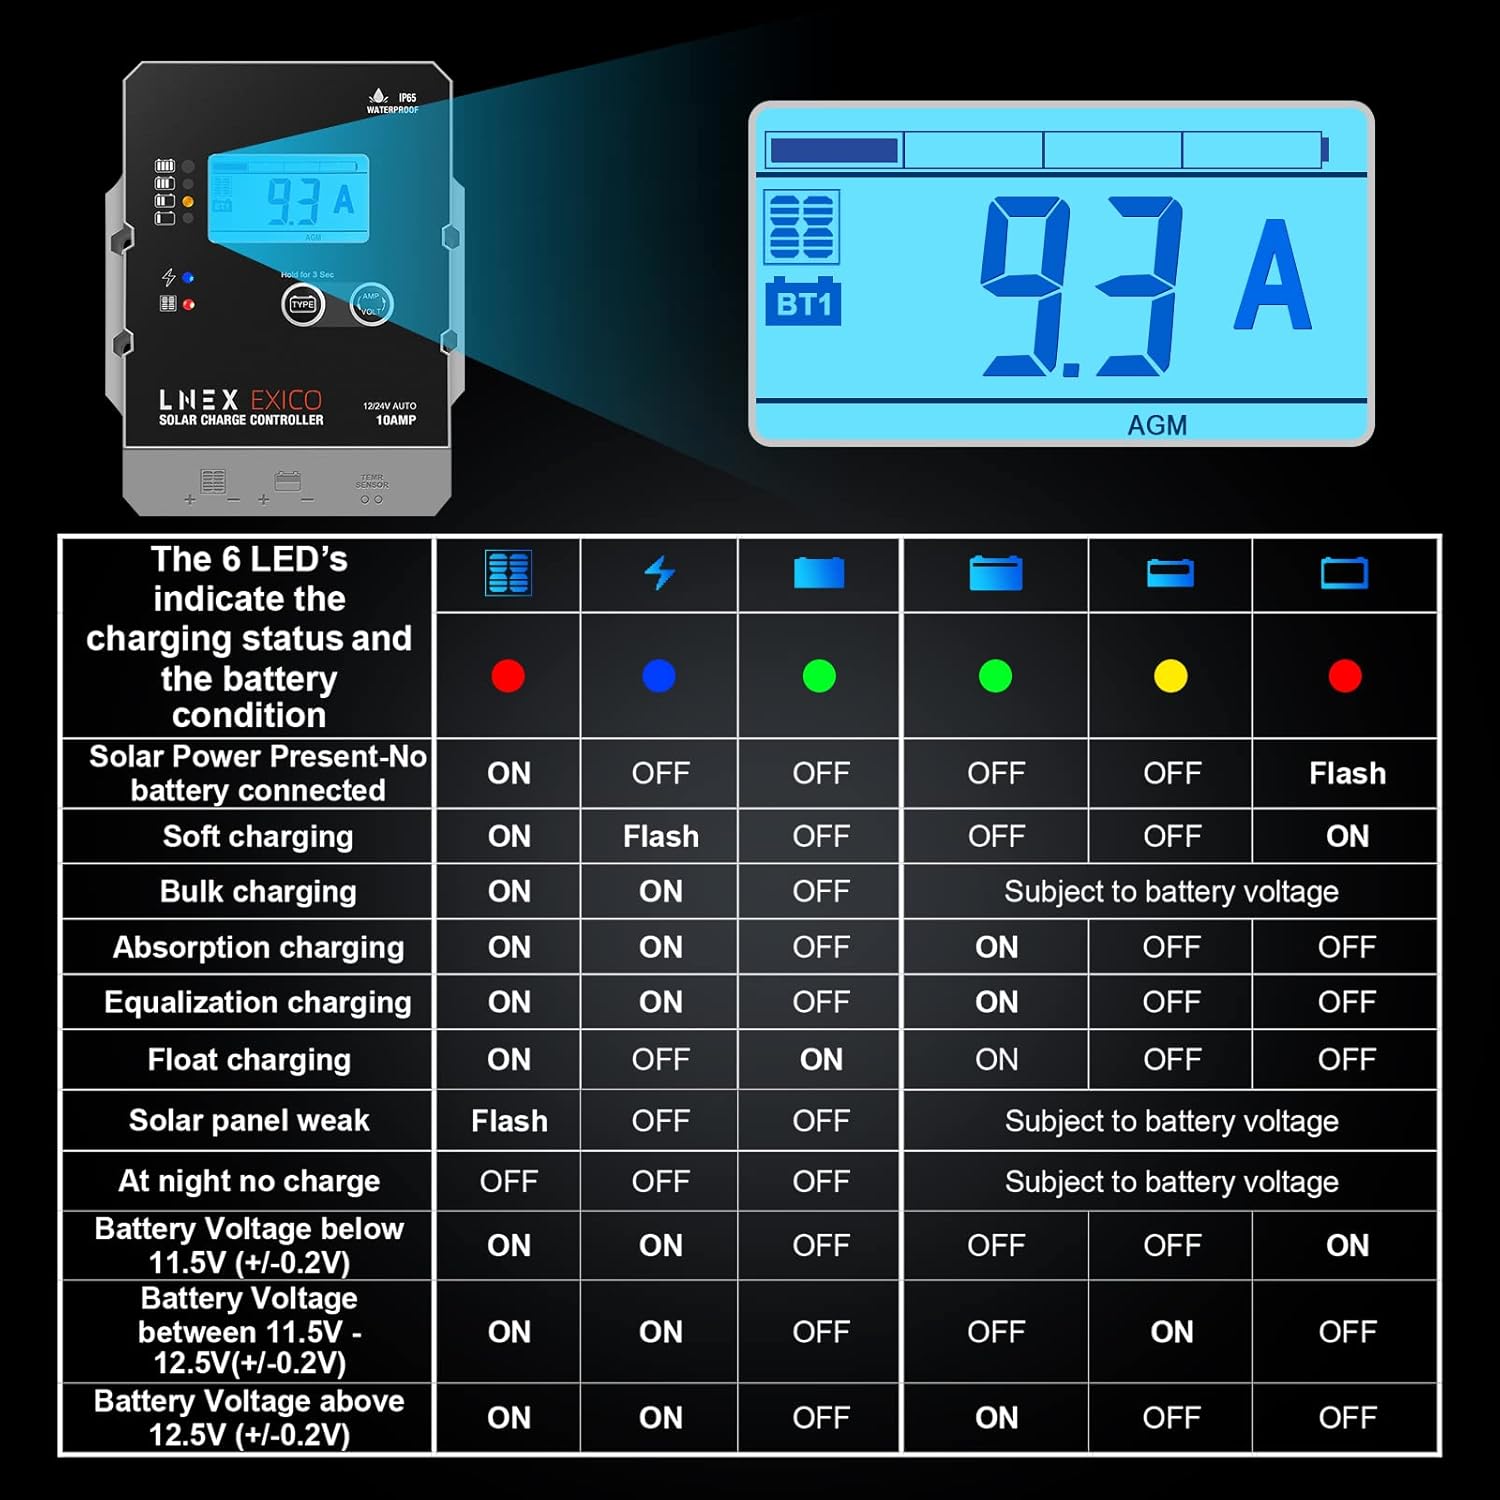
The six LED indicators provide a quick visual reference for charging status and battery condition:
| Condition | Solar Power Present | Battery Connected | Charging Status |
|---|---|---|---|
| Soft Charging | ON | ON | Flash |
| Bulk Charging | ON | ON | ON |
| Absorption Charging | ON | ON | OFF |
| Equalization Charging | ON | ON | ON |
| Float Charging | ON | ON | OFF |
| Solar Panel Weak | Flash | OFF | OFF |
| At Night No Charge | OFF | OFF | OFF |
5. Charging Technology
The LNEX Solar Charge Controller employs a sophisticated 5-stage PWM (Pulse Width Modulation) charging algorithm to ensure optimal battery health and longevity.
- Soft Start: When batteries are deeply discharged, the controller gently ramps up the battery voltage to a safe level (10V for 12V battery, 20V for 24V battery).
- Bulk Charge: Maximum current charging until batteries reach the absorption level.
- Absorption Charge: Constant voltage charging until the battery is over 85% charged.
- Equalization Charge: For WET or Calcium batteries, if deeply drained below 10V, this stage automatically equalizes the internal cells every 28 days to restore full capacity. (LiFePO4, LTO, GEL, and AGM batteries do not require equalization).
- Float Charge: Maintains the battery at a full charge by providing a small, constant voltage, preventing overcharging.

6. Safety Features
The LNEX Solar Charge Controller is equipped with multiple protection mechanisms to ensure the safety and longevity of your system:
- Short Circuit Protection
- Reverse Discharge Protection (prevents current flow from battery to solar panel at night)
- Over Temperature Protection
- Over Voltage Protection
- Over Current Protection
- Overload Protection
7. Maintenance
To ensure optimal performance and longevity of your LNEX Solar Charge Controller, periodic maintenance is recommended:
- Regular Cleaning: Keep the controller's surface clean and free from dust and debris. Use a soft, dry cloth.
- Check Connections: Periodically inspect all wiring connections to ensure they are tight and free from corrosion. Loose connections can lead to poor performance or damage.
- Inspect for Damage: Check the casing and cables for any signs of physical damage, wear, or exposure to extreme conditions.
- Monitor Performance: Regularly check the LCD display and LED indicators to ensure the system is operating within normal parameters and charging effectively.
8. Troubleshooting
If you encounter issues with your solar charge controller, refer to the following common problems and solutions:
- No Display/No Power:
- Check battery connections and ensure they are secure and correctly polarized.
- Verify battery voltage is within the operating range (12V/24V).
- Battery Not Charging:
- Ensure solar panel is receiving adequate sunlight.
- Check solar panel connections for correct polarity and secure fit.
- Verify solar panel voltage is sufficient for charging.
- Check LED indicators for "Solar Panel Weak" or "No Charge" status.
- Overcharging/Undercharging:
- Confirm the correct battery type is selected on the controller.
- Ensure the temperature sensor (if used) is properly connected and positioned.
- Error Codes/Unusual Behavior:
- Refer to the multi-protection features. The controller may be in a protection mode (e.g., over-voltage, short-circuit).
- Disconnect all power sources, wait a few minutes, and reconnect to reset the controller.
For persistent issues, contact customer support.
9. Technical Specifications
| Attribute | Detail |
|---|---|
| Model Number | CTM12-10 |
| Display Type | LCD |
| Voltage | 12V/24V Auto-detection |
| Max Current | 10A |
| Waterproof Rating | IP65 |
| Product Dimensions | 4.25"L x 0.87"W x 5.15"H (10.82 x 2.2 x 13.1 cm) |
| Item Weight | 10 ounces |
| Compatible Battery Types | LiFePO4, LTO, GEL, AGM, Lead-Acid, Calcium, EFB |
| Country of Origin | China |
10. Warranty and Support
Warranty Information:
The LNEX Solar Charge Controller comes with a manufacturer's warranty for 90 days from the date of purchase. Please retain your proof of purchase for warranty claims.
Customer Support:
For any questions, technical assistance, or warranty inquiries, please contact LNEX Direct customer support through the retailer's platform or the official LNEX website.
Visit the official LNEX Store for more products and information.
Ask a question about this manual
Ask about setup, troubleshooting, compatibility, parts, safety, or missing instructions. Manuals+ will review the question and use this page’s manual context to help answer it.