
1. Introduction
Thank you for choosing the Vacmaster VK1638SWC Industrial Wet and Dry Vacuum Cleaner. This manual provides essential information for the safe assembly, operation, maintenance, and troubleshooting of your new appliance. Please read these instructions thoroughly before use and retain them for future reference.

Image: The Vacmaster VK1638SWC vacuum cleaner actively cleaning a workshop floor, demonstrating its industrial application.
2. Safety Information
Always follow basic safety precautions when using this appliance to reduce the risk of fire, electric shock, or injury.
- Read all instructions before operating the vacuum cleaner.
- Do not leave the appliance unattended when plugged in. Unplug from outlet when not in use and before servicing.
- Do not pick up hot ashes, coals, or flammable/combustible liquids.
- Do not use around explosive liquids or vapors.
- Ensure all filters are correctly installed for the intended operation (wet or dry).
- Keep hair, loose clothing, fingers, and all parts of the body away from openings and moving parts.
- Use only as described in this manual. Use only manufacturer's recommended attachments.
- Do not use with a damaged cord or plug. If the appliance is not working as it should, has been dropped, damaged, left outdoors, or dropped into water, return it to a service center.
- Do not pull or carry by cord, use cord as a handle, close a door on cord, or pull cord around sharp edges or corners. Do not run appliance over cord. Keep cord away from heated surfaces.
- Do not unplug by pulling on cord. To unplug, grasp the plug, not the cord.
- Do not handle plug or appliance with wet hands.
- Turn off all controls before unplugging.
- Use extra care when cleaning on stairs.
- Do not use to pick up flammable or combustible liquids, such as gasoline, or use in areas where they may be present.
- Do not pick up anything that is burning or smoking, such as cigarettes, matches, or hot ashes.
- Do not use without filters in place.
- This appliance is not intended for use by persons (including children) with reduced physical, sensory or mental capabilities, or lack of experience and knowledge, unless they have been given supervision or instruction concerning use of the appliance by a person responsible for their safety.
- Children should be supervised to ensure that they do not play with the appliance.
3. Package Contents
Carefully unpack the box and ensure all items are present and undamaged. If any parts are missing or damaged, contact Vacmaster customer support.
- 1 x Dust Extractor Unit
- 1 x HEPA 13 Cartridge Filter
- 1 x HEPA Exhaust Filter
- 1 x Pre-filter (washable)
- 1 x Foam Filter
- 2 x Extension Tubes
- 1 x Handle with Air Flow Control
- 1 x Universal Floor Head
- 1 x Dual Mode Floor Head
- 1 x Anti-crush Hose
- 1 x Round Dusting Tool
- 1 x Extra-large Crevice Tool
- 1 x Universal Power Tool Adaptor
- 1 x Accessory Pouch
- 1 x 38L Hygiene Seal Dust Bag

Image: The Vacmaster VK1638SWC unit displayed with its full range of included accessories.
4. Setup
4.1 Assembling the Vacuum
- Attach Casters: Insert the casters into the designated slots on the base of the vacuum until they click securely into place.
- Attach Handle: Secure the handle to the top of the unit using the provided hardware.
- Connect Hose: Insert the anti-crush hose into the suction inlet on the front of the tank. Ensure it is firmly seated.
- Install Filters: Refer to section 4.2 for specific filter installation based on your intended use (wet or dry).

Image: A close-up view of the yellow latch, indicating how to secure or release the motor head from the tank.
4.2 Filter Installation
The VK1638SWC uses different filters for wet and dry applications. Always ensure the correct filter is installed before operation.
- For Dry Vacuuming: Install the HEPA 13 Cartridge Filter and the washable Pre-filter. Ensure the HEPA Exhaust Filter is also in place. The 38L hygiene seal dust bag can be used for improved dust collection and disposal.
- For Wet Vacuuming: Remove the HEPA 13 Cartridge Filter and Pre-filter. Install the Foam Filter over the filter cage. Do NOT use the dust bag for wet vacuuming.

Image: A person demonstrating the process of accessing and handling the filter inside the vacuum cleaner's tank.
5. Operating Instructions
5.1 Dry Vacuuming
- Ensure the HEPA 13 Cartridge Filter and Pre-filter are correctly installed.
- Connect the desired extension tubes and floor head (universal or dual mode) or other accessory to the hose.
- Plug the power cord into a suitable electrical outlet (240 Volts).
- Turn the vacuum cleaner ON using the power switch.
- Begin vacuuming the dry debris.
- When finished, turn the vacuum OFF and unplug it.
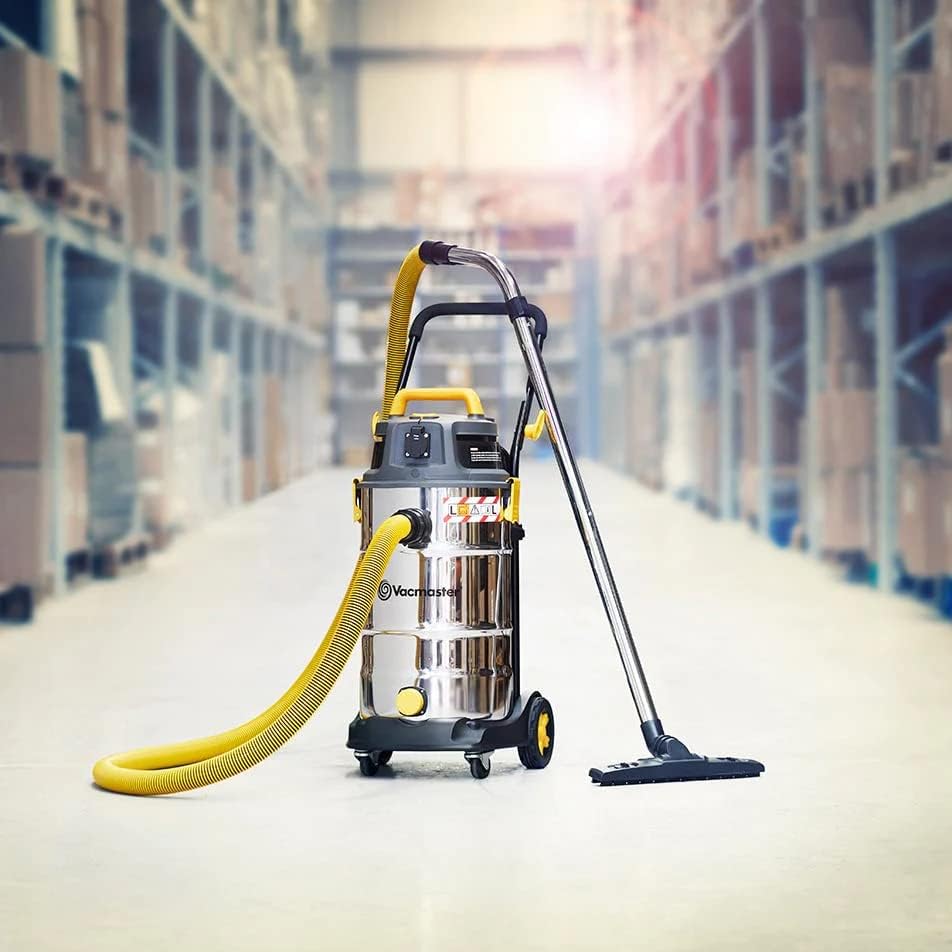
Image: The Vacmaster VK1638SWC vacuum cleaner fully assembled with its hose, extension tubes, and floor head.
5.2 Wet Vacuuming
- Ensure the Foam Filter is correctly installed and the HEPA 13 Cartridge Filter and Pre-filter are removed.
- Connect the desired floor head or accessory suitable for wet pickup to the hose.
- Plug the power cord into a suitable electrical outlet.
- Turn the vacuum cleaner ON.
- Begin vacuuming liquids. The vacuum has an automatic shut-off feature that will stop suction when the tank is full.
- When finished or when the tank is full, turn the vacuum OFF and unplug it. Empty the tank as described in the Maintenance section.

Image: The Vacmaster VK1638SWC vacuum cleaner demonstrating its liquid draining capability from the tank's outlet.
5.3 Blower Function
The VK1638SWC can also function as a powerful blower.
- Ensure the tank is empty and clean, and the appropriate filter is installed (HEPA for dry blowing, no filter or foam filter for wet blowing).
- Remove the hose from the suction inlet.
- Insert the hose into the blower port located on the motor head.
- Plug in and turn ON the vacuum to use the blower function.
5.4 Power Tool Connection
The included universal power tool adaptor allows for direct dust extraction when working with power tools.
- Ensure the vacuum is set up for dry vacuuming with the HEPA 13 filter.
- Connect the universal power tool adaptor to the end of the vacuum hose.
- Attach the other end of the adaptor to the dust extraction port on your power tool.
- Plug the power tool into the integrated power socket on the vacuum cleaner (if available and compatible). This allows the vacuum to start automatically when the power tool is activated.
- Turn on the vacuum cleaner and then your power tool to begin dust extraction.

Image: The Vacmaster VK1638SWC vacuum cleaner connected to a sanding machine, demonstrating its dust extraction capability.
5.5 Using the Wheel Brake
To secure the vacuum cleaner in place, engage the wheel brake by pressing down on the lever located on one of the casters. To release, lift the lever.

Image: A person's foot pressing down on the yellow lever to engage the wheel brake on the vacuum cleaner.
6. Maintenance
Regular maintenance ensures optimal performance and extends the life of your vacuum cleaner. Always unplug the unit before performing any maintenance.
6.1 Filter Cleaning and Replacement
- HEPA 13 Cartridge Filter & Pre-filter: For dry use, these filters should be cleaned regularly by tapping them gently to dislodge dust or by using a soft brush. The pre-filter is washable; rinse with water and allow to air dry completely before reinstallation. Replace the HEPA cartridge filter when suction power significantly decreases or if it becomes damaged.
- Foam Filter: For wet use, the foam filter should be rinsed with water after each use and allowed to air dry completely before storage or next use.
- HEPA Exhaust Filter: Check periodically and replace if visibly dirty or if air quality issues are noted.
6.2 Tank Cleaning and Emptying
- Dry Debris: Unlatch the motor head and carefully lift it off. Remove the dust bag (if used) and dispose of contents. Empty any remaining debris from the stainless steel tank.
- Liquids: For liquid disposal, the tank can be emptied by tilting the unit or by using the drain plug located at the bottom of the tank. After emptying, rinse the tank with water and wipe dry to prevent odors and corrosion.
6.3 Accessory Storage
The VK1638SWC features integrated storage for its accessories, keeping them organized and readily accessible.

Image: The Vacmaster VK1638SWC vacuum cleaner showcasing its onboard storage for hose, power cord, and various attachments.
7. Troubleshooting
Before contacting customer support, refer to the following table for common issues and their solutions.
| Problem | Possible Cause | Solution |
|---|---|---|
| Vacuum does not turn on. | No power supply; Damaged cord/plug; Faulty switch. | Check power outlet and plug. Inspect cord for damage. Contact service if switch is faulty. |
| Loss of suction. | Clogged hose/attachments; Full tank; Dirty/incorrect filter; Air leak. | Clear obstructions. Empty tank. Clean/replace filters. Check all connections for leaks. |
| Motor overheats/shuts off. | Blocked airflow; Full tank (wet use); Prolonged heavy use. | Check for blockages. Empty tank. Allow motor to cool down before restarting. |
| Water leaking from unit. | Foam filter not installed correctly for wet use; Tank overfilled; Damaged tank seal. | Ensure foam filter is properly seated. Do not overfill tank. Inspect tank seal for damage. |
8. Specifications
| Feature | Detail |
|---|---|
| Model Number | VK1638SWC |
| Power | 1600W Motor |
| Air Watts | 260 Air Watts |
| Airflow | 52 L/s (max) |
| Vacuum Pressure | 27 kpa |
| Tank Capacity | 38 Liters |
| Filtration | Dual HEPA 13 (Cartridge & Exhaust), Washable Pre-filter, Foam Filter |
| Material | Stainless Steel Tank |
| Dimensions (L x W x H) | 49 x 41 x 79 cm |
| Weight | 17 Kilograms |
| Voltage | 240 Volts |
| Special Feature | Wet/Dry Functionality |
9. Warranty and Support
9.1 Warranty Information
The Vacmaster VK1638SWC Industrial Wet and Dry Vacuum Cleaner comes with a 2-year warranty from the date of purchase. This warranty covers defects in materials and workmanship under normal use. It does not cover damage resulting from misuse, abuse, accident, unauthorized repairs, or lack of maintenance.
9.2 Customer Support
For technical assistance, warranty claims, or to order replacement parts, please contact Vacmaster customer support. Refer to the contact information provided with your purchase documentation or visit the official Vacmaster website.


