
BSIDE Z1 Buscapolos Electricista
BSIDE Pen-Type Digital Multimeter Z1 User Manual
Model: Z1 Buscapolos Electricista | Brand: BSIDE
1. Introduction
The BSIDE Pen-Type Digital Multimeter Z1 is a portable, smart auto-ranging instrument designed for electrical testing. It features a 3-results display, auto and manual modes, and can measure AC/DC voltage, resistance, frequency, continuity, V-Alert (non-contact voltage detection), and perform live-wire checks. Its compact design and integrated flashlight make it suitable for various applications, from home electrical work to professional electronic maintenance.
2. Safety Information
Always read and understand all safety warnings and operating instructions before using this instrument. Failure to do so may result in injury or damage to the meter or equipment under test.
- Do not exceed the maximum voltage rating specified for the meter.
- Use caution when working with voltages above 30V AC RMS, 42V peak, or 60V DC. These voltages pose a shock hazard.
- Before measuring resistance or continuity, ensure that the circuit is de-energized and all capacitors are discharged.
- Inspect the test leads for damage before each use. Do not use if insulation is damaged or bare metal is exposed.
- Do not operate the meter if it appears damaged or is not operating properly.
- Always use the correct function and range for the measurement.
- Keep fingers behind the finger guards on the test leads during measurements.
- Replace batteries immediately when the low battery indicator appears to ensure accurate readings.
3. Package Contents
Verify that all items listed below are included in your package. If any items are missing or damaged, please contact your retailer or BSIDE support.
- 1 x BSIDE Pen Type Multimeter (Z1)
- 1 x Test Lead
- 2 x AAA Batteries
- 1 x Screwdriver
- 1 x User Manual

4. Product Features and Components
The BSIDE Z1 Multimeter is designed for ease of use with its pen-type form factor and intuitive controls.

4.1. Display Features
The multimeter features a 1.9-inch LCD screen with a 2000-count display. It includes a unique red and green backlight system to enhance readability and provide visual cues for readings.

4.2. Controls and Ports
- Power Button: Used to turn the device on and off.
- VALT Button: Likely used for voltage measurement selection or mode switching.
- SEL Button: Used to select different measurement functions within a mode (e.g., AC/DC voltage, resistance, frequency).
- Input Jack: For connecting the test lead.
- COM Jack: Common terminal for the test lead.
4.3. Integrated Flashlight
The multimeter includes an upgraded LED flashlight at the tip, allowing for efficient and comfortable testing in dimly lit environments, both indoors and outdoors.

5. Setup
5.1. Battery Installation
The BSIDE Z1 Multimeter requires two 1.5V AAA batteries (included). To install or replace batteries:
- Locate the battery compartment cover on the back of the multimeter.
- Use the provided screwdriver to loosen the screw securing the battery cover.
- Remove the cover.
- Insert the two AAA batteries, observing the correct polarity (+ and -) as indicated inside the compartment.
- Replace the battery cover and tighten the screw.
5.2. Connecting Test Leads
The multimeter comes with a single test lead for various measurements.
- Insert the banana plug end of the test lead into the 'INPUT' jack on the top of the multimeter.
- For measurements requiring a common reference, ensure the 'COM' terminal is properly utilized or the single lead is used as intended for pen-type operation.
6. Operating Instructions
6.1. Power On/Off
- To turn on the multimeter, press the Power button.
- To turn off the multimeter, press and hold the Power button until the display turns off. The device also features an auto power-off function to conserve battery life.
6.2. Auto Mode Operation
The BSIDE Z1 features a smart auto-identification design, allowing it to automatically detect the parameter being measured (voltage, resistance, continuity) and select the appropriate range.

6.3. Specific Measurement Functions
While the multimeter operates largely in auto mode, specific functions can be selected using the VALT and SEL buttons.
- AC/DC Voltage Measurement:
Connect the test lead to the circuit. The multimeter will automatically detect AC or DC voltage. Use the SEL button if manual selection between AC and DC is required. - Resistance Measurement:
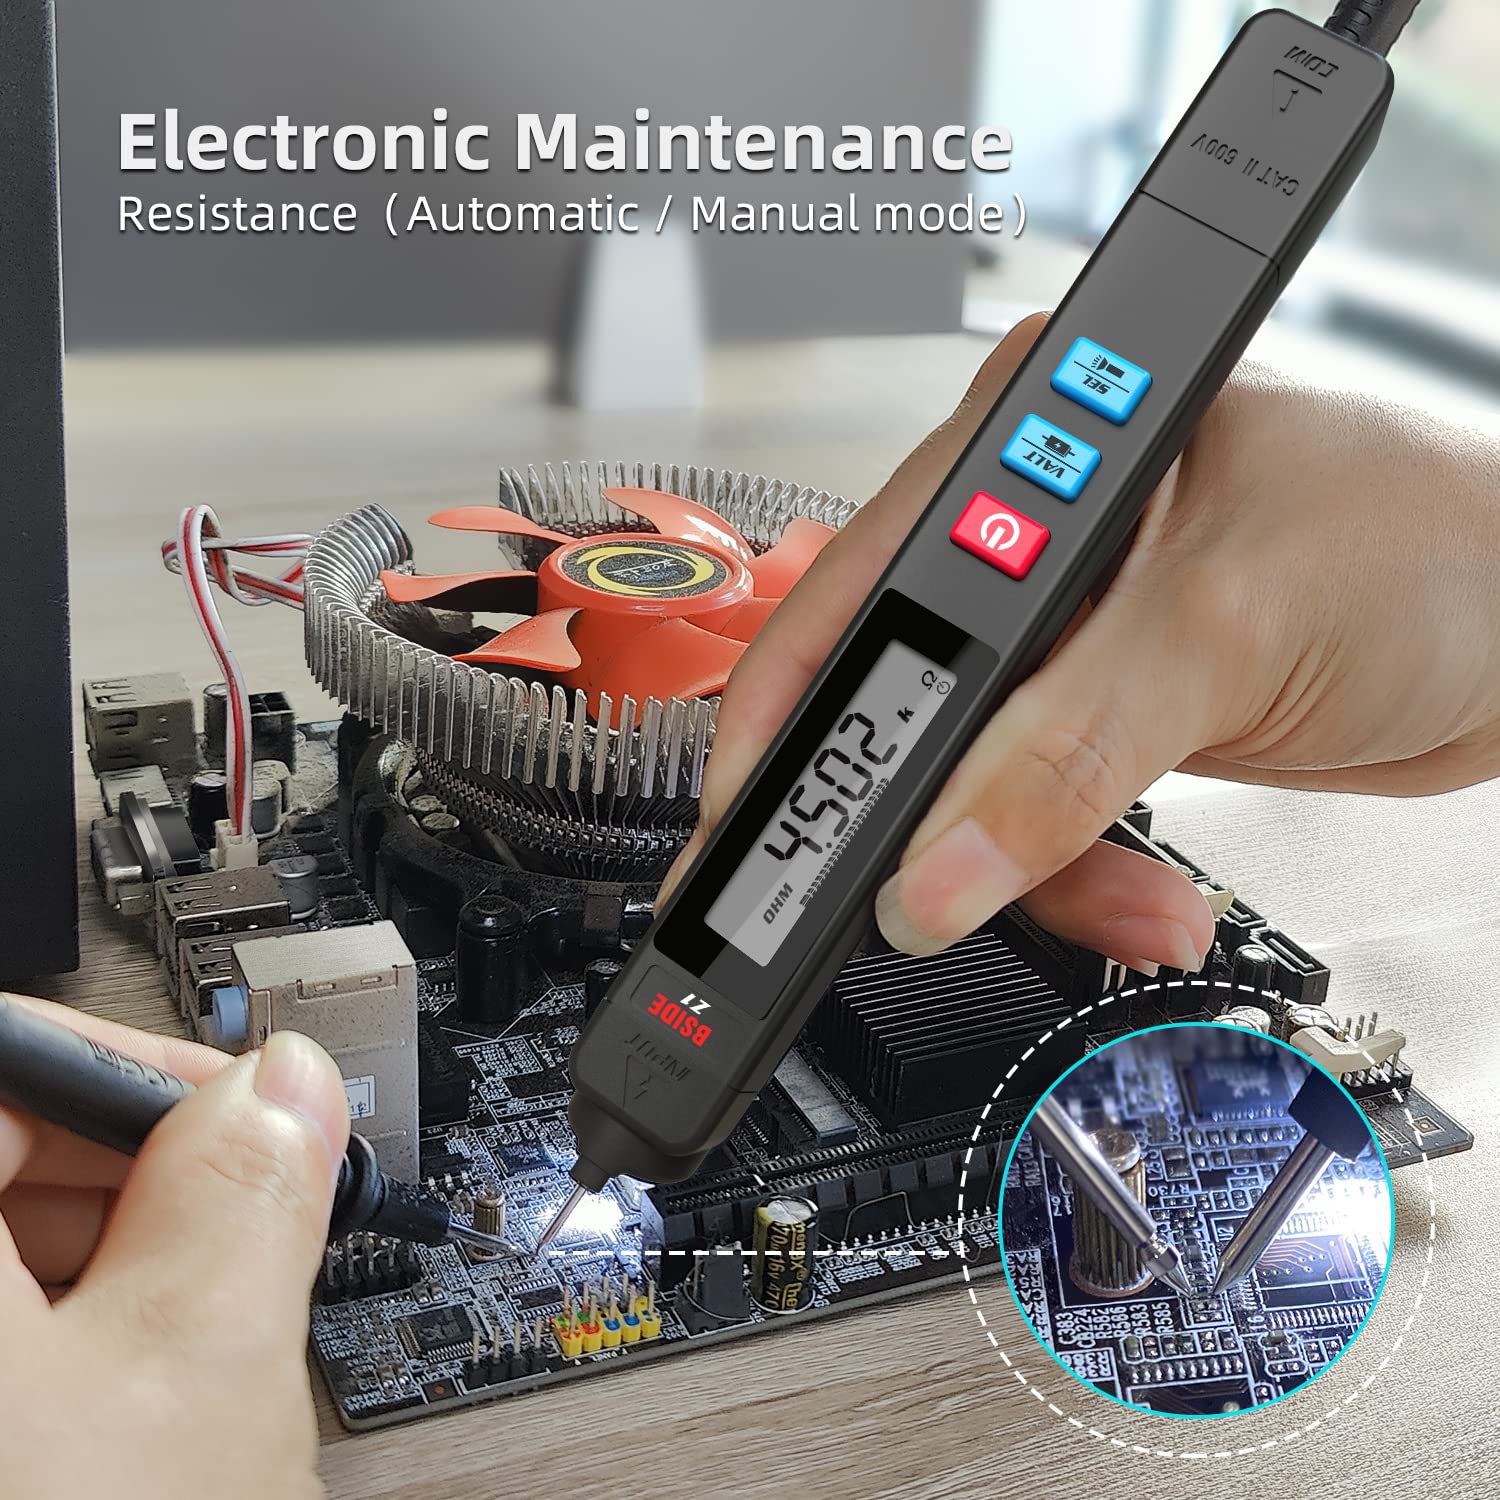
Ensure the circuit is de-energized. Connect the test lead across the component to measure resistance. The multimeter will display the resistance value.
- Frequency Measurement:
Select the frequency function. Connect the test lead to the signal source. The multimeter will display the frequency in Hertz (Hz). - Continuity Test:
Select the continuity function. Connect the test lead across the circuit or component. If the resistance is less than 50Ω, the beeper will sound, indicating continuity. - V-Alert (Non-contact Voltage Detection):
Hold the tip of the multimeter near an AC voltage source without direct contact. The meter will indicate the presence of AC voltage through visual and/or audible alerts. - Live Wire Check:
Select the Live Wire Check function. Insert the test lead into the live terminal of an outlet or touch it to a live wire. The display will show 'LIVE' and illuminate red if a live wire is detected.


6.4. Data Hold Function
To freeze the current reading on the display, press the VALT button briefly during a measurement. Press it again to release the hold and resume live readings.
6.5. Flashlight Operation
To activate the integrated LED flashlight, press and hold the SEL button. Release the button to turn off the flashlight.
7. Maintenance
7.1. Cleaning
To clean the multimeter, wipe the case with a damp cloth and a mild detergent. Do not use abrasives or solvents. Ensure the device is powered off and disconnected from any circuits before cleaning.
7.2. Battery Replacement
Refer to Section 5.1 for detailed instructions on battery installation and replacement. Replace batteries promptly when the low battery indicator appears on the display to maintain measurement accuracy.
7.3. Storage
When the multimeter is not in use for an extended period, remove the batteries to prevent leakage and damage to the device. Store the multimeter in a cool, dry place, away from direct sunlight and extreme temperatures.
8. Troubleshooting
This section addresses common issues you might encounter with your BSIDE Z1 Multimeter.
| Problem | Possible Cause | Solution |
|---|---|---|
| Multimeter does not power on. | Dead or incorrectly installed batteries. | Check battery polarity or replace with new AAA batteries. |
| Inaccurate readings. | Low battery; incorrect function/range selected; environmental interference. | Replace batteries; ensure auto mode is active or correct function is selected; move away from strong electromagnetic fields. |
| Continuity beeper does not sound. | Resistance is too high (>50Ω); circuit is open. | Verify the circuit is closed and the resistance is below 50Ω. |
| Display is dim or flickering. | Low battery. | Replace batteries. |
| Live Wire Check not detecting. | Not close enough to the live wire; wire is not live. | Ensure the tip is close to the wire; confirm the wire is indeed live. |
9. Specifications
Detailed technical specifications for the BSIDE Pen-Type Digital Multimeter Z1.
| Parameter | Specification |
|---|---|
| Display | 2000 Counts, 1.9 inch LCD Screen |
| DC Voltage | 0V-500V (DC Mode) / 0.5-500V (Auto Mode) Accuracy: 0.01V ±(0.8%+3) |
| AC Voltage | 0V-500V (AC Mode) / 0.8-500V (Auto Mode) Accuracy: 0.01V ±(1.2%+5) |
| Resistance | 0Ω-2MΩ Accuracy: 1Ω ±(1.2%+3) |
| Frequency | 40-1000Hz (0-30V AC) / 40Hz-400Hz (0-500V AC) Accuracy: 0.1Hz ±(2.0%+10) |
| Continuity | Beeper sounds if resistance < 50Ω |
| V-Alert (NCV) | Yes |
| Live Wire Check | Yes |
| Power | 2 x 1.5V AAA Batteries |
| Dimensions | 185 x 22 x 22 mm (7.28 x 0.87 x 0.87 inches) |
| Weight | 52g (1.83 ounces) |
| Auto Range | Yes |
| Auto Power Off | Yes |
| Data Hold | Yes |
| Low Battery Indication | Yes |
10. Warranty and Support
For warranty information and technical support, please refer to the warranty card included with your product or visit the official BSIDE website. You may also contact BSIDE customer service directly for assistance with product operation, troubleshooting, or repair services.
Related documentsZ1 Buscapolos Electricista

Ask a question about this manual
Ask about setup, troubleshooting, compatibility, parts, safety, or missing instructions. Manuals+ will review the question and use this page’s manual context to help answer it.