
KETOTEK KT5000 UK
KETOTEK KT5000 PID Reptile Thermostat Dimming Temperature Controller User Manual
Model: KT5000 UK
1. Product Overview
The KETOTEK KT5000 is a sophisticated PID dimming temperature controller designed for precise environmental management. It features dual outputs for heating and timing control, allowing for distinct day and night temperature settings. This controller is ideal for maintaining stable temperatures in various applications such as reptile terrariums, aquariums, incubators, and greenhouses.

Figure 1: KETOTEK KT5000 PID Dimming Thermostat and Power Unit.
2. Key Features
- PID and Dimming Output: One output is dedicated to PID temperature control for heating, ensuring stable and precise temperature regulation. The second output is for timing control. This unit is designed for heating only, without cooling functionality.
- Day and Night Temperature Control: Allows setting different target temperatures for day and night cycles over a 24-hour period, providing optimal conditions for your specific environment.
- Advanced Functions: Includes high-temperature alarm, temperature calibration, reset function, and data storage upon power loss, enhancing usability and reliability.
- Safety and Reliability: Utilizes a dimming control mode to prevent frequent on/off switching, which can prolong the lifespan of heating elements and electrical appliances. The temperature probe is waterproof and can be immersed.
- Wide Application: Suitable for various environments requiring precise temperature and timing control, including reptile habitats, pet enclosures, aquariums, vivariums, incubators, and greenhouses.

Figure 2: Diverse applications of the KT5000 controller.
3. Package Contents
Please verify that all items are present and in good condition upon opening the package.
- 1 x KETOTEK KT5000 Dimming Thermostat Unit
- 1 x User Manual
- 2 x Double-coated tissue tape for mounting

Figure 3: KT5000 Package Contents.
4. Specifications
| Parameter | Value |
|---|---|
| Model | KT5000 UK |
| Input Voltage | 220Vac ± 15%/50Hz (UK Version) |
| Temperature Control Range | 0°C ~ 50°C |
| Accuracy | ±1°C |
| Maximum Heating Output (Socket I) | 440W |
| Maximum Timer Output (Socket II) | Resistive load 1100W; Inductive load 275W; Incandescent lamps 220W |
| Sensor Type | NTC (Waterproof probe) |
| Display Type | LCD or LED |
| Package Dimensions | 23.5 x 13.5 x 6.2 cm |
| Weight | 640 g |

Figure 4: Product Dimensions.
5. Setup and Installation
5.1 Connecting the Unit
- Plug the KETOTEK KT5000 power unit into a standard 220V UK wall socket.
- Connect your heating device (e.g., heat lamp, heating mat) to Socket I (PID Temperature Heating Control). Ensure the device's power consumption does not exceed 440W.
- Connect your timing-controlled device (e.g., light, air pump) to Socket II (Timer Control). Ensure the device's power consumption does not exceed 1100W (resistive), 275W (inductive), or 220W (incandescent).

Figure 5: Output Socket Functions.
5.2 Probe Placement
Place the waterproof temperature probe in the environment where temperature needs to be monitored and controlled (e.g., inside the terrarium, aquarium, or incubator). Ensure the probe is securely positioned and not directly exposed to heating elements or strong air currents that could affect readings.
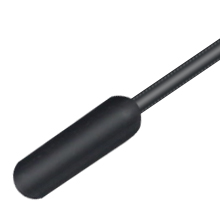
Figure 6: Waterproof Temperature Probe.
5.3 Mounting the Display Unit
The display unit can be mounted using the provided double-coated tissue tape or by utilizing its suction cup for glass surfaces. Choose a location that allows for easy viewing and access to the control buttons.

Figure 7: Installation in an Aquarium.

Figure 8: Installation in a Terrarium.
6. Operating Instructions
6.1 Display Overview
The LCD display shows the real-time temperature (RT), target temperature, current time, and indicators for day/night mode and heating status.

Figure 9: Thermostat Display.
6.2 Setting Day and Night Temperatures
The KT5000 allows for a 24-hour dual time cycle setting, enabling different temperatures for day and night periods.
- Press the SET button to enter the setting mode.
- Use the UP and DOWN arrows to navigate through settings.
- Adjust the start and end times for the day and night periods.
- Set the desired target temperature for the day period.
- Set the desired target temperature for the night period.
- Confirm settings by pressing SET again or waiting for the unit to auto-save.
Example: Control temperature at 20°C between 8:00 a.m. and 6:00 p.m., and 25°C between 6:00 p.m. and 8:00 a.m. the next morning. This cycle will repeat daily.

Figure 10: Day/Night Mode Indicators.
6.3 PID Temperature Control (Socket I)
The PID (Proportional-Integral-Derivative) algorithm ensures stable temperature control by continuously adjusting the power output to the heating element, preventing large temperature fluctuations common with simple on/off thermostats. Once the target temperature is set, the controller will automatically manage the heating output to maintain it.
6.4 Timer Function (Socket II)
The second socket operates on a timer. Refer to the specific timer settings in the manual for detailed programming steps. This allows you to schedule on/off times for devices like lighting or misting systems independently of temperature control.
7. Advanced Features
- High Temperature Alarm: The unit can be configured to trigger an alarm if the measured temperature exceeds a set high limit. Consult the full manual for setting alarm thresholds.
- Temperature Calibration: If the displayed temperature does not match a known accurate thermometer, you can calibrate the sensor. This feature allows for minor adjustments to ensure precise readings.
- Reset Function: A reset option is available to return the controller to its factory default settings.
- Data Storage: The controller retains its settings even after a power outage, ensuring continuous operation without reprogramming.
8. Maintenance
- Keep the display unit and power module clean and free from dust. Use a soft, dry cloth for cleaning.
- Ensure the temperature probe is clean and free from debris that could affect its accuracy. While the probe is waterproof, avoid unnecessary exposure of the main unit to moisture.
- Regularly check all cable connections to ensure they are secure and undamaged.
9. Troubleshooting
| Problem | Possible Cause | Solution |
|---|---|---|
| Display not turning on | No power to the unit; loose connection. | Check if the power plug is securely inserted into the wall socket. Verify the wall socket has power. |
| Temperature reading is inaccurate | Probe misplacement; need for calibration. | Ensure the probe is correctly placed and not near a direct heat source or draft. Perform temperature calibration as per the manual. |
| Heating element not turning on/off as expected | Incorrect temperature settings; faulty heating device; incorrect wiring. | Verify day/night temperature settings and current time. Check if the heating device is functional. Ensure the heating device is plugged into Socket I. |
| Timer-controlled device not operating | Incorrect timer settings; faulty device. | Review timer programming for Socket II. Test the device by plugging it into a standard outlet. |
| Alarm sounding unexpectedly | Temperature exceeded set limits. | Check the current temperature and compare it to your set alarm thresholds. Adjust settings if necessary. |
10. Safety Information
- This device is designed for indoor use only.
- Do not expose the main unit to water or excessive humidity. Only the temperature probe is waterproof.
- Ensure the total power consumption of connected devices does not exceed the specified maximum loads for each socket.
- Do not attempt to disassemble or repair the unit yourself. Refer to qualified personnel for service.
- Keep out of reach of children and pets.
- Always unplug the unit from the power outlet before performing any maintenance or connecting/disconnecting devices.
11. Warranty and Support
For warranty information, technical support, or service inquiries, please contact KETOTEK customer service or refer to the retailer from whom the product was purchased. Please retain your proof of purchase for warranty claims.
Manufacturer: KETOTEK
Manufacturer Reference: KT5000-UK
ASIN: B0B4JVV3FH
For more information, visit the KETOTEK Store on Amazon.
Related documentsKT5000 UK

Ask a question about this manual
Ask about setup, troubleshooting, compatibility, parts, safety, or missing instructions. Manuals+ will review the question and use this page’s manual context to help answer it.