1. Product Overview
The ErGear Height Adjustable Electric Standing Desk is designed to provide a versatile and ergonomic workspace, allowing users to seamlessly switch between sitting and standing positions. This desk features a robust construction, smooth height adjustment, and programmable memory settings to enhance comfort and productivity.

Figure 1: ErGear Height Adjustable Electric Standing Desk
2. Safety Information
- Ensure the desk is securely anchored to the wall if children are present to prevent tipping.
- Do not exceed the maximum weight capacity of 176 lbs (80 kg) on the desktop.
- Keep hands and objects clear of moving parts during height adjustment.
- Avoid placing liquids directly on the control panel or near electrical components.
- Use only the provided power adapter and cables.
3. Product Features
- Outstanding Stability: Constructed with a sturdy solid steel frame and aerospace-grade lifting column connectors, ensuring stability even at full height.
- Smooth Height Adjustment: Electric motor allows for quiet and smooth height transitions from 28.35 inches (72 cm) to 46.94 inches (119 cm).
- Memory Presets: Save up to three preferred height settings for quick and convenient adjustment.
- Uprated Motor: Powerful lifting performance and reliable long-term operation, tested for over 50,000 full-load lift cycles.
- Safe Low-VOC Materials: Desktop materials are designed with sharply reduced formaldehyde and other VOC emissions, meeting federal and state safe air standards.
- Integrated Cable Management: Features cable routing options to keep your workspace tidy.
- Accessory Hooks: Includes hooks for headphones or bags, enhancing organization.

Figure 2: Ergonomics Tailored to You
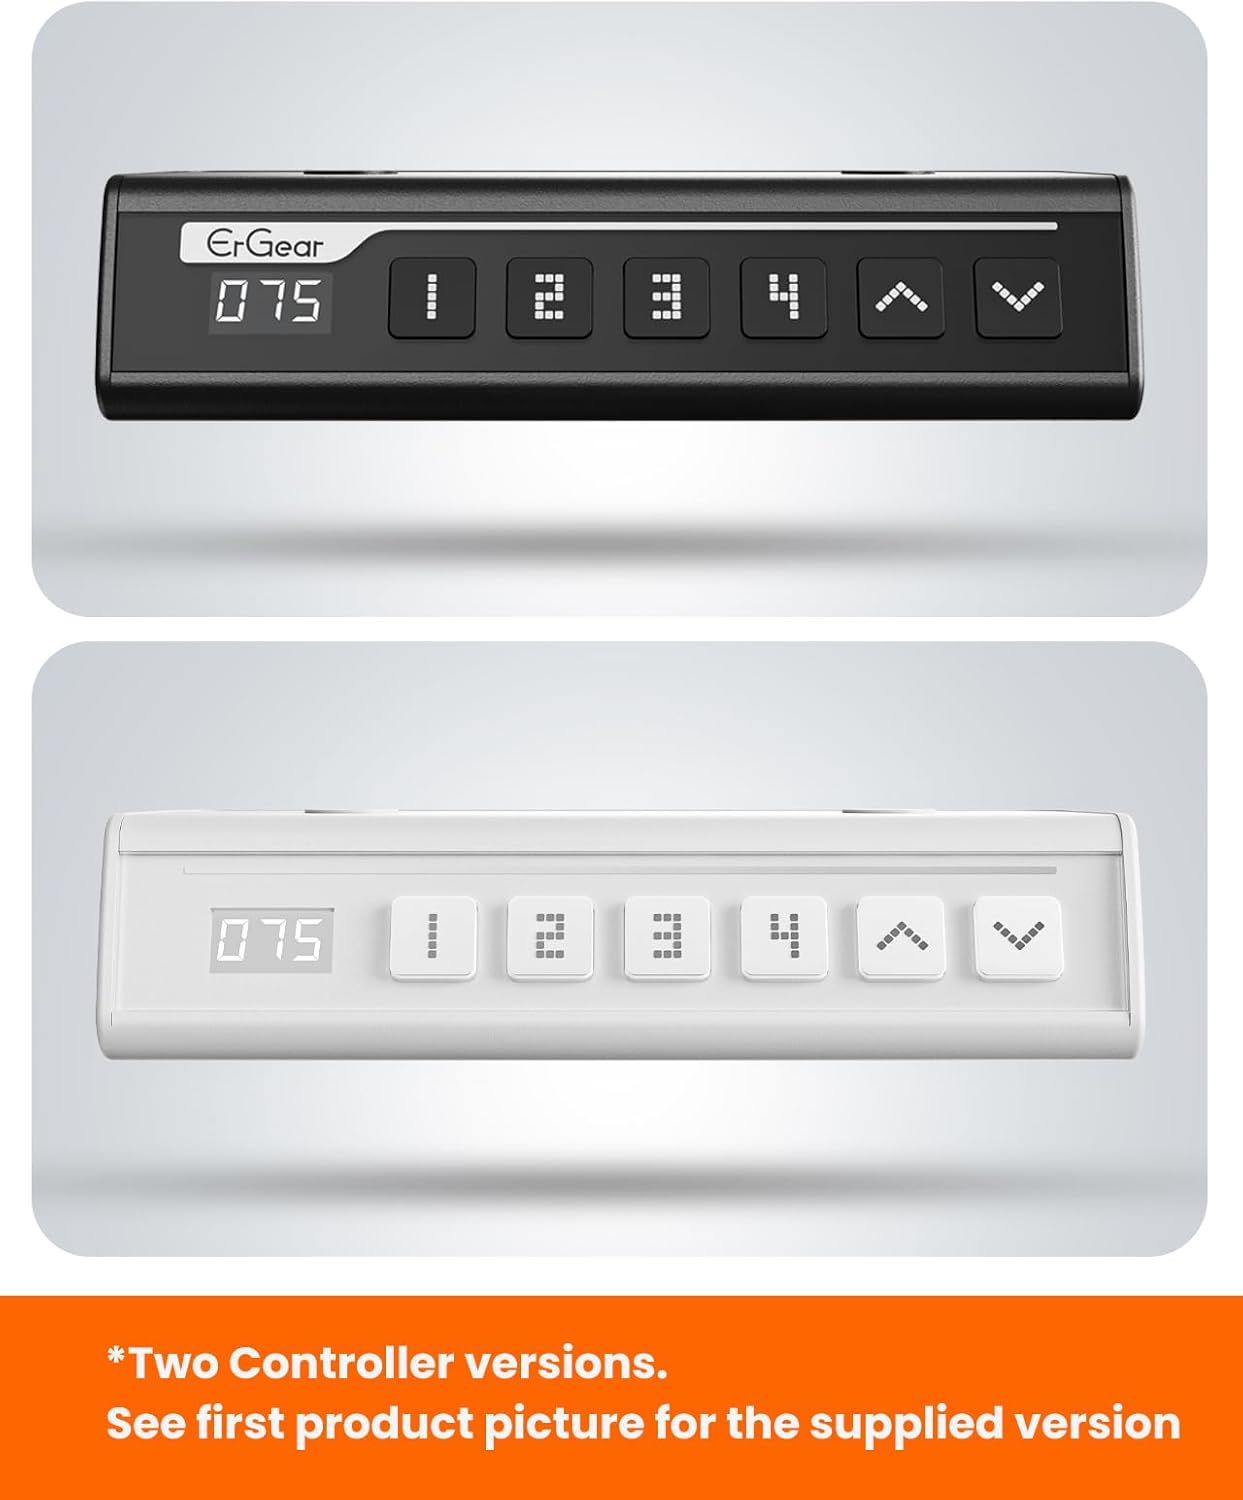
Figure 3: Built For Durability
4. Setup and Assembly
Assembly of the ErGear Electric Standing Desk is designed to be straightforward. Please follow the steps below and refer to the official assembly video for visual guidance.
4.1 Unpacking and Preparation
- Carefully unpack all components and verify against the parts list in your included manual.
- Ensure you have all necessary tools, which are typically included.
- Clear a spacious area for assembly.
4.2 Assembly Steps
- Assemble the Desk Legs: Attach the crossbars to the lifting columns using the provided screws.
- Attach Side Plates and Transmission Rod: Secure the side plates to the leg assemblies. Insert the transmission rod fully into the left leg and connect it to the motor.
- Assemble and Attach the Desktop: Place the desktop panels together, ensuring proper alignment. Secure the desktop to the assembled frame using the designated screws.
- Connect Cables: Connect the motor and control panel cables to the main control box. Secure cables using the provided cable management clips.
- Install Cable Hole Covers: Place the cable hole covers into the designated openings on the desktop.

Figure 4: Simplified Assembly Overview
4.3 Assembly Video Guide
Video 1: Official ErGear Standing Desk Assembly Guide. This video provides a step-by-step visual walkthrough of the assembly process for the EGESD4/5/6/7 Series desks.
5. Operating Instructions
The ErGear Electric Standing Desk features an intuitive control panel for easy height adjustment and memory preset management.
5.1 Basic Height Adjustment
- Use the Up Arrow (^) button to raise the desk.
- Use the Down Arrow (v) button to lower the desk.
- Release the button at your desired height. The digital display will show the current height in inches.
5.2 Setting Memory Presets
The desk allows you to save up to three custom height settings for quick recall.
- Adjust the desk to your desired height using the Up/Down arrow buttons.
- Press the 'S' (Set) button. The display will show 'S-'.
- Immediately press one of the number buttons (1, 2, or 3) to save the current height to that preset. The display will show the number you selected, confirming the setting.
5.3 Using Memory Presets
- To move the desk to a saved height, simply press the corresponding number button (1, 2, or 3). The desk will automatically adjust to the programmed height.

Figure 5: Control Panel with Memory Presets

Figure 6: Intuitive Smart Controls
6. Maintenance
- Cleaning: Wipe the desktop and frame with a soft, damp cloth. Avoid abrasive cleaners or harsh chemicals.
- Cable Management: Periodically check and organize cables to prevent tangling or damage, especially during height adjustments.
- Inspections: Regularly inspect all screws and connections to ensure they are tight and secure.
7. Troubleshooting
If you encounter any issues with your ErGear Electric Standing Desk, please refer to the following common troubleshooting tips:
- Desk Not Moving: Check all cable connections to ensure they are securely plugged in. Verify the power outlet is functional.
- Uneven Height: If the desk legs are not moving synchronously, ensure the transmission rod is fully inserted and secured. Refer to the assembly video for proper installation of the transmission rod.
- Error Codes: If the display shows an error code, consult the full user manual (if provided separately) or contact customer support for specific guidance.
- Reset Function: Some models may have a reset procedure. Typically, this involves holding down specific buttons on the control panel for a few seconds. Refer to your specific model's instructions.
8. Specifications
| Feature | Specification |
|---|---|
| Brand | ErGear |
| Model Number | EGESD6W |
| Product Dimensions (D x W x H) | 28"D x 55"W x 28.35"H (Minimum) |
| Maximum Height | 46.46 Inches |
| Minimum Height | 28.35 Inches |
| Tabletop Thickness | 0.71 Inches |
| Maximum Weight Recommendation | 176 Pounds (80 kg) |
| Top Material Type | Engineered Wood |
| Base Material | Alloy Steel |
| Number of Height Positions | 3 (Programmable Memory Presets) |
| Required Assembly | Yes |
| Includes All Assembly Tools | Yes |

Figure 7: Desk Dimensions
9. Warranty and Support
9.1 Product Warranty
- Desktop and Desk Frame: 5-year protection.
- Motors and Electrical Components: 2-year protection.

Figure 8: Warranty Information
9.2 Customer Support
For any questions, assistance, or warranty claims, please contact our US-Based Customer Support team. Refer to your product packaging or the ErGear official website for contact details.

Figure 9: US-Based Customer Support


