
1. Introduction
This instruction manual provides detailed information for the M MATI Handlebar Switch Control, designed as a direct replacement part for specific Yamaha ATV models. It covers product features, installation procedures, operational guidelines, maintenance tips, troubleshooting, and technical specifications. Please read this manual thoroughly before installation and use to ensure proper function and safety.
2. Product Overview
The M MATI Handlebar Switch Control integrates essential functions for your ATV, including engine start, engine run off, and headlight control. It is engineered to meet OEM specifications for a precise fit and reliable performance.

Figure 2.1: Front view of the M MATI Handlebar Switch Control. This image shows the main body of the switch with the "LIGHTS" slider, headlight icons, and the red kill switch button, along with the attached wiring harness and connectors.

Figure 2.2: Top view of the M MATI Handlebar Switch Control. This perspective highlights the "LIGHTS" slider and the headlight function indicators, showing the overall compact design.
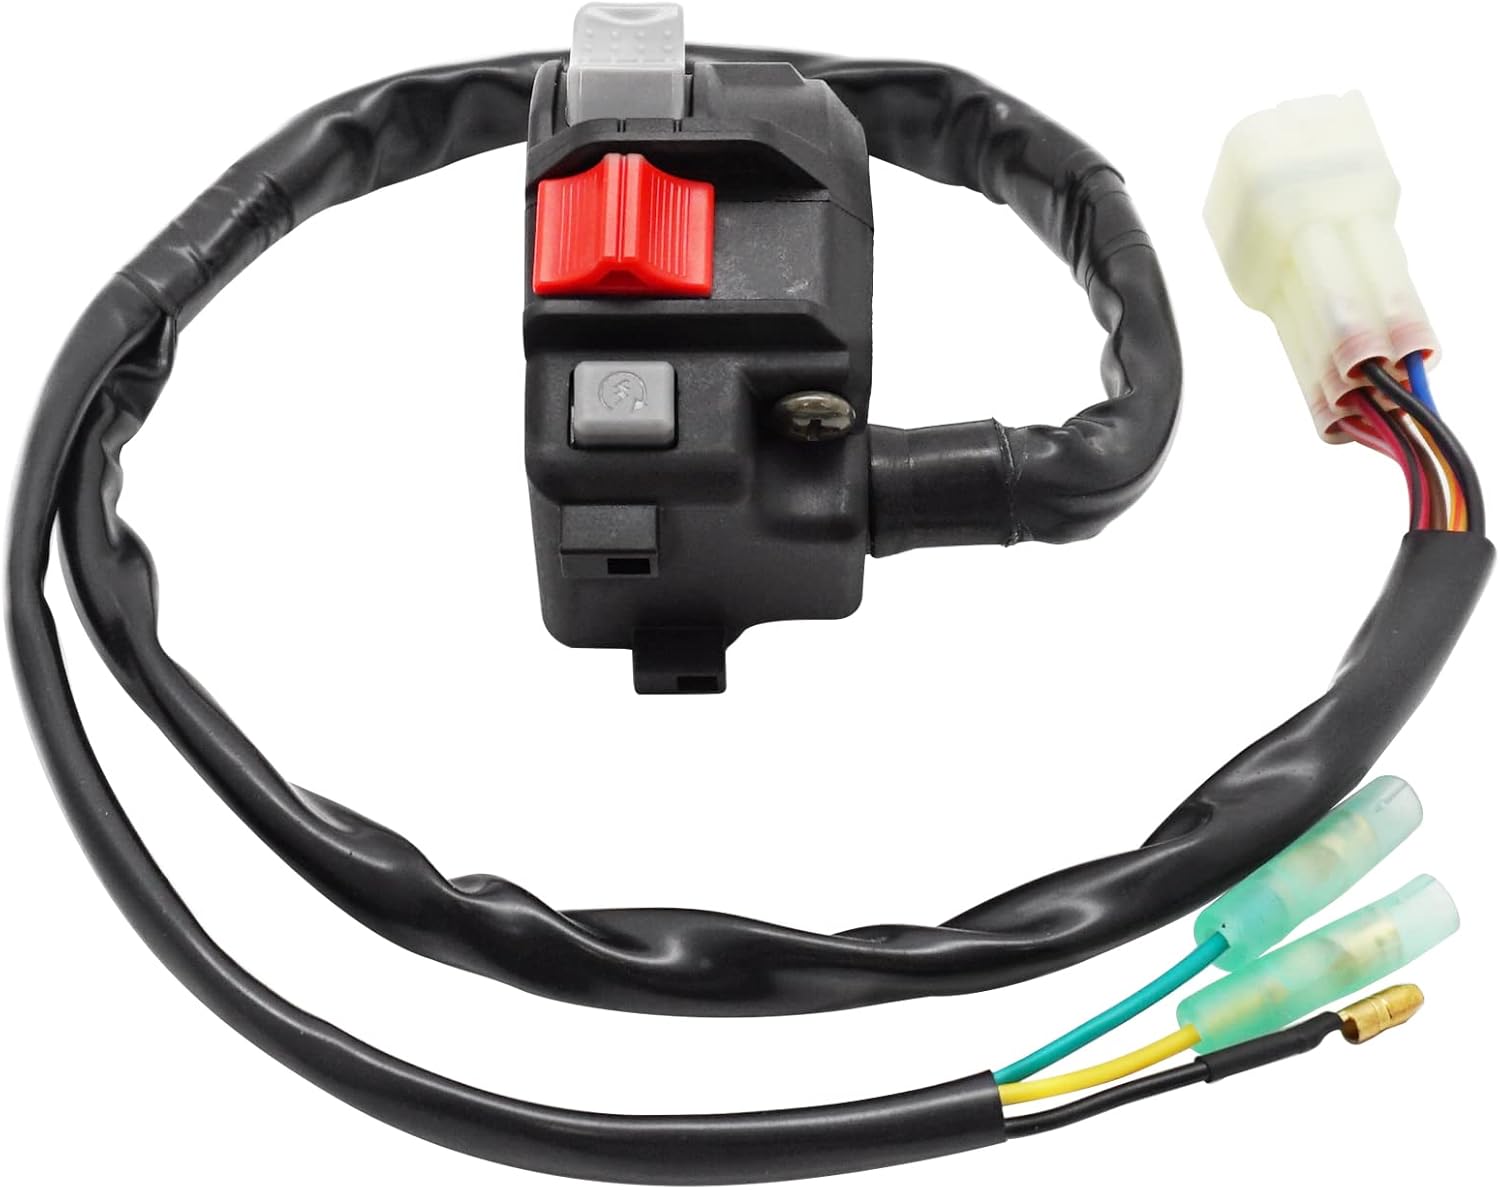
Figure 2.3: Bottom view of the M MATI Handlebar Switch Control. This image displays the underside of the switch, revealing the mounting screw and the entry point for the wiring harness.

Figure 2.4: Side view of the M MATI Handlebar Switch Control, showing the main white connector and two smaller green and yellow connectors. This view emphasizes the plug-and-play design for easy installation.
Key Components:
- Engine Start Button: Initiates the engine.
- Engine Run Off Switch (Kill Switch): Stops the engine.
- Headlight Switch: Controls the ATV's headlights.
- Wiring Harness: Pre-attached wiring with exact connectors for direct plug-in.
3. Compatibility
This handlebar switch control is specifically designed to fit the following Yamaha ATV models:
- Yamaha ATV YFA-1 Breeze 125 (2002)
- Yamaha ATV YFA-1 Breeze 125 (2003)
- Yamaha ATV YFA-1 Breeze 125 (2004)
Manufacturer Part Numbers: 3FA-83973-29-00, 3FA-83973-20-00
Please verify your ATV's model and year to ensure proper fitment before installation.
4. Installation Instructions
Installation of the M MATI Handlebar Switch Control is designed to be a direct replacement. Follow these steps carefully:
- Safety First: Ensure the ATV's engine is off and the ignition key is removed. Disconnect the negative terminal of the battery to prevent accidental electrical shorts.
- Locate Existing Switch: Identify the current handlebar switch control on your Yamaha ATV.
- Disconnect Wiring: Carefully disconnect all electrical connectors attached to the old switch. Note their positions if necessary, though the new switch's connectors are designed for specific mating.
- Remove Old Switch: Loosen any screws or clamps securing the old switch to the handlebar and remove it.
- Position New Switch: Place the M MATI Handlebar Switch Control onto the handlebar in the correct orientation.
- Secure New Switch: Tighten the mounting screws or clamps to secure the new switch firmly in place. Do not overtighten.
- Connect Wiring: Connect the wiring harness of the new switch to the corresponding electrical connectors on your ATV. The connectors are exact and should plug in easily without modification.
- Reconnect Battery: Reconnect the negative terminal of the battery.
- Test Functionality: Before riding, test all functions of the new switch: engine start, engine run off (kill switch), and headlight operation (on/off/high/low beam, if applicable).
If you are unsure about any step, it is recommended to consult a qualified mechanic or refer to your ATV's service manual.
5. Operating Instructions
The M MATI Handlebar Switch Control provides intuitive operation for key ATV functions:
- Engine Start: Press the designated engine start button (often marked with a lightning bolt or start icon) to crank the engine. Ensure the kill switch is in the "Run" position before attempting to start.
- Engine Run Off (Kill Switch): To immediately stop the engine, push or slide the kill switch to the "Off" or "Stop" position (typically a red button or lever). This is a safety feature for emergency engine shutdown.
- Headlight Control: Use the headlight switch (often a slider or button marked "LIGHTS" or with headlight icons) to cycle through headlight modes:
- OFF: Headlights are off.
- ON (Low Beam): Activates the low beam headlights.
- ON (High Beam): Activates the high beam headlights (if applicable to your ATV model and switch design).
Always familiarize yourself with the controls before operating your ATV.
6. Maintenance
The M MATI Handlebar Switch Control is designed for durability and requires minimal maintenance. However, periodic checks can extend its lifespan and ensure reliable operation:
- Cleaning: Keep the switch clean from dirt, mud, and debris. Use a damp cloth to wipe the exterior. Avoid using harsh chemicals or abrasive cleaners.
- Wiring Inspection: Periodically inspect the wiring harness and connectors for any signs of wear, fraying, or corrosion. Ensure all connections are secure.
- Functionality Check: Regularly test all switch functions (engine start, kill switch, headlights) to ensure they operate smoothly and responsively.
- Protection: While the switch has an IP54 rating for protection against dust and splashing water, avoid prolonged exposure to extreme weather conditions or direct high-pressure water sprays.
7. Troubleshooting
If you encounter issues with your M MATI Handlebar Switch Control, refer to the following common problems and solutions:
| Problem | Possible Cause | Solution |
|---|---|---|
| Engine does not start when button is pressed. | Kill switch is in "Off" position; loose wiring connection; battery issue; faulty starter relay. | Ensure kill switch is in "Run" position. Check all wiring connections for tightness. Verify battery charge and connections. Consult ATV service manual for starter relay diagnosis. |
| Headlights do not turn on. | Headlight switch in "Off" position; loose wiring connection; blown fuse; faulty bulb. | Ensure headlight switch is in "On" position. Check wiring connections. Inspect ATV's fuse box for blown headlight fuse. Check headlight bulbs. |
| Engine does not stop when kill switch is activated. | Faulty kill switch; wiring issue. | Inspect the kill switch for physical damage. Check wiring from the kill switch to the ignition system for continuity and secure connections. |
| Intermittent function. | Loose or corroded connections; internal switch fault. | Inspect and clean all electrical connections. Ensure they are fully seated. If issues persist, the switch may need replacement. |
For problems not listed here or if solutions do not resolve the issue, please contact M MATI customer support.
8. Specifications
Detailed technical specifications for the M MATI Handlebar Switch Control:
| Attribute | Value |
|---|---|
| Manufacturer Part Numbers | 3FA-83973-29-00, 3FA-83973-20-00 |
| Brand | M MATI |
| Operation Mode | Start Stop |
| Contact Type | Normally Open |
| Connector Type | Plug In |
| Terminal | Button |
| Circuit Type | 3-way |
| Actuator Type | Push Button |
| Contact Material | Iron |
| International Protection Rating | IP54 |
| Number of Positions | 1 |
| Controller Type | ATV Handlebar Switch Controller |
| Control Method | Touch |
| Color | Black |
| Item Weight | 5.6 ounces |
| Package Dimensions | 3.54 x 3.54 x 3.21 inches |
9. Warranty and Support
M MATI is committed to providing high-quality products and customer satisfaction.
Warranty Information:
If there is any product problem within 1 year of purchase, please contact M MATI for assistance. We provide product service to address any issues you may encounter.
Customer Support:
For technical support, troubleshooting assistance, or warranty claims, please visit the official M MATI store or contact their customer service department through the platform where the product was purchased. You can find more information and contact details on the M MATI Store Page.