
Besvic PMB05
Besvic Electricity Consumption Meter User Manual
Model: PMB05
1. Introduction
Thank you for choosing the Besvic Electricity Consumption Meter. This device is designed to help you monitor and understand the electricity consumption of your household appliances, enabling you to manage energy usage and costs effectively. Please read this manual carefully before use to ensure proper operation and safety.
2. Safety Information
- Do not disassemble or modify the device.
- Ensure the connected appliance's power consumption does not exceed 3680W (16A).
- Keep the device away from water and high humidity.
- Do not use the device if it is damaged.
- This device is for indoor use only.
3. Product Overview
The Besvic Electricity Consumption Meter features a large backlit LCD display and intuitive buttons for easy operation. It provides comprehensive monitoring of various electrical parameters.

Figure 3.1: Front view of the Besvic Electricity Consumption Meter, showing the LCD display, function buttons (FVNC, COST, UP, DOWN), and the EU plug socket.

Figure 3.2: Detailed view of the meter highlighting key components: Large screen, Adjustable Monitoring Modes (FVNC button), Electricity Unit Price Setting (COST button), Price Adjustment (UP/DOWN buttons), and Reset button.
4. Setup
- Unpacking: Carefully remove the meter from its packaging.
- Initial Connection: Plug the Besvic Electricity Consumption Meter into a standard EU wall socket. The LCD display will light up.
- Connecting Appliance: Plug the appliance you wish to monitor into the socket on the front of the meter.
- Setting Unit Cost:
- Press the "COST" button until "COST/kWh" flashes on the screen.
- Press the "FUNC" button briefly to change the digit position.
- Use the "UP" and "DOWN" buttons to adjust the number.
- Press "COST" again, then "FUNC" to exit the setting mode.

Figure 4.1: Illustration of setting the unit cost on the meter's display.
5. Operating Instructions
5.1 Monitoring Modes
The meter offers 7 monitoring modes. Press the "FVNC" button to cycle through them:

Figure 5.1: Visual representation of the 7 monitoring modes available on the display.
- Mode 1: Time/Watt/Money Cost - Displays current time, real-time power consumption (Watts), and accumulated cost.
- Mode 2: Days/Cumulative Energy Consumption (kWh) - Shows the number of days the device has been monitoring and the total accumulated kilowatt-hours.
- Mode 3: Voltage/Frequency - Displays the current voltage (V) and frequency (Hz) of the power supply.
- Mode 4: Current/Power Factor - Shows the current (A) and power factor.
- Mode 5: Minimum Power Recording - Displays the lowest power consumption recorded.
- Mode 6: Maximum Power Recording - Displays the highest power consumption recorded.
- Mode 7: Cost per kWh Setting - Allows adjustment of the electricity unit price (as described in Setup).
5.2 Real-time Monitoring
Once connected, the meter automatically begins monitoring and recording the electricity consumption and costs of the connected device. This helps you understand the energy footprint of your appliances.

Figure 5.2: The meter actively displaying real-time consumption data while a toaster is in use, illustrating how it helps save money by tracking energy usage.
5.3 Backlight Function
Press any button to activate the backlight for 10 seconds, allowing you to read the data clearly in low-light conditions.
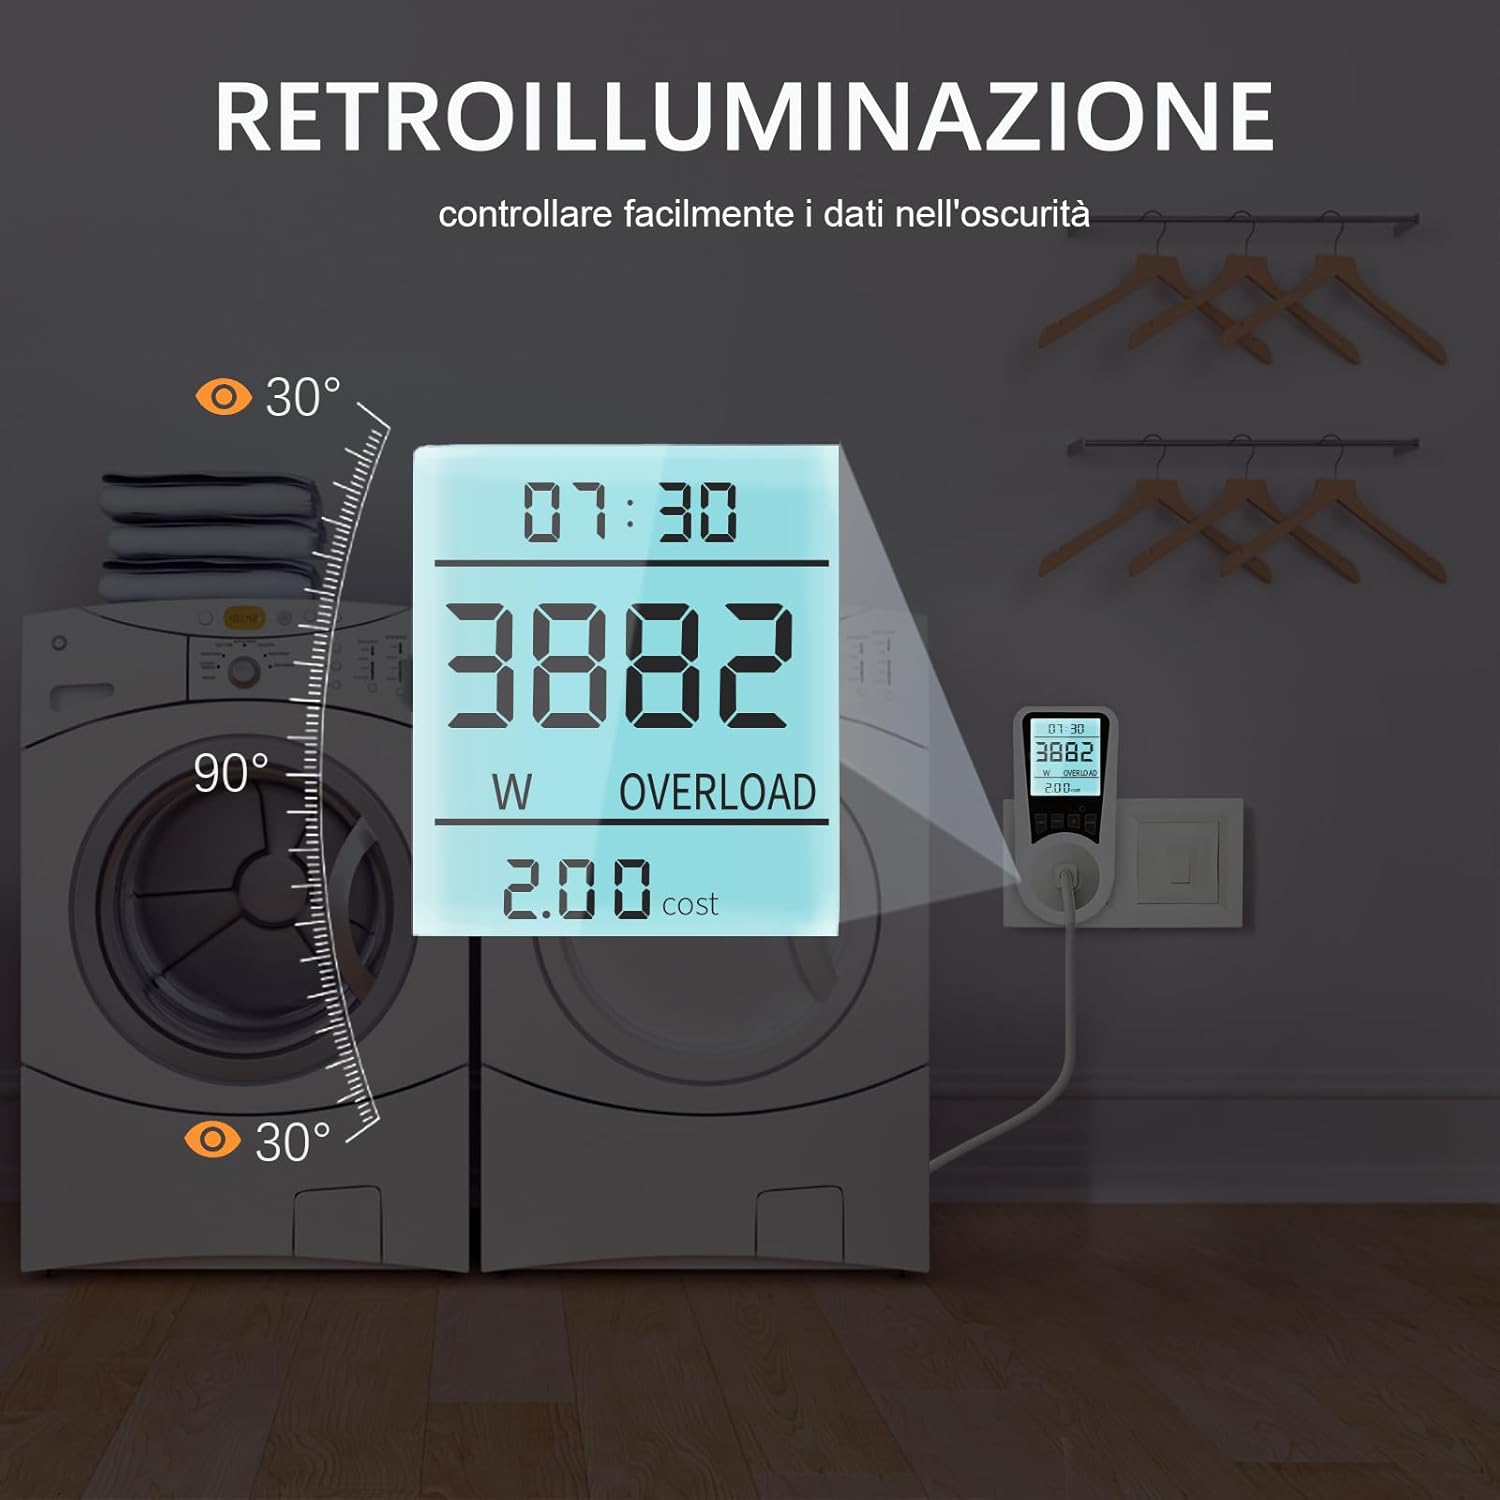
Figure 5.3: The meter's display illuminated by its backlight, demonstrating readability from various angles in a dim environment.
5.4 Overload Warning
If the connected device's current load exceeds 3680W, the LCD screen will flash "OVERLOAD" to alert you. This feature protects both the connected device and the meter from potential damage.

Figure 5.4: The meter showing an "OVERLOAD" warning on its display, indicating that the connected appliance's power exceeds the safe limit of 3680W.
5.5 Data Memory Function
The built-in backup battery ensures that the meter retains all recorded data even during a power outage.

Figure 5.5: The meter illustrating its memory function, which saves data even if power is interrupted, thanks to its built-in backup battery.
5.6 Resetting Data
To clear all settings and recorded data, press the "RESET" button. This is useful for starting new monitoring periods or for initial setup.
6. Important Notes on Operation
- The unit price for cost calculation must be entered in Euros.
- The displayed time is the running time and only counts when the appliance is actively consuming power. For intermittent appliances (e.g., freezers), this reflects actual operational time.
- The device only records data if the working power of the appliance is greater than 2W. Appliances in standby mode with less than 2W consumption will not be recorded.

Figure 6.1: Illustration indicating that power consumption below 2 Watts will not be recorded by the device.
7. Troubleshooting
| Problem | Possible Cause | Solution |
|---|---|---|
| Display is blank. | No power supply; device not plugged in correctly. | Ensure the meter is securely plugged into a live wall socket. Check the wall socket with another appliance. |
| "OVERLOAD" warning flashes. | Connected appliance exceeds 3680W. | Unplug the appliance immediately. Do not connect appliances with power consumption above 3680W. |
| Data not recording. | Appliance power consumption is below 2W. | The meter only records consumption above 2W. This is normal for very low-power or standby devices. |
| Incorrect cost calculation. | Incorrect unit price set. | Refer to Section 4.4 "Setting Unit Cost" to re-enter the correct electricity price per kWh. Ensure it's in Euros. |
8. Specifications
| Parameter | Value |
|---|---|
| Model Number | PMB05 |
| Installation Type | Plug-in |
| Voltage | 230VAC, 50Hz |
| Max Current/Power | 16A / 3680W (EU Plug) |
| Operating Temperature | -10°C to +40°C |
| Accuracy | ±2% |
| Backup Battery | NiMH 3.6V, 20mAh |
| Product Dimensions | 14.3 x 8 x 7 cm |
| Item Weight | 190 grams |

Figure 8.1: Energy efficiency diagram, illustrating the potential for energy saving with the device.
9. Maintenance
- Clean the device with a dry, soft cloth. Do not use abrasive cleaners or solvents.
- Store the device in a cool, dry place when not in use.
- No user-serviceable parts inside. Do not attempt to open the casing.
10. Warranty and Support
For warranty information or technical support, please refer to the product packaging or contact Besvic customer service. If you require an uncompressed PDF manual, please download it from the product page or contact us via email.
For further assistance, you may visit the Besvic brand store on Amazon.
Related documentsPMB05


Ask a question about this manual
Ask about setup, troubleshooting, compatibility, parts, safety, or missing instructions. Manuals+ will review the question and use this page’s manual context to help answer it.