1. Introduction
Thank you for choosing the johgee HCT-326 Irrigation Computer. This device is designed to simplify your garden watering tasks with its advanced features and user-friendly interface. It offers precise control over your irrigation schedule, ensuring your plants receive optimal hydration while conserving water.
This manual provides detailed instructions for the installation, operation, and maintenance of your HCT-326 Irrigation Computer. Please read it thoroughly before use to ensure proper functionality and to extend the lifespan of your device.
2. Product Features
- Dual Independent Outputs: Control two separate watering zones with distinct programs, preventing interference.
- Automatic & Manual Watering Modes: Flexible scheduling from 1 second to 99 minutes, with frequencies from 1 hour to 15 days. Manual mode allows temporary watering without altering preset schedules.
- Intelligent Rain Delay: Pause watering for a set period (24, 48, or 72 hours) to avoid overwatering during rainy weather, saving water.
- Child Lock Function: Prevents accidental changes to programming, ensuring consistent watering.
- IPX5 Waterproof Rating: Designed to withstand outdoor conditions and splashes.
- Durable Construction: Features a newly upgraded aluminum alloy filter to prevent blockages and leakage, and 30% reinforced nylon fiber material.
- Large LCD Display: High-resolution screen for clear visibility of settings and current status. Automatically enters sleep mode after 30 seconds to conserve battery.

Figure 2.1: Overview of key features including IPX5 waterproofing, rain delay, child lock, LCD display, and watering modes.

Figure 2.2: The dual independent outputs allow for simultaneous, distinct programming for two watering zones.
3. Package Contents
Please check the package contents upon unboxing:
- 1 x johgee HCT-326 Irrigation Computer
- 1 x User Manual
- Necessary adapters (e.g., 3/4" adapter for EU-type faucets)
- O-rings
Note: 2 x AA 1.5V Alkaline batteries are required and are not included in the package.
4. Setup and Installation
Follow these steps to set up your irrigation computer:
- Install Batteries: Open the battery compartment on the back of the device. Insert two (2) AA 1.5V alkaline batteries, ensuring correct polarity. Close the compartment securely.
- Connect to Faucet:
- For USA-type 3/4" hose faucets, directly screw the irrigation computer onto the faucet. Ensure the 3mm O-ring is in place for a watertight seal.
- For EU-type 1/2" hose faucets, first attach the provided 3/4" adapter to the faucet, then screw the irrigation computer onto the adapter. Ensure O-rings are used for proper sealing.
- Attach Hoses: Connect your garden hoses to the two independent outlets (A and B) at the bottom of the irrigation computer. Ensure a secure connection to prevent leaks.
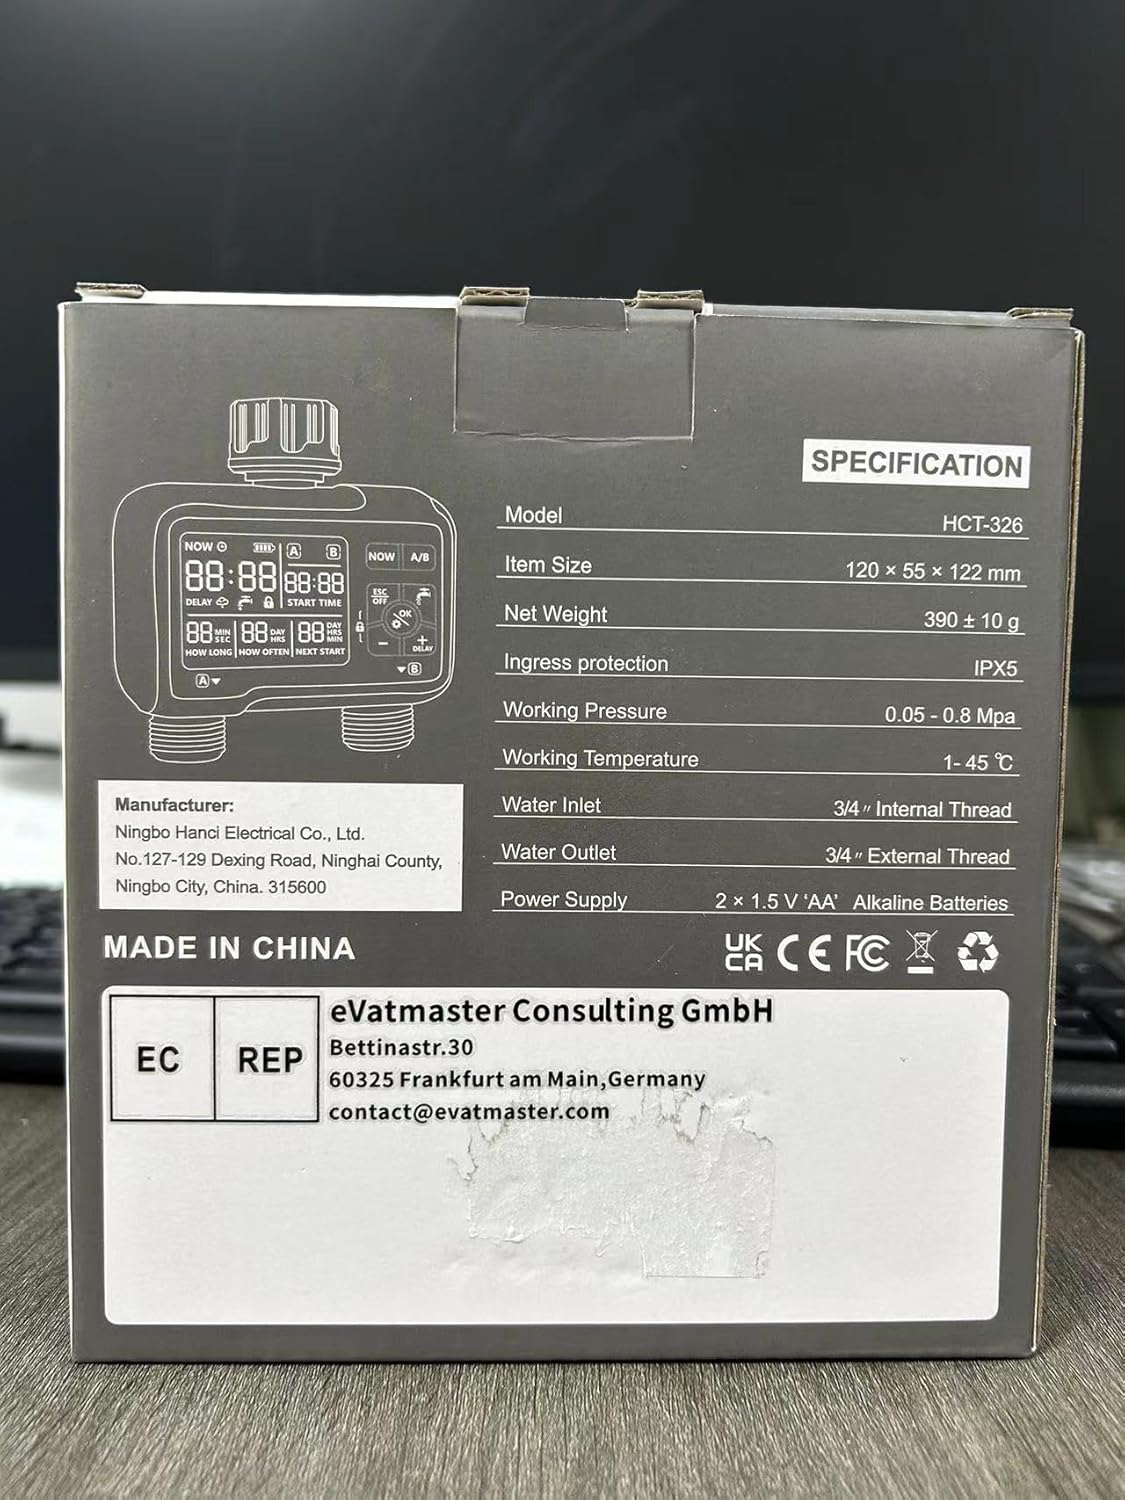
Figure 4.1: Quick Installation Diagram for connecting the irrigation computer to different faucet types.
5. Operating Instructions
The HCT-326 features a clear LCD display and intuitive controls. The main buttons are: NOW, A/B, ESC/OFF, OK, +, -, and DELAY.

Figure 5.1: Understanding the LCD Display and Controls.
5.1. Setting Current Time
- Press the NOW button. The time display will flash.
- Use the + and - buttons to adjust the hour. Press OK to confirm.
- Adjust the minutes using + and -. Press OK to confirm and save the current time.
5.2. Programming Automatic Watering (Zones A & B)
Each zone (A and B) can be programmed independently.
- Press the A/B button to select the zone you wish to program (A or B). The selected zone indicator will be highlighted.
- Set Start Time: Press OK. The 'START TIME' will flash. Use + and - to set the desired start hour and minute. Press OK after each adjustment.
- Set Watering Duration ('HOW LONG'): After setting the start time, the 'HOW LONG' display will flash. Use + and - to set the watering duration from 1 second to 99 minutes. Press OK to confirm.
- Set Watering Frequency ('HOW OFTEN'): The 'HOW OFTEN' display will flash. Use + and - to set the frequency: from 1 hour up to 23 hours, or from 1 day up to 15 days. Press OK to confirm and save the program for the selected zone.
- Repeat steps 1-4 for the other zone if desired.
5.3. Manual Watering
Manual watering allows you to water immediately without interrupting your programmed schedule.
- Press the OK button (the water drop icon). The display will show 'MANUAL'.
- Use + and - to set the desired manual watering duration (from 1 second to 99 minutes).
- Press OK to start manual watering. The timer will begin counting down.
- To stop manual watering prematurely, press ESC/OFF.

Figure 5.2: Manual watering can be activated without interrupting your programmed schedule.
5.4. Rain Delay Mode
Activate rain delay to pause your watering schedule during rainy periods.
- Press the DELAY button. The rain cloud icon will appear on the display.
- Use + and - to select the delay duration: 24 hours, 48 hours, or 72 hours.
- Press OK to confirm. The timer will pause for the selected duration, and the 'NEXT START' time will update accordingly.
- To cancel rain delay, press DELAY again and select '00' hours, then press OK.
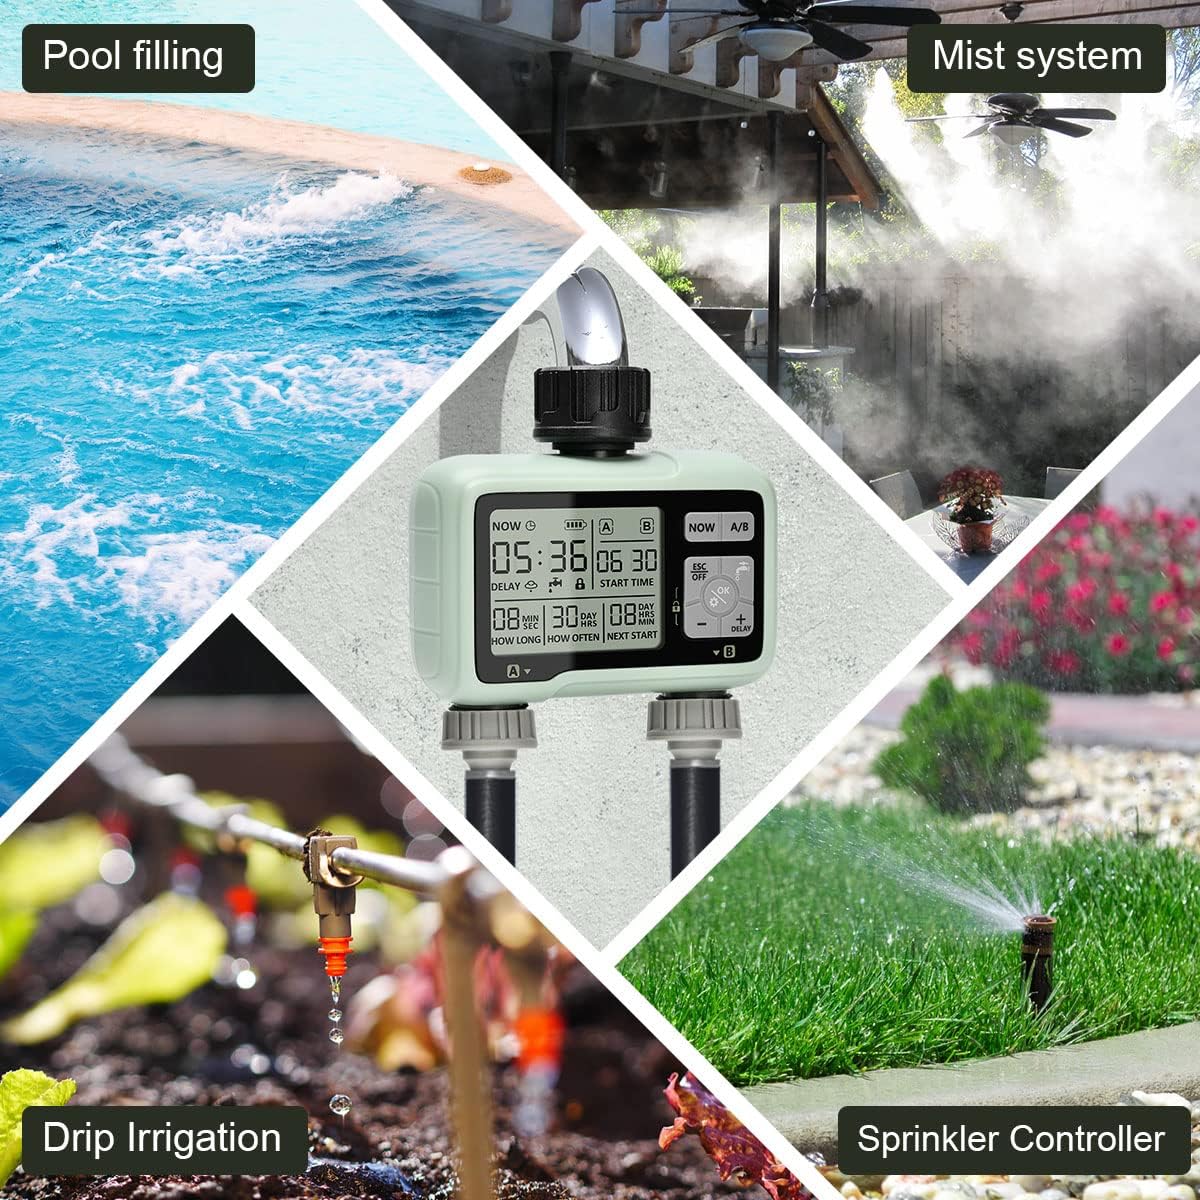
Figure 5.3: The rain delay mode helps conserve water by pausing irrigation during rainfall.
5.5. Child Lock Function
To prevent accidental changes to your settings:
- To activate: Press and hold the OK button for 3 seconds until the lock icon appears on the display.
- To deactivate: Press and hold the OK button for 3 seconds until the lock icon disappears.
5.6. Turning Off the Timer
To turn off all watering programs:
- Press the ESC/OFF button. The display will show 'OFF'.
- To reactivate, press ESC/OFF again.
6. Maintenance
Regular maintenance ensures optimal performance and longevity of your irrigation computer.
- Battery Replacement: The display will show a low battery indicator when batteries need replacing. Replace both AA batteries every 6 months or when the indicator appears to ensure continuous operation.
- Filter Cleaning: Periodically check and clean the aluminum alloy filter located at the water inlet. Remove any debris or sediment to prevent blockages and maintain water flow.
- Winterization: Before the first frost, disconnect the irrigation computer from the faucet and hoses. Drain any remaining water from the unit. Store it indoors in a dry, frost-free location to prevent damage.
- Cleaning: Wipe the exterior of the unit with a soft, damp cloth. Do not use abrasive cleaners or solvents.
7. Troubleshooting
If you encounter issues with your johgee HCT-326, refer to the following common problems and solutions:
| Problem | Possible Cause | Solution |
|---|---|---|
| No water flow | Low water pressure; Clogged filter; Timer is OFF or not programmed; Batteries are dead. | Check water pressure; Clean the filter; Ensure timer is ON and programmed correctly; Replace batteries. |
| Timer not starting at programmed time | Incorrect current time setting; Incorrect start time setting; Rain delay active; Child lock active. | Verify current time; Re-program start time; Deactivate rain delay; Deactivate child lock. |
| Display is blank or dim | Low batteries; Timer in sleep mode. | Replace batteries; Press any button to wake up the display. |
| Water leaking from connections | Loose connections; Missing or damaged O-rings. | Tighten all connections; Check and replace O-rings if necessary. |
8. Specifications
| Feature | Specification |
|---|---|
| Model Number | HCT-326 |
| Product Dimensions | 16 x 6 x 15 cm |
| Item Weight | 500 g |
| Material | Aluminium, Reinforced Nylon Fiber |
| Ingress Protection | IPX5 |
| Working Pressure | 0.05 - 0.8 MPa |
| Working Temperature | 1 - 45 °C |
| Water Inlet Thread | 3/4" Internal Thread |
| Water Outlet Thread | 3/4" External Thread |
| Power Supply | 2 x 1.5V 'AA' Alkaline Batteries |

Figure 8.1: Product specifications as listed on the packaging.
9. Warranty and Support
johgee products are manufactured to high-quality standards. For warranty information or technical support, please refer to the contact details provided with your purchase or visit the official johgee website. Keep your purchase receipt as proof of purchase for any warranty claims.
For European customers, the authorized representative is eVatmaster Consulting GmbH, Bettinastr.30, 60325 Frankfurt am Main, Germany. You can reach them at contact@Evatmaster.com.


