
1. Initial Setup
1.1. Unboxing and Components
Upon opening the package, you will find the following components:
- Bushnell CelluCORE 20 Solar Trail Camera with integrated solar panel
- Power cord for solar panel
- Antenna
- Mounting strap
- User manual

Figure 1: Bushnell CelluCORE 20 Solar Trail Camera
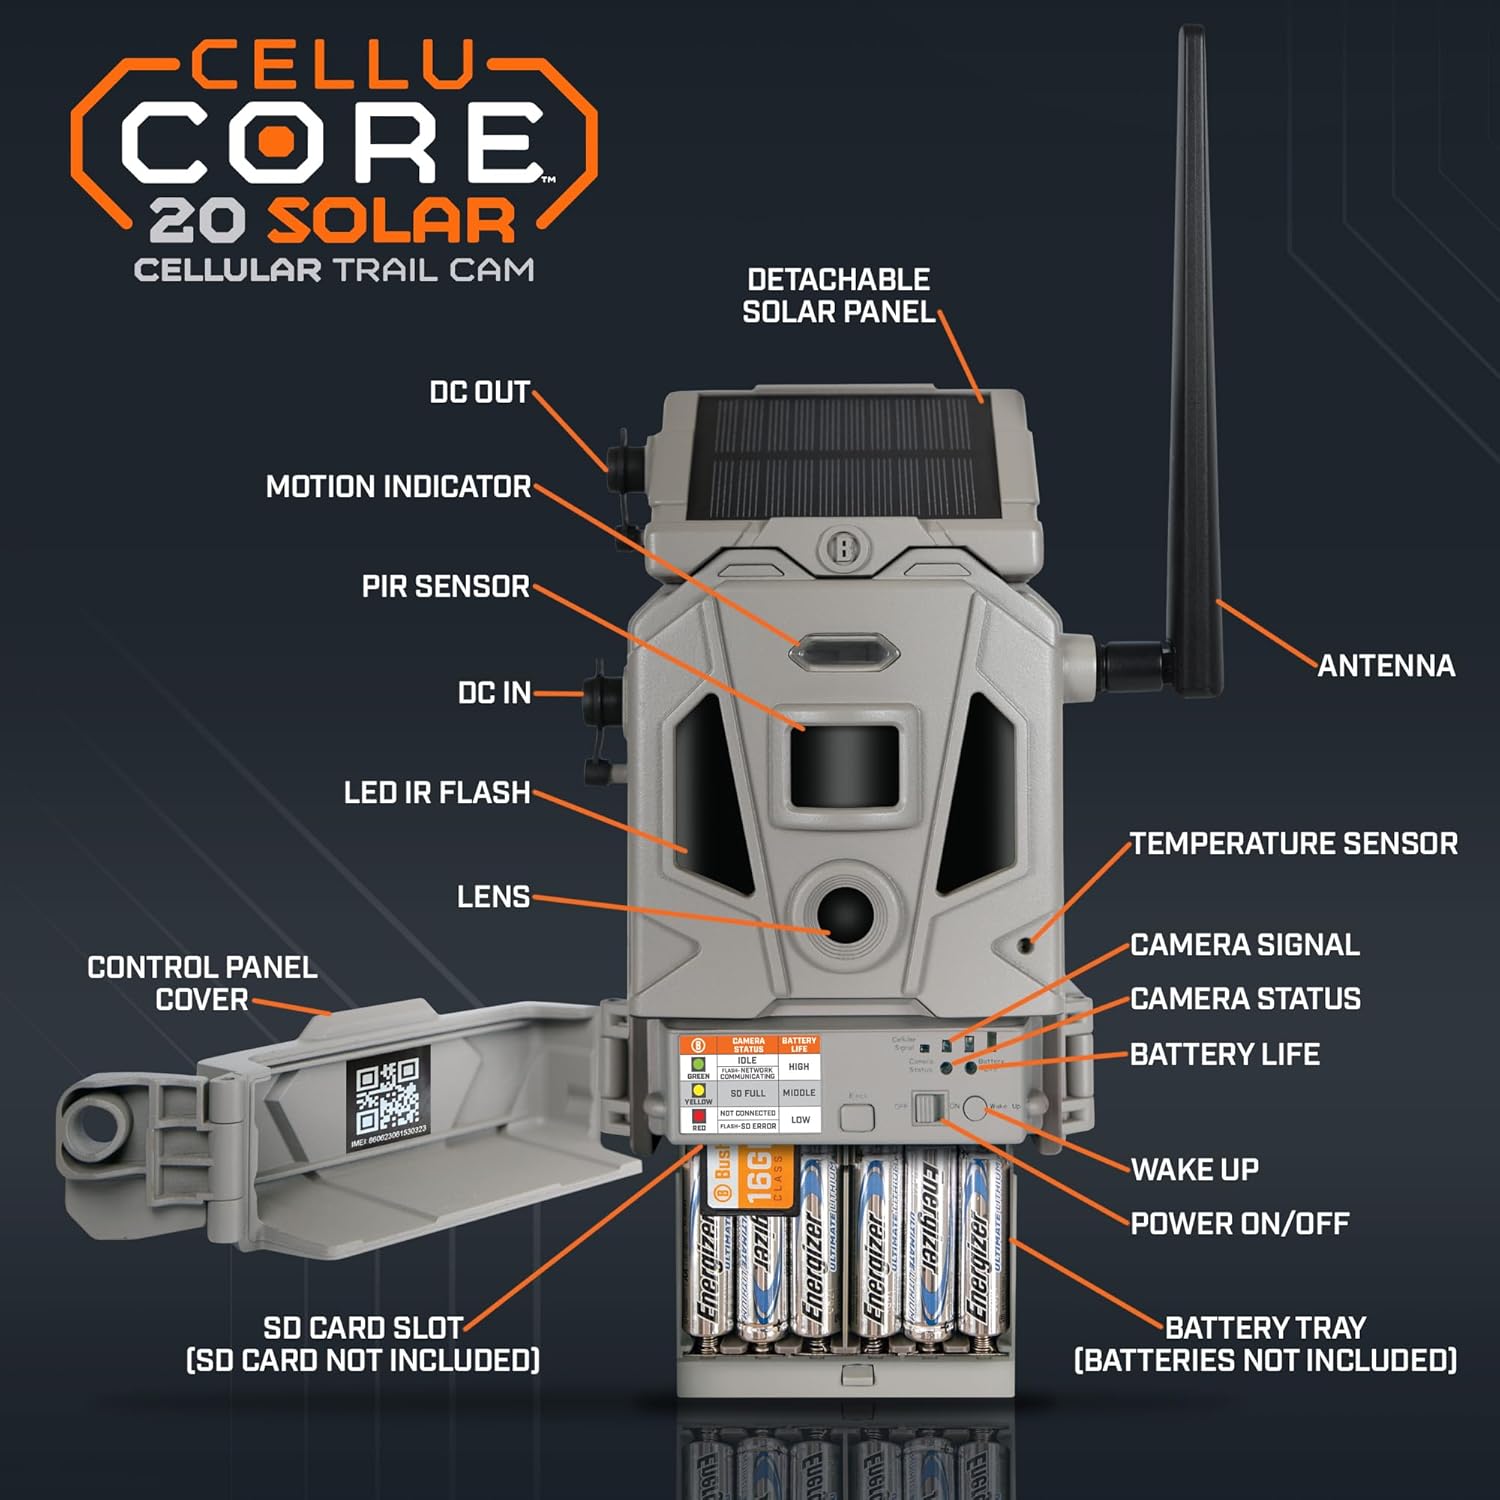
Figure 2: Labeled components of the CelluCORE 20 Solar Trail Camera, including DC Out, Motion Indicator, PIR Sensor, DC In, LED IR Flash, Lens, Control Panel Cover, SD Card Slot, Battery Tray, Wake Up, Power On/Off, Battery Life, Camera Status, Camera Signal, Temperature Sensor, and Antenna.
1.2. App Registration and Subscription
Before proceeding with hardware setup, it is recommended to add your camera to your Bushnell Trail Camera App account. If you do not have the app, download it from the Apple App Store or Google Play and create an account.
- Open the Bushnell Trail Camera App.
- Click on the 'Add Camera' button.
- Select 'Scan QR Code'.
- Scan the QR code located on the inside door of your camera.
- Once recognized, the app will prompt you to sign up for a data plan. The first 30 days are free. You will then be asked to select either an unlimited or standard plan.
Video: Bushnell CelluCORE 20 Solar Trail Camera Setup Guide. This video demonstrates the process of setting up your camera, including app registration, solar panel configuration, and battery/SD card installation.
1.3. Solar Panel Configuration
The CelluCORE 20 Solar features an integrated solar panel. To make it operational:
- Back out the thumb screw located on the solar panel.
- Remove the panel and the small blocker that prevents contact.
- Reattach the solar panel and tighten the thumb screw.
The solar panel comes pre-charged and should be ready for immediate operation.

Figure 3: Side view of the camera, showing the solar panel attachment point.
1.4. Battery and SD Card Installation
For optimal performance, load 12 AA Lithium batteries into the detachable battery tray. Ensure correct polarity. Insert an SD card (up to 32GB, Class 10 recommended) into the designated slot.

Figure 4: Back view of the camera, illustrating the battery tray and SD card slot.
1.5. Antenna Attachment
Attach the antenna by screwing it into the port on the side of the camera until secure.
2. Operation
2.1. Powering On and Signal Acquisition
Once batteries and SD card are installed, flip the power switch to the 'On' position. Observe the camera status lights. The CelluCORE 20 Solar features Dual SIM technology, automatically connecting to the strongest cellular network (AT&T or Verizon) in your location. The signal bars will illuminate as the camera acquires a signal. Once both camera status lights turn green, your camera is ready.
2.2. Deployment
Mount the camera to a tree or other suitable surface using the provided mounting strap. The external power cord allows you to position the solar panel separately from the camera, optimizing sun exposure without needing to face the camera directly into the sun. This is an optional feature.
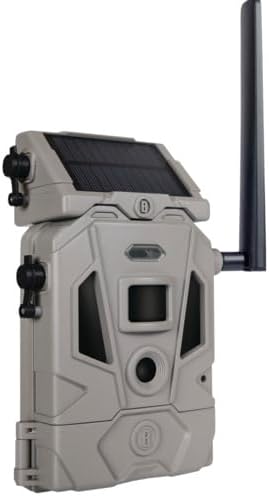
Figure 5: The CelluCORE 20 Solar Trail Camera mounted on a tree, demonstrating deployment.
2.3. Image and Video Capture
The camera captures crystal clear 20MP images and HD video. It boasts a rapid 0.2-second trigger speed and best-in-class 80ft night range. The camera works seamlessly with OnX Hunt, allowing you to add your Bushnell cellular trail cams to your OnX Hunt account for centralized image and information management.

Figure 6: The camera integrated with the OnX Hunt app on a smartphone, showcasing remote image viewing.
3. Maintenance
3.1. Battery Life and Solar Charging
The integrated solar panel significantly extends battery life by continuously charging the internal rechargeable lithium-ion battery. The actual extension depends on lighting conditions (direct sunlight exposure) and camera power consumption (e.g., frequency of captures, video length). Ensure the solar panel is positioned to receive maximum sunlight.
3.2. SD Card Management
Regularly check the SD card for storage capacity. It is recommended to periodically format the SD card using the camera's settings or a computer to maintain optimal performance and prevent data corruption.
3.3. Cleaning
Keep the camera lens, PIR sensor, and solar panel clean from dirt, dust, and debris to ensure clear images and efficient charging. Use a soft, lint-free cloth for cleaning. Avoid abrasive materials or harsh chemicals.
4. Troubleshooting
4.1. Common Issues
- No Signal: Check the camera's signal status lights. Ensure the antenna is securely attached and the camera is in an area with adequate cellular coverage (AT&T or Verizon).
- Battery Drain: Verify that 12 AA Lithium batteries are used and installed with correct polarity. Ensure the solar panel is receiving sufficient direct sunlight. Reduce capture frequency or video length if battery life is still short.
- No Images/Videos: Confirm the SD card is properly inserted and is a Class 10 card with sufficient free space. Check the camera's settings in the app to ensure it's configured to capture images/videos.
- App Connectivity Issues: Ensure your smartphone has a stable internet connection. Restart the app or the camera if connection problems persist.
5. Product Specifications
| Feature | Value |
|---|---|
| Indoor/Outdoor Usage | Outdoor |
| Compatible Devices | Smartphone |
| Power Source | Solar Powered, Battery Hybrid |
| Connectivity Protocol | Wi-Fi |
| Controller Type | Push Button |
| Mounting Type | Wall Mount |
| Video Capture Resolution | 720p |
| Color | Gray |
| Number of Items | 1 |
| Included Components | Solar Panel, Trail Camera |
| Number of Channels | 1 |
| Wireless Communication Technology | Dual Cellular Sim Card |
| Form Factor | Box |
| Material | Plastic |
| Voltage | 12 Volts |
| Wattage | 1 watts |
| Item dimensions L x W x H | 10 x 7 x 4 inches |
| Batteries Required? | Yes |
| Item Weight | 1 Pounds |
| Shape | Rectangular |
| Focus Type | automatically |
| Low light technology | Thermal Sensing |
| Alert Type | Motion Only |
| Video Capture Format | MPEG-4 |
| Specific Uses For Product | Hunting, Surveillance |
| Unit Count | 1.0 Count |
| Effective Still Resolution | 20 MP |
| International Protection Rating | IP54 |
| Control Method | App |
| Global Trade Identification Number | 00029757009364 |
| UPC | 029757009364 |
| Item Package Dimensions L x W x H | 11.26 x 6.22 x 3.11 inches |
| Package Weight | 0.95 Kilograms |
| Item Dimensions LxWxH | 10 x 7 x 4 inches |
| Brand Name | Bushnell |
| Warranty Description | 2 Year Manufacturer |
| Suggested Users | unisex-adult |
| Manufacturer | Bushnell |
| Part Number | 119904S |
| Model Year | 2022 |
| Style | Solar Powered Trail Camera |
| Size | 1 Count (Pack of 1) |
| Sport Type | Hunting |
| ASIN | B0B2CD5C3H |
| Date First Available | May 25, 2022 |
| Recommended Uses For Product | Game & Trail |
| Brand | Bushnell |
| Model Name | Bushnell CelluCORE 20 Solar Trail Camera |
| Connectivity Technology | Wireless |
| Special Feature | Dual Sim, Solar Panel |
6. Warranty and Support
6.1. Warranty Information
The Bushnell CelluCORE 20 Solar Trail Camera comes with a 2-Year Manufacturer Warranty. Please refer to the warranty description for full details on coverage and claims procedures.
6.2. Customer Support
For further assistance, technical support, or warranty claims, please contact Bushnell customer service through their official website or the contact information provided in your product packaging. Always refer to the latest information available from Bushnell for the most accurate support details.

