
1. Introduction
Thank you for choosing the Starway SW1020S Floor-Standing Water Dispenser. This appliance is designed to provide convenient access to hot, normal, and cold water. It features a bottom-load design, an anti-overflow system, automatic water temperature control, a storage cabinet, and protection functions for hot water and overheating. Please read this manual thoroughly before installation and operation to ensure proper use and maintenance.
2. Safety Instructions
- Ensure the power supply matches the voltage specified on the dispenser's rating label.
- Do not operate the dispenser with a damaged power cord or plug. Contact qualified service personnel for repairs.
- Place the dispenser on a flat, stable surface away from direct sunlight and heat sources.
- Keep the dispenser away from flammable materials and explosive gases.
- Do not immerse the dispenser, cord, or plug in water or other liquids.
- Unplug the dispenser before cleaning or performing any maintenance.
- Supervise children to ensure they do not play with the appliance. The hot water tap has a safety feature, but caution is still advised.
- Do not block ventilation openings on the appliance.
- This appliance is intended for household use only.
3. Product Diagram
Below is an illustration of the Starway SW1020S Water Dispenser, highlighting its main components.
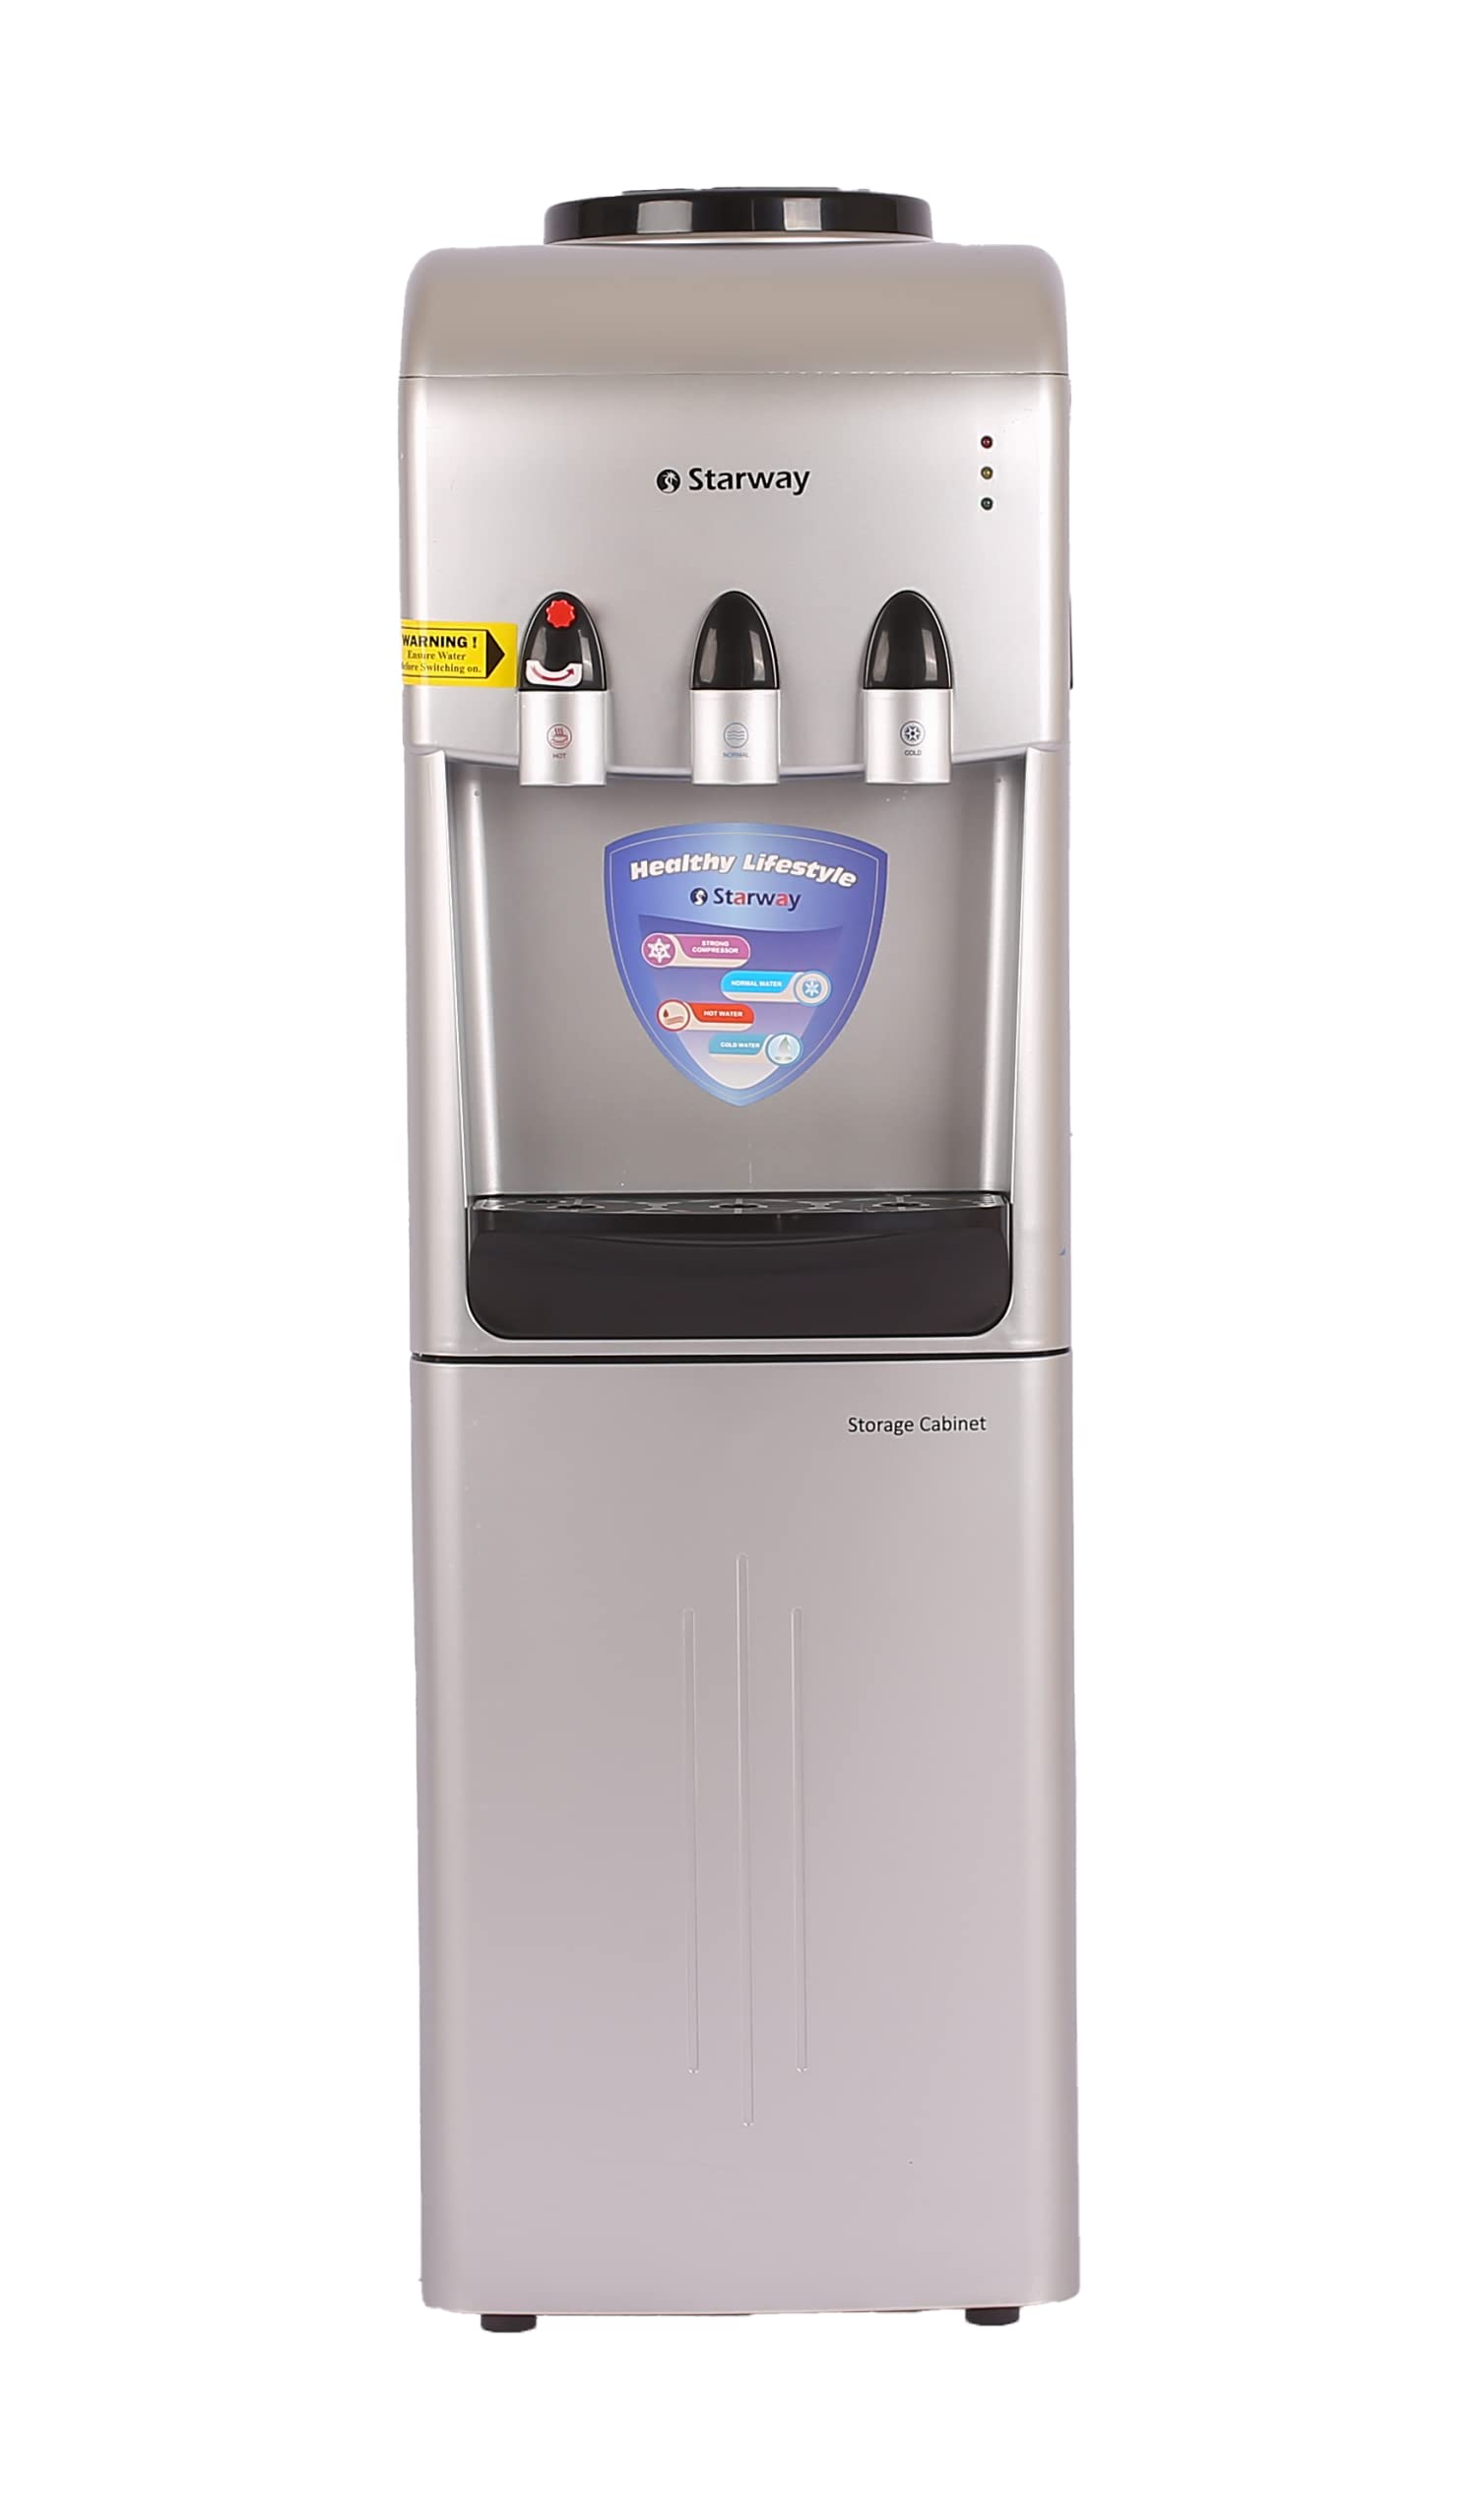
Key Components:
- Hot Water Tap: Dispenses hot water (with child safety lock).
- Normal Water Tap: Dispenses room temperature water.
- Cold Water Tap: Dispenses chilled water.
- Drip Tray: Collects spilled water for easy cleaning.
- Lower Cabinet Door: Provides access to the water bottle compartment.
- Power Switches: Located at the back for hot and cold water functions.
- Power Cord: Connects the dispenser to an electrical outlet.
4. Setup
- Unpacking: Carefully remove the dispenser from its packaging. Retain packaging materials for future transport if needed.
- Placement: Position the dispenser on a firm, level floor surface. Ensure there is at least 10 cm of space from walls to allow for proper ventilation. Avoid placing it near direct sunlight or heat-emitting appliances.
- Initial Cleaning: Before first use, clean the exterior with a soft, damp cloth.
- Water Bottle Installation (Bottom Load):
- Open the lower cabinet door.
- Remove the cap from a new 5-gallon (or compatible size) water bottle.
- Insert the water pump tube into the bottle opening. Ensure the tube reaches the bottom of the bottle.
- Slide the water bottle into the cabinet and close the door securely.
- Power Connection: Plug the power cord into a grounded electrical outlet.
- Priming the System: Before turning on the heating or cooling functions, dispense water from all three taps (hot, normal, cold) until water flows steadily. This removes air from the tanks and prevents damage to the heating element.
- Activate Functions: Turn on the hot water switch and cold water switch located at the back of the unit. Allow approximately 15-30 minutes for the water to reach desired temperatures.
5. Operating Instructions
The Starway SW1020S offers three water temperature options:
- Hot Water: Press the hot water tap. For safety, this tap typically has a child safety lock that requires two actions (e.g., sliding a button and pressing the tap) to dispense hot water.
- Normal Water: Press the normal water tap to dispense room temperature water.
- Cold Water: Press the cold water tap to dispense chilled water.
Indicator Lights: The dispenser may have indicator lights on the front panel to show when the hot and cold water functions are active and when water has reached its target temperature.
Automatic Temperature Control: The dispenser automatically maintains the set hot and cold water temperatures. The heating and cooling elements will cycle on and off as needed.
6. Maintenance
Regular maintenance ensures optimal performance and hygiene of your water dispenser.
- Cleaning the Exterior: Wipe the exterior surfaces with a soft, damp cloth. Do not use abrasive cleaners or solvents.
- Drip Tray Cleaning: The drip tray should be emptied and cleaned regularly to prevent overflow and bacterial growth. Remove the tray, discard collected water, wash with mild soap and water, rinse thoroughly, and replace.
- Descaling (Every 3-6 Months):
- Unplug the dispenser and remove the water bottle.
- Drain all water from the hot and cold tanks by dispensing from the taps until no more water comes out.
- Prepare a descaling solution (e.g., a mixture of water and white vinegar, or a commercial descaling agent following its instructions).
- Pour the solution into the water reservoir (where the pump tube goes).
- Allow the solution to sit for 15-30 minutes (or as recommended by the descaling agent).
- Drain the solution through the taps.
- Rinse the system thoroughly by filling the reservoir with clean water and draining it through the taps several times until no descaling solution residue remains.
- Reinstall a fresh water bottle and prime the system as described in the Setup section.
- Condenser Cleaning: Periodically clean the condenser coils at the back of the unit with a brush or vacuum cleaner to ensure efficient cooling. Ensure the unit is unplugged before cleaning.
7. Troubleshooting
If you encounter issues with your water dispenser, refer to the following common problems and solutions:
| Problem | Possible Cause | Solution |
|---|---|---|
| No water dispensed | Empty water bottle; pump tube not properly inserted; airlock in system. | Replace water bottle; ensure pump tube is fully inserted; prime the system by dispensing from all taps. |
| Water not hot/cold | Hot/cold switch off; power outage; insufficient time for heating/cooling; faulty thermostat. | Ensure hot/cold switches are ON; check power supply; allow 15-30 minutes for temperature change; contact service if problem persists. |
| Water leakage | Loose connections; damaged water bottle; clogged drain. | Check all connections; inspect water bottle for cracks; clean drip tray and check for blockages. |
| Unusual noise | Compressor operation (normal); loose parts; unit not level. | Ensure unit is on a level surface; check for any loose components; compressor noise is normal during cooling cycles. |
If the problem persists after attempting these solutions, please contact customer support.
8. Specifications
| Brand | Starway |
| Model Number | SW1020S |
| Color | Silver |
| Material | Plastic |
| Product Dimensions (D x W x H) | 33 cm x 35 cm x 105 cm |
| Style | Bottom Load |
| Installation Type | Floor-Standing |
| Access Location | Bottom |
| Number of Settings | 3 (Hot, Normal, Cold) |
| Max Temperature Rating | 100°C |
| Power Source | Corded Electric |
| Global Trade Item Number (GTIN) | 06285599002046 |
| Country of Origin | India |
9. Warranty and Support
For warranty information or technical support, please refer to the warranty card included with your product or contact Starway customer service. Keep your purchase receipt as proof of purchase for any warranty claims.