
1. Introduction
The BSIDE Z1 Pen-Type Digital Multimeter is a portable, smart, auto-ranging instrument designed for measuring AC/DC voltage, resistance, frequency, and continuity. It also features V-Alert (non-contact voltage detection) and live wire checking capabilities, along with a built-in flashlight for enhanced usability in various environments. Its compact design and smart mode functionality make it suitable for both professional and home use.
2. Safety Information
Please read and understand all safety information before operating this multimeter. Failure to follow these instructions may result in electric shock, fire, or damage to the instrument.
- Always ensure the multimeter is in good working condition before use.
- Do not apply voltage or current that exceeds the maximum specified limits for the multimeter.
- Exercise extreme caution when working with live circuits.
- Do not use the multimeter if the test leads are damaged or if the casing is open.
- Replace batteries promptly when the low battery indicator appears to ensure accurate readings.
- Keep hands and fingers behind the probe barriers during measurements.
- Do not operate the multimeter in explosive gas, vapor, or dusty environments.
3. Package Contents
Verify that all items are present in the package:
- 1 x BSIDE Z1 Pen-Type Digital Multimeter
- 1 x Test Lead
- 2 x AAA Batteries
- 1 x Screwdriver
- 1 x User Manual (this document)

Figure 3.1: BSIDE Z1 Pen-Type Digital Multimeter with included test lead, batteries, and screwdriver.
4. Setup
4.1 Battery Installation
The multimeter requires two 1.5V AAA batteries for operation. Follow these steps to install or replace the batteries:
- Locate the battery compartment cover on the back of the multimeter.
- Use the provided screwdriver to loosen the screw securing the battery cover.
- Remove the battery cover.
- Insert two AAA batteries, ensuring correct polarity (+ and -).
- Carefully replace the battery cover and tighten the screw. Ensure the cover is securely fastened to prevent damage.
Caution: When replacing batteries, exercise care to avoid dislodging internal components. Ensure batteries are inserted correctly to prevent damage to the device.
5. Operating Instructions
5.1 Power On/Off
Press and hold the red power button (U) to turn the multimeter on or off.
5.2 Smart Mode (Automatic Identification)
The multimeter features a smart mode that automatically identifies the tested parameters (AC/DC voltage, resistance, continuity) and selects the appropriate range. This simplifies operation for general measurements.

Figure 5.1: The multimeter's automatic mode selection simplifies measurements for voltage, resistance, continuity, frequency, NCV, and live wire detection.
5.3 Function Selection (Manual Mode)
Press the blue 'SEL' button to cycle through different measurement functions if manual mode is desired or for specific functions not covered by smart mode (e.g., Frequency, V-Alert, Live Check).
5.4 AC/DC Voltage Measurement
To measure voltage:
- Connect the test lead to the 'COM' port and the red probe tip to the 'INPUT' port.
- Select AC or DC voltage mode (or allow smart mode to detect).
- Carefully touch the red probe tip to the positive point of the circuit and the test lead to the negative point.
- Read the voltage value on the display.
5.5 Resistance Measurement
To measure resistance:
- Ensure the circuit or component is de-energized before measuring resistance.
- Connect the test lead to the 'COM' port and the red probe tip to the 'INPUT' port.
- Select resistance mode (or allow smart mode to detect).
- Touch the red probe tip and the test lead to the two ends of the component being measured.
- Read the resistance value on the display.
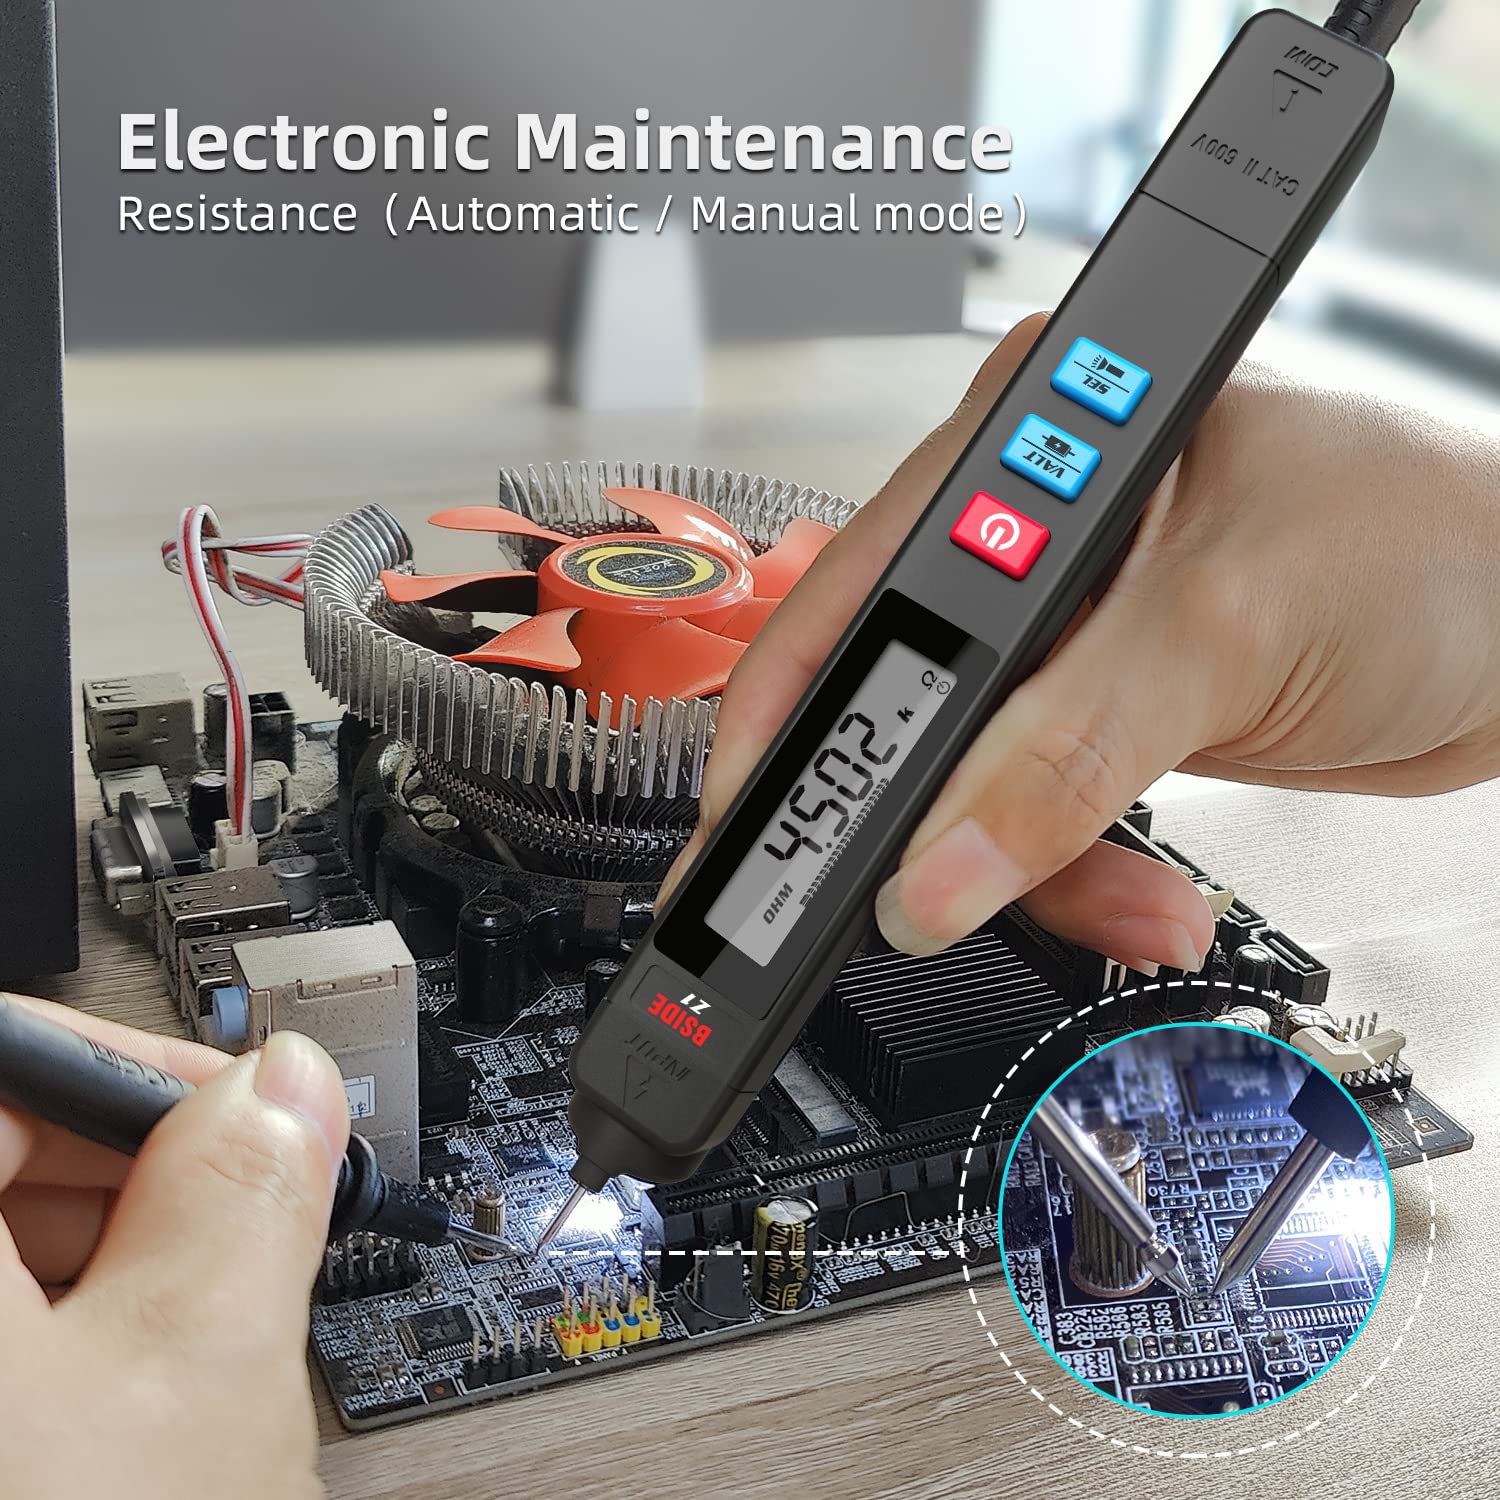
Figure 5.2: Measuring resistance on electronic components using the multimeter.
5.6 Continuity Test
To perform a continuity test:
- Ensure the circuit or component is de-energized.
- Connect the test lead to 'COM' and the red probe tip to 'INPUT'.
- Select continuity mode.
- Touch the red probe tip and the test lead to the two points you wish to test for continuity.
- If the resistance is less than 50Ω, the beeper will sound, indicating continuity.
5.7 Frequency Measurement
To measure frequency:
- Connect the test lead to 'COM' and the red probe tip to 'INPUT'.
- Select frequency mode.
- Apply the probes to the circuit where frequency needs to be measured.
- Read the frequency value in Hertz (Hz) on the display.
5.8 V-Alert (Non-Contact Voltage Detection)
The V-Alert function allows for non-contact detection of AC voltage, useful for identifying live wires without direct contact.
- Select V-Alert mode.
- Bring the tip of the multimeter close to the suspected live wire or outlet.
- The display will show a 'VALE' indicator, and the backlight will change color (green for low voltage, red for high voltage), accompanied by an audible alarm, indicating the presence and strength of AC voltage.

Figure 5.3: The display backlight indicates voltage strength during V-Alert detection.
5.9 Live Wire Check
This function helps distinguish between live and neutral wires.
- Select Live Wire Check mode.
- Insert the red probe tip into the socket or touch it to the wire.
- The display will show 'LIVE' and the backlight will turn red with an audible alarm if a live wire is detected. A neutral wire will typically show a weaker or no signal.

Figure 5.4: Distinguishing between live and neutral wires using the multimeter's live check function.
5.10 Flashlight Function
The built-in LED flashlight can be activated to illuminate dark work areas.

Figure 5.5: The integrated flashlight provides illumination for working in low-light conditions.
5.11 Data Hold
Press the 'HOLD' button to freeze the current reading on the display. Press it again to release the hold function.
5.12 Auto Power Off
The multimeter will automatically power off after a period of inactivity to conserve battery life. Press any button to wake it up.
6. Maintenance
6.1 Cleaning
Wipe the multimeter casing with a damp cloth and mild detergent. Do not use abrasives or solvents. Ensure the device is dry before use.
6.2 Storage
When not in use for extended periods, remove the batteries to prevent leakage and store the multimeter in a cool, dry place away from direct sunlight and extreme temperatures.
6.3 Battery Replacement
Refer to Section 4.1 for battery replacement instructions. Always replace both batteries at the same time with new ones of the same type (1.5V AAA).
7. Troubleshooting
- No Display / Device Not Turning On:
Check battery installation and ensure batteries are not depleted. Replace batteries if necessary. - Inaccurate Readings:
Ensure test leads are properly connected. Verify the correct measurement mode is selected. Check battery level; low batteries can affect accuracy. - No Continuity Beep:
Ensure the circuit is de-energized. Check if the resistance is above 50Ω, as the beeper only activates below this threshold. - V-Alert / Live Check Not Responding:
Ensure the function is selected. The detection range may vary based on environmental factors and voltage strength.
8. Specifications
| Parameter | Specification |
|---|---|
| Display | 2000 counts, 1.9 inch screen |
| DC Voltage Range | 0V-500V (DC Mode) / 0.5V-500V (Auto Mode) |
| DC Voltage Accuracy | ±(0.8%+3) |
| AC Voltage Range | 0V-500V (AC Mode) / 0.8V-500V (Auto Mode) |
| AC Voltage Accuracy | ±(1.2%+5) |
| Resistance Range | 0Ω-2MΩ |
| Resistance Accuracy | ±(1.2%+3) |
| Frequency Range | 40-1000Hz (0-30V AC) / 40-400Hz (0-500V AC) |
| Frequency Accuracy | ±(2.0%+10) |
| Continuity | Beeper sounds if resistance < 50Ω |
| V-Alert (NCV) | Yes |
| Live Wire Check | Yes |
| Power Source | 2 x 1.5V AAA Batteries |
| Dimensions | 185 x 22 x 22 mm |
| Weight | 52g (without batteries) |
9. Warranty and Support
BSIDE products are designed for reliability and performance. For warranty information or technical support, please refer to the contact details provided with your purchase documentation or visit the official BSIDE website. Keep your purchase receipt as proof of purchase for warranty claims.


