
1. Safety Information
Operating the Trailmaster TM10 Dirt Bike requires adherence to strict safety guidelines to prevent injury. This vehicle is intended for off-road use only and should always be operated under adult supervision.
- Always wear a helmet: A properly fitted, DOT-approved helmet is mandatory for all riders.
- Protective Gear: Wear appropriate protective gear, including gloves, long pants, long-sleeved shirts, and sturdy boots.
- Adult Supervision: Children must always be supervised by a responsible adult while operating the dirt bike.
- Pre-Ride Inspection: Before each ride, perform a thorough inspection of the bike, checking brakes, tires, chain, and controls.
- Understand Controls: Ensure the rider fully understands how to operate the throttle, brakes, and engine kill switch before riding.
- Riding Environment: Ride only in designated, safe off-road areas, away from traffic, pedestrians, and obstacles.
- No Passengers: This dirt bike is designed for a single rider only.
2. Setup and Assembly
The Trailmaster TM10 Dirt Bike requires some assembly before its first use. A basic tool kit is included to assist with this process. Follow these steps carefully.
2.1 Unpacking and Initial Inspection
- Carefully remove all components from the packaging.
- Check for any visible damage during shipping. Report any damage immediately.
- Verify all parts listed in the packing list are present.
2.2 Assembly Steps
- Handlebar Installation: Attach the handlebars to the triple clamp. Ensure they are centered and tightened securely.
- Front Wheel and Fender: Install the front wheel, ensuring the axle is properly seated and tightened. Mount the front fender.
- Fluid Checks: Check the engine oil level and add fuel (unleaded gasoline) to the fuel tank. Refer to the specifications for recommended fuel type.
- Chain Adjustment: Verify the drive chain has the correct tension. Adjust if necessary according to the maintenance section.
- Brake Check: Confirm both front and rear hydraulic disc brakes are functioning correctly and have adequate fluid.

This image shows the Trailmaster TM10 Kids Dirt Bike from a front-side angle, highlighting the front wheel, handlebars, and the number plate. This view is useful for understanding the front assembly components.
3. Operating Instructions
Familiarize yourself with the controls and operation of the Trailmaster TM10 before riding.
3.1 Pre-Ride Check
- Tires: Check tire pressure and condition.
- Brakes: Test front and rear brakes for proper function.
- Throttle: Ensure smooth operation and return to idle.
- Chain: Check tension and lubrication.
- Fuel/Oil: Verify adequate fuel and engine oil levels.
- Fasteners: Inspect for any loose nuts or bolts.
3.2 Starting the Engine (Kick Start)
- Ensure the fuel valve is in the 'ON' position.
- If the engine is cold, pull the choke lever to the 'ON' position.
- Place the transmission in neutral (N).
- Firmly push down on the kick start lever with your foot until the engine starts.
- Once the engine starts, slowly push the choke lever to the 'OFF' position as the engine warms up.
3.3 Riding with Semi-Automatic Transmission
The TM10 features a semi-automatic 4-speed transmission, meaning there is no clutch lever to operate. Gear changes are made by shifting the foot lever.
- To shift up, gently lift the shift lever with your foot.
- To shift down, gently press the shift lever down with your foot.
- Practice shifting at low speeds in a safe, open area until comfortable.
- The semi-automatic transmission teaches young riders to use gears for acceleration and controlled stopping.
3.4 Stopping the Dirt Bike
- Gradually release the throttle to reduce speed.
- Apply both the front and rear hydraulic disc brakes smoothly and evenly.
- Downshift through the gears as you slow down.
- Once stopped, place the transmission in neutral and turn off the engine using the kill switch.
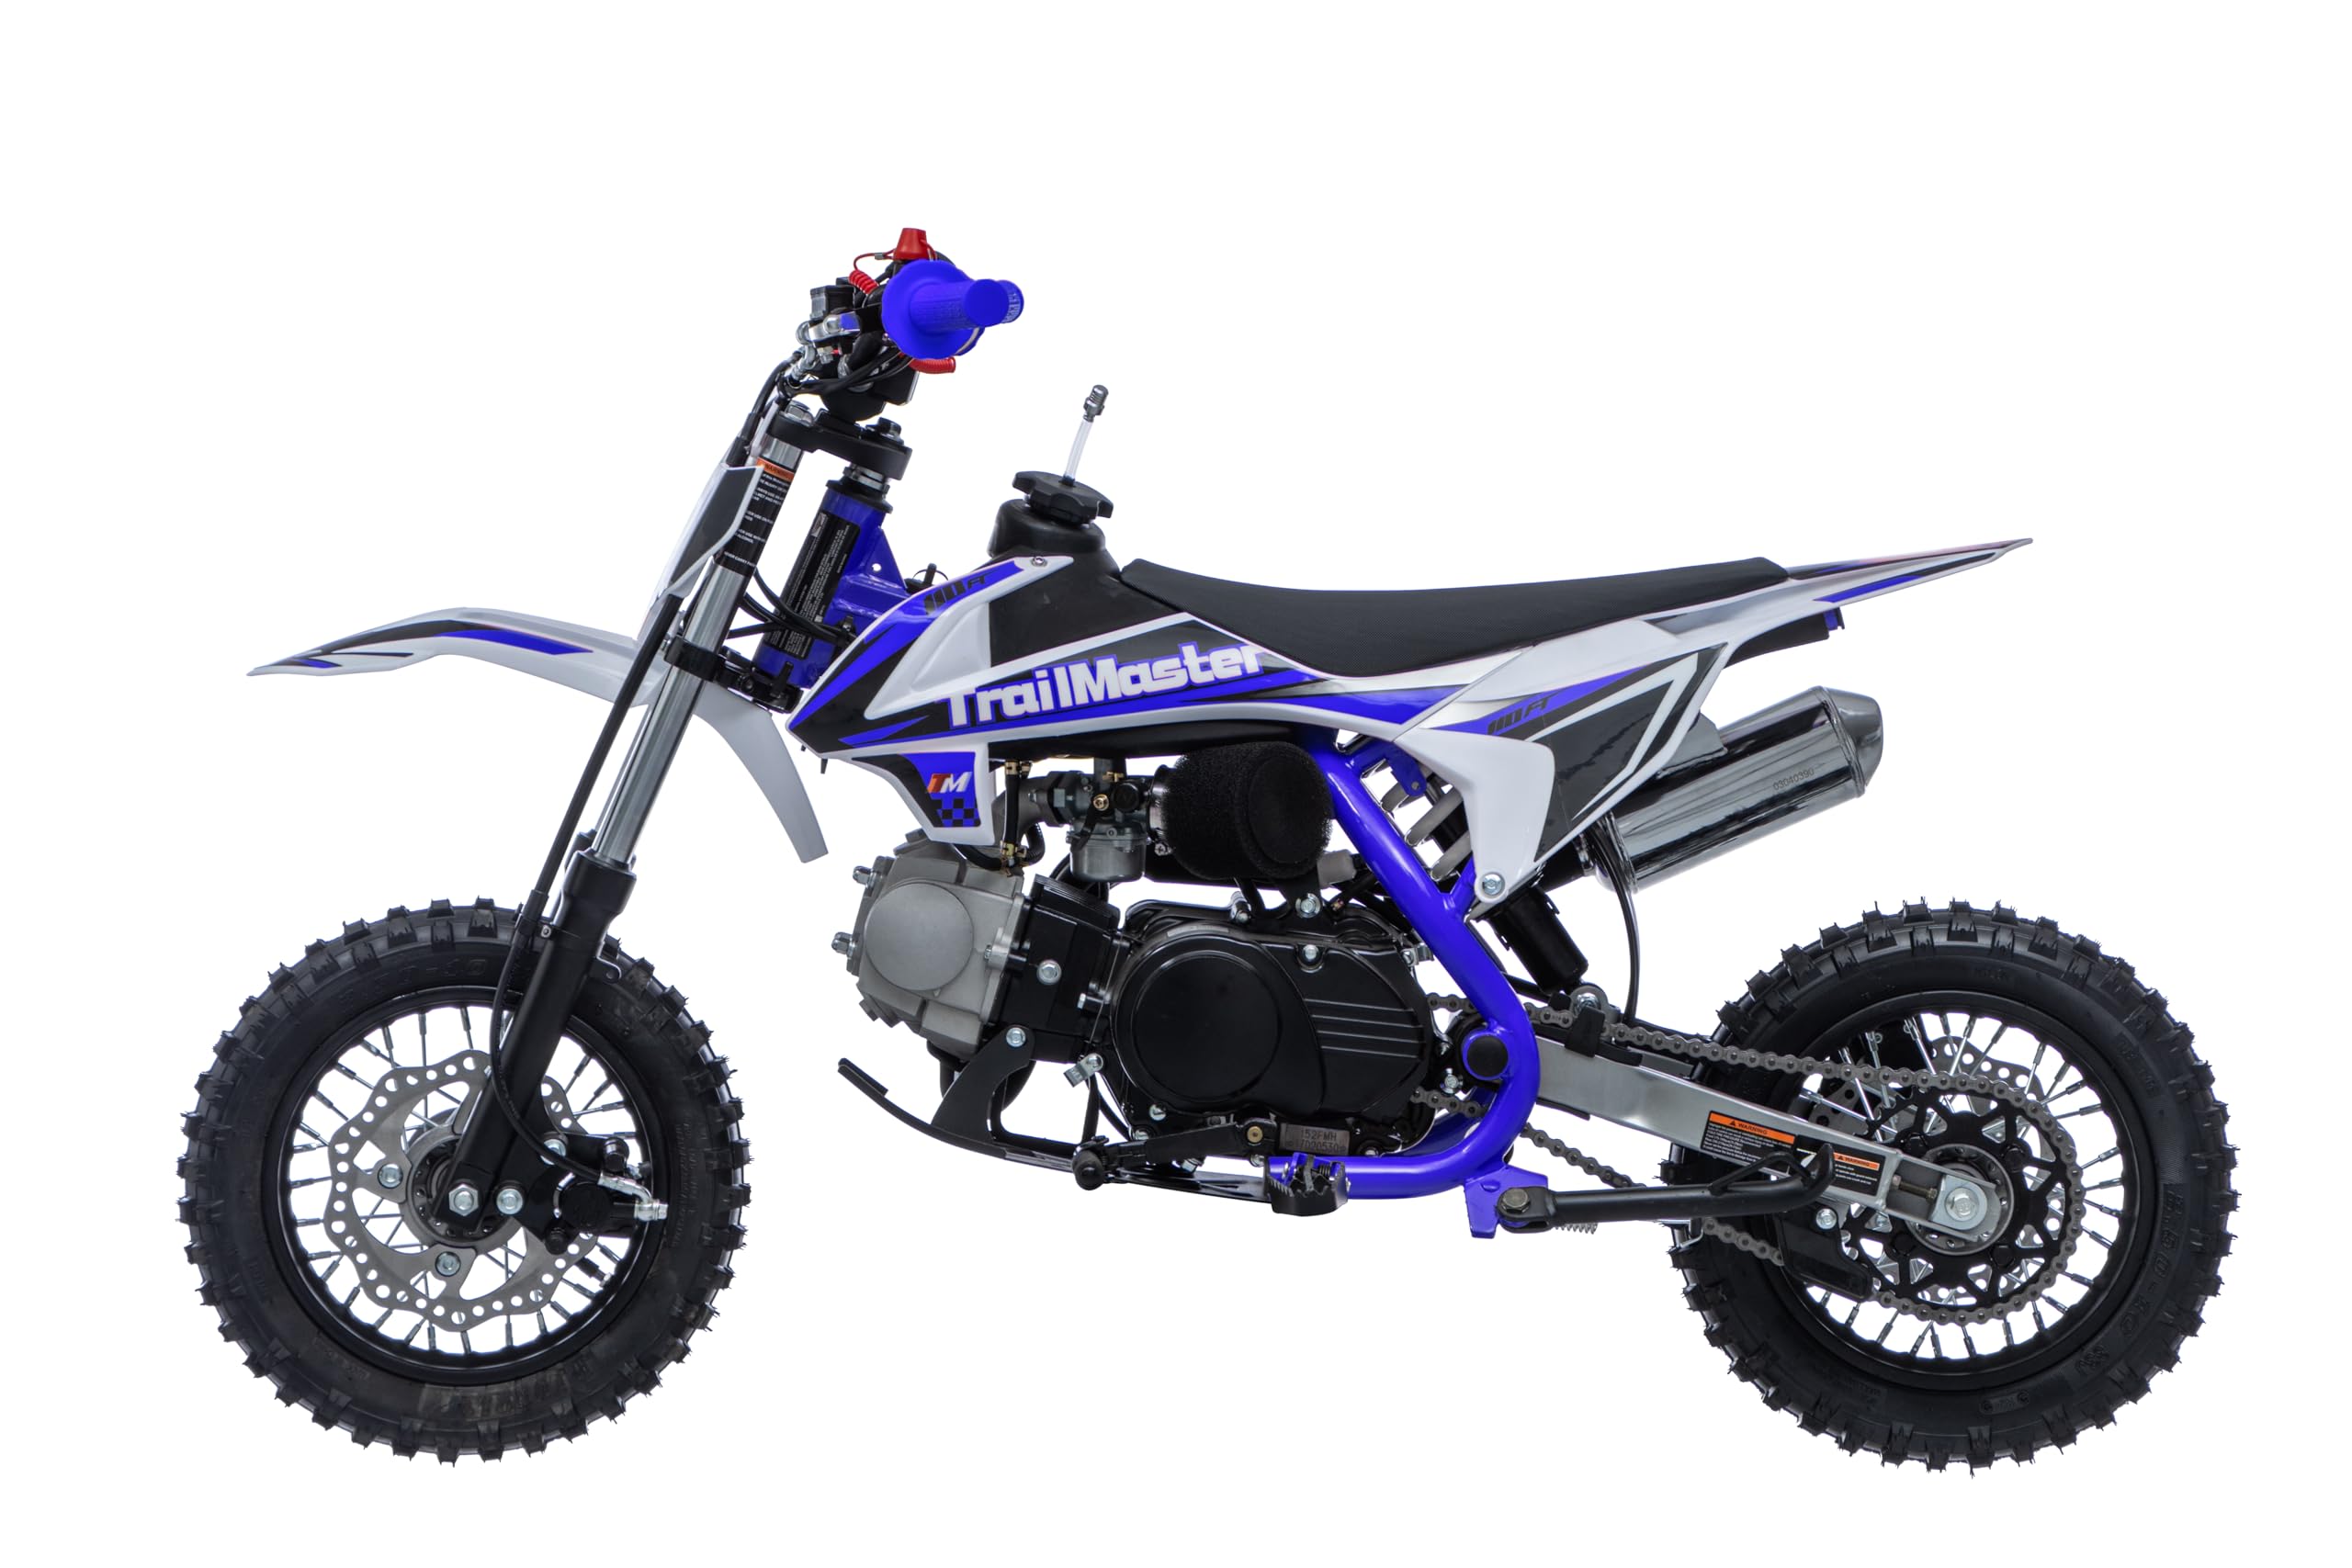
A complete side view of the Trailmaster TM10 Kids Dirt Bike, illustrating the overall design, engine placement, exhaust system, and the semi-automatic transmission components. This perspective is helpful for general operation and maintenance identification.
Official Product Video
This video provides an overview of the TrailMaster TM Kids Series Dirt Bikes, including the TM10 model. It demonstrates key features such as the twin spar frame, welded steel frame, and highlights the balance and power-to-weight ratio. Useful for visual understanding of the bike's construction and capabilities.
4. Maintenance
Regular maintenance is crucial for the longevity and safe operation of your Trailmaster TM10 Dirt Bike. Easy-to-access motor mounts facilitate maintenance tasks.
4.1 Regular Checks (Before Each Ride)
- Tires: Inspect for wear, damage, and correct pressure.
- Brakes: Check brake lever/pedal free play and effectiveness. Ensure no fluid leaks.
- Chain: Check tension, lubrication, and wear. Adjust or lubricate as needed.
- Controls: Ensure throttle, brake levers, and shift lever operate smoothly.
- Fasteners: Check all nuts, bolts, and screws for tightness.
4.2 Scheduled Maintenance
- Engine Oil: Change engine oil regularly as specified in the service schedule (typically after the first few hours, then periodically).
- Air Filter: Clean or replace the air filter regularly, especially when riding in dusty conditions.
- Spark Plug: Inspect and clean or replace the spark plug as needed.
- Brake System: Periodically check brake pads for wear and brake fluid level. Bleed brakes if necessary.
- Suspension: Inspect front forks and rear shock for leaks or damage.
- Frame: Clean the frame and inspect for cracks or damage.
5. Troubleshooting Common Issues
This section provides guidance for common operational problems. For complex issues, consult a qualified technician.
5.1 Engine Not Starting
- No Fuel: Check if there is enough fuel in the tank and the fuel valve is open.
- Choke: Ensure the choke is used correctly for a cold engine.
- Spark Plug: Check the spark plug for fouling or damage. Clean or replace if necessary.
- Kill Switch: Verify the engine kill switch is in the 'RUN' position.
5.2 Carburetor Issues (e.g., Fuel Leaking)
- Fuel Valve: Ensure the fuel valve is turned 'OFF' when the bike is not in use to prevent fuel overflow.
- Float Valve: A leaking carburetor often indicates a faulty float valve or debris preventing it from sealing. This may require professional cleaning or replacement of carburetor components.
- Drain Screw: Check if the carburetor drain screw is fully tightened.
5.3 Poor Brake Performance
- Brake Pads: Inspect brake pads for wear. Replace if worn beyond limits.
- Brake Fluid: Check brake fluid level. Low fluid can indicate a leak or worn pads.
- Air in System: Spongy brakes may indicate air in the hydraulic system, requiring bleeding.
6. Specifications
Key technical specifications for the Trailmaster TM10 Kids Dirt Bike.
| Feature | Specification |
|---|---|
| Engine Type | 110cc, Air-cooled |
| Transmission | Semi-Automatic, 4-Speed |
| Starting System | Kick Start |
| Seat Height | 24.41 inches (62 cm) |
| Wheelbase | 39.37 inches (100 cm) |
| Front Tire | 10 inch |
| Rear Tire | 10 inch |
| Brakes | Hydraulic Front and Rear Disc Brake |
| Overall Dimensions (L x W x H) | 59.84 x 25.6 x 33.07 inches |
| Frame Material | Alloy Steel |
| Assembly Required | Yes |
| Included Components | Tool Kit |
7. Warranty Information
The Trailmaster TM10 Kids Dirt Bike is backed by a manufacturer's warranty. This warranty covers the engine and transmission for a period of 6 months or 6,000 miles, whichever comes first. Please retain your proof of purchase for warranty claims. The warranty covers manufacturing defects and does not cover damage due to misuse, neglect, or normal wear and tear.
8. Support and Contact
For technical assistance, parts inquiries, or to submit a warranty claim, please contact TrailMaster Powersports. Refer to your purchase documentation or the official Trailmaster website for the most current contact information.
When contacting support, please have your model number (TM10) and proof of purchase readily available to expedite service.

