1. Introduction
Thank you for choosing the CIRYCASE DT68A Digital Cooking Thermometer. This device is designed to provide accurate and instant temperature readings for various cooking applications, ensuring your food is cooked to perfection. Featuring a dual-probe design, backlit LCD, and temperature alarm, it is a versatile tool for any kitchen.

Image 1.1: The CIRYCASE DT68A Digital Cooking Thermometer, showcasing its foldable probe and external wired probe.
2. Package Contents
Please check the package to ensure all items are present:
- 1 x CIRYCASE DT68A Digital Cooking Thermometer
- 1 x External Wired Probe (102cm / 40 inches)
- 2 x CR2032 Batteries (pre-installed or separate)
- 1 x User Manual
3. Product Features
- Dual Probe Design: Includes a 12cm (4.7 inch) foldable integrated probe and a 102cm (40 inch) braided stainless steel external probe for versatile use in ovens, grills, and various foods.
- Instant & Accurate Readings: Provides temperature readings within 2-3 seconds with an accuracy of ±1℃/2℉.
- Wide Temperature Range: Measures temperatures from -50℃ to 300℃ (-58℉ to 572℉).
- Temperature Alarm Function: Set a target temperature, and the thermometer will alert you with an audible alarm and flashing screen when the temperature is reached.
- Automatic On/Off: The device automatically turns on when the foldable probe is opened or the external probe is inserted/removed. It automatically turns off when the foldable probe is closed or after 10 minutes of inactivity.
- Backlit LCD Display: A bright, clear LCD screen ensures easy readability in various lighting conditions.
- Data Hold Function: Temporarily locks the current temperature reading on the display.
- Unit Switching: Easily switch between Celsius (℃) and Fahrenheit (℉).
- Convenient Storage: Features an integrated magnet for attaching to metal surfaces and a hanging hole for easy storage.
- Durable Materials: Constructed with ABS plastic and food-grade 304 stainless steel probes.
4. Components Overview

Image 4.1: Detailed view of the thermometer's components and controls.
- Large LCD Backlight Display
- ℃/℉ Switching / Backlight On/Off Button (Short Press) / Calibration (Long Press)
- Data Hold Button (Short Press)
- Temperature Alarm Set Button
- Rotatable Foldable Probe
- Auto-off when Foldable Probe is Closed
- 3V CR2032 Battery Compartment
- Built-in Magnet
- Kitchen Hook Hole
- External Probe Socket
- External Wired Probe
5. Setup
5.1 Battery Installation
The thermometer comes with two CR2032 batteries. They may be pre-installed with a protective tab. If not, or if replacement is needed:
- Locate the battery compartment on the back of the device.
- Use a coin or small screwdriver to open the battery cover.
- Insert the two CR2032 batteries with the positive (+) side facing up.
- Close the battery cover securely.
5.2 Initial Power On
The thermometer will automatically power on when you open the foldable probe or insert the external probe into its socket.
6. Operating Instructions
6.1 Basic Temperature Measurement
- Open the foldable probe or connect the external probe. The device will power on.
- Insert the probe tip into the thickest part of the food, avoiding bones or gristle.
- Wait for 2-3 seconds for the temperature reading to stabilize on the LCD display.
- Remove the probe from the food.
- To turn off, fold the probe back into the housing or disconnect the external probe. The device will also auto-off after 10 minutes of inactivity.

Image 6.1: Demonstrating instant and accurate temperature reading with the thermometer.
6.2 Using the External Wired Probe
The external probe is ideal for monitoring temperatures inside ovens, grills, or smokers without opening the door, thanks to its 102cm (40 inch) braided stainless steel cable.
- Plug the external probe into the socket on the side of the thermometer.
- Insert the external probe tip into the food.
- Place the food in the oven/grill, ensuring the cable is not pinched or exposed to direct flame.
- Monitor the temperature on the main unit outside the cooking appliance.
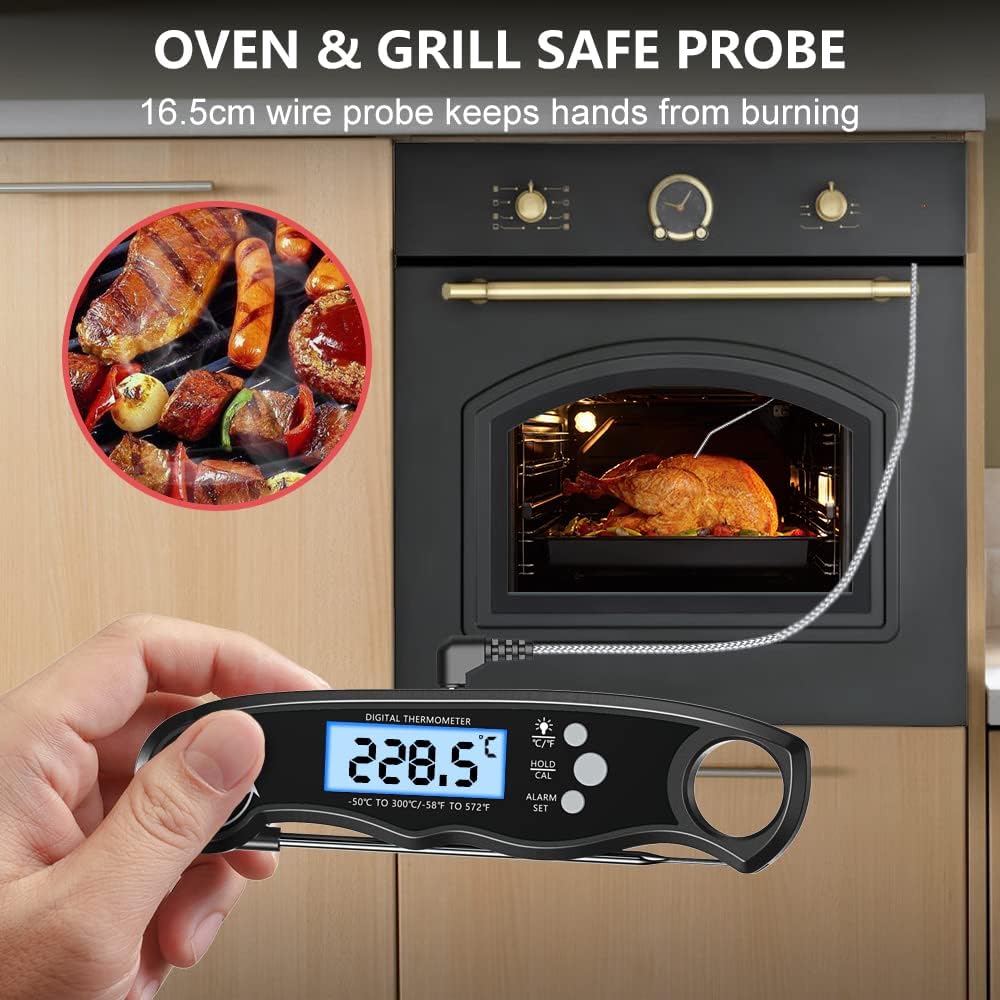
Image 6.2: The external probe allows safe temperature monitoring inside an oven or grill.
6.3 Setting the Temperature Alarm
The alarm function notifies you when your food reaches a desired temperature.
- Press the "ALARM SET" button once. The current target temperature will flash.
- Use the "℃/℉" button to increase the target temperature and the "HOLD/CAL" button to decrease it.
- Press "ALARM SET" again to confirm and activate the alarm.
- When the food reaches the set temperature, the thermometer will beep and the screen will flash.
- Press any button to stop the alarm.

Image 6.3: Steps for setting a custom temperature alarm.
6.4 Switching Temperature Units (℃/℉)
Short press the "℃/℉" button to toggle between Celsius and Fahrenheit display modes.
6.5 Backlight Function
Short press the backlight button (often combined with ℃/℉) to turn the LCD backlight on or off for better visibility in low light conditions.

Image 6.4: The backlit display enhances readability.
6.6 Data Hold Function
Short press the "HOLD/CAL" button to freeze the current temperature reading on the display. Press it again to release and resume live temperature monitoring.

Image 6.5: The data hold function allows you to lock the temperature reading.
6.7 Calibration
To ensure accuracy, you can calibrate the thermometer using an ice-water bath.
- Prepare a glass with crushed ice and fill it with cold water. Stir well.
- Insert the probe into the ice-water mixture, ensuring the tip is fully submerged but not touching the bottom or sides of the glass.
- Wait for the reading to stabilize (it should be close to 0℃ or 32℉).
- Long press the "HOLD/CAL" button for 3 seconds. The display will show "CAL" and then adjust to 0.0℃ or 32.0℉.
- Calibration is complete.

Image 6.6: Calibration using an ice-water bath.
7. Maintenance
7.1 Cleaning
- Always clean the probe thoroughly after each use with a damp cloth and mild soap.
- Do not immerse the main body of the thermometer in water, as it is not waterproof.
- Wipe the main unit with a soft, damp cloth.
- Ensure the probes are dry before storing.
7.2 Storage
- Fold the probe back into the housing for safe storage.
- Utilize the integrated magnet to attach the thermometer to a refrigerator or other metal surface.
- Use the hanging hole to store it on a kitchen hook.
- Store in a dry place, away from extreme temperatures.
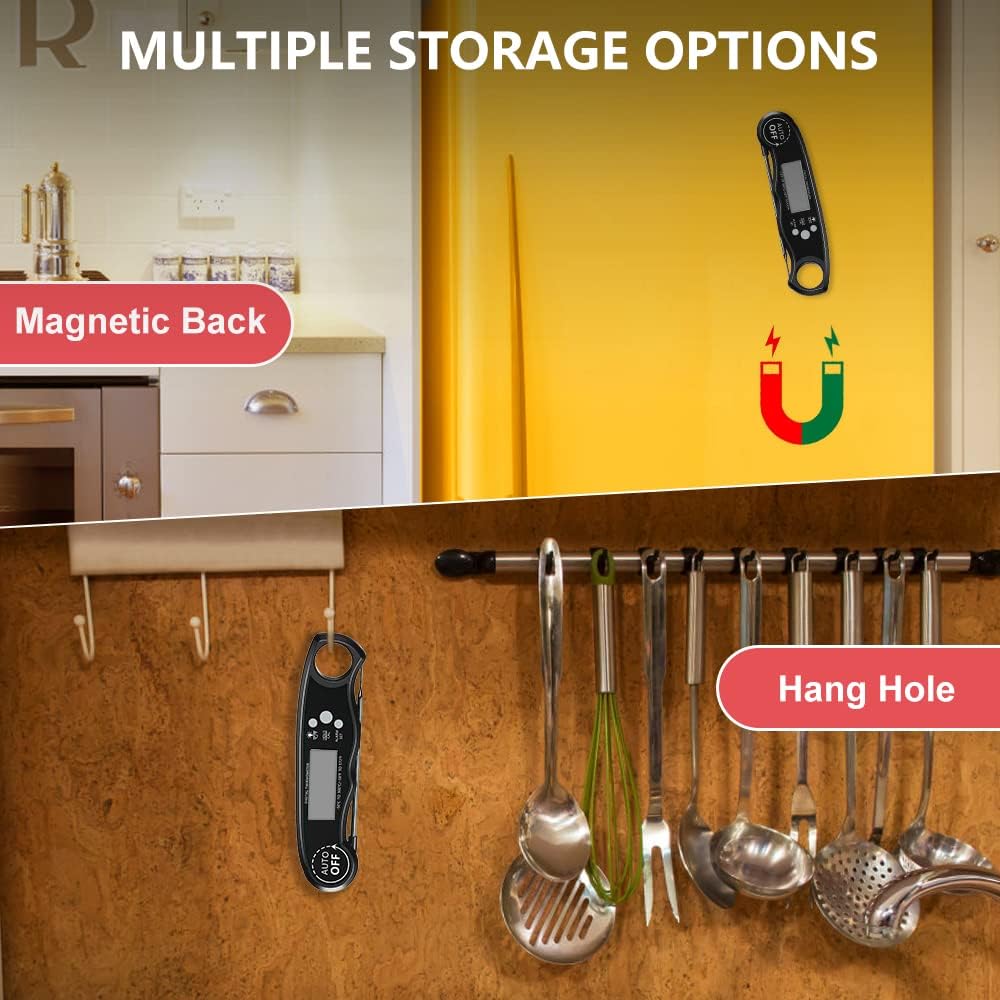
Image 7.1: Multiple storage options for convenience.
8. Troubleshooting
| Problem | Possible Cause | Solution |
|---|---|---|
| No display/Power off | Low battery; Probe not fully opened/inserted; Auto-off activated. | Replace batteries; Fully open the foldable probe or insert the external probe; Press any button to reactivate. |
| Inaccurate readings | Probe tip not in the thickest part of food; Needs calibration. | Ensure probe tip is correctly positioned; Perform ice-water bath calibration (refer to section 6.7). |
| Alarm not working | Alarm not set correctly; Volume too low (if applicable). | Review alarm setting steps (section 6.3); Ensure the environment is quiet enough to hear the alarm. |
| External probe not working | Probe not fully inserted; Damaged probe/cable. | Ensure the external probe is firmly plugged into the socket; Contact customer support if damaged. |
9. Specifications
- Model: DT68A
- Temperature Range: -50℃ to 300℃ (-58℉ to 572℉)
- Accuracy: ±1℃ (±2℉)
- Response Time: 2-3 seconds
- Probe Material: Food-grade 304 Stainless Steel
- Foldable Probe Length: 12 cm (4.7 inches)
- External Probe Cable Length: 102 cm (40 inches)
- Power Source: 2 x CR2032 Batteries
- Dimensions: 17.5 x 6.2 x 3.1 cm (6.9 x 2.4 x 1.2 inches)
- Weight: 100 g (3.5 oz)
- Certifications: CE
10. Warranty and Support
CIRYCASE offers a 2-year after-sales service and lifetime technical support for this product. If you encounter any issues or have questions regarding your CIRYCASE DT68A Digital Cooking Thermometer, please contact our customer support team. We aim to provide a rapid response within 24 hours.
For support, please visit the official CIRYCASE store or contact us through your purchase platform.


