1. Introduction
The AUTOOL CT160 is an advanced automotive fuel injector cleaner and tester designed for both automotive and motorcycle fuel injectors. This device integrates ultrasonic cleaning technology with microcomputer-controlled oil pressure for stable and precise testing. It supports simultaneous cleaning and testing of up to four fuel injectors, simulating various engine working conditions to accurately diagnose and clean injectors. Its compact design and ease of use make it suitable for small to medium-sized repair shops and DIY enthusiasts.

Figure 1: AUTOOL CT160 Main Unit and Included Accessories.
2. Safety Information
Always observe the following safety precautions to prevent personal injury or damage to the equipment:
- Operate the device in a well-ventilated area to avoid inhaling fumes from cleaning and testing fluids.
- Wear appropriate personal protective equipment (PPE), including safety glasses and chemical-resistant gloves.
- Ensure the power supply matches the device's requirements (220V).
- Do not use corrosive or flammable liquids other than recommended professional cleaning and testing fluids. Medical alcohol (75%+) can be used as an alternative if professional fluids are unavailable, but with caution.
- Keep the device away from open flames, sparks, and heat sources.
- Do not disassemble or modify the device. Refer all servicing to qualified personnel.
- Ensure all connections are secure before operation to prevent leaks.
- Keep children and unauthorized persons away from the operating area.
3. Product Overview and Components
The AUTOOL CT160 unit comprises a main body with an integrated ultrasonic cleaning bath and a test bench for injectors. It features a control panel for selecting functions and adjusting parameters.

Figure 2: Control Panel and Key Areas of the CT160.
Included Accessories:
- 1 * AUTOOL CT160 Fuel Injector Cleaner Tester Main Unit
- 1 * Funnel (for adding test fluid)
- 1 * Ultrasonic cleaning bracket (for placing injectors during cleaning)
- 1 * Micro seals (for auxiliary installation of special fuel injectors)
- 2 * Drain valves (for draining cleaning and test fluid)
- 1 * Locking rods (for fixing the oil separator)
- 1 * Locking nut (for fixing the oil separator)
- 1 * Extended plug (used to block holes on the oil separator)
- 4 * Upper inlet connectors (various sizes: φ9.8mm/φ11mm/φ10.6mm/φ10.5mm/φ13.5mm, for connecting injector top to oil separator hole)
- 3 * Plugs for oil separator (used to block holes on the oil separator)
- 1 * Drive signal line (used to transmit pulse signal, connect to injector signal input pin)
- 4 * Adapter cables (for transferring pulse signal line connector, instead of connecting injector signal input pin directly)
- 1 * Oil Separator (distribution device for pressurized test fluid output to injectors)
- 1 * Power cable (for connecting power)
- 1 * Seal kit (for sealing fuel injector and oil separator junction)
- 1 * User Manual (instructions)
4. Setup
Follow these steps for initial setup of your AUTOOL CT160:
- Unpacking: Carefully remove all components from the packaging and verify against the included accessories list.
- Placement: Place the main unit on a stable, level surface in a well-ventilated area.
- Power Connection: Connect the power cable to the unit and then to a suitable 220V power outlet. Ensure the power switch is in the OFF position before connecting.
- Fluid Preparation:
- Cleaning Fluid: Pour professional ultrasonic cleaning fluid into the ultrasonic bath. Ensure the fluid level is sufficient to cover the injector nozzles during cleaning.
- Test Fluid: Pour professional test fluid into the test fluid reservoir. Use the provided funnel to avoid spills.
- Injector Installation: Install the appropriate upper inlet connectors and secure the oil separator. Mount the injectors onto the test bench, ensuring they are properly sealed with the provided O-rings and the locking rods.

Figure 3: Fluid Heating Capability for Enhanced Cleaning.
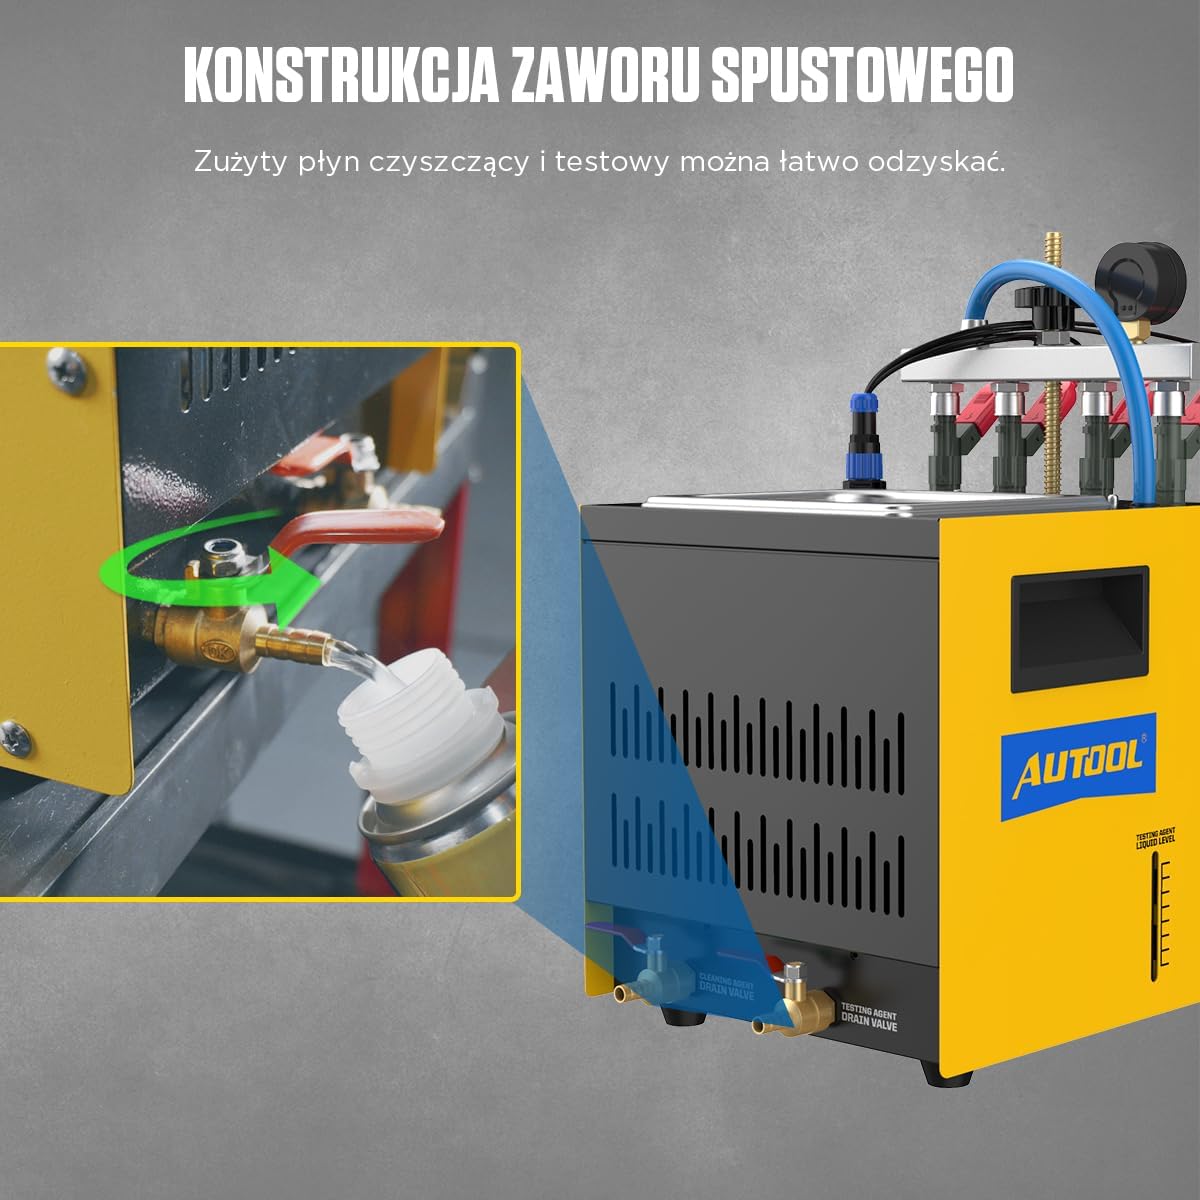
Figure 4: Drain Valve for Fluid Management.
5. Operating Instructions
The AUTOOL CT160 offers various functions for comprehensive injector maintenance. Ensure the unit is properly set up and fluids are at appropriate levels before beginning any operation.
5.1. Ultrasonic Cleaning
Ultrasonic cleaning uses high-frequency sound waves to agitate the cleaning fluid, effectively removing carbon deposits and impurities from the injectors.
- Place the injectors into the ultrasonic cleaning bath using the provided bracket. Ensure the nozzles are submerged in the cleaning fluid.
- Select the "Ultrasonic Cleaning" function on the control panel.
- Set the desired cleaning time. The unit can heat the cleaning fluid to 45°C for improved cleaning efficiency.
- Start the cleaning process. The unit will send pulse signals to the injectors during cleaning to facilitate the removal of internal deposits.
- Once cleaning is complete, remove the injectors and inspect them.

Figure 5: Ultrasonic Cleaning in Progress.
5.2. Injector Testing Functions
The CT160 simulates various engine conditions to test injector performance. Ensure injectors are securely mounted on the test bench and connected to the oil separator.

Figure 6: Control Panel with Function Menu.
Available tests include:
- Idle Test (0-20 ms): Simulates engine idling conditions to test injector status.
- Medium Speed Test (0-7.5 ms): Simulates engine operation at medium speed.
- High Speed Test (0-4 ms): Simulates engine high-speed performance.
- Acceleration Test: Simulates car acceleration conditions.
- Shift Speed Test: Simulates car gear shift conditions.
- Leak Test: Checks the sealing integrity of the fuel injector.
- Idle Spray Test: Observes injector spray performance at idle.
- Medium Speed Spray Test: Observes injector spray performance at medium speed.
- High Speed Spray Test: Observes injector spray performance at high speed.
- Unit Info: Displays product number and manufacturing date.
- Select the desired test function from the menu.
- Adjust parameters such as pulse width and injection times as needed using the control panel.
- Start the test. Observe the spray pattern, uniformity, and leakage in the graduated cylinders.
- Compare the results with expected values to diagnose injector performance.

Figure 7: Fuel Injector Testing in Progress.
6. Maintenance
Proper maintenance ensures the longevity and accurate performance of your AUTOOL CT160.
- Fluid Management: After each use, especially after cleaning, drain the used cleaning and test fluids using the drain valves (refer to Figure 4). Dispose of fluids according to local environmental regulations.
- Cleaning the Unit: Wipe down the exterior of the unit with a soft, damp cloth. Avoid using abrasive cleaners or solvents that could damage the finish or electronic components.
- Injector Adapters and Seals: Regularly inspect injector adapters and seals for wear and tear. Replace them as needed to ensure proper sealing and prevent leaks during operation.
- Storage: When not in use, store the unit in a clean, dry environment, away from direct sunlight and extreme temperatures.
7. Troubleshooting
This section provides solutions to common issues you might encounter with your AUTOOL CT160.
| Problem | Possible Cause | Solution |
|---|---|---|
| Unit does not power on. | Power cable not connected; Power switch off; No power from outlet. | Ensure power cable is securely connected; Turn power switch ON; Check power outlet with another device. |
| No fluid flow during testing. | Insufficient test fluid; Clogged filter; Pump malfunction. | Add more test fluid; Clean or replace filter; Contact customer support if pump is faulty. |
| Fluid leakage from injectors. | Improperly installed injectors; Worn O-rings/seals; Loose connections. | Reinstall injectors securely; Replace worn O-rings/seals; Tighten all connections. |
| Inconsistent spray pattern. | Injector still dirty; Damaged injector; Incorrect test parameters. | Perform additional ultrasonic cleaning cycles; Injector may need replacement; Verify test parameters are set correctly. |
8. Specifications
Technical specifications for the AUTOOL CT160 Fuel Injector Cleaner & Tester:
| Parameter | Value |
|---|---|
| Power Supply | 220V ± 10% |
| Frequency | 50Hz / 60Hz |
| Relative Humidity | <85% |
| Ambient Temperature | 0°C ~ 40°C |
| External Magnetic Field Strength | <400A/m |
| RPM Range | 0 ~ 7500 r/min |
| PWM Pulse Width | 0 ~ 20.0 ms (step 0.1 ms) |
| Working Time Setting | 0 ~ 10 min |
| Cleaning Frequency | 28 kHz |
| Cylinder Volume | 100 ml |
| Injection Times | 0 ~ 9900 times (step 100 ms) |
| System Pressure | 0 ~ 0.6 MPa |
| Ultrasonic Cleaning Power | 70 W |
| Main Unit Dimensions | 292 x 260 x 273 mm |
| Packaging Dimensions | 340 x 295 x 360 mm |
| Item Weight | 7.75 Kilograms |

Figure 8: Detailed Technical Specifications.
9. Warranty and Support
AUTOOL is committed to providing high-quality products and excellent customer service.
Warranty Information:
The AUTOOL CT160 comes with a three-year warranty from the date of purchase. During this period, AUTOOL commits to replacing parts free of charge for any manufacturing defects or malfunctions under normal use. This warranty does not cover damage caused by misuse, accident, unauthorized modification, or improper maintenance.
Customer Support:
For technical assistance, troubleshooting, or warranty claims, please contact AUTOOL customer support. Refer to the contact information provided on the product packaging or the official AUTOOL website. Please have your product model number and purchase date ready when contacting support.

Figure 9: AUTOOL's Commitment to Quality and Support.