
1. Introduction
This manual provides essential instructions for the safe and effective use of your Dekain BL-FP190E projector lamp. This replacement lamp is designed for compatibility with Optoma VDGTGZBZ projectors and features an original Osram bulb for optimal performance. Please read this manual thoroughly before installation and operation.
2. Safety Information
WARNING: Risk of electric shock and burns. Always disconnect power before servicing.
- Ensure the projector is completely powered off and unplugged from the electrical outlet before attempting any installation or maintenance.
- Allow the projector and the old lamp to cool down for at least 60 minutes before handling. Projector lamps operate at high temperatures and can cause severe burns.
- Do not touch the glass part of the new lamp with bare hands. Oils from your skin can cause hot spots and reduce lamp life. Use gloves or a clean cloth.
- Handle the lamp module carefully to avoid dropping or damaging it.
- Dispose of old lamps according to local regulations. Lamps contain mercury and other hazardous materials.
- Never operate the projector with the lamp cover removed.
3. Package Contents
Verify that your package contains the following items:
- 1 x Dekain BL-FP190E Projector Lamp Module (with original Osram bulb and compatible housing)
- 1 x User Manual (this document)
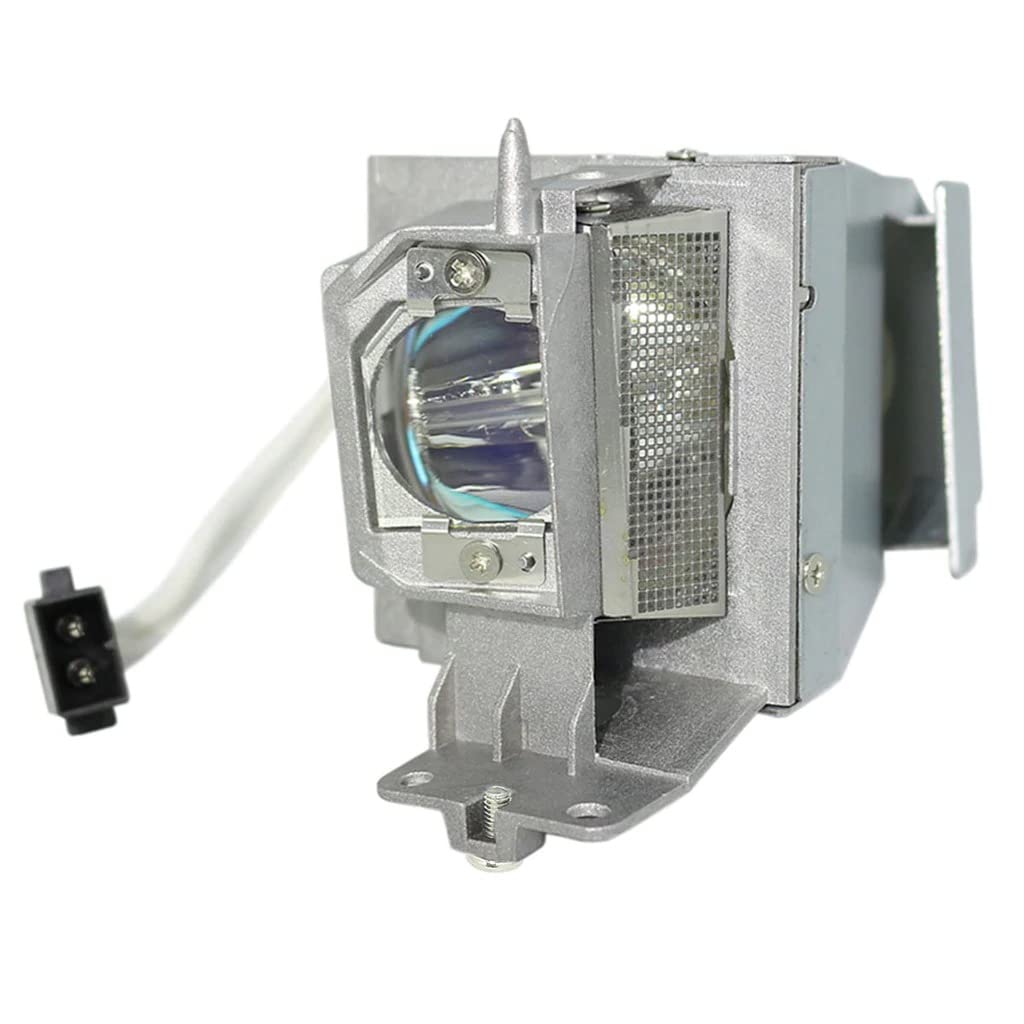
Image 1: Dekain BL-FP190E Projector Lamp Module. This image shows the complete lamp module, including the bulb and its housing, ready for installation.
4. Installation Instructions
Follow these steps to safely replace your projector lamp:
- Prepare the Projector: Power off your Optoma VDGTGZBZ projector completely and unplug it from the power outlet. Allow it to cool down for at least 60 minutes.
- Locate the Lamp Cover: Refer to your projector's user manual to locate the lamp cover. It is typically secured with one or more screws.
- Remove the Lamp Cover: Use a screwdriver to loosen the screw(s) holding the lamp cover in place. Carefully remove the cover.
- Remove the Old Lamp: Loosen the screw(s) that secure the old lamp module. Gently pull the handle on the lamp module to slide it out of the projector. Be careful not to force it.
- Install the New Lamp: Carefully insert the new Dekain BL-FP190E lamp module into the projector, ensuring it is seated firmly and correctly. Do not force the lamp.
- Secure the New Lamp: Tighten the screw(s) to secure the new lamp module in place.
- Replace the Lamp Cover: Reattach the lamp cover and tighten its screw(s).
- Reconnect Power: Plug the projector back into the power outlet.
- Reset Lamp Timer: Power on the projector. Navigate to the projector's menu settings and locate the "Lamp Timer Reset" option. Follow the on-screen instructions to reset the lamp timer. This is crucial for accurate lamp life tracking.

Image 2: Projector with lamp compartment visible. This image illustrates a typical projector setup, showing where the lamp module is usually accessed for replacement.
5. Operation
Once the lamp is installed and the timer reset, your projector is ready for operation. The Dekain BL-FP190E lamp is designed to provide bright and clear images. For specific operational details, such as adjusting picture settings or connecting devices, please refer to your Optoma VDGTGZBZ projector's original user manual.

Image 3: Projector emitting a light beam. This image depicts the projector in operation, casting a bright light beam, indicative of a functioning lamp.
6. Maintenance
Proper maintenance can extend the life of your projector and lamp:
- Cool Down: Always allow the projector to complete its cool-down cycle after use before unplugging it. This helps to prolong lamp life.
- Clean Filters: Regularly clean or replace the projector's air filters as recommended by the projector manufacturer. Clogged filters can lead to overheating and reduced lamp life.
- Environment: Operate the projector in a clean, dust-free, and well-ventilated environment. Avoid extreme temperatures.
- Handling: Avoid frequent on/off cycles, which can stress the lamp.
7. Troubleshooting
| Problem | Possible Cause | Solution |
|---|---|---|
| Projector does not turn on after lamp replacement. | Lamp not seated correctly, lamp cover not secured, or power issue. | Ensure the lamp module is fully inserted and secured. Check that the lamp cover is properly closed and screwed in. Verify power cable connection. |
| Image is dim or discolored. | Lamp nearing end of life (if not new), or projector settings. | If the lamp is new, check projector display settings. If the old lamp was dim, this new lamp should resolve it. |
| Lamp indicator light is on. | Lamp timer not reset, or lamp issue. | Reset the lamp timer in the projector's menu. If the issue persists, consult your projector's manual for specific error codes. |
For further troubleshooting, refer to your Optoma VDGTGZBZ projector's original user manual or contact Dekain customer support.
8. Specifications
| Feature | Detail |
|---|---|
| Brand | Dekain |
| Model Number | BL-FP190E |
| Compatible Projector | Optoma VDGTGZBZ |
| Light Type | Metal Halide (Original Osram Bulb) |
| Wattage | 190 Watt-hours |
| Bulb Shape Size | MR20 |
| Item Weight | 14.4 ounces |
| Package Dimensions | 6 x 6 x 5 inches |
9. Warranty and Support
Dekain projector lamps are manufactured to high-quality standards. For warranty information and customer support, please refer to the documentation provided with your purchase or visit the official Dekain website. Keep your purchase receipt as proof of purchase.
For technical assistance or inquiries, please contact Dekain customer service through the retailer where the product was purchased or via the contact information provided on the official Dekain website.