
1. Introduction
The DANOPLUS DP-104 is a portable wireless fish finder designed to assist anglers in locating fish and understanding underwater topography. It features a large color LCD screen, a rechargeable wireless sonar sensor, and a depth detection capability of up to 147 feet (45 meters). This manual provides detailed instructions for the proper setup, operation, and maintenance of your device.

Image 1.1: The DANOPLUS DP-104 Portable Wireless Fish Finder, showing the display unit and the yellow sonar sensor.
2. Package Contents
Please verify that all items listed below are included in your package:
- 1 x Fish Finder Display Unit
- 1 x Wireless Sonar Sensor
- 1 x User Manual (this document)
- 1 x USB Charging Cable
- 1 x AC Adapter
- 1 x Car Adapter
- 1 x Transparent Sensor Cover
- 1 x Carrying Tape
- 2 x Hooks
- 1 x User Guideline

Image 2.1: All components of the DANOPLUS DP-104 Fish Finder package, including the display unit, sonar sensor, cables, adapters, and documentation.
3. Product Overview
3.1 Display Unit
The display unit features a 2.4-inch color LCD screen and several control buttons for easy operation.

Image 3.1: Front and back view of the display unit with labels for LCD screen, antenna, Zoom button, Menu/Power button, Mode button, Left/Right arrow buttons, and charging port.
- LCD Screen: 2.4-inch color display for viewing sonar data.
- Antenna: For wireless communication with the sonar sensor.
- Zoom Button: Adjusts the zoom level of the sonar display.
- Menu / Power Button: Press and hold to power on/off. Press briefly to access or exit the menu.
- Mode Button: Switches between different display modes.
- Left/Right Arrow Buttons: Navigate through menu options and adjust settings.
- Charging Port: Located at the bottom of the unit for recharging the internal battery.
3.2 Wireless Sonar Sensor
The wireless sonar sensor is castable and automatically activates when submerged in water.

Image 3.2: Top and bottom view of the wireless sonar sensor with labels for charging port, working indicator (blue LED), charging indicator (red LED), and hole for fishing line.
- Charging Port: Located on the top, protected by a cap.
- Working Indicator (Blue LED): Illuminates when the sensor is active in water.
- Charging Indicator (Red LED): Illuminates during charging, turns off when fully charged.
- Hole for Fishing Line: Used to attach the sensor to your fishing line for casting.
- Attractive Lamp: The sensor features an attractive lamp that automatically turns on in water to help attract fish.
4. Setup
4.1 Charging the Device
Before initial use, ensure both the display unit and the wireless sonar sensor are fully charged. Use the provided USB charging cable with either the AC adapter or the car adapter.
- Display Unit: Connect the USB cable to the charging port on the bottom of the display unit.
- Sonar Sensor: Unscrew the cap on the top of the sonar sensor to reveal the charging port. Connect the USB cable. The red LED will illuminate during charging and turn off when complete. Ensure the cap is securely tightened after charging to prevent water ingress.
4.2 Powering On/Off
- To Power On: Press and hold the Menu / Power button until the screen illuminates.
- To Power Off: Press and hold the Menu / Power button until the screen turns off.
5. Operating Instructions
5.1 Deploying the Sonar Sensor
Attach the wireless sonar sensor to your fishing line using the designated hole. Cast the sensor into the water. The sensor will automatically activate upon contact with water, indicated by the blue LED light.

Image 5.1: Illustration of the wireless sonar sensor deployed in water, showing its 90-degree detection angle and 147 feet (45 meters) depth capability.
5.2 Basic Navigation
- Use the Left Arrow and Right Arrow buttons to navigate through menu options or adjust values.
- Press the Menu / Power button to enter a menu, confirm a selection, or exit a menu.
- Press the Mode button to cycle through different display modes (e.g., raw sonar, fish icon view).
- Press the Zoom button to adjust the zoom level on the sonar graph.
5.3 Application Scenarios
The DANOPLUS DP-104 is versatile and suitable for various fishing environments:
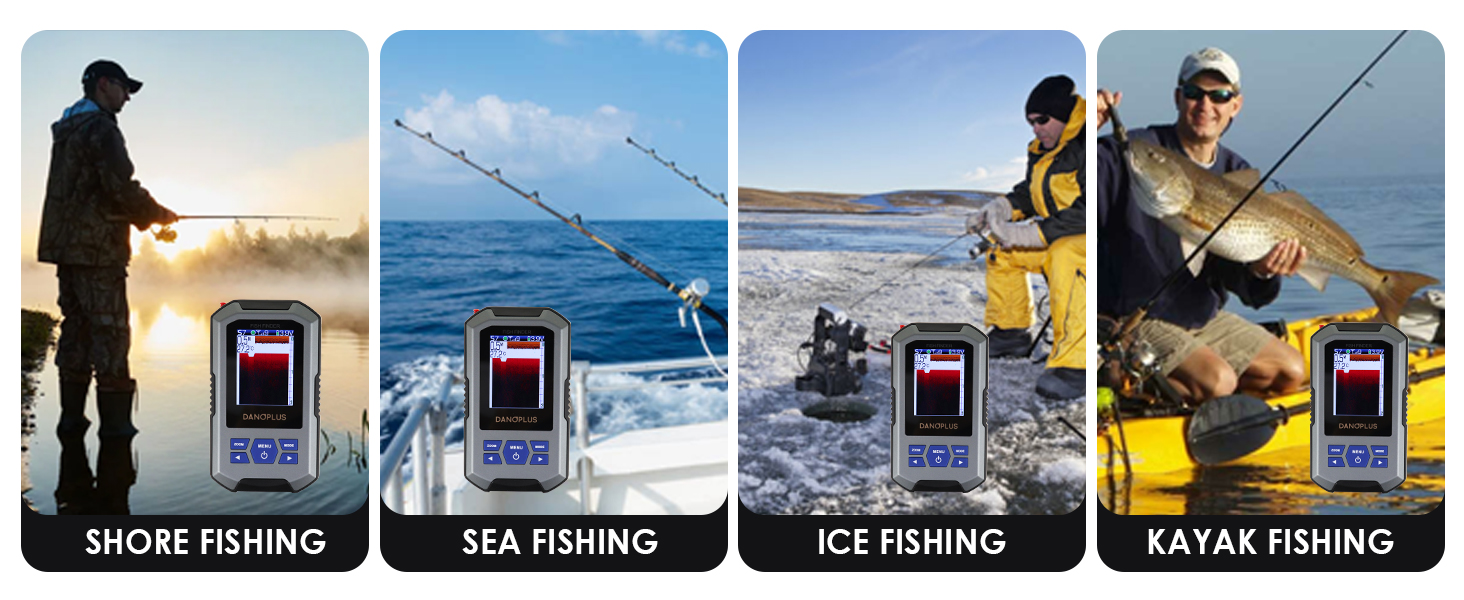
Image 5.2: The DANOPLUS DP-104 being used for shore fishing, sea fishing, ice fishing, and kayak fishing.
- Shore Fishing: Cast the sensor from the bank to scan the water.
- Sea Fishing: Ideal for use from small boats or kayaks.
- Ice Fishing: Place the sensor in a drilled hole to detect fish under the ice.
- Kayak Fishing: Easily attach and deploy the sensor from your kayak.
6. Display Interpretation
Understanding the information displayed on the screen is crucial for effective use of your fish finder.

Image 6.1: A detailed diagram labeling various elements on the fish finder screen, including sensitivity, water depth, water temperature, fish icons, bottom contour, and battery indicator.
- Sensitivity (S): Indicates the current sonar sensitivity level (e.g., S5).
- Sensor Connected Indicator: Shows if the wireless sensor is actively connected.
- Battery Indicator: Displays the remaining battery life of the display unit.
- Water Depth: Current depth of the water directly below the sensor.
- Water Temperature: Current water temperature.
- Depth Upper/Lower Limit: Defines the displayed depth range.
- Water Surface: Represents the water level.
- Fish Icon with Depth: Icons representing detected fish, often with their approximate depth.
- Bottom Contour: Graphical representation of the lake or river bed.
7. Settings
7.1 Language Selection
The DANOPLUS DP-104 supports 21 operating languages. To change the language:
- Press the Menu button to enter the main menu.
- Navigate to the 'Language' option using the Left/Right Arrow buttons.
- Press Menu to select.
- Use the Left/Right Arrow buttons to scroll through the available languages.
- Press Menu to confirm your selection.

Image 7.1: The display unit showing the list of 21 available languages for the user interface.
7.2 Sensitivity Adjustment
Adjusting the sonar sensitivity (1-10 levels) helps optimize detection based on water conditions and target size.
- Press the Menu button.
- Navigate to the 'Sensitivity' option.
- Press Menu to select.
- Use the Left/Right Arrow buttons to increase or decrease the sensitivity level (1-10).
- Press Menu to confirm.
Note: Higher sensitivity detects smaller objects and weaker signals but may also show more clutter or false readings in turbulent water. Lower sensitivity reduces clutter but may miss smaller fish.
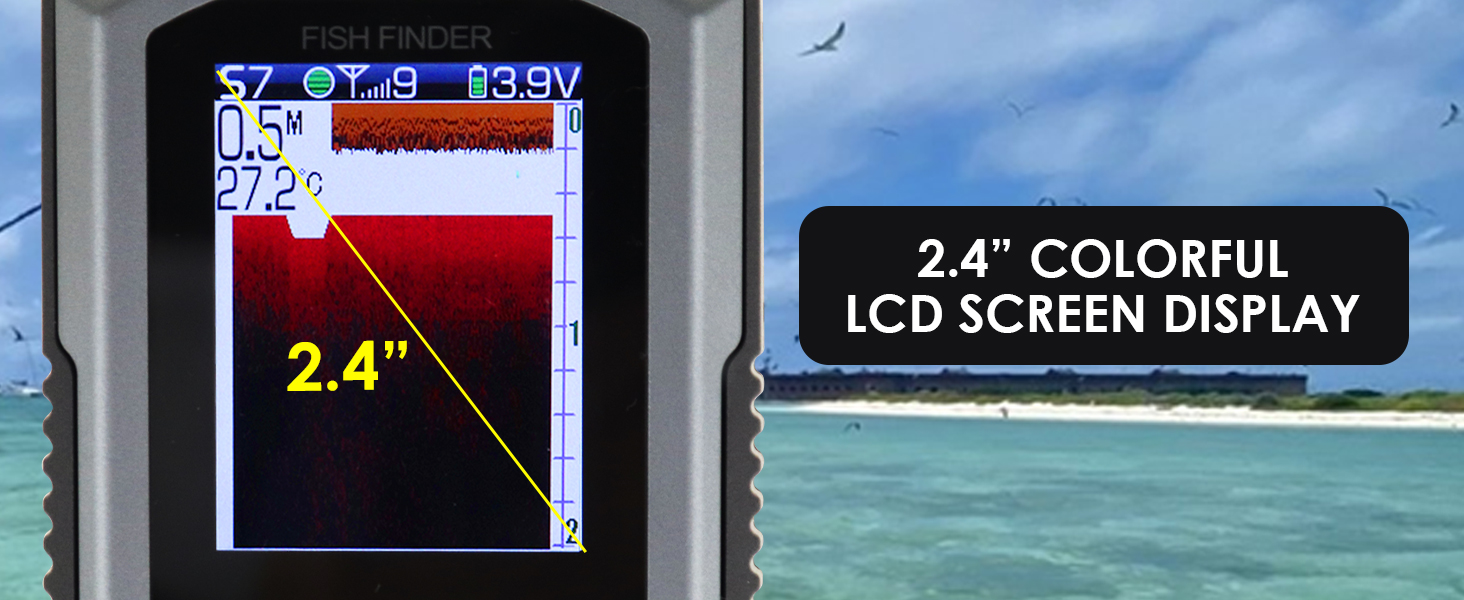
Image 7.2: The display unit showing the sensitivity adjustment bar, ranging from 1 to 10 levels.
7.3 Fish Alarm
The fish alarm feature provides an audible alert when fish are detected.
- Press the Menu button.
- Navigate to the 'Fish Alarm' option.
- Press Menu to select.
- Use the Left/Right Arrow buttons to toggle the alarm 'On' or 'Off'.
- Press Menu to confirm.
8. Maintenance
- Cleaning: After each use, wipe the display unit and sonar sensor with a soft, dry cloth. Avoid using abrasive cleaners or solvents.
- Storage: Store the device in a cool, dry place away from direct sunlight. Ensure both the display unit and sonar sensor are fully charged before long-term storage to preserve battery health.
- Sonar Sensor Cap: Always ensure the charging port cap on the sonar sensor is securely tightened when in use or stored to prevent water damage.
9. Troubleshooting
| Problem | Possible Cause | Solution |
|---|---|---|
| No signal from sonar sensor | Sensor not in water or not activated; low battery; out of range. | Ensure sensor is fully submerged; check sensor battery; move display unit closer to sensor. |
| Inaccurate depth readings | Sensor obstructed; high sensitivity in shallow/turbulent water. | Clear any debris from sensor; reduce sensitivity; ensure sensor is vertical. |
| Display unit not powering on | Low battery; power button not held long enough. | Charge the display unit; press and hold the Power/Menu button for 3-5 seconds. |
| Sonar sensor not charging | Charging cable/adapter faulty; charging port obstructed. | Try a different USB cable/adapter; ensure charging port is clean and dry. |
10. Specifications
- Brand: DANOPLUS
- Model Name: DP-104
- Power Source: Battery Powered
- Screen Size: 2.4 Inches
- Display Type: LCD
- Maximum Measuring Depth: 147 Feet (45 meters)
- Sonar Coverage: 90-degree detection angle
- Item Weight: Approximately 0.33 Pounds (150g)
- Product Dimensions: 4.92"L x 2.87"W x 0.98"H (12.5cm L x 7.3cm W x 2.5cm H)
- Material: ABS
11. Warranty and Support
11.1 Warranty Information
The DANOPLUS DP-104 Portable Wireless Fish Finder comes with a ONE YEAR WARRANTY from the date of purchase. This warranty covers manufacturing defects under normal use. Please retain your proof of purchase for warranty claims.
11.2 Customer Support
For further assistance, technical support, or warranty inquiries, please refer to the contact information provided in your user guideline or visit our official website.
Official Product Page: https://www.danoplus.com/dp-104
Manufacturer Contact: dp_global1us@gmail.com
