
i-Star 90081PI
I-Star Digital Alarm Clock User Manual
Model: 90081PI
Introduction
Thank you for choosing the i-Star Digital Alarm Clock. This portable and easy-to-use alarm clock features a clear LCD display, multiple alarm settings, and displays room temperature and humidity. This manual provides detailed instructions to help you set up and operate your new device.

Image: The i-Star Digital Alarm Clock displaying 9:30, Friday, May 3rd, 21°C, and 53% humidity.
Key Features
- Clear large digit LCD time display
- 12 hr and 24 hr clock display options
- Weekday and date display
- Set up to three alarms
- 5, 6 & 7 Day alarm setting options
- Touch control snooze and backlight function
- Room temperature and humidity display
Package Contents
- 1 x i-Star Digital Alarm Clock (Model: 90081PI)
- 1 x User Manual
Note: 2x AA batteries are required for operation and are not included in the package.
Setup
1. Battery Installation
The i-Star Digital Alarm Clock is powered by 2x AA batteries (not supplied). To install the batteries:
- Locate the battery compartment on the back of the clock.
- Slide open the battery compartment cover.
- Insert 2x AA batteries, ensuring the correct polarity (+ and -) as indicated inside the compartment.
- Close the battery compartment cover securely.
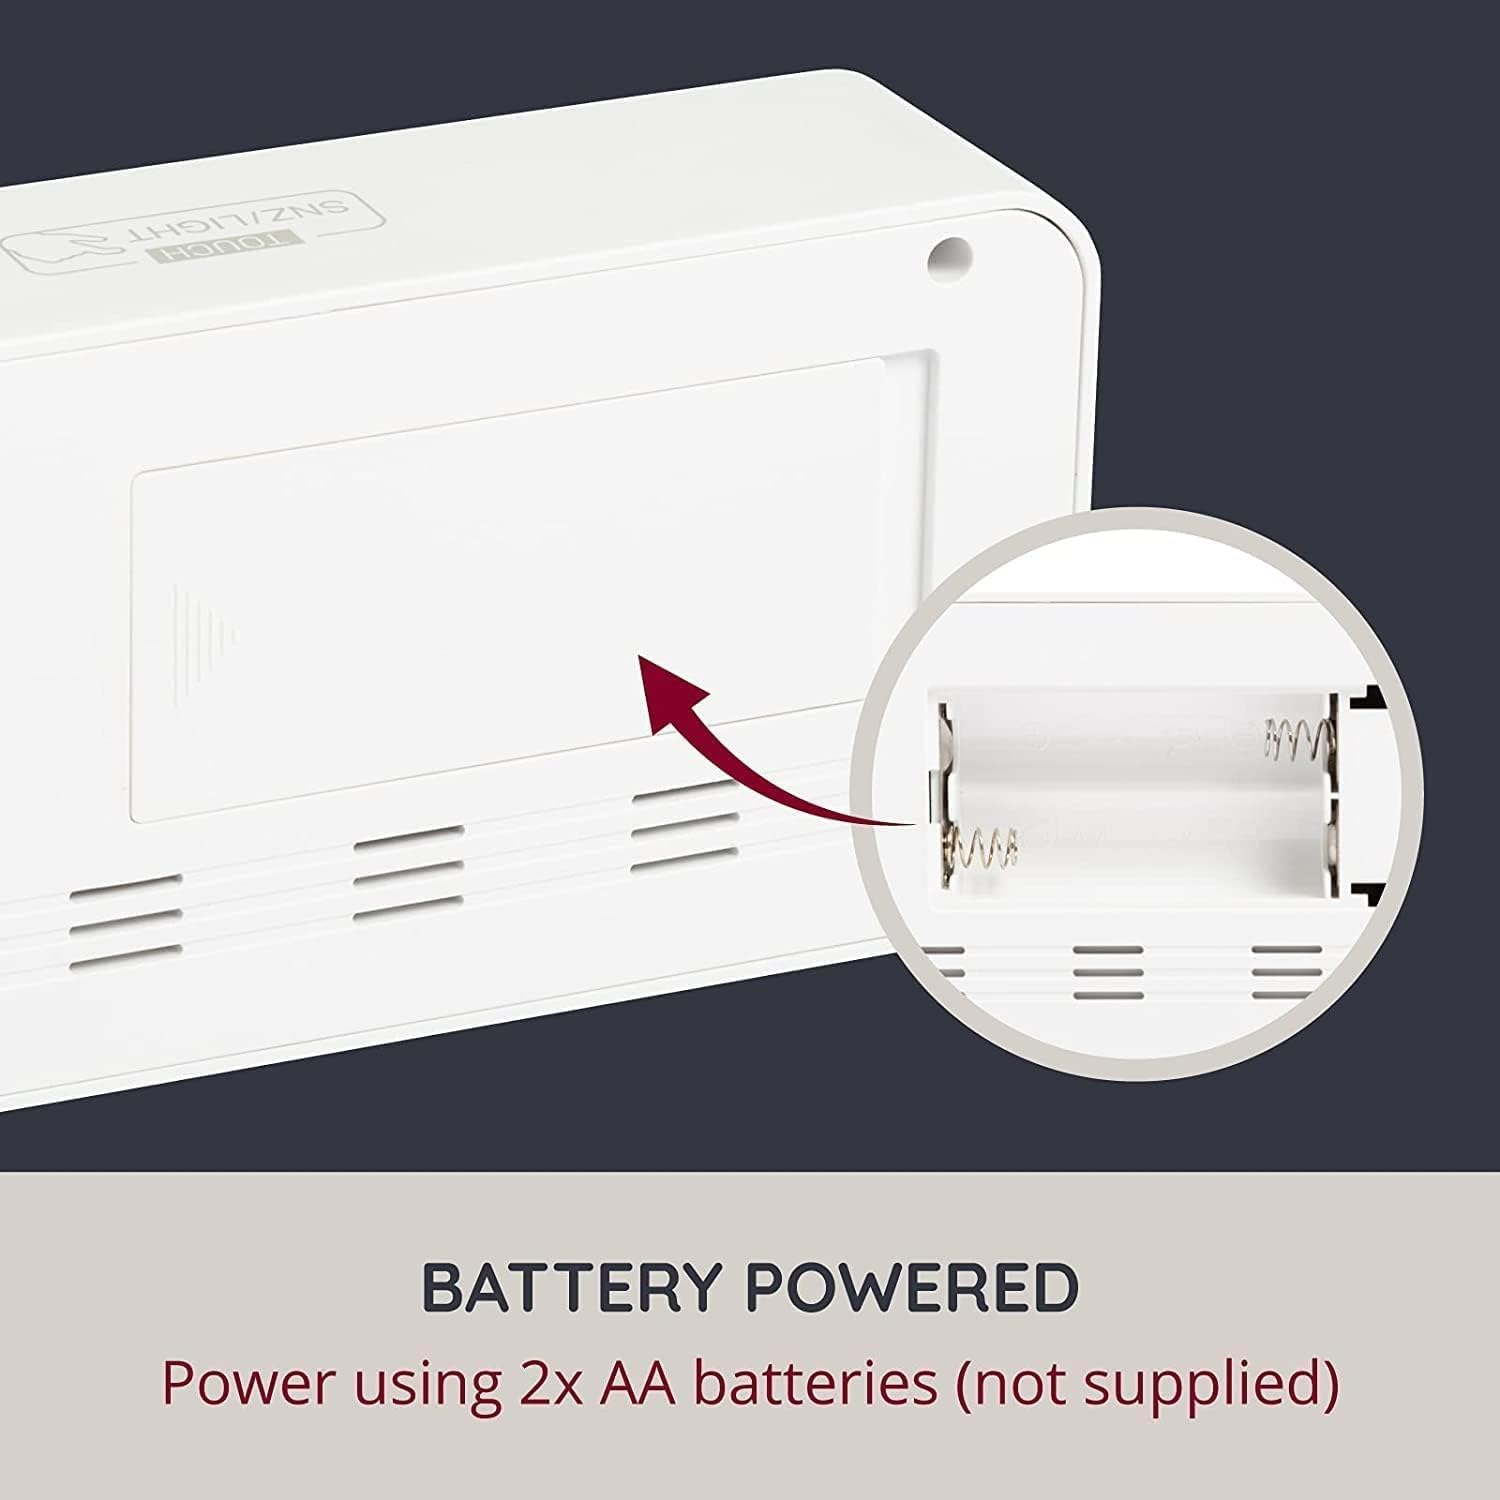
Image: Rear view of the alarm clock with the battery compartment open, indicating where to insert AA batteries.
2. Initial Power On
Once batteries are installed, the clock display will light up, and you can proceed to set the time and other functions.
Operating Instructions
The clock features control buttons typically located on the back or side, and a touch-sensitive area on the top for snooze/backlight.
Setting Time (12/24 Hour Format)
Refer to the specific buttons (e.g., 'SET', 'MODE', 'UP', 'DOWN') on your device to enter time setting mode. Typically, you press a 'SET' or 'MODE' button, then use 'UP'/'DOWN' to adjust hours and minutes, confirming each step with 'SET' or 'MODE'. You can usually toggle between 12-hour and 24-hour formats during this process.
Setting Date and Day
Similar to setting the time, enter the date setting mode. Adjust the year, month, and day using the 'UP'/'DOWN' buttons and confirm with 'SET' or 'MODE'. The weekday will automatically update based on the date.
Setting Alarms
This clock supports up to three independent alarms. To set an alarm:
- Press the 'ALARM' button (or similar) repeatedly to cycle through Alarm 1, Alarm 2, and Alarm 3 settings.
- When the desired alarm is displayed, press 'SET' (or similar) to enter its setting mode.
- Adjust the alarm hour and minute using 'UP'/'DOWN' buttons.
- Select the alarm schedule: 5-day (Monday-Friday), 6-day (Monday-Saturday), or 7-day (Monday-Sunday).
- Confirm settings. Ensure the alarm is activated (an alarm icon usually appears on the display).
Snooze Function
When an alarm sounds, touch the 'TOUCH SNZ/LIGHT' area on the top of the clock to activate the snooze function. The alarm will pause for a few minutes (typically 5-10 minutes) and then sound again. To turn off the alarm completely, press any other button on the clock.
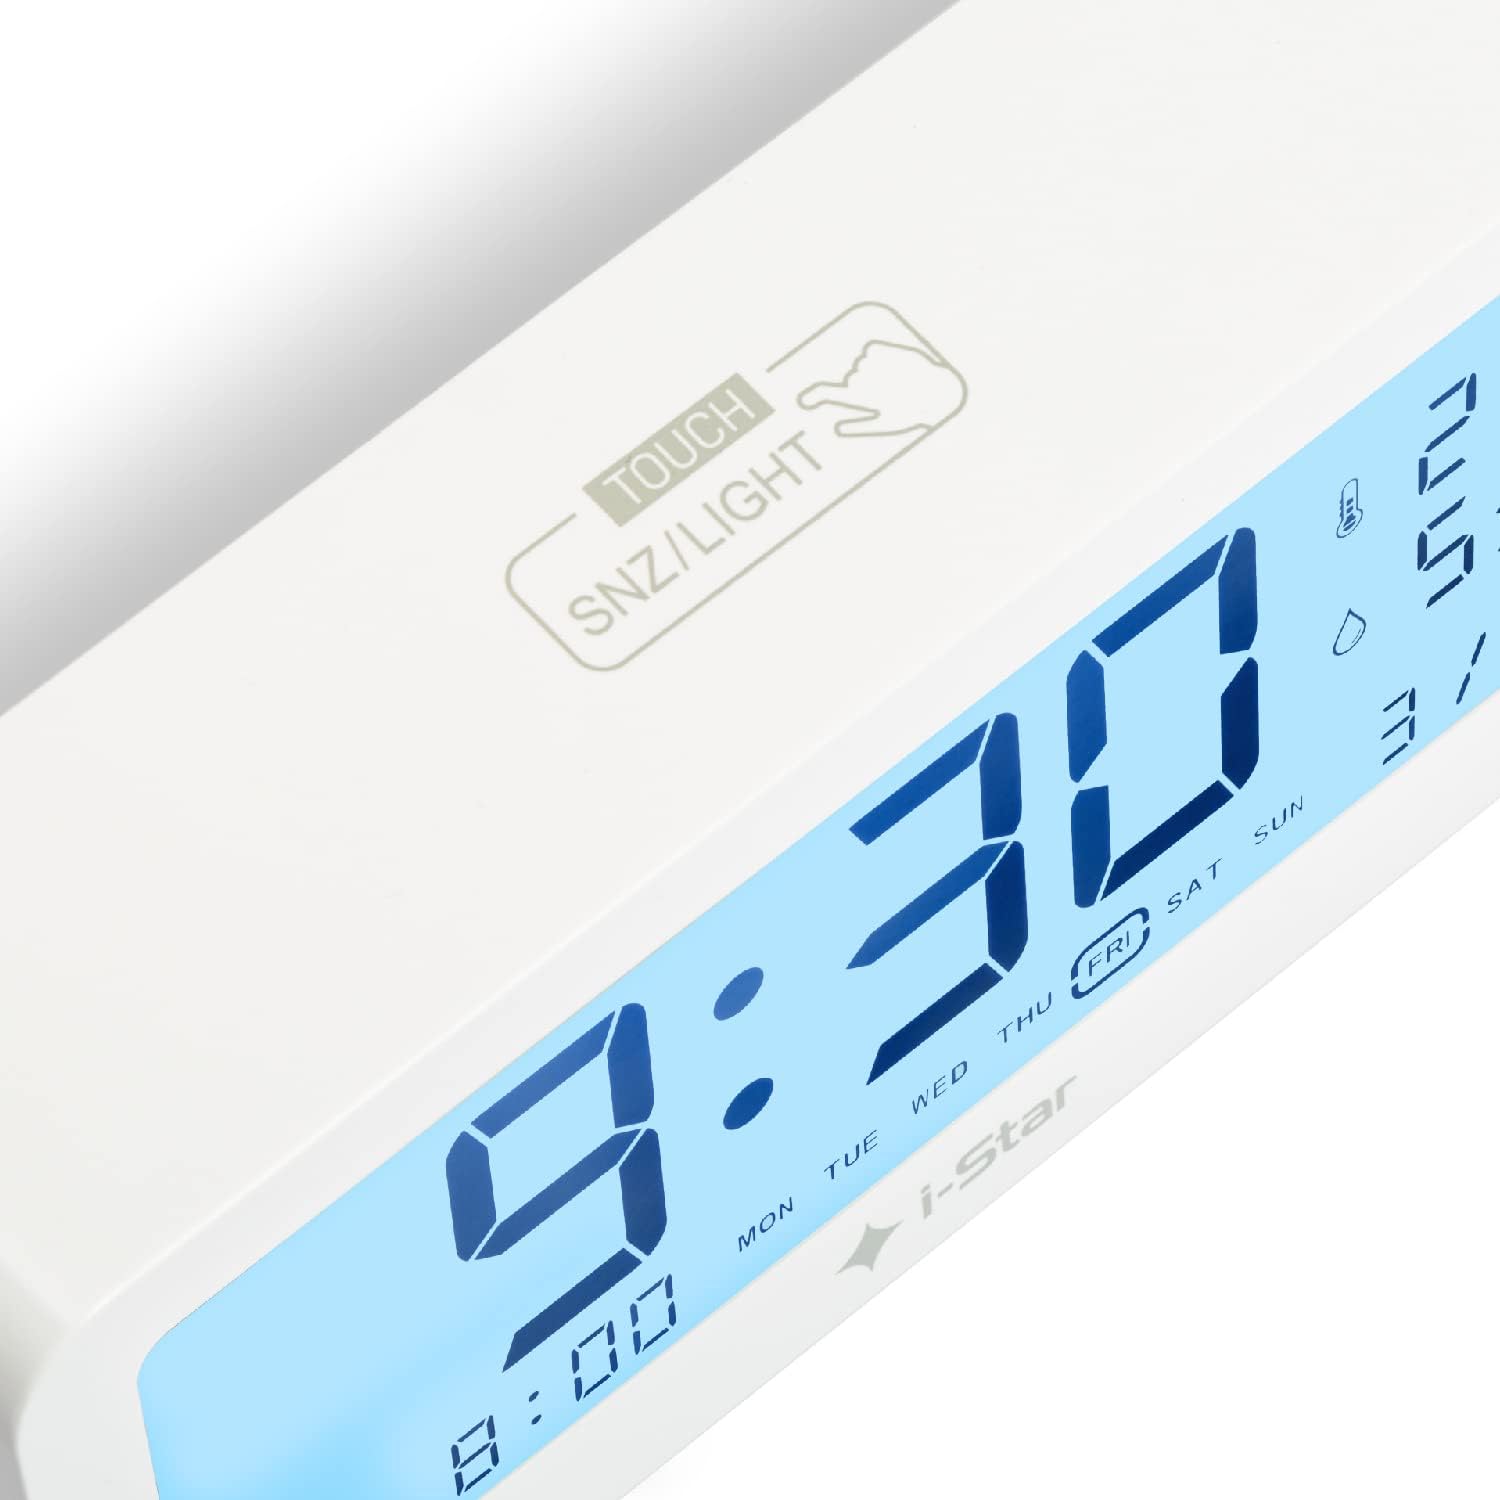
Image: A close-up view of the top surface of the alarm clock, highlighting the touch-sensitive area labeled 'TOUCH SNZ/LIGHT' for snooze and backlight control.
Backlight Control
The LCD display features a backlight for easy reading in low light conditions. Touch the 'TOUCH SNZ/LIGHT' area on the top of the clock to momentarily illuminate the display. This is useful for checking the time at night without disturbing sleep.

Image: A split image demonstrating the alarm clock's display in bright conditions (top, no backlight) and in dark conditions with the backlight activated (bottom).
Temperature and Humidity Display
The clock continuously displays the current room temperature and humidity. The temperature can typically be switched between Celsius (°C) and Fahrenheit (°F) by pressing a dedicated button (often labeled 'C/F' or integrated with another setting button).
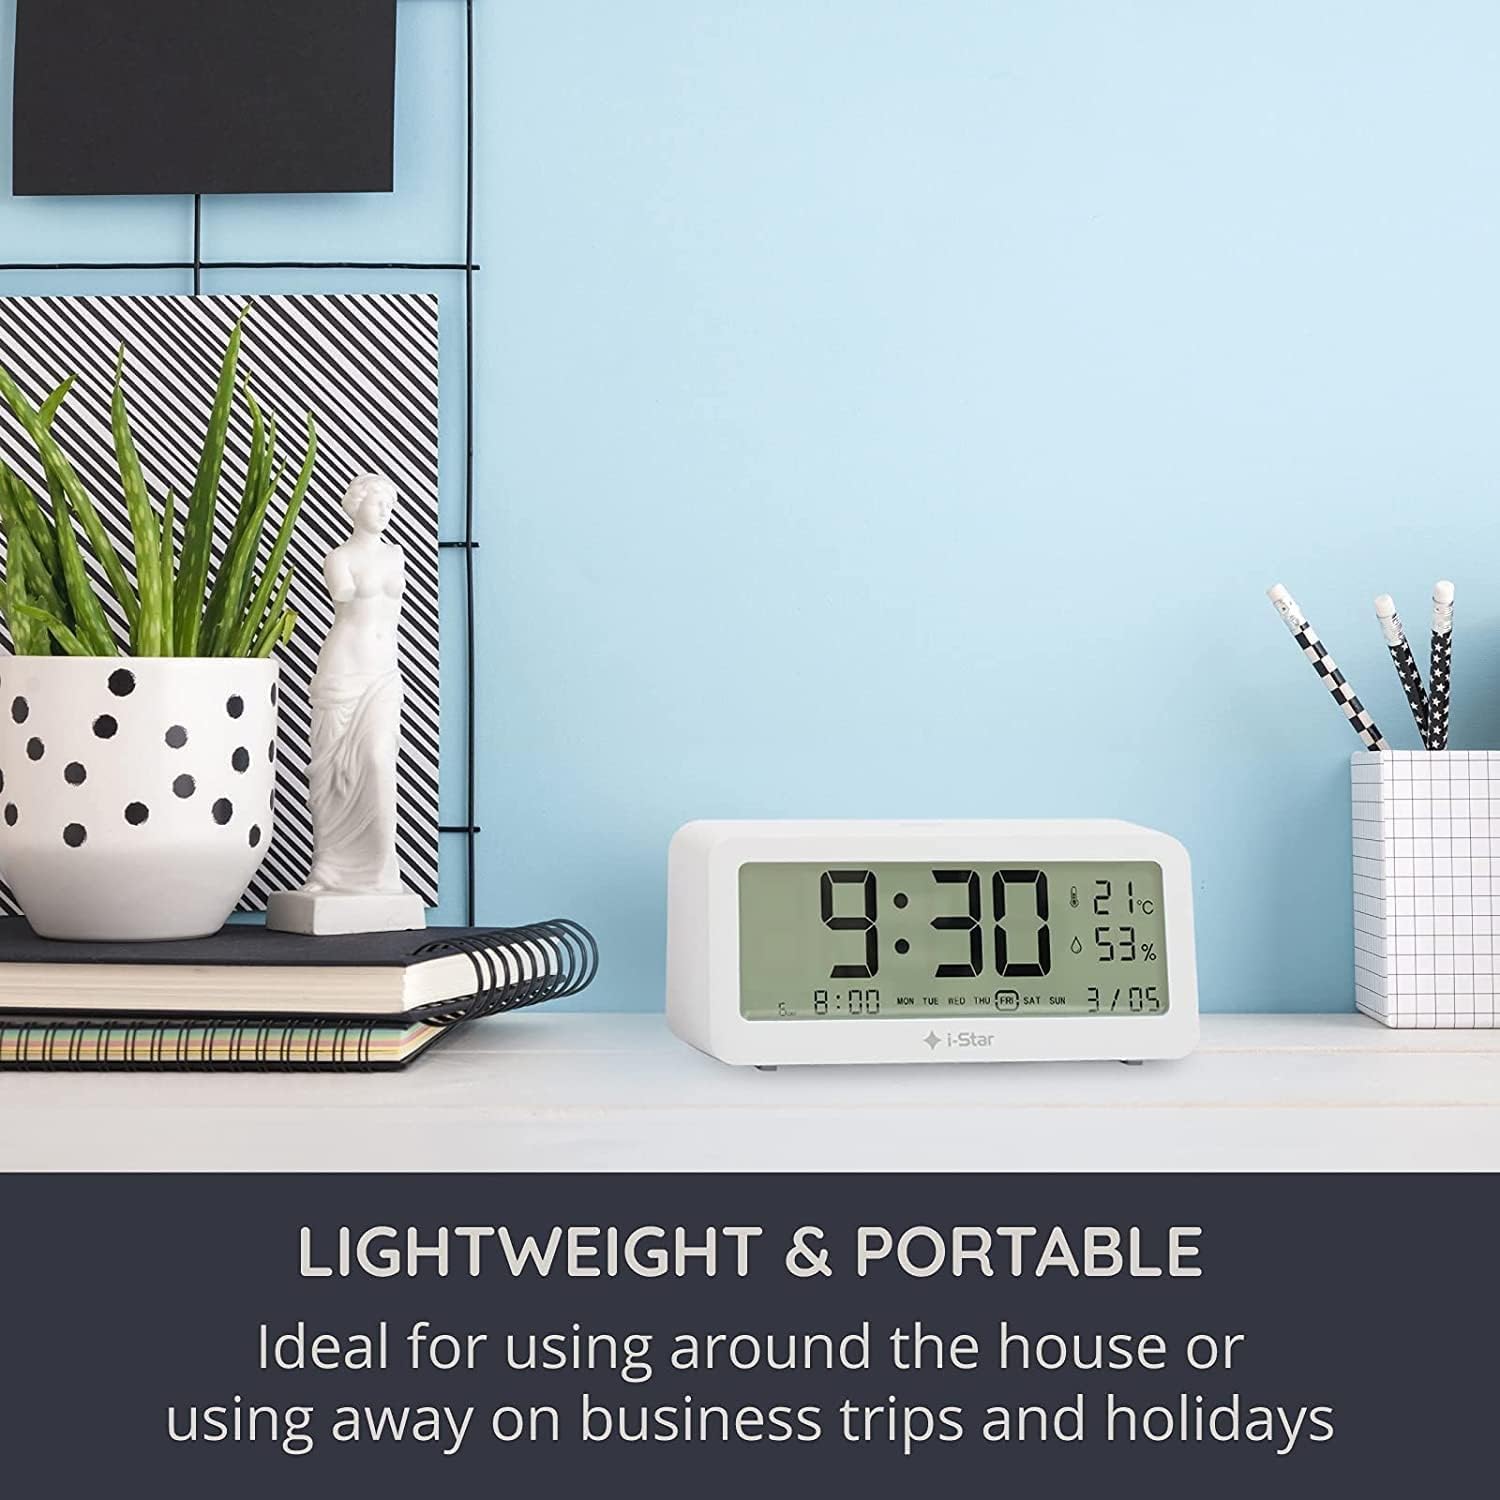
Image: The i-Star Digital Alarm Clock placed on a modern desk alongside books and a plant, illustrating its compact and portable design.
Maintenance
Cleaning
To clean your i-Star Digital Alarm Clock, gently wipe the surface with a soft, dry cloth. Do not use abrasive cleaners, solvents, or immerse the device in water. Keep the device away from excessive dust and moisture.
Battery Replacement
When the display dims or functions become erratic, it's time to replace the batteries. Follow the battery installation steps outlined in the Setup section.
Troubleshooting
- Display is blank or dim:
Check if the batteries are inserted correctly with the right polarity. Replace old batteries with new ones. - Alarm does not sound:
Ensure the alarm is set and activated (look for the alarm icon on the display). Check the alarm volume setting if applicable (though this model typically has a fixed alarm sound). - Incorrect time/date:
Re-enter the time and date settings following the operating instructions. Ensure you are confirming each step. - Temperature/Humidity readings seem inaccurate:
Ensure the clock is placed in a stable environment, away from direct sunlight, heat sources, or drafts, which can affect readings.
Specifications
| Feature | Detail |
|---|---|
| Brand | i-Star |
| Model Number | 90081PI |
| Display Type | Digital LCD |
| Power Source | Battery Powered (2x AA, not included) |
| Special Features | Temperature Display, Humidity Display, Alarm, Snooze, Backlight |
| Material | Plastic |
| Product Dimensions | 5 x 3.81 x 8 cm (approx.) |
| Item Weight | 200 g (approx.) |
| Colour | White |
Warranty and Support
For warranty information and customer support, please refer to the documentation provided at the time of purchase or contact your retailer. Keep your purchase receipt as proof of purchase.
Related documents90081PI


Ask a question about this manual
Ask about setup, troubleshooting, compatibility, parts, safety, or missing instructions. Manuals+ will review the question and use this page’s manual context to help answer it.