
Cook's Essentials CE117ICE-SS
Cook's Essentials 26-lbs Portable Stainless Steel Ice Maker
Model: CE117ICE-SS
Introduction
Thank you for purchasing the Cook's Essentials Portable Stainless Steel Ice Maker. This manual provides important information regarding the safe operation, installation, maintenance, and troubleshooting of your appliance. Please read this manual thoroughly before using the ice maker and retain it for future reference.
This ice maker is designed to produce up to 26 pounds of ice per day, featuring a 1/2-lb basket capacity and a digital LCD control for ease of use. Its compact and portable design makes it suitable for various settings.
Important Safety Instructions
To reduce the risk of fire, electric shock, or injury when using your ice maker, follow these basic precautions:
- Read all instructions before use.
- Do not touch the evaporator when the unit is making ice, as it can cause frostbite.
- Do not immerse cord, plug, or any part of the unit in water or other liquids.
- Close supervision is necessary when any appliance is used by or near children.
- Do not operate any appliance with a damaged cord or plug, or after the appliance malfunctions or has been damaged in any manner.
- Use only potable water.
- Do not block any ventilation openings.
- Do not use outdoors.
- Do not place on or near a hot gas or electric burner, or in a heated oven.
- Do not use for other than intended use.
- Unplug from outlet when not in use and before cleaning.
- Do not use abrasive cleaners or sharp objects to clean the unit.
Parts Identification
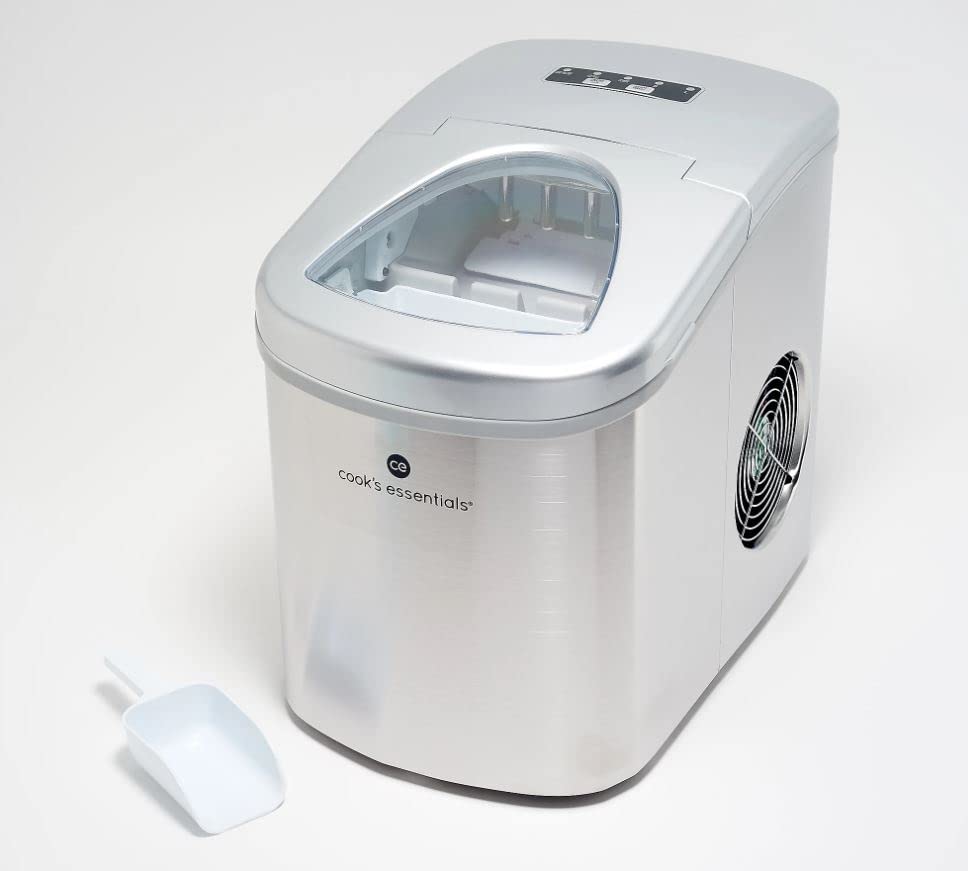
Figure 1: Front view of the Cook's Essentials Portable Ice Maker, showing its silver stainless steel finish and the included ice scoop. The transparent window on top allows for viewing the ice production.
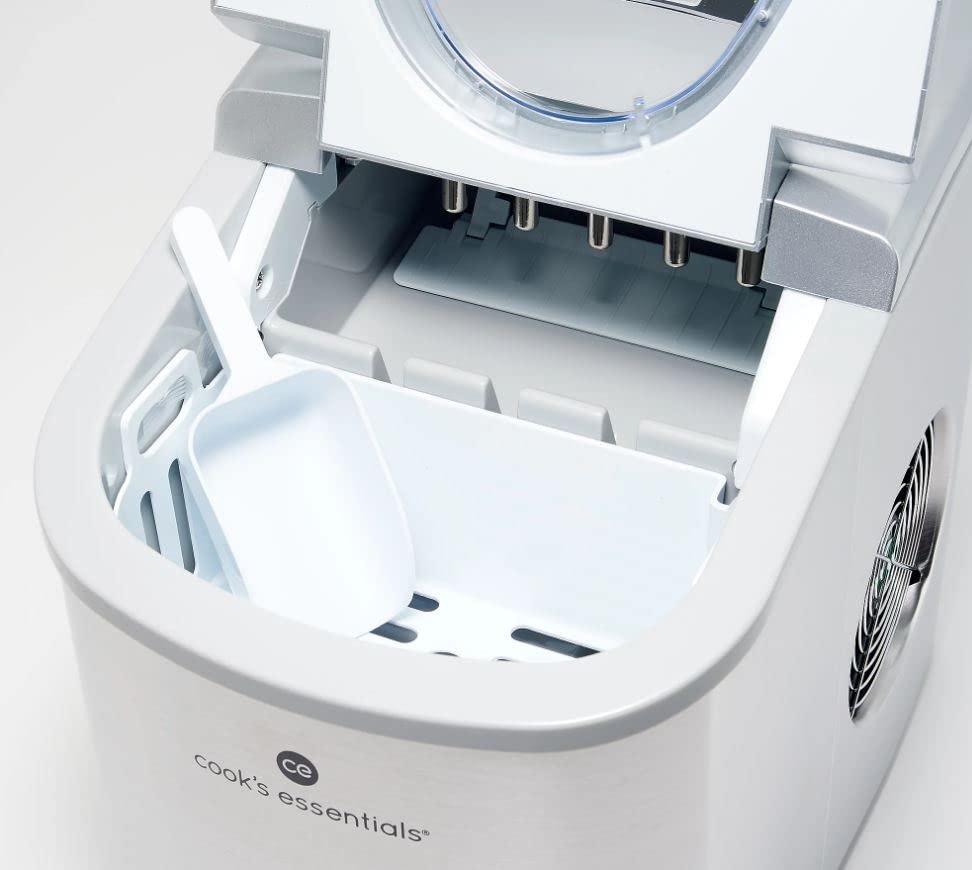
Figure 2: Interior view of the ice maker, highlighting the removable ice basket and the ice scoop placed inside. The ice-making mechanism is visible at the top.
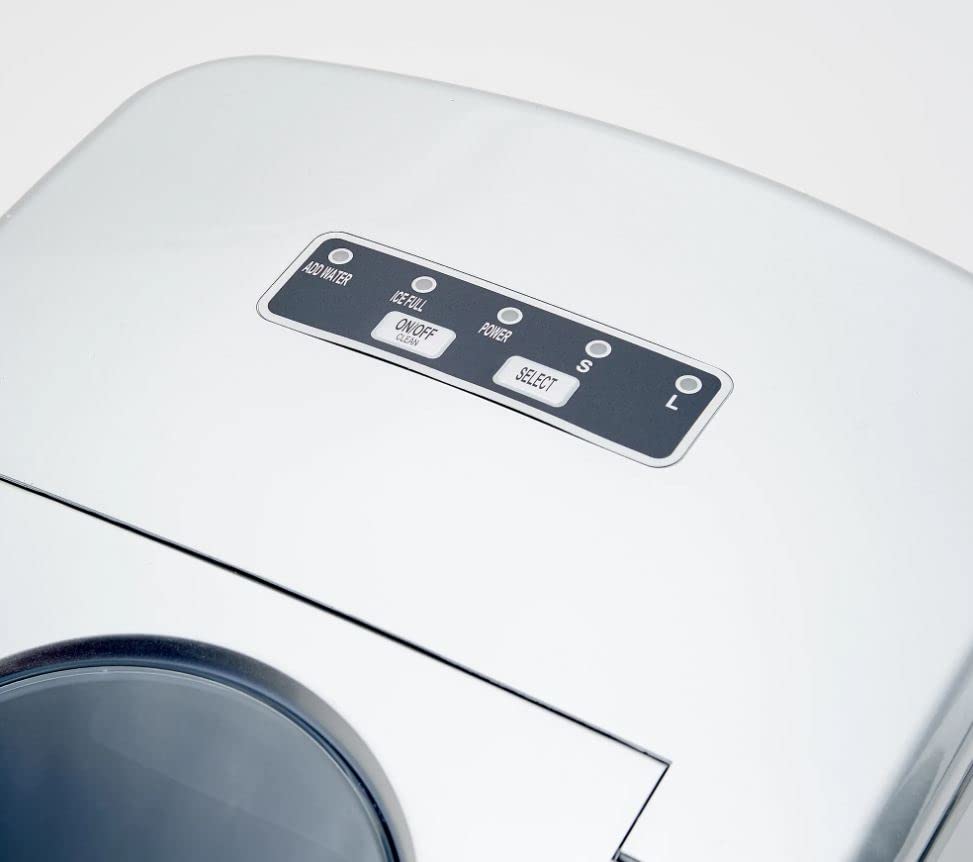
Figure 3: Close-up of the digital control panel located on the top of the ice maker. It features indicator lights for "ADD WATER", "ICE FULL", "POWER", and buttons for "ON/OFF" and "SELECT" (for ice size S/L).
The ice maker includes the main unit, an ice scoop, and an ice basket. Key features include a transparent window for monitoring ice levels and a digital LCD control panel.
Setup and Installation
- Unpacking: Carefully unpack your ice maker and remove all packaging materials. Ensure all parts are present: ice maker unit, ice basket, and ice scoop.
- Placement: Place the ice maker on a flat, stable surface away from direct sunlight and other heat sources (e.g., stoves, furnaces, radiators). Ensure there is at least 4 inches of space around the unit for proper ventilation.
- Initial Cleaning: Before first use, clean the interior of the ice maker. Refer to the "Maintenance and Cleaning" section for detailed instructions.
- Power Connection: Plug the ice maker into a grounded electrical outlet. Ensure the voltage matches the specifications of the unit.
- First Use Recommendation: For optimal performance, allow the unit to sit upright for at least 1 hour before plugging it in. Discard the first few batches of ice produced to ensure cleanliness.
Operating Instructions
Making Ice
- Add Water: Open the top cover and remove the ice basket. Fill the water reservoir with potable water up to the "MAX" fill line. Do not overfill.
- Power On: Close the top cover. Press the "ON/OFF" button on the control panel to turn on the unit. The "POWER" indicator light will illuminate.
- Select Ice Size: Press the "SELECT" button to choose your desired ice cube size: "S" for small or "L" for large. The corresponding indicator light will illuminate.
- Ice Production: The ice maker will begin the ice-making cycle. The first batch of ice typically takes 6-13 minutes, depending on the selected size and ambient temperature.
- Ice Full Indicator: When the ice basket is full, the "ICE FULL" indicator light will illuminate, and the unit will automatically stop making ice. Remove ice from the basket to resume production.
- Add Water Indicator: If the water level in the reservoir is too low, the "ADD WATER" indicator light will illuminate, and the unit will stop. Add more water to resume operation.
- Power Off: To stop ice production, press the "ON/OFF" button.
Self-Cleaning Mode
The ice maker features a self-cleaning function for convenient maintenance.
- Ensure the unit is empty of ice and water.
- Fill the water reservoir with water and a small amount of mild detergent or vinegar (optional, for descaling).
- Press and hold the "SELECT" button for 5 seconds to activate the self-cleaning mode. The "CLEAN" indicator light will illuminate.
- The cleaning cycle will run for approximately 20 minutes.
- Once complete, drain the water and rinse the interior thoroughly with clean water.
Maintenance and Cleaning
Regular cleaning and maintenance will ensure the longevity and optimal performance of your ice maker.
- Daily Cleaning: Drain any remaining water from the reservoir and wipe the interior with a soft, damp cloth after each use.
- Weekly Cleaning: Remove the ice basket and clean it with warm, soapy water. Rinse thoroughly. Clean the water reservoir and ice-making components with a solution of water and vinegar or a mild disinfectant. Rinse multiple times to remove any residue.
- Exterior Cleaning: Wipe the exterior of the unit with a soft, damp cloth. For stainless steel surfaces, use a stainless steel cleaner to maintain its luster.
- Storage: If storing the ice maker for an extended period, ensure it is completely dry. Drain all water, clean the unit, and leave the top cover slightly ajar to allow for air circulation and prevent mold or mildew growth. Store in a cool, dry place.
- Descaling: Over time, mineral deposits from water can build up. Use the self-cleaning function with a descaling solution (e.g., citric acid or vinegar) as needed.
Troubleshooting Guide
Before contacting customer service, please refer to the following table for common issues and their solutions.
| Problem | Possible Cause | Solution |
|---|---|---|
| Ice maker not working. | Unit not plugged in; power outage; fuse blown/circuit breaker tripped. | Ensure unit is plugged in firmly. Check power supply. Reset circuit breaker or replace fuse. |
| "ADD WATER" indicator light is on. | Water reservoir is empty or water level is too low. | Add potable water to the reservoir up to the MAX fill line. |
| "ICE FULL" indicator light is on. | Ice basket is full. | Remove ice from the basket. |
| Ice cubes are small or cloudy. | Water temperature too high; ambient temperature too high; mineral deposits. | Use colder water. Ensure unit is in a cool environment. Perform self-cleaning/descaling. |
| Ice maker is noisy. | Unit not level; fan obstruction; normal operating sounds. | Ensure unit is on a level surface. Check for obstructions around the fan. Some sounds (e.g., refrigerant flow) are normal. |
Product Specifications
| Feature | Detail |
|---|---|
| Model Number | CE117ICE-SS |
| Brand | Cook's Essentials |
| Ice Production Capacity | Up to 26 lbs per 24 hours |
| Ice Basket Capacity | 1/2 lb |
| Refrigerant | R134a |
| Control Type | Digital LCD |
| Construction Material | Stainless Steel |
| Dimensions (Package) | 12.1 x 11.1 x 8.8 inches |
| Weight (Package) | 19 Pounds |
| UPC | 058465817923 |
Warranty and Customer Support
For warranty information or technical assistance, please contact Cook's Essentials customer support. Details regarding warranty coverage are typically provided with your purchase documentation or can be found on the manufacturer's official website.
When contacting support, please have your model number (CE117ICE-SS) and purchase date ready.
Related documentsCE117ICE-SS


Ask a question about this manual
Ask about setup, troubleshooting, compatibility, parts, safety, or missing instructions. Manuals+ will review the question and use this page’s manual context to help answer it.