1. Introduction
This manual provides instructions for the safe and effective operation of your RDINSCOS MT68 Pinless Moisture Meter. Please read this manual thoroughly before use and retain it for future reference.
1.1 Safety Information
- Do not attempt to modify or repair the device.
- Keep the device away from water and extreme temperatures.
- Remove batteries if the device will not be used for an extended period.
- Avoid using the device near strong electromagnetic fields.
2. Product Overview
The RDINSCOS MT68 Pinless Moisture Meter features a non-invasive ball sensor for detecting moisture without damaging surfaces.

Image: Front view of the RDINSCOS MT68 Pinless Moisture Meter, showing the ball sensor, LCD display, and control buttons.
2.1 Components and Display

Image: Detailed view of the MT68's display and buttons, highlighting the display screen, indicator light, power button, UP button, Measure/Hold button, alarm threshold setting button, Down/Flashlight button, and battery compartment.
- Display Screen: Shows measured values, battery level, and other indicators.
- Indicator Light: Tri-color LED (Green for DRY, Yellow for RISK, Red for WET).
- Power Button: Turns the device on/off.
- UP Button: Used for navigation and setting adjustments.
- Measure/Hold Screen Button: Initiates measurement or holds the current reading.
- Alarm Threshold Setting Button: Adjusts the moisture alarm levels.
- Down/Flashlight Button: Used for navigation and activating the built-in flashlight.
- Battery Compartment: Located at the back for battery installation.
3. Setup
3.1 Battery Installation
- Open the battery compartment cover on the back of the device.
- Insert three AAA batteries, ensuring correct polarity (+/-).
- Close the battery compartment cover securely.
The device will power on automatically or can be turned on using the Power button.
4. Operating Instructions
4.1 Basic Measurement
- Press the Power button to turn on the device.
- Place the ball sensor flat against the surface to be measured. Ensure there is no metal within 2 inches of the testing area.

Image: Illustration showing correct and incorrect placement of the moisture meter, emphasizing the need to avoid metal objects like rebar or pipes within 2 inches of the measurement area.
- The display will show the moisture level. The tri-color LED indicator will light up: Green for Dry, Yellow for Risk, Red for Wet.
- For optimal accuracy, the measured material thickness should be greater than 20-40 mm.

Image: Diagram illustrating the measurement depth of the ball sensor, showing optimal performance for material thickness greater than 20-40mm (up to 40mm or 1.57 inches).
- Press the Measure/Hold button to hold the current reading on the display. Press again to release.
4.2 Material Selection and Alarm Thresholds
The MT68 allows users to set moisture alarm thresholds for different materials. Refer to the reference table below for guidance.

Image: A table showing recommended LCD display digit ranges and corresponding moisture levels (DRY, RISK, WET) for Plaster and Anhydrite, Cement-based materials, and Wood. This image also shows the meter displaying a reading of 19.0.
To adjust alarm thresholds:
- Press the Alarm threshold setting button.
- Use the UP and Down buttons to navigate through material types or adjust threshold values.
- Confirm your selection.
4.3 Flashlight Function
The built-in LED flashlight can be activated for use in dimly lit environments.

Image: The MT68 moisture meter with its flashlight illuminated, demonstrating its use in a dark environment. The image also indicates a 30-minute auto power-off feature.
Press the Down/Flashlight button to turn the flashlight on or off.
4.4 Auto Power Off
The device features an automatic power-off function after approximately 30 minutes of inactivity to conserve battery life.
5. Maintenance
5.1 Cleaning
Wipe the device with a soft, dry cloth. Do not use abrasive cleaners or solvents.
5.2 Storage
Store the meter in a dry, cool place, away from direct sunlight and extreme temperatures. Remove batteries if storing for extended periods.
6. Troubleshooting
6.1 Common Issues
| Problem | Possible Cause | Solution |
|---|---|---|
| No display/Device won't turn on | Low batteries; Incorrect battery installation | Replace batteries; Check battery polarity |
| Inaccurate readings | Interference from metal objects; Sensor not flat on surface; Material too thin | Ensure no metal within 2 inches; Place sensor flat; Ensure material thickness > 20mm |
| Alarm constantly active | High moisture levels; Incorrect alarm threshold settings | Verify moisture levels; Adjust alarm thresholds for the material |
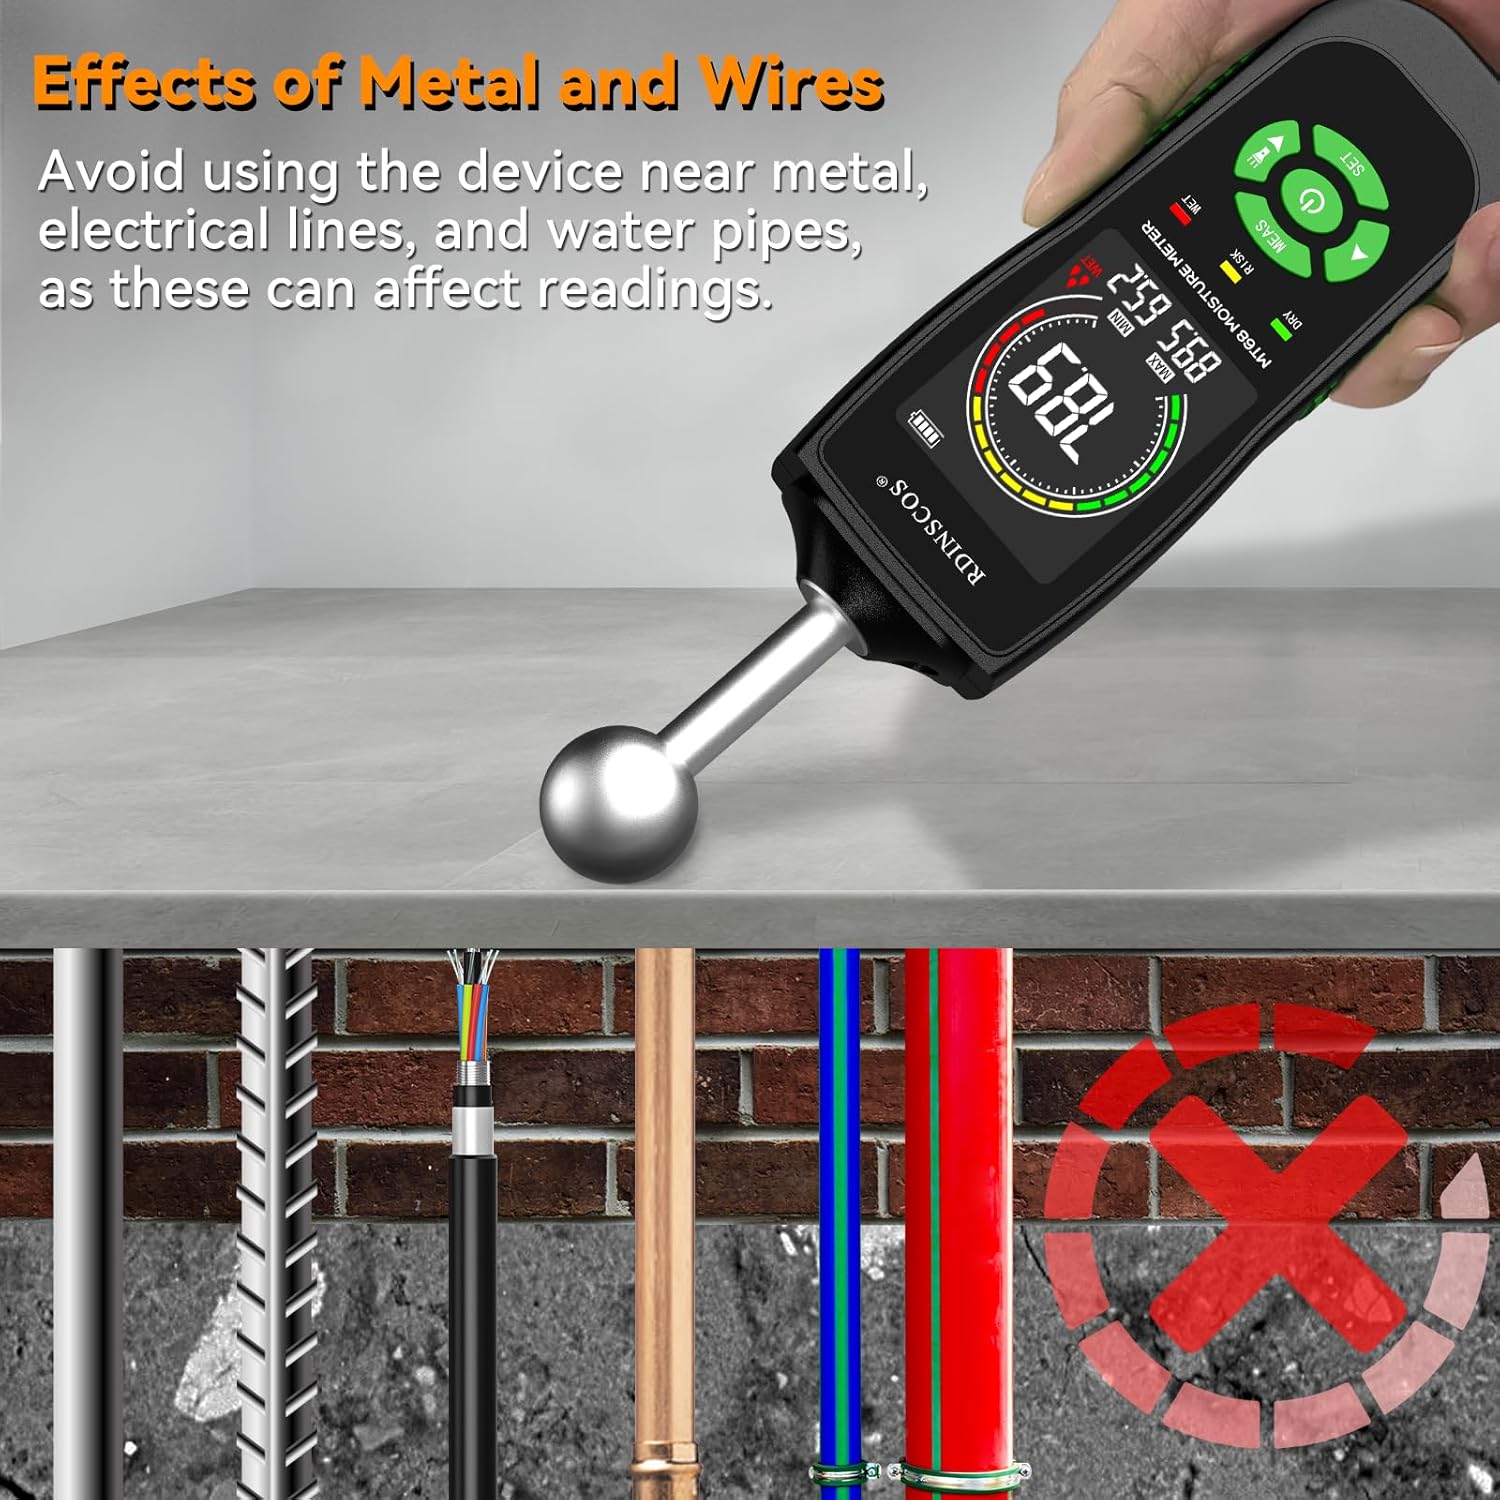
Image: An illustration demonstrating how metal objects like rebar, electrical lines, and water pipes can affect the moisture meter's readings, advising users to avoid these areas.
7. Specifications
7.1 Technical Data
- Model: MT68
- Measurement Principle: Non-invasive ball sensor
- Display: LCD with tri-color LED indicator
- Power Source: 3 x AAA batteries
- Auto Power Off: Approximately 30 minutes
- Dimensions: 18 x 6 x 4 cm
- Weight: 249 g
- Included Components: 1*Wood Moisture Meter; 3*AAA battery
8. Warranty and Support
8.1 Customer Support
For technical assistance, warranty information, or service inquiries, please contact RDINSCOS customer support through your retailer or the official brand website. Keep your purchase receipt as proof of purchase.


