
1. Introduction
This manual provides essential information for the installation, operation, and maintenance of your AUTO-VOX Solar4 Wireless Backup Camera. This camera is designed to enhance your vehicle's safety by providing a clear, wide-angle view behind your vehicle, especially during reversing maneuvers. It features 1080P resolution, infrared (IR) night vision, and a built-in rechargeable battery for convenient, wire-free operation.
The AUTO-VOX Solar4 camera is specifically designed to work with the AUTO-VOX Solar4 rear camera system. It cannot be used with other devices or brands.
2. Product Features
- 1080P High-Definition Video: Provides clear and detailed images for improved visibility.
- Super IR Night Vision: Equipped with 2 powerful infrared LEDs to deliver a sharp image in low-light conditions, enhancing night driving safety.
- Built-in Rechargeable Battery: Operates independently of the vehicle's electrical system, eliminating the need for complex wiring to the reversing light.
- Wireless Connectivity: Simplifies installation and allows flexible placement.
- Durable and Weatherproof Design: Rated IP67 for water resistance and designed to withstand extreme temperatures from -20°C (-4°F) to 65°C (149°F).
3. Setup and Installation
3.1 Initial Charging
Before first use, ensure the camera is fully charged via the provided USB cable. This ensures optimal battery performance.
3.2 Physical Installation
The camera's built-in battery allows for flexible installation without needing to connect to the vehicle's reversing light. Choose a suitable location on your vehicle for optimal rear view coverage.

Image: Two-step installation process. First, secure the mounting bracket, then slide the camera into place.
3.3 Pairing the Camera with Your Monitor
To establish a connection between the camera and your AUTO-VOX Solar4 monitor, follow these pairing steps:
- On your monitor, press the M button to access the menu.
- Navigate to the Pair option and select Cam2 to enter the pairing page.
- On the camera, press and hold the power switch for approximately 8 seconds until the blue indicator light on the camera begins to flash.
- The camera will automatically attempt to pair with the monitor. Once pairing is successful, the camera's image will appear on the monitor.
Note: The pairing process has a default time limit of 30 seconds. If pairing is not successful within this period, the process will stop, and the monitor will enter standby mode. In such a case, please repeat the pairing steps. For any pairing difficulties, contact customer service.

Image: Visual guide for pairing the camera to the monitor.
4. Operation
4.1 General Use
Once paired and installed, the camera will transmit a live 1080P video feed to your AUTO-VOX Solar4 monitor. This feed provides a wide-angle view of the area behind your vehicle, assisting with reversing and parking.
4.2 Night Vision
The camera automatically activates its Super IR Night Vision in low-light conditions. The two powerful infrared LEDs illuminate the area, providing a clear image even in complete darkness, significantly improving safety during night operations.

Image: Comparison of a scene at night without and with IR night vision, demonstrating enhanced visibility.
4.3 Battery Life
The integrated 6600mAh battery provides extended operation, making it suitable for long journeys without frequent recharging.

Image: Illustration of the camera's 15-hour battery life, suitable for extended travel.
4.4 Multiple Camera Support
The Solar4 system supports connecting an additional camera (Cam2) to meet various needs, such as monitoring different angles or vehicles.

Image: Examples of how two cameras can be used to cover different perspectives on an RV or a car with a trailer.
5. Maintenance
To ensure the longevity and optimal performance of your AUTO-VOX Solar4 camera, consider the following maintenance tips:
- Regular Cleaning: Keep the camera lens clean from dirt, dust, and debris to maintain clear image quality. Use a soft, damp cloth for cleaning.
- Battery Charging: Periodically charge the camera's battery, especially before long periods of inactivity, to preserve battery health.
- Environmental Protection: While the camera is designed to be durable and weatherproof (IP67 rated, operating temperatures from -20°C to 65°C), avoid exposing it to extreme physical shocks or prolonged submersion in water.
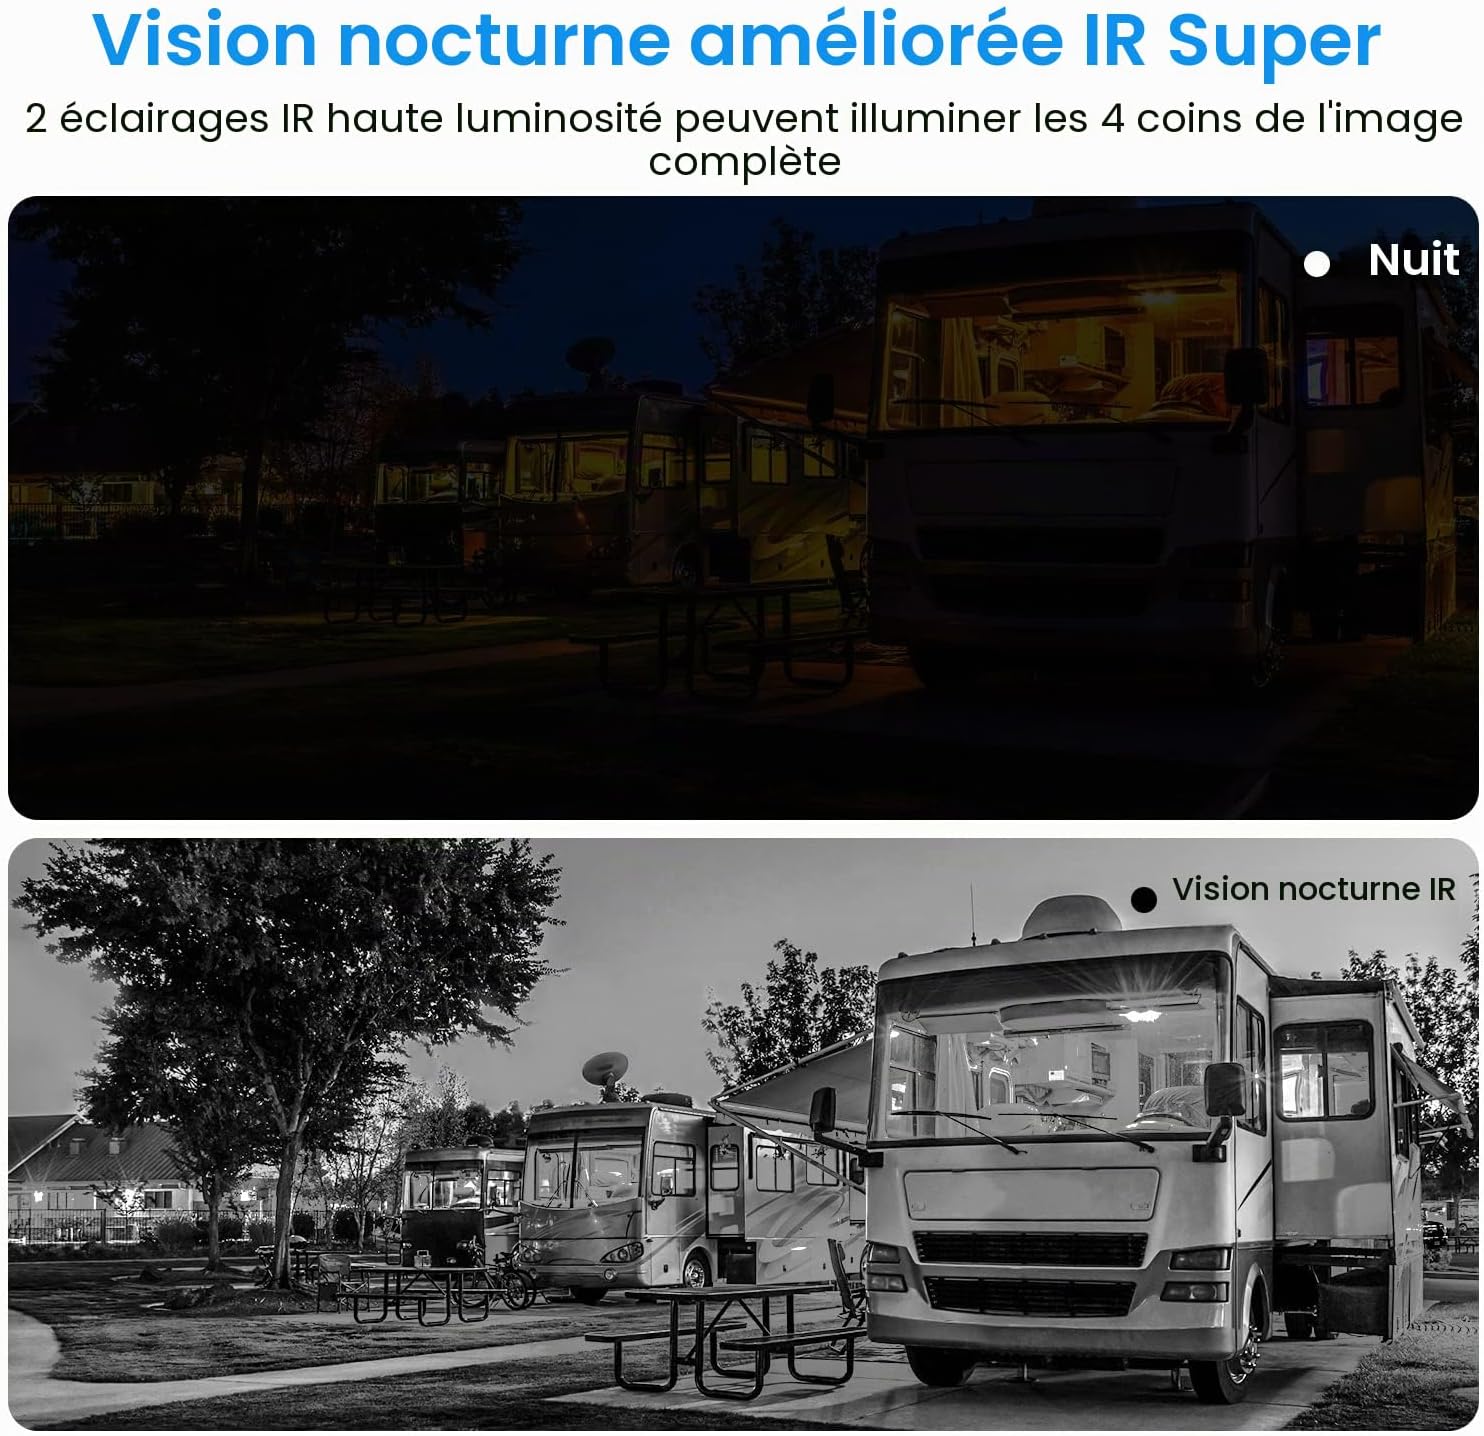
Image: The AUTO-VOX Solar4 camera, built for durability and all-weather conditions.
6. Troubleshooting
- No Image on Monitor:
- Ensure the camera is powered on and fully charged.
- Verify that the camera is correctly paired with the monitor. If not, repeat the pairing steps outlined in Section 3.3.
- Check for any obstructions between the camera and the monitor that might interfere with the wireless signal.
- Pairing Failure:
- If pairing fails within 30 seconds, the monitor will enter standby. Re-attempt the pairing process.
- Confirm that you are attempting to pair with an AUTO-VOX Solar4 monitor, as this camera is not compatible with other systems.
- Poor Image Quality:
- Clean the camera lens to remove any dirt or smudges.
- Ensure there is sufficient light for the camera to operate effectively, or that night vision is active in dark conditions.
If you encounter persistent issues not resolved by these steps, please contact AUTO-VOX customer support for assistance.
7. Specifications
| Feature | Specification |
|---|---|
| Brand | AUTO-VOX |
| Model | Solar4 (compatible camera) |
| Compatible Devices | AUTO-VOX Solar4 Monitor |
| Installation Type | Wireless |
| Optical Sensor Technology | CMOS |
| Lens Type | Wide angle, fixed |
| Actual Viewing Angle | 90 degrees |
| Field of View | 90 Degrees |
| Optical Sensor Size | 1/2.3 inch |
| Effective Capture Resolution | 1920 Pixels |
| Screen Capture Resolution | 1080p |
| Battery Capacity | 6600mAh (implied from image) |
| Operating Temperature | -20°C to 65°C (-4°F to 149°F) (implied from image) |
| Water Resistance Rating | IP67 (implied from image) |
8. Safety and Certifications
The AUTO-VOX Solar4 camera complies with relevant safety and environmental standards, including CE, FCC, and E9 certifications. The crossed-out wheeled bin symbol indicates that the product should not be disposed of with household waste but should be handed over to an appropriate collection point for the recycling of electrical and electronic equipment.

Image: Product certification symbols.
9. Customer Support
For further assistance, technical support, or warranty inquiries, please contact AUTO-VOX customer service. Refer to your product packaging or the AUTO-VOX official website for contact details.


