
1. Introduction
This manual provides essential instructions for the safe and effective operation, maintenance, and troubleshooting of your AMZCNC YQK-70 8-Ton Hydraulic Crimping Tool. Please read this manual thoroughly before use and retain it for future reference. This tool is designed for crimping copper and aluminum cable lugs within the specified range.
2. Package Contents
Verify that all items listed below are present in your package:
- 1 x AMZCNC YQK-70 Hydraulic Crimping Tool (Standard crimping force: 80KN, Maximum crimping force: 100kN, Stroke: 11mm)
- 9 x Sets of Crimping Dies (Sizes: 4, 6, 8, 10, 16, 25, 35, 50, 70 mm²)
- 2 x Pairs of Spare Sealing Rings
- 1 x Insulated and Shock-Resistant Carrying Case
- 1 x Customer Service Contact Card

Image: The AMZCNC YQK-70 hydraulic crimping tool, along with its various die sets and spare sealing rings, neatly organized within its durable carrying case.
3. Safety Instructions
Always adhere to the following safety guidelines to prevent injury and damage to the tool:
- Wear Personal Protective Equipment: Always wear safety glasses and gloves when operating the tool.
- Inspect Before Use: Before each use, check the tool for any signs of damage, wear, or oil leakage. Do not use if damaged.
- Proper Die Selection: Use only the correct die size for the cable and lug being crimped. Mismatched dies can lead to improper crimps or tool damage.
- Secure Workpiece: Ensure the cable and lug are properly positioned and stable before crimping.
- Keep Hands Clear: Keep hands and fingers away from the crimping jaws during operation.
- Do Not Exceed Capacity: Never attempt to crimp materials or sizes beyond the tool's specified capacity (4-70 mm² for copper, 4-50 mm² for aluminum).
- Avoid Modifications: Do not modify the tool or its components. Use only original AMZCNC parts for replacement.
- Store Safely: Store the tool in its case in a dry, secure location, out of reach of children.
4. Setup
- Unpack the Tool: Carefully remove the hydraulic crimping tool and its accessories from the carrying case.
- Identify Components: Familiarize yourself with the tool's parts, including the crimping head, handles, pressure release valve, and die slots.
- Select Correct Dies: Choose the appropriate die set (e.g., 16mm², 25mm²) that matches the cross-sectional area of the cable and the lug you intend to crimp. Refer to the die size chart for guidance.
- Insert Dies: Open the crimping head by rotating it if necessary. Insert the selected dies into the designated slots in the crimping head. Ensure they are seated correctly and securely. The innovative guide groove design prevents misalignment.

Image: A detailed chart illustrating the 9 different die sizes (4mm² to 70mm²) included with the tool, along with their corresponding AWG equivalents and dimensions for precise crimping.
5. Operating Instructions
- Prepare Cable and Lug: Strip the insulation from the cable to the appropriate length for the lug. Insert the stripped cable into the lug.
- Position for Crimping: Place the cable lug with the inserted cable between the open dies of the crimping tool. Ensure the lug is centered and fully within the die cavity.
- Operate the Pump Handle: Close the pressure release valve (usually by turning it clockwise). Begin pumping the movable handle repeatedly. The hydraulic pressure will cause the dies to close, crimping the lug onto the cable. Continue pumping until the dies meet and the crimp is complete. The innovative return spring allows for easier one-handed operation compared to tools without this feature.
- Release Pressure: Once the crimp is complete, open the pressure release valve (usually by turning it counter-clockwise). The dies will retract, and you can remove the crimped cable.
- Inspect Crimp: Visually inspect the crimped connection to ensure it is secure and properly formed.
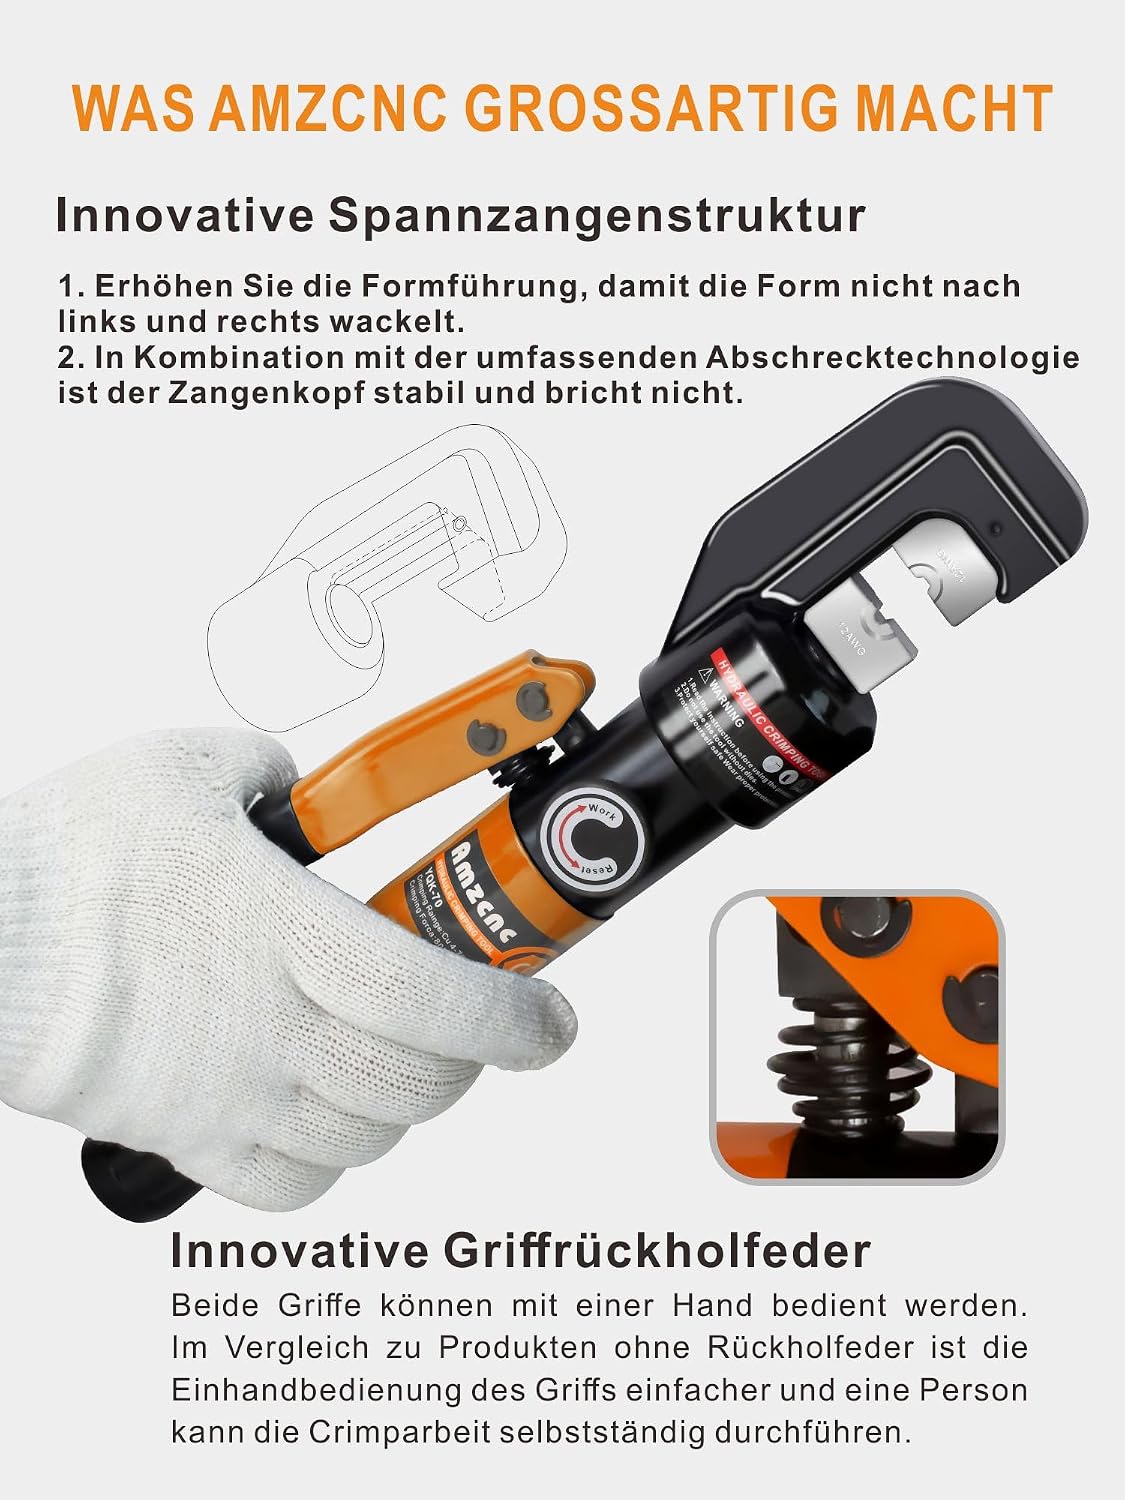
Image: A user's hand holding the AMZCNC hydraulic crimping tool, demonstrating the ergonomic grip and the innovative jaw design that ensures stable crimping without wobbling.

Image: Visual examples of the tool's versatility, including its use in circuit repair, crimping battery cables, and compressing wire ropes for various applications.
6. Maintenance
Regular maintenance ensures the longevity and optimal performance of your tool:
- Cleaning: After each use, wipe down the tool with a clean, dry cloth to remove any dirt, dust, or debris.
- Oil Leakage Check: Periodically inspect the tool for any signs of hydraulic oil leakage. The tool is equipped with a double seal design to prevent leaks. If a leak occurs, use the provided spare sealing rings for replacement.
- Lubrication: Apply a small amount of hydraulic oil to the moving parts and die surfaces as needed to ensure smooth operation.
- Die Care: Keep the dies clean and free from corrosion. Store them in their designated slots in the carrying case.
- Storage: Store the tool in its original carrying case in a cool, dry place, protected from direct sunlight and moisture.
7. Troubleshooting
If you encounter issues, refer to the following common problems and solutions:
- Tool Not Crimping Effectively:
- Ensure the correct die size is selected for the cable and lug.
- Verify the pressure release valve is fully closed before pumping.
- Pump the handle until the dies fully meet and the crimp is complete.
- Oil Leakage:
- Inspect the sealing rings. If damaged, replace them with the spare pairs provided in the package.
- If leakage persists after replacing seals, contact customer support.
- Dies Not Fitting Correctly:
- Ensure the dies are inserted into the correct slots and are fully seated.
- Check for any debris in the die slots that might prevent proper seating.
For issues not covered here, please contact AMZCNC customer support.
8. Specifications
| Parameter | Value |
|---|---|
| Model Number | YQK-70 |
| Standard Crimping Force | 80 KN |
| Maximum Crimping Force | 100 KN |
| Stroke | 11 mm |
| Crimping Range (Copper Lugs) | 4 - 70 mm² |
| Crimping Range (Aluminum Lugs) | 4 - 50 mm² |
| Included Die Sizes | 4, 6, 8, 10, 16, 25, 35, 50, 70 mm² |
| Tool Weight | 1.8 Kilograms |
| Package Dimensions | 34.79 x 16.2 x 7.9 cm |
| Handle Material | Alloy Steel |
| Handle Type | Ergonomic |
| Color | Orange |
| Country of Origin | China |

Image: The AMZCNC YQK-70 hydraulic crimping tool displayed alongside a table detailing its key parameters such as model number, crimping range, crimping force, stroke, weight, and included die sizes.
9. Warranty and Support
AMZCNC is committed to providing high-quality tools. All products undergo double testing to ensure reliability.
- Quality Assurance: In the event of any quality issues with the product, AMZCNC offers a perfect after-sales service, including replacement or refund options.
- Customer Support: If you have any questions, concerns, or require assistance with your AMZCNC YQK-70 Hydraulic Crimping Tool, please refer to the customer service contact card included in your package or visit the official AMZCNC website for support.

