
Espelho DU5L-KH
Espelho Elevated Automatic Cat Feeder User Manual
Model: DU5L-KH
Brand: Espelho
Introduction
The Espelho Elevated Automatic Cat Feeder is designed to provide convenient and consistent feeding for your pets, especially suitable for multi-cat households. This 5L capacity feeder features programmable meal times and portion control, an elevated stand for comfortable eating, and dual power supply options to ensure uninterrupted feeding. It includes a 2-way splitter and stainless steel bowls, promoting healthy eating habits and reducing mealtime conflicts.

Figure 1: Espelho Elevated Automatic Cat Feeder, showing the main unit with food in the dual stainless steel bowls.
Product Features
- Feeding Multiple Pets: Comes with a 2-way splitter and double stainless steel food bowls, allowing simultaneous feeding for multiple pets. Can also be assembled as a single-bowl feeder.
- Flexible Meal Scheduling: Program up to 6 meals per day with up to 20 portions per meal (1/8 cup/2 tbsp each portion) via the inbuilt LCD screen. Includes a "Feed" button for manual dispensing.
- 10s Personalized Recordings: Record a short voice message that plays during meal times to call your pets.
- Dual Power Supply: Operates with a 5V USB-C adapter and has backup power from 3 alkaline D-cell batteries (not included) for power outage protection.
- 5L Large Capacity: The food tank holds 2-3kg of pet food, sufficient for 20-35 days for cats and small dogs.
- Freshness Preservation: Features a desiccant bag, patented rotor, and secure twist-lock lid for triple seal freshness, keeping food fresh and crunchy.
- Elevated Design: Promotes healthy eating posture, aids food digestion, and reduces stress on your pet's neck, shoulders, and joints.
Setup Guide
1. Unboxing and Components
Carefully unpack all components from the box. Ensure all listed items are present:
- Feeder Body with Control Panel
- 5L Food Tank with Sliding Lock Lid and Silicone Sealing Ring
- 2-Way Splitter
- Dual Food Bowl Tray
- Stainless Steel Food Bowls (x2)
- Tall & Short Risers (for elevated stand)
- Power Adapter
- 5 ft USB-C Cord
- Desiccant Bag
- User Manual (this document)
- Extra Gift: Single Food Bowl Tray (optional, may vary by package)

Figure 2: Detachable and separate design components for easy installation, detachment, and cleaning.
2. Assembly
- Place the feeder body on a flat, stable surface.
- Attach the desired risers (short or tall) to the bottom of the dual food bowl tray, if using the elevated feature. If not using risers, the bowls will sit directly on the floor.
- Insert the stainless steel bowls into the dual food bowl tray.
- Connect the dual food bowl tray to the main feeder body. Ensure it clicks securely into place.
- Insert the 2-way splitter into the food outlet of the feeder body.
- Place the 5L food tank onto the feeder body, aligning it properly. Secure the sliding lock lid on top of the food tank.

Figure 3: The assembled feeder with elevated stainless steel bowls, ready for use.

Figure 4: The feeder offers adjustable heights (None, Short, Tall Risers) to suit different pet sizes, promoting comfortable eating posture.
3. Power Supply
The feeder supports dual power supply for reliable operation:
- Primary Power: Connect the 5 ft USB-C cord to the feeder and plug the power adapter into a standard wall outlet.
- Backup Power: For protection against power outages, install 3 alkaline D-cell batteries (not included) into the battery compartment at the bottom of the feeder. This ensures continuous food supply even if main power is lost.

Figure 5: Illustration of the dual power supply, showing both battery and charger connections.
4. Initial Setup and Programming
Follow these steps to program the feeder using the control panel. A visual guide is provided below.
Video 1: Espelho Automatic Cat Feeder Setting. This video demonstrates the programming steps for the feeder.
- Unlock the Screen: Press and hold the SET button for 3 seconds to unlock the screen.
- Set Current Time (Hour): The hour digit will blink. Use the UP and DOWN arrows to adjust the hour. Press SET to confirm.
- Set Current Time (Minute): The minute digit will blink. Use the UP and DOWN arrows to adjust the minute. Press SET to confirm and save.
- Set Meals Per Day: The meal icon (M:1-2-3-4-5-6) will blink. Use the UP and DOWN arrows to select the number of meals (1-6). Press SET to confirm.
- Set Meal Time (Meal 1): The time for Meal 1 will blink. Use the UP and DOWN arrows to set the hour, then press SET to move to minutes. Repeat for minutes. Press SET to confirm.
- Set Portion (Meal 1): The portion icon will blink. Use the UP and DOWN arrows to set the number of portions (1-20). Press SET to confirm.
- Repeat steps 5 and 6 for any additional meals you wish to program (Meal 2, Meal 3, etc.).
- Record Feeding Voice: In unlock mode, press and hold the REC button for 3 seconds until you hear "Do" and start recording your 10-second message. Release the button when finished; you will hear "Did" indicating recording is complete. The old recording will be automatically deleted when a new one is made.

Figure 6: Detailed steps for programming the feeder's time, meals, portions, and voice recording.

Figure 7: Reference table for portion settings, indicating daily intake, meals per day, and portion per meal.
Operating Instructions
1. Automatic Feeding
Once programmed, the feeder will automatically dispense food at the scheduled times and portions. Ensure the food tank is adequately filled.

Figure 8: The feeder helps build a healthy diet by adhering to scientific and customized feeding times.
2. Manual Feeding
To dispense food outside of the scheduled feeding times, simply press the FEED button on the control panel. Each press will dispense one portion.
Video 2: Time saver! This video shows a cat interacting with the feeder and the manual feed button.
Maintenance
1. Cleaning
Regular cleaning ensures hygiene and proper functioning of the feeder. The detachable design allows for thorough cleaning.
- Unplug the feeder and remove any remaining food from the tank.
- Detach the food tank, 2-way splitter, dual food bowl tray, and stainless steel bowls from the main feeder body.
- Wash the food tank, splitter, tray, and bowls with mild soap and water. Rinse thoroughly and dry completely before reassembling.
- Wipe the main feeder body with a damp cloth. Do not submerge the main unit in water.
- Ensure all parts are completely dry before reassembly and adding new food.

Figure 9: The feeder features a detachable design for easy and thorough cleaning of all food-contact parts.
2. Desiccant Bag Replacement
The built-in desiccant bag helps absorb moisture and keep the food fresh. It is recommended to replace the desiccant bag once every month to maintain optimal food freshness. Replacement desiccant bags can be found by searching for "B0BG3Z6XX6".
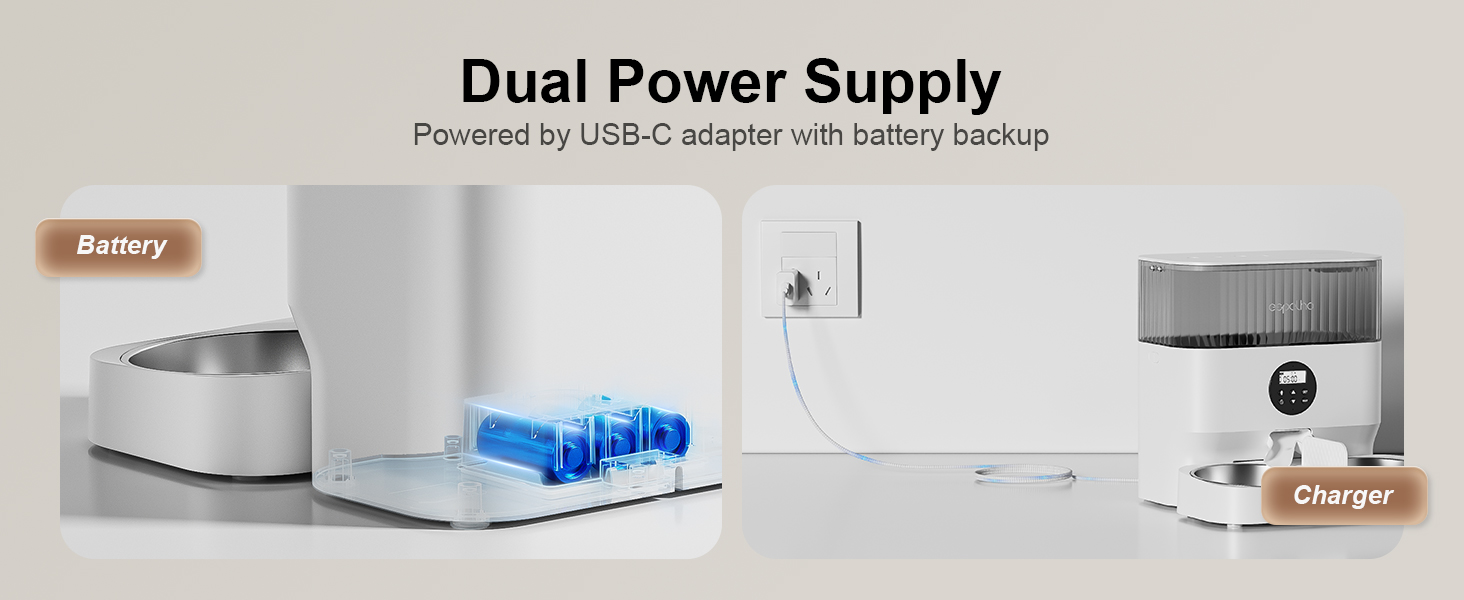
Figure 10: The built-in desiccant bag helps maintain food freshness and should be replaced monthly.
Troubleshooting
| Problem | Possible Cause | Solution |
|---|---|---|
| Feeder not dispensing food. | Food tank empty; kibble size too large; food jammed; power issue. | Refill food tank. Ensure kibble size is between 2-13mm. Check for food blockage in the outlet and clear it. Verify power connection and battery backup. |
| Uneven food distribution between bowls. | Food type/shape; splitter misalignment. | Some kibble shapes may distribute unevenly. Ensure the 2-way splitter is correctly installed and not obstructed. |
| Programming difficulties. | Incorrect button sequence; screen not unlocked. | Refer to the "Initial Setup and Programming" section and Figure 6 for detailed steps. Ensure the screen is unlocked by holding the SET button for 3 seconds. |
| Voice recording not playing. | No recording saved; new recording overwrote old one. | Ensure a voice message has been successfully recorded. Only the most recent 10-second recording is saved. |
The feeder is designed with an anti-clog patent motor and a 45° slope food outlet to minimize jamming. For optimal performance, use kibble between 2-13mm in size.

Figure 11: Recommended kibble sizes (2-13mm) to prevent food from getting stuck inside the feeder.

Figure 12: The 45° slope food outlet and Anti-Clog Patent Motor Design ensure smooth food dispensing.
Specifications
| Attribute | Detail |
|---|---|
| Model Name | DU5L-KH |
| Brand | Espelho |
| Capacity | 5 Liters / 20 Cups |
| Material | BPA free ABS |
| Color | White-5L |
| Item Dimensions (LxWxH) | 10 x 6 x 14 inches |
| Item Weight | 4.88 pounds (2.22 Kilograms) |
| Power Supply | 5V USB-C Adapter (primary), 3x D-cell batteries (backup) |
| Meal Programming | Up to 6 meals/day, up to 20 portions/meal |
| Voice Recording | 10 seconds personalized message |
| Recommended Kibble Size | 2-13mm |
| Target Species | Cat, Dog |

Figure 13: Key dimensions of the Espelho Automatic Cat Feeder.
Warranty and Support
The Espelho Elevated Automatic Cat Feeder comes with a 36 Months Warranty from the date of purchase.
For any questions, technical support, or warranty claims, please contact Espelho customer service:
Email: Espelhohelp@outlook.com
Please provide your model number (DU5L-KH) and purchase details when contacting support for faster assistance.
Related documentsDU5L-KH


Ask a question about this manual
Ask about setup, troubleshooting, compatibility, parts, safety, or missing instructions. Manuals+ will review the question and use this page’s manual context to help answer it.