
1. Introduction
This manual provides essential information for the safe and efficient installation, operation, and maintenance of your RICH SOLAR 300 Watt Solar Kit. Please read these instructions thoroughly before beginning installation or use. Proper adherence to these guidelines will ensure optimal performance and longevity of your solar power system.
2. Kit Contents
Your RICH SOLAR 300W Solar Kit includes the following components:
- 3 x 100W Monocrystalline Solar Panels
- 1 x 40A MPPT Charge Controller
- 1 x 20' 10 AWG Solar Cable Set (Panel to Controller)
- 1 x 10' 8 AWG Wire (Controller to Battery)
- 1 x 15A Inline Fuse Holder with Fuse
- 3 x Z Brackets (Mounting Hardware)

The image above illustrates the main components included in your solar kit. Ensure all items are present and undamaged upon unboxing.

This image provides a closer look at the mounting hardware, various gauge wires for connections, and the inline fuse holder, which are crucial for system assembly.
The video above visually demonstrates the components of the solar kit and provides a quick guide to the installation process, which can be helpful for understanding the physical setup.
3. Setup and Installation
The RICH SOLAR 300W Solar Kit is designed for straightforward installation. Follow these steps for proper setup:
3.1 Solar Panel Placement and Mounting
Select a location for your solar panels that receives maximum direct sunlight throughout the day, free from obstructions like trees or buildings. The panels should be angled to optimize sun exposure based on your geographical location and season.

Refer to the diagram above for the physical dimensions of each 100W solar panel to assist with planning your mounting location. The Z brackets provided are used to secure the panels to a flat surface.
3.2 Wiring Connections
Connect the solar panels to the 40A MPPT charge controller, and then connect the charge controller to your battery bank. Ensure all connections are secure and observe correct polarity (positive to positive, negative to negative) to prevent damage to the system.
This diagram illustrates the recommended wiring sequence for your solar kit. The 15A inline fuse holder should be installed between the solar panels and the charge controller for protection. The 10 AWG solar extension cables connect the panels to the controller, and the 8 AWG wires connect the controller to the battery. An optional inverter can be connected to the battery to provide AC power.
3.3 MPPT Charge Controller Setup
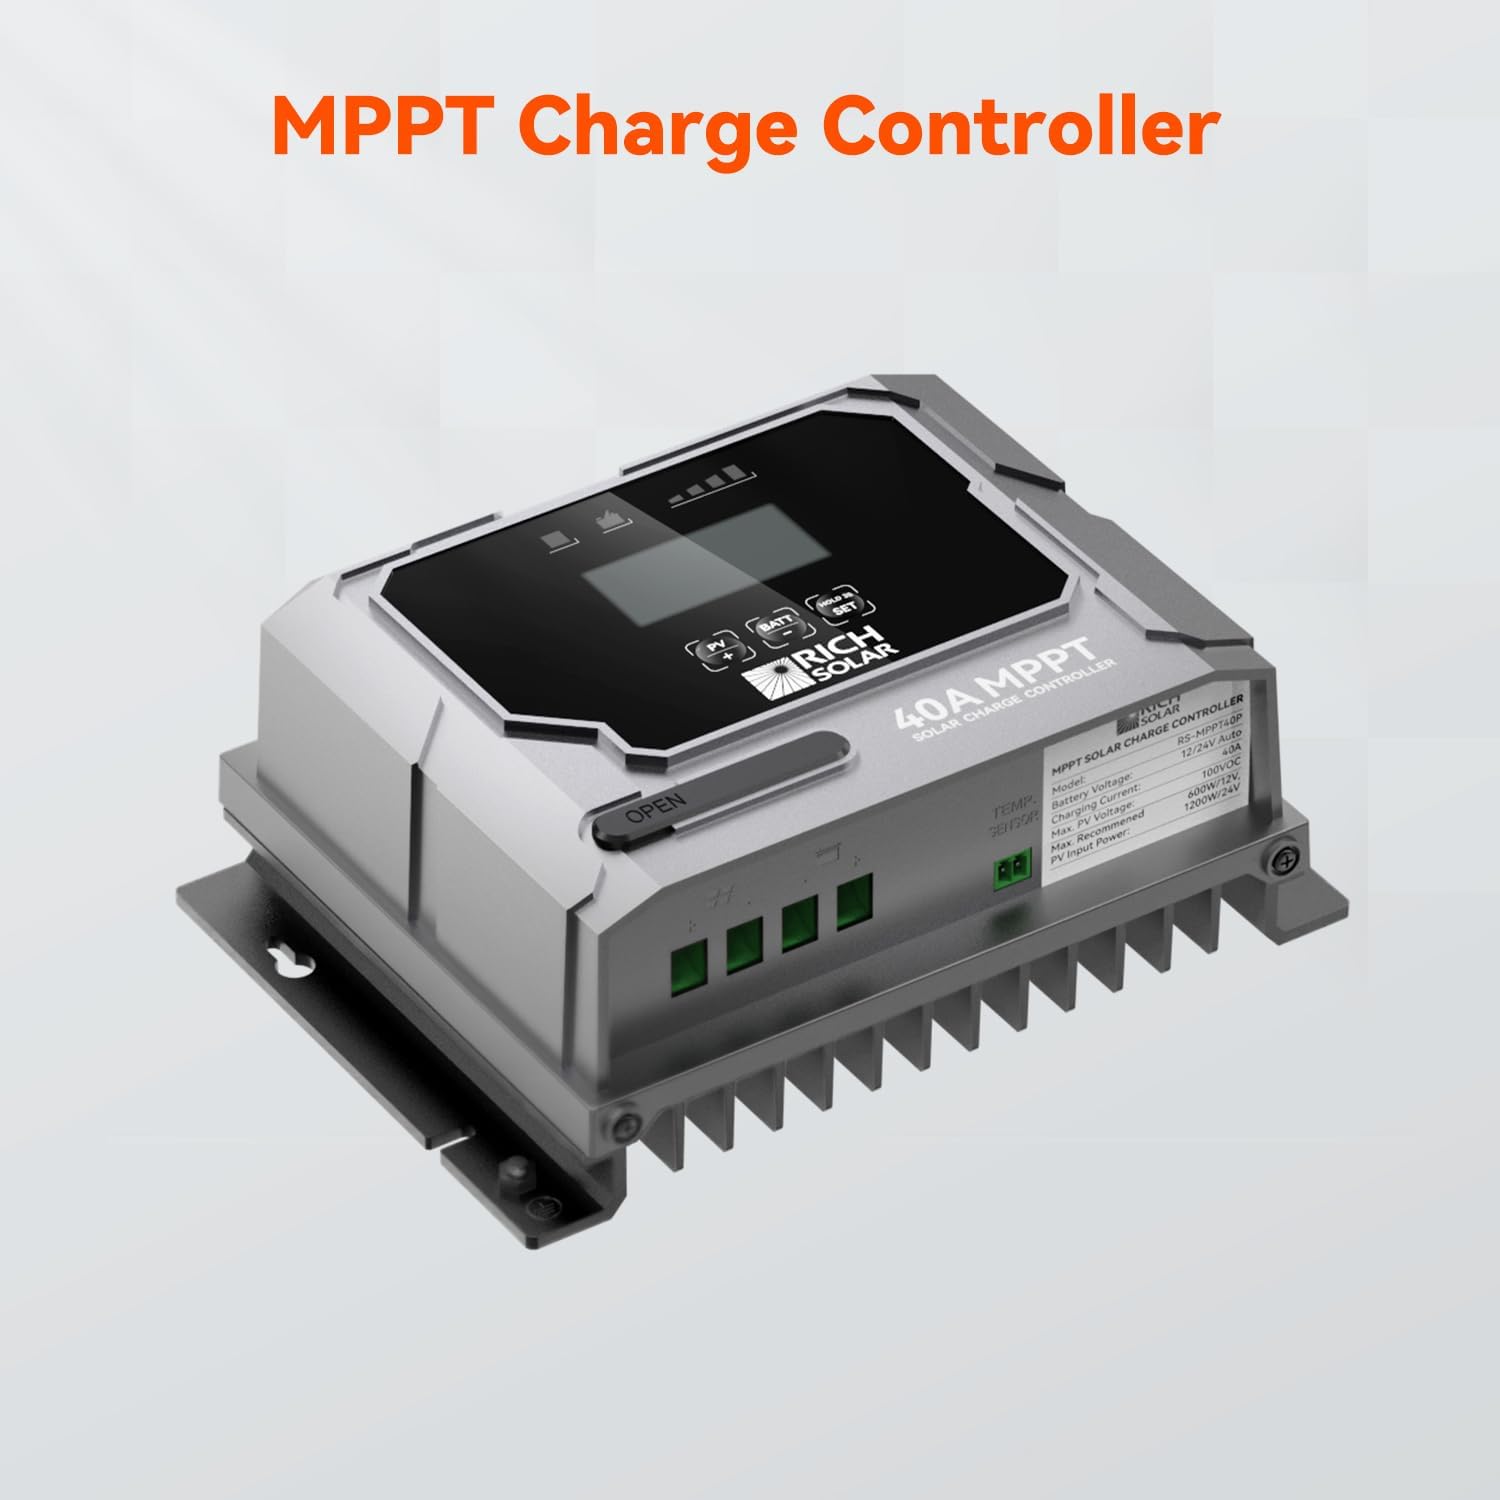
The 40A MPPT charge controller manages the power flow from your solar panels to your battery. It features a digital display for real-time monitoring of volts, amps, and amp-hours. While the kit includes a pre-assembled wiring harness, specific programming of the controller may be required depending on your battery type and system configuration. Consult the separate detailed manual for the 40A MPPT controller for advanced settings and programming instructions.

The image above shows the 40A MPPT charge controller. Its digital display provides essential system information. For detailed operation and programming of the controller, refer to its dedicated user manual.
4. Operating Instructions
Once installed, your RICH SOLAR 300W Solar Kit will automatically begin charging your battery when sunlight is available. The MPPT controller optimizes the power output from the solar panels to efficiently charge your battery bank.
4.1 Monitoring System Performance
The digital display on the 40A MPPT charge controller provides real-time data. You can monitor:
- Battery voltage
- Charging current (amps)
- Accumulated amp-hours
These readings help you understand the current state of your system and ensure it is operating as expected.

This image highlights the connection between the MPPT controller and a battery, emphasizing the system's high tracking efficiency (99%) and peak conversion efficiency (98%) for optimal power delivery.
5. Maintenance
Regular maintenance ensures the longevity and efficiency of your solar kit.
5.1 Solar Panels
- Cleaning: Periodically clean the surface of the solar panels with a soft cloth and mild, non-abrasive cleaner to remove dirt, dust, leaves, or other debris that may reduce efficiency. Do not use harsh chemicals or abrasive materials.
- Inspection: Regularly inspect panels for any physical damage, such as cracks in the glass or frame, or loose connections.

This image details the robust construction of the solar panels, including the aluminum frame, tempered glass, and TPT backsheet, which contribute to their durability and ease of maintenance.
5.2 Charge Controller and Wiring
- Connections: Check all wiring connections periodically to ensure they are tight and free from corrosion.
- Environment: Ensure the charge controller is installed in a dry, well-ventilated area, protected from direct sunlight and extreme temperatures.
6. Troubleshooting
If you encounter issues with your RICH SOLAR 300W Solar Kit, refer to the following common troubleshooting steps:
6.1 No Power Output from Panels
- Check Sunlight: Ensure panels are receiving direct sunlight and are not shaded.
- Clean Panels: Clean any dirt or debris from the panel surface.
- Inspect Connections: Verify all panel wiring connections are secure and correctly polarized.
- Fuse Check: Inspect the inline fuse for continuity. Replace if blown.
6.2 Battery Not Charging
- Controller Display: Check the MPPT controller display for error codes or charging status.
- Battery Connections: Ensure battery connections to the controller are secure and correctly polarized.
- Battery Health: Verify the battery itself is in good working condition and not fully discharged or damaged.
- Controller Settings: Confirm the charge controller settings match your battery type (e.g., lead-acid, lithium). If you are unsure about controller programming, consult the detailed controller manual or contact customer support.
6.3 Low Charging Current
- Panel Orientation: Adjust panel angle and orientation for optimal sun exposure.
- Temperature: High temperatures can slightly reduce panel efficiency.
- Wiring Gauge: Ensure appropriate wire gauge is used for the distance and current to minimize voltage drop.
7. Specifications
Below are the key specifications for the RICH SOLAR 300W Solar Kit:
| Feature | Specification |
|---|---|
| Brand | RICH SOLAR |
| Model | 300W Solar Kit |
| Solar Panel Type | Monocrystalline Silicon |
| Total Maximum Power | 300 Watts (3 x 100W panels) |
| Panel Dimensions (each) | 39"L x 21.3"W x 1.2"H |
| Item Weight | 15 Pounds (each panel) |
| Efficiency | High Efficiency |
| Charge Controller | 40A MPPT |
| Maximum Voltage | 12 Volts |
| UPC | 650380707947 |

This image provides a detailed breakdown of the electrical and physical specifications for each individual 100W solar panel included in the kit.

This image presents the technical specifications for the 40A MPPT charge controller, including voltage, current ratings, and efficiency metrics.
8. Warranty
The RICH SOLAR 300W Solar Kit comes with a 25-Year Output Warranty, ensuring the long-term performance of your solar investment. For specific terms and conditions of the warranty, please refer to the official RICH SOLAR warranty documentation or contact customer support.
9. Customer Support
RICH SOLAR is committed to providing free, lifetime after-sale support for its products. If you have any questions, require assistance with installation, operation, or troubleshooting, please do not hesitate to contact RICH SOLAR customer service.
For more information and support, visit the official RICH SOLAR Store.


