1. Product Overview
The Hamilton Beach Electric Stand Mixer is designed to simplify your baking and cooking tasks. Featuring a powerful 300-watt motor and planetary mixing action, it ensures thorough mixing for various recipes, from light batters to heavy doughs. This manual provides essential information for safe and efficient use of your stand mixer.

Figure 1: Hamilton Beach Electric Stand Mixer, showcasing its compact design and stainless steel bowl.
2. Important Safety Information
Please read all instructions carefully before using the appliance. Failure to follow these safety guidelines may result in electric shock, fire, or serious injury.
- Always unplug the mixer from the outlet when not in use, before putting on or taking off parts, and before cleaning.
- Avoid contact with moving parts. Keep hands, hair, clothing, as well as spatulas and other utensils away from beaters during operation to reduce the risk of injury to persons and/or damage to the mixer.
- Do not operate any appliance with a damaged cord or plug, or after the appliance malfunctions or has been dropped or damaged in any manner.
- Do not use outdoors.
- Close supervision is necessary when any appliance is used by or near children.
3. Components and Features
Your Hamilton Beach Electric Stand Mixer comes with the following components:
- Mixer Base: Contains the motor, speed control, and tilt-head release.
- 4-Quart Stainless Steel Bowl: Durable mixing bowl with handles for easy handling.
- Dough Hook: Ideal for kneading yeast doughs.
- Flat Beater: Perfect for mixing batters, frostings, and cookies.
- Whisk: Designed for whipping cream, egg whites, and light batters.
- Splash Guard: Helps prevent ingredients from splattering during mixing.
- Easy-Carry Top Handle: For convenient lifting and moving of the mixer.

Figure 2: All included attachments: whisk, dough hook, flat beater, and splash guard.
4. Setup and Assembly
- Unpack: Carefully remove all components from the packaging. Remove any protective films or stickers.
- Clean: Wash the stainless steel bowl, dough hook, flat beater, whisk, and splash guard in warm, soapy water. Rinse thoroughly and dry. The mixer base can be wiped with a damp cloth.
- Position: Place the mixer on a clean, dry, and stable countertop. Ensure the suction cups on the base are securely attached to the surface to prevent movement during operation.
- Attach Bowl: Press the TILT button to raise the mixer head. Place the 4-quart stainless steel bowl onto the base, twisting clockwise until it locks securely into place.
- Attach Accessory: Select the desired attachment (dough hook, flat beater, or whisk). Insert the attachment into the shaft until it clicks into place.
- Lower Head: Press the TILT button again to lower the mixer head until it locks into position.
- Add Splash Guard: If desired, place the splash guard over the bowl, aligning the opening with the attachment.
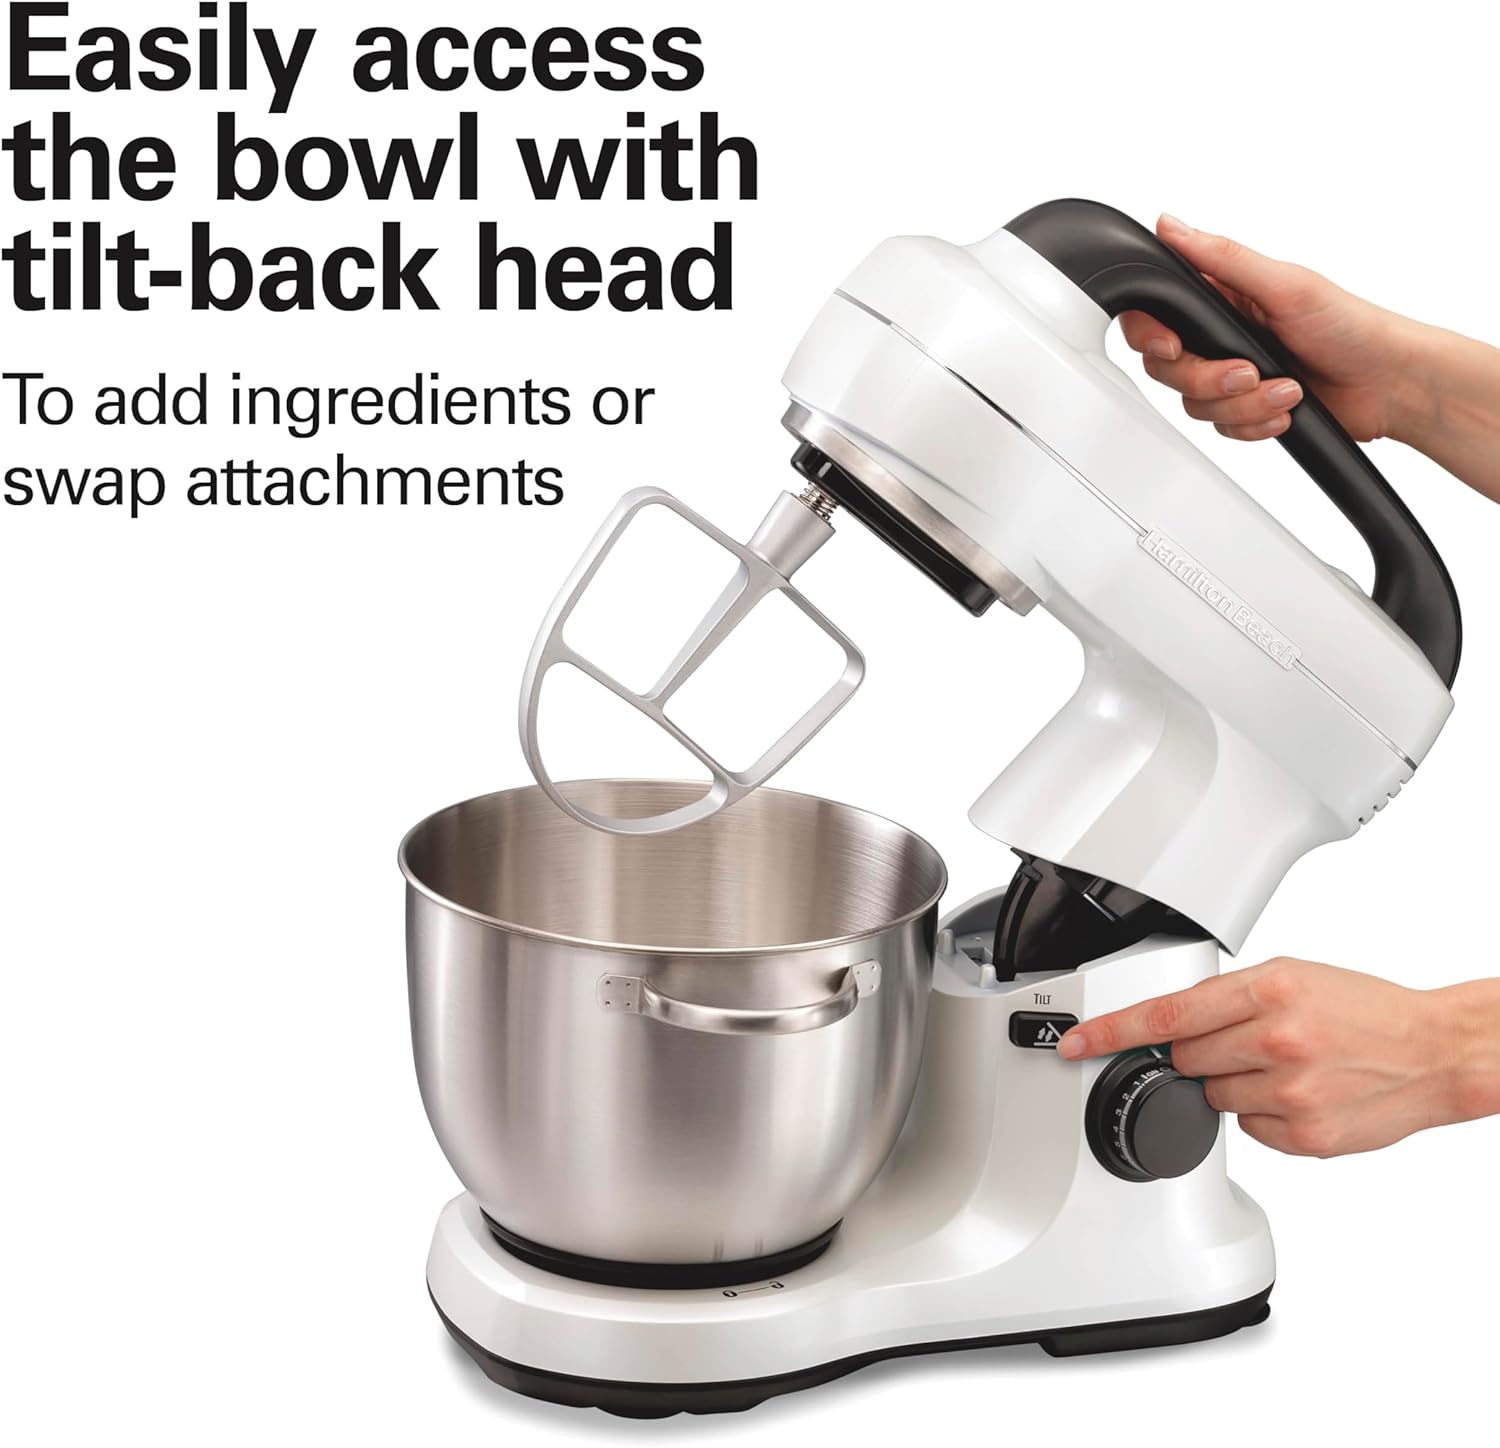
Figure 3: Tilting the mixer head for easy access to the bowl and attachments.
5. Operating Instructions
Before operating, ensure the mixer is properly assembled and plugged into a standard 120V AC outlet.
- Add Ingredients: Place your ingredients into the mixing bowl.
- Select Speed: Use the speed control knob located on the side of the mixer to select the desired speed. The mixer features 7 speeds, with a slower first speed to minimize splatter. Refer to the mixing guide on the mixer head for recommended speeds for different tasks.
- Start Mixing: Turn the speed control knob to the desired setting. The planetary mixing action will begin, rotating the attachment around the entire bowl for thorough mixing.
- Adjust Speed: You can adjust the speed during operation by turning the knob.
- Stop Mixing: Turn the speed control knob to the 'OFF' position. Unplug the mixer when finished.

Figure 4: Speed control dial and integrated mixing guide for optimal results.
Mixing Guide
| Speed | Task |
|---|---|
| 1 | Stirring |
| 2 | Folding |
| 3 | Kneading |
| 4 | Mixing |
| 5 | Creaming |
| 6 | Beating |
| 7 | Whipping |

Figure 5: Planetary mixing action ensures complete bowl coverage for even results.
6. Using Attachments
Each attachment is designed for specific mixing tasks to achieve optimal results.
- Dough Hook: Use for heavy mixtures like bread dough, pizza dough, and pasta dough. It effectively kneads ingredients, developing gluten for proper texture.
- Flat Beater: Ideal for medium-heavy mixtures such as cake batters, cookie dough, cream cheese frosting, and mashed potatoes. It thoroughly combines ingredients without over-aerating.
- Whisk: Best for light mixtures that require aeration, like whipping egg whites, cream, and light batters for soufflés or meringues.

Figure 6: The mixer effortlessly handles thick batters for homemade baked goods.
7. Care and Cleaning
Proper cleaning and maintenance will extend the life of your stand mixer.
- Before Cleaning: Always unplug the mixer from the power outlet.
- Bowl and Attachments: The stainless steel bowl, dough hook, flat beater, whisk, and splash guard are dishwasher safe. Alternatively, wash them in warm, soapy water, rinse, and dry thoroughly.
- Mixer Base: Wipe the exterior of the mixer base with a damp cloth. Do not immerse the base in water or any other liquid.
- Storage: Store the mixer in a dry place. The top handle allows for easy lifting and storage.

Figure 7: The built-in top handle makes the mixer easy to lift, move, and store.
8. Troubleshooting
If your mixer is not operating as expected, refer to the following common issues and solutions:
- Mixer does not turn on: Ensure the power cord is securely plugged into a working outlet. Check if the mixer head is fully lowered and locked into place.
- Attachment not mixing properly: Ensure the attachment is correctly inserted and locked into the shaft. The planetary mixing action should cover the entire bowl.
- Excessive vibration or noise: Verify that the mixer is placed on a flat, stable surface and that the suction cups are engaged. Reduce the batch size if it exceeds the recommended capacity.
- Splatter during mixing: Use the splash guard provided. Start mixing at a slower speed and gradually increase as needed.
For issues not covered here, please contact Hamilton Beach customer support.
9. Product Specifications
| Feature | Detail |
|---|---|
| Brand | Hamilton Beach |
| Model Number | 63398 |
| Color | White |
| Capacity | 4 Quarts |
| Wattage | 300 watts |
| Voltage | 120.0 V |
| Speeds | 7 (Adjustable Speed Control) |
| Material | Plastic, Stainless Steel |
| Product Dimensions | 16.3"D x 10.5"W x 16.3"H |
| Item Weight | 13.2 Pounds |
| Dishwasher Safe Parts | Bowl, Dough Hook, Flat Beater, Whisk, Splash Guard |

Figure 8: Product dimensions for placement and storage planning.
10. Warranty and Customer Support
Hamilton Beach products are manufactured to the highest quality standards. For warranty information or customer support, please refer to the warranty card included with your product or visit the official Hamilton Beach website.
For additional assistance, you may contact Hamilton Beach customer service directly through their website or the contact information provided in your product packaging.


