1. Introduction
The Whadda STEM Shield (model WSEDU10) is an educational expansion board designed for use with Arduino microcontrollers. It provides a range of integrated components, including LEDs, push buttons, a 7-segment display, and a buzzer, to facilitate learning and experimentation in electronics and programming. This manual provides essential information for setting up, operating, and maintaining your STEM Shield.
2. Product Overview
The Whadda STEM Shield is designed to simplify the process of connecting various electronic components to an Arduino board. It features clearly labeled pins and integrated modules, making it ideal for beginners and educational purposes.

Figure 1: Top view of the Whadda STEM Shield, illustrating the arrangement of LEDs, push buttons, and the 7-segment display.

Figure 2: Bottom view of the Whadda STEM Shield, displaying the Velleman Projects branding and the pin headers for Arduino connection.
Key Components:
- LEDs: Multiple light-emitting diodes for visual feedback.
- Push Buttons: Several tactile buttons for user input.
- 7-Segment Display: A single-digit display for numerical output.
- Buzzer: An audio component for sound output.
- Pin Headers: Standard Arduino-compatible headers for easy mounting.
3. Setup Instructions
To begin using your Whadda STEM Shield, follow these steps to properly connect it to a compatible Arduino board.
- Prepare Arduino Board: Ensure your Arduino board (e.g., Arduino Uno) is powered off and disconnected from any power source or USB cable.
- Align Shield: Carefully align the pin headers on the underside of the Whadda STEM Shield with the corresponding female headers on your Arduino board. Ensure all pins are correctly aligned to prevent bending.
- Mount Shield: Gently press the STEM Shield onto the Arduino board until it is firmly seated. Do not force the shield if it does not align easily.
- Connect Arduino: Once the shield is securely mounted, connect your Arduino board to your computer via a USB cable. The Arduino IDE can now be used to program the board and interact with the STEM Shield.
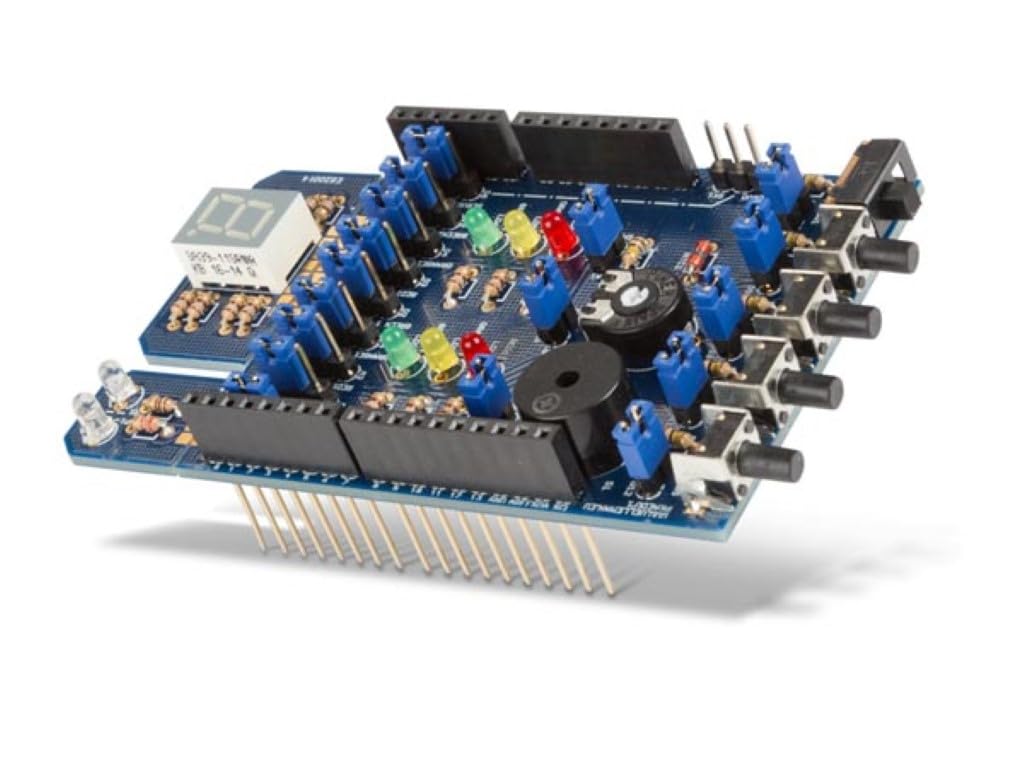
Figure 3: Angled view of the Whadda STEM Shield, illustrating its form factor and readiness for integration with an Arduino board.
4. Operating the STEM Shield
The operation of the Whadda STEM Shield is entirely dependent on the code uploaded to the connected Arduino board. The shield provides the hardware interface for various inputs and outputs.
Programming Basics:
- Arduino IDE: Use the official Arduino Integrated Development Environment (IDE) to write and upload code.
- Libraries: Specific libraries may be required to easily control the 7-segment display or other complex components. Refer to online resources or Whadda documentation for recommended libraries.
- Pin Mapping: Consult the shield's schematic or documentation for the correct pin assignments for each component (LEDs, buttons, buzzer, 7-segment display segments).
Example Operations:
- Controlling LEDs: Digital pins are typically used to turn LEDs on or off.
- Reading Buttons: Digital pins are used to detect when a button is pressed.
- Sound Generation: The buzzer can be controlled using digital or PWM pins to produce tones.
- Displaying Numbers: The 7-segment display requires multiple digital pins to control its individual segments to form numbers or characters.
5. Maintenance
The Whadda STEM Shield is a robust electronic component, but proper care ensures its longevity and reliable performance.
- Cleaning: Use a soft, dry cloth to gently wipe the surface of the shield. Avoid using liquids or abrasive cleaners.
- Storage: Store the shield in a dry, cool environment, away from direct sunlight and extreme temperatures.
- Handling: Always handle the shield by its edges to minimize contact with electronic components and prevent static discharge.
- Avoid Moisture: Keep the shield away from water and high humidity to prevent short circuits and corrosion.
6. Troubleshooting
If you encounter issues with your Whadda STEM Shield, consider the following troubleshooting steps:
- No Power/Functionality:
- Ensure the Arduino board is properly powered via USB or an external power supply.
- Verify that the STEM Shield is securely seated on the Arduino's pin headers.
- Check the USB connection to your computer.
- Component Not Responding:
- Review your Arduino code for correct pin assignments and logic for the specific component.
- Ensure any necessary libraries are installed and correctly included in your sketch.
- Inspect the component on the shield for any visible damage.
- Arduino IDE Errors:
- Check for syntax errors in your code.
- Ensure the correct board type and port are selected in the Arduino IDE.
7. Specifications
| Feature | Detail |
|---|---|
| Model Number | WSEDU10 |
| Brand | Whadda |
| Manufacturer | Velleman Group nv |
| Product Dimensions | 15 x 20 x 22 cm; 80 g |
| Material | Plastic |
| Color | Multicolour |
| Country of Origin | Germany |
| First Available Date | 16 May 2022 |
8. Warranty and Support
The Whadda STEM Shield is a product of Velleman Group nv. For warranty information, technical support, or further assistance, please refer to the official Whadda or Velleman Group nv website. Contact details and support resources are typically available in the support section of their websites.
Whadda is a premium brand of Velleman Group nv, known for producing electronic projects for makers and enthusiasts. Velleman Group has been developing unique electronic projects for over 20 years.


