1. Important Safety Instructions
Read all instructions carefully before using this appliance. Keep this manual for future reference.
- This appliance is for indoor use only.
- Ensure the power supply matches the voltage specified on the rating label.
- Always plug the unit into a grounded electrical outlet. Do not use extension cords or adapter plugs.
- Do not operate the unit with a damaged cord or plug. If the supply cord is damaged, it must be replaced by the manufacturer or a qualified service agent.
- Keep the unit away from heat sources, direct sunlight, and flammable materials.
- Do not block the air inlets or outlets. Maintain at least 12 inches (30 cm) clearance from walls and other objects.
- Always turn off and unplug the unit before cleaning or performing any maintenance.
- Do not insert fingers or objects into the air outlets.
- This appliance is not intended for use by persons (including children) with reduced physical, sensory or mental capabilities, or lack of experience and knowledge, unless they have been given supervision or instruction concerning use of the appliance by a person responsible for their safety.
- The unit features a child lock function to prevent accidental operation.
- The unit will automatically shut off when the water tank is full to prevent overflow.

This image emphasizes the safety features of the unit, including a child lock, automatic shut-off when the water tank is full, and its ETL & DOE certifications, with a baby in the foreground.
2. Product Overview
The DORTALA Portable Air Conditioner is a versatile 3-in-1 unit designed to provide cooling, dehumidification, and air circulation for your indoor spaces. It offers efficient performance for rooms up to 230 sq.ft.
- Cooling Capacity: 8000 BTU
- Adjustable Temperature: 60.8°F - 89.6°F
- Coverage Area: Up to 230 sq.ft
- Air Flow: 290 m³/h

This image highlights the key performance specifications of the DORTALA 8000 BTU Portable Air Conditioner, including its cooling capacity, adjustable temperature range, effective cooling area, and air flow rate.
3. Package Contents
Verify that all components are present in the package:
- Portable Air Conditioner Unit
- Remote Control
- Window Venting Kit (includes exhaust hose, window slider kit, and adapters)
- User Manual
4. Installation Guide
4.1 Unit Placement
Place the air conditioner on a flat, stable surface. Ensure there is at least 12 inches (30 cm) of space around the unit for proper airflow. Position the unit near a window for exhaust hose installation.
4.2 Window Kit Installation
The adjustable window venting kit is designed for most vertical or horizontal sliding windows with a size range of 25.5" to 47".
- Assemble the window slider kit to fit your window opening. Secure the panels with screws if necessary.
- Attach the exhaust hose adapter to one end of the exhaust hose.
- Connect the other end of the exhaust hose to the exhaust outlet on the back of the air conditioner unit.
- Insert the window exhaust adapter into the opening of the window slider kit.
- Extend the exhaust hose to its maximum length of 5 feet, ensuring it is not kinked or bent sharply.
- Close the window securely against the window slider kit to seal the opening.

This image provides visual guidance for installation, showing the maximum exhaust hose length (5 Ft) and window height/width limit (47"), along with diagrams for compatible double/single-hung and sliding windows.
5. Operating Your Air Conditioner
The unit can be controlled via the LED digital display on the top panel or the included remote control.

This detailed view shows the intuitive LED digital display and the remote control, outlining the functions for setting the timer, adjusting fan speed, activating the child lock, and selecting operational modes.
5.1 Control Panel and Remote Control Functions
- Power Button: Turns the unit ON or OFF.
- Mode Button: Cycles through Cooling, Dehumidifier, and Fan modes.
- Up/Down Buttons: Adjust temperature settings or timer duration.
- Speed Button: Selects fan speed (High/Low) in Fan mode.
- Timer Button: Sets the 24-hour auto ON/OFF timer.
- Lock Button (Child Lock): Activates or deactivates the child lock feature on the control panel.
5.2 Operating Modes
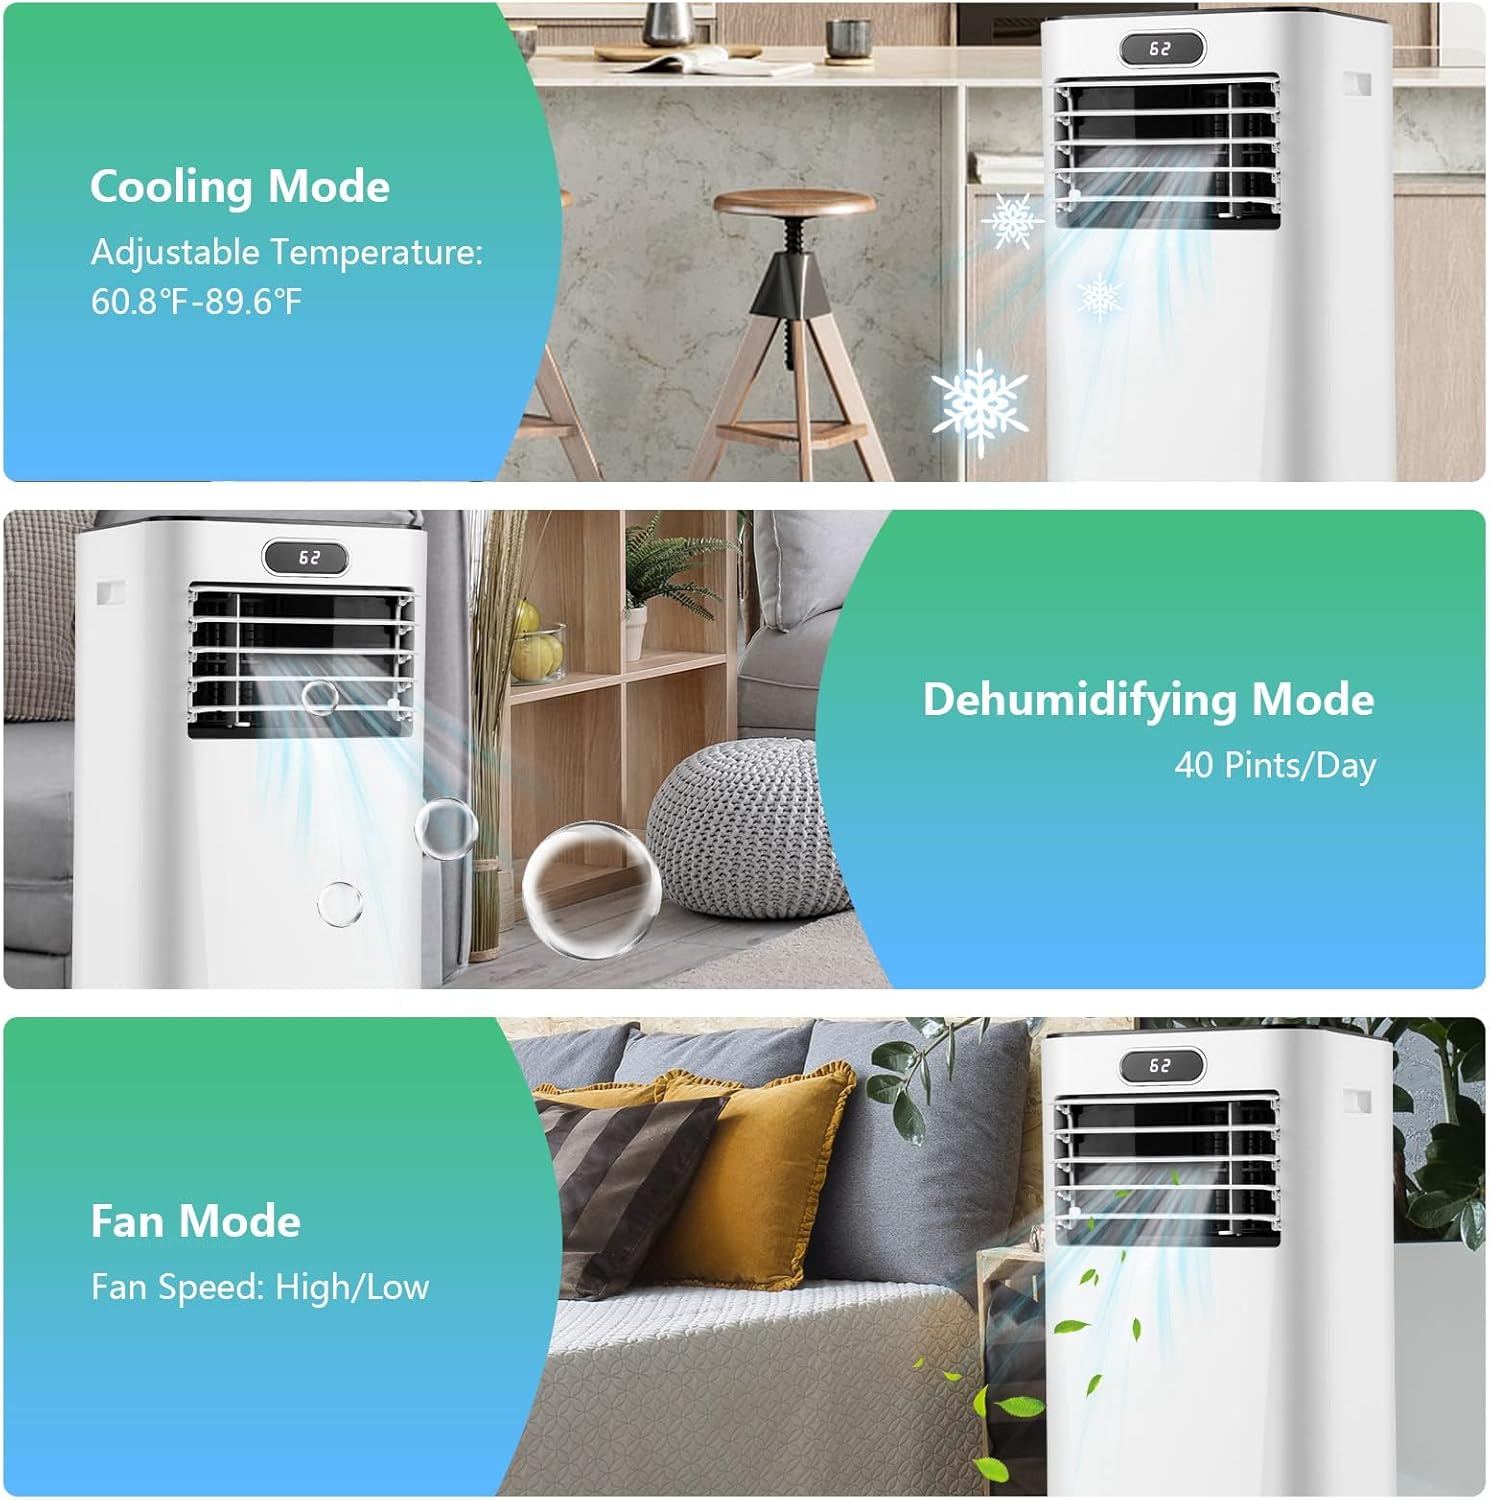
This image illustrates the three operational modes of the air conditioner: Cooling, Dehumidifying (with 40 Pints/Day capacity), and Fan (with High/Low speed options).
- Cooling Mode: Provides air conditioning. Adjust the temperature using the Up/Down buttons. The temperature range is 60.8°F to 89.6°F.
- Dehumidifier Mode: Removes moisture from the air. The unit has a moisture removal capacity of 40 pints per day. In this mode, the fan speed is automatically set to low.
- Fan Mode: Circulates air without cooling. Select between High and Low fan speeds using the Speed button.
5.3 Louver Adjustment
The vertical louver can be manually adjusted up to 90°. The horizontal louver can be automatically adjusted up to 60°.
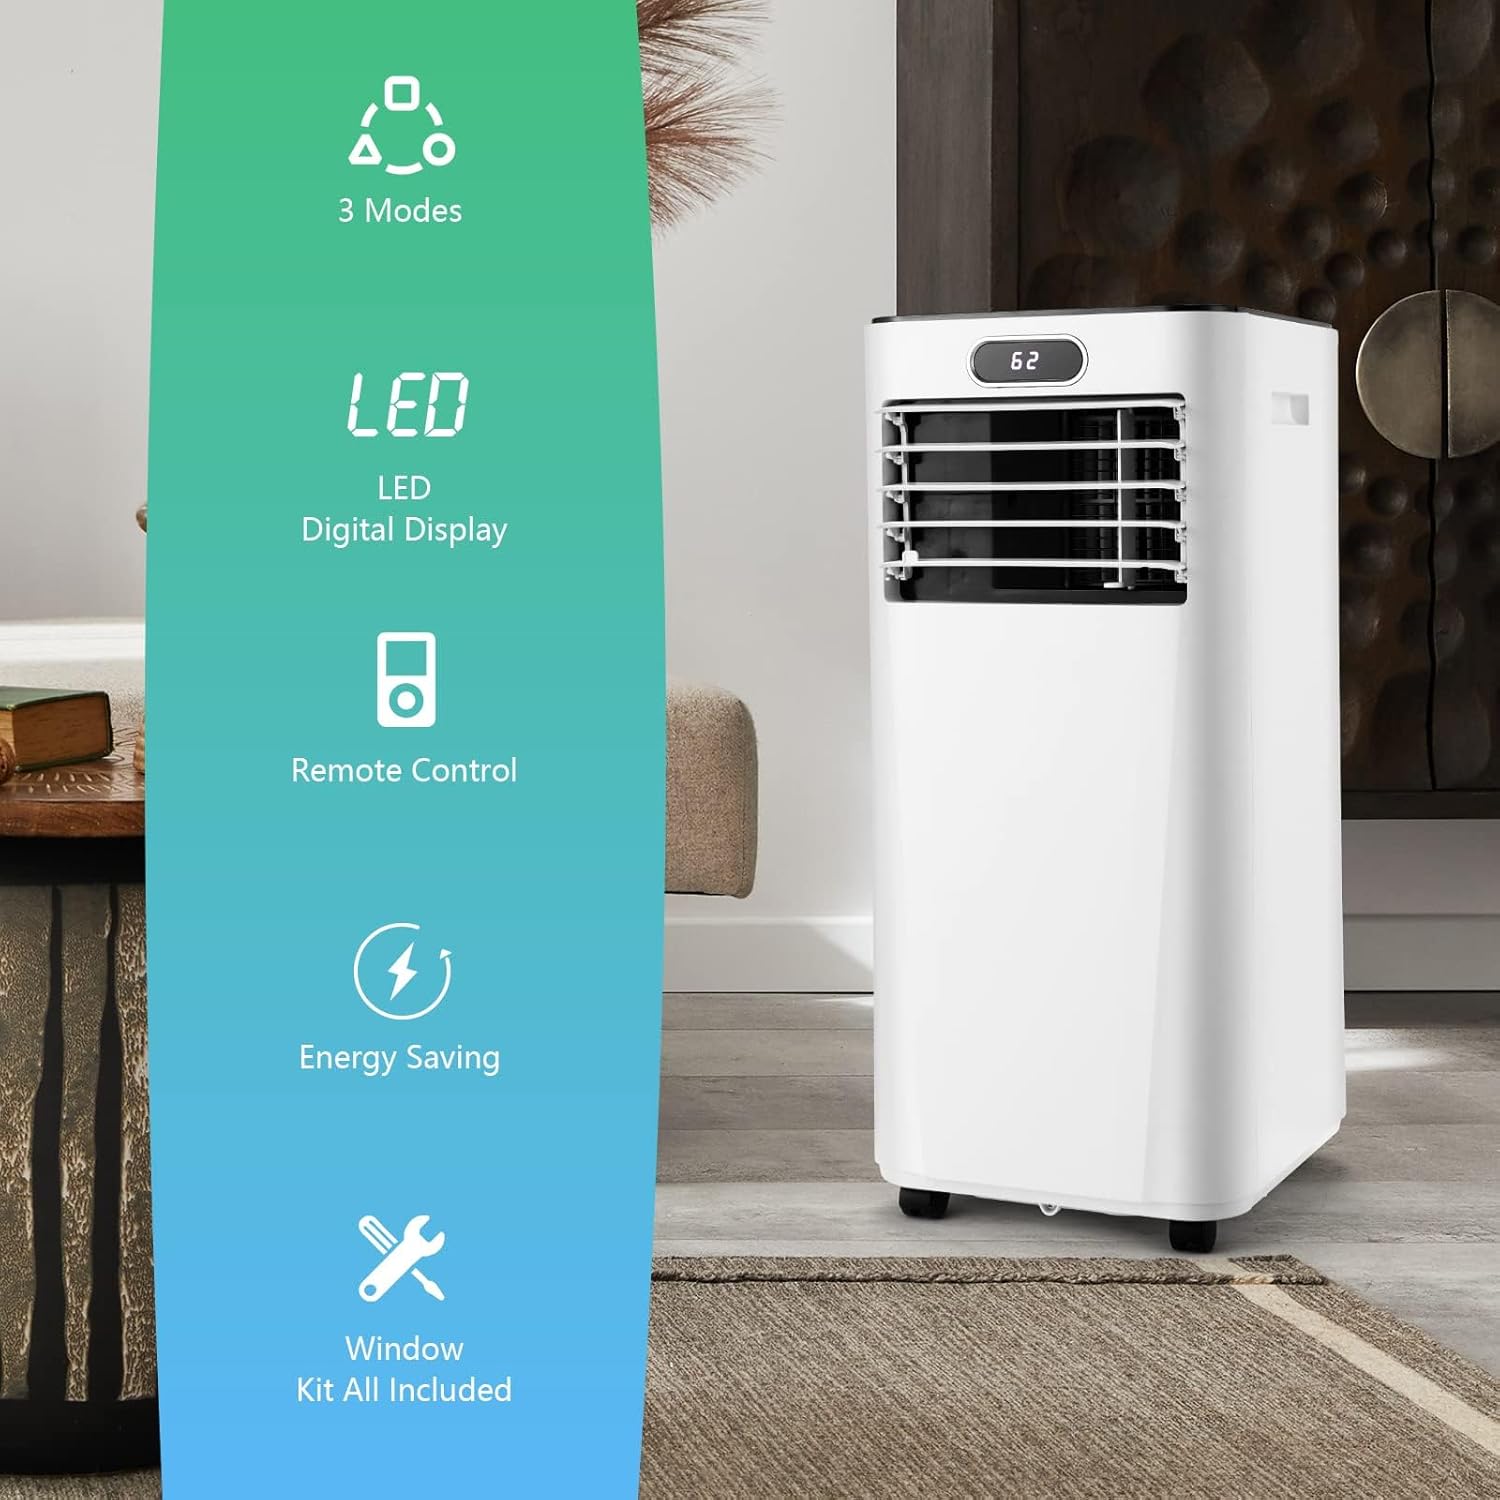
This image summarizes the main features of the air conditioner, including its multi-mode operation, digital display, remote control capability, energy efficiency, and the complete window kit provided for installation.
6. Maintenance
Regular maintenance ensures optimal performance and extends the lifespan of your air conditioner.
6.1 Cleaning the Air Filter
The air filter should be cleaned every two weeks or more frequently depending on usage and air quality.
- Turn off the unit and unplug it from the power outlet.
- Locate and remove the air filter from the back or side of the unit.
- Wash the filter with warm, soapy water. Rinse thoroughly.
- Allow the filter to air dry completely before reinserting it into the unit. Do not use a dryer or direct heat.
6.2 Draining Accumulated Water
During dehumidification or prolonged cooling, water will accumulate inside the unit. The unit has an auto shut-off feature when the tank is full. Drain the water regularly.
- Turn off the unit and unplug it.
- Place a shallow pan or tray under the drain port located at the bottom rear of the unit.
- Remove the drain plug to allow water to flow out.
- Once all water has drained, replace the drain plug securely.
6.3 Storage
If the unit will not be used for an extended period:
- Drain all accumulated water.
- Clean the air filter.
- Run the unit in fan mode for a few hours to dry the interior.
- Unplug the power cord and store it neatly.
- Cover the unit with a plastic bag or cloth to protect it from dust.
- Store the unit in a cool, dry place.
7. Troubleshooting
Before contacting customer support, refer to the following table for common issues and solutions.
| Problem | Possible Cause | Solution |
|---|---|---|
| Unit does not turn on | No power supply Power cord not plugged in Full water tank | Check power outlet Ensure cord is securely plugged in Drain water tank |
| Unit is not cooling effectively | Air filter is dirty Room size too large Windows/doors open Exhaust hose blocked/kinked Temperature setting too high | Clean air filter Ensure room size is within 230 sq.ft Close all windows and doors Check and clear exhaust hose Lower temperature setting |
| Unit is noisy | Unit not on a flat surface Air filter dirty | Place on a flat, stable surface Clean air filter |
| Water leakage | Drain plug not secured Unit tilted | Ensure drain plug is tightly closed Place unit on a level surface |
8. Product Specifications
| Specification | Detail |
|---|---|
| Brand | DORTALA |
| Model Number | AU-10119US-WHFP |
| Cooling Power | 8000 BTU |
| Coverage Area | Up to 230 sq.ft |
| Dehumidification Capacity | 40 Pints/Day |
| Noise Level | 50 Decibels |
| Voltage | 115 Volts |
| Wattage | 920 watts |
| Refrigerant | R 410A |
| Product Dimensions (D x W x H) | 13" x 13" x 27.5" |
| Item Weight | 44 pounds |
| Material Type | ABS Plastic |
| Installation Type | Window |
| Special Features | Portable, Remote Controlled |
9. Warranty and Support
DORTALA products are manufactured to high-quality standards. For information regarding warranty coverage, please refer to the warranty card included with your purchase or contact DORTALA customer support directly.
For technical assistance, troubleshooting not covered in this manual, or to inquire about replacement parts, please contact DORTALA customer service through the contact information provided on the official DORTALA website or your purchase documentation.


