
1. Safety Information
Read all instructions carefully before installing or operating this appliance. Keep this manual for future reference.
General Safety Precautions
- Ensure the installation area is suitable and meets all local building codes and regulations.
- This appliance is intended for household use only. Do not use it for commercial purposes.
- Always disconnect power before servicing or cleaning the unit.
- Do not operate the range hood if the power cord is damaged. Contact qualified service personnel.
- Maintain proper ventilation in the kitchen to prevent backdrafting of combustion gases from other fuel-burning appliances.
- Never leave cooking food unattended. Grease fires can occur.
- Clean grease filters regularly to prevent grease buildup, which can be a fire hazard.
- Do not flambé under the range hood.
- The range hood may have sharp edges; wear protective gloves during installation and maintenance.
Electrical Safety
- This appliance must be properly grounded.
- Ensure the electrical supply matches the voltage and frequency specified on the rating label of the appliance (120V/60Hz).
- Do not use extension cords or adapters with this appliance.
- If the supply cord is damaged, it must be replaced by the manufacturer, its service agent, or similarly qualified persons to avoid a hazard.
2. What's in the Box
Verify that all components are present and undamaged before proceeding with installation.
- SNDOAS Black Range Hood Unit
- Grease Filters (Baffle Filters)
- LED Lights (pre-installed)
- 3-Prong Power Plug
- Installation Hardware (screws, anchors, etc.)
- User Manual
Note: Carbon filters for ductless operation are not included and must be purchased separately (Part # CF-0475).
3. Product Overview
The SNDOAS Black Range Hood is designed to effectively remove smoke, steam, and odors from your kitchen. It features a durable stainless steel construction with a matte black finish and versatile venting options.
Key Features
- Material: 430 Premium Stainless Steel with Black Painted Finish
- Airflow: 500 CFM (Cubic Feet Per Minute)
- Fan Speeds: 3-speed fan control
- Controls: Simple Push Button Operation
- Lighting: Two LED Lights for illumination
- Filters: Dishwasher-safe Stainless Steel Baffle Filters
- Venting Options: Convertible for Ducted or Ductless (recirculating) use. Supports Top Round, Top Rectangle, and Rear Rectangle venting.
- Dimensions: 29.8''(W) x 19.7''(D) x 5.9''(H)
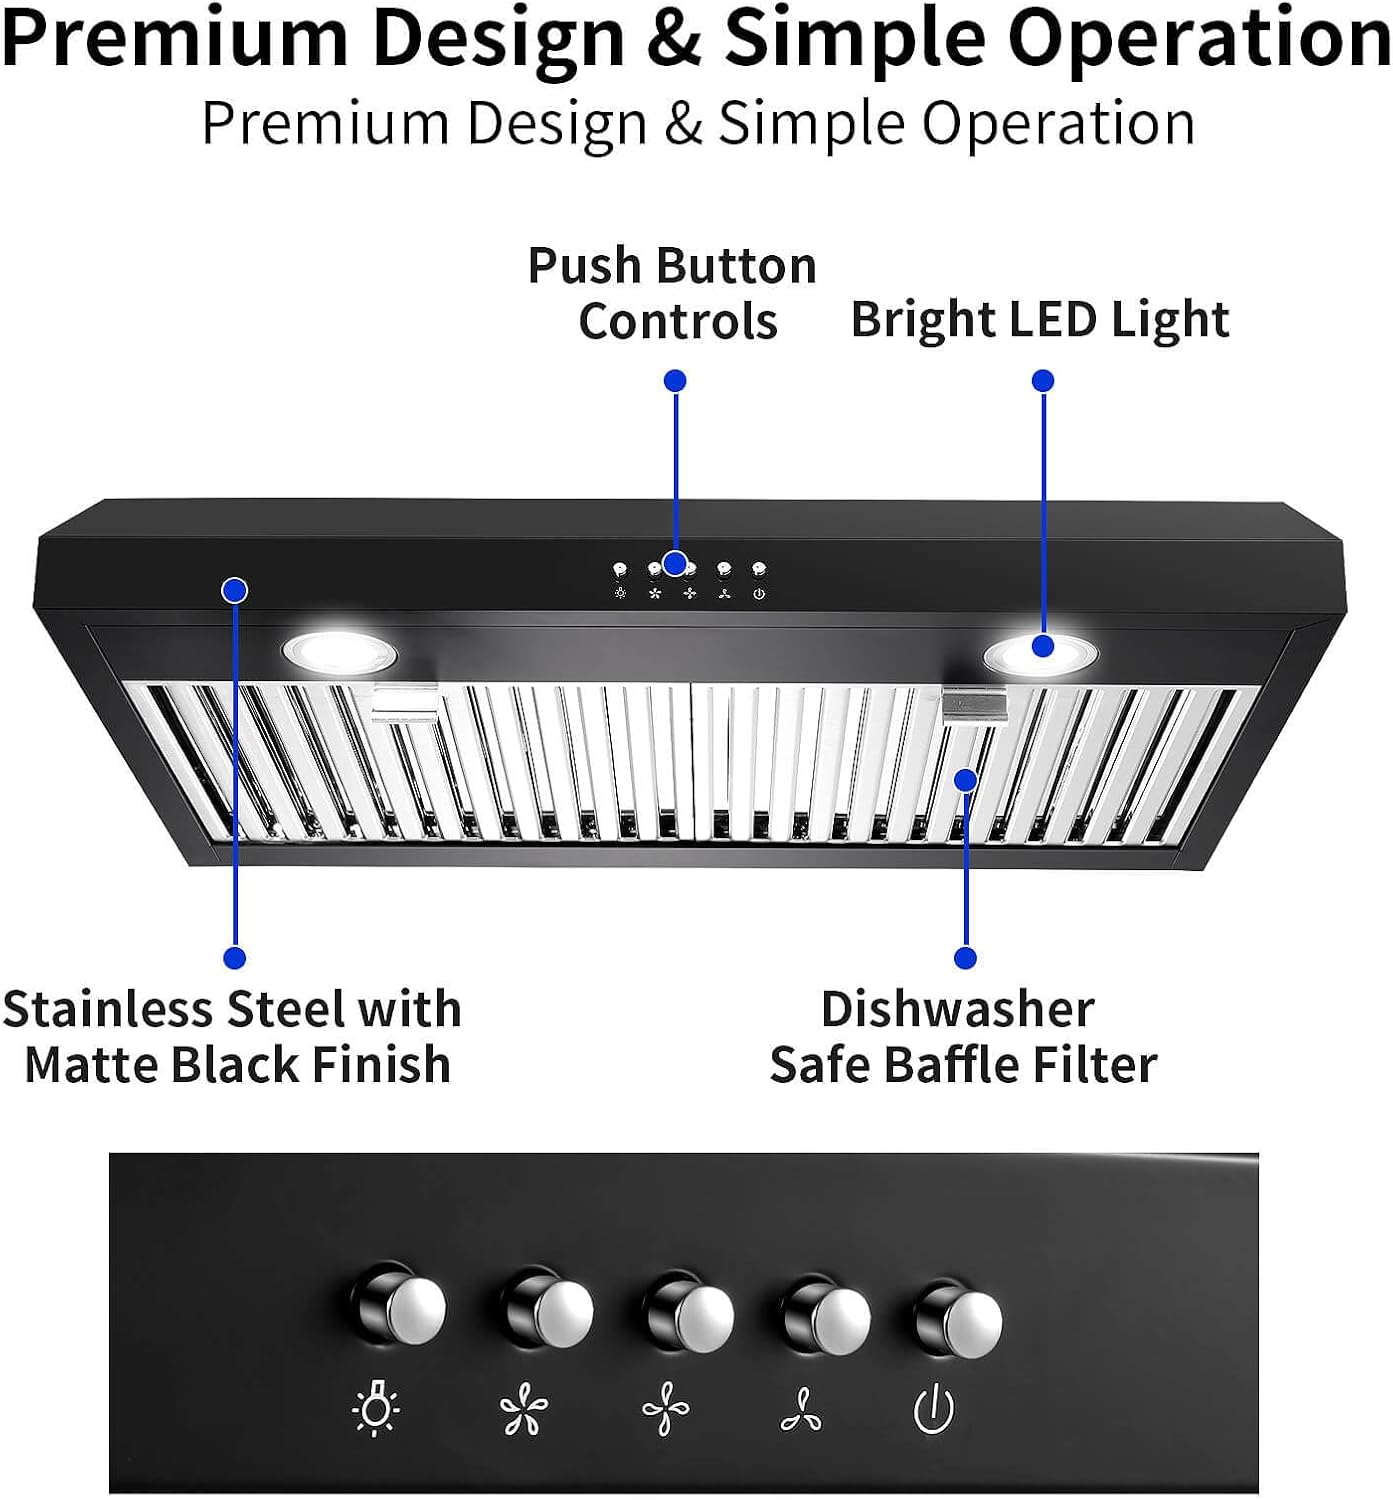
Image 3.1: Overview of the SNDOAS Black Range Hood, highlighting push button controls, bright LED lights, stainless steel with matte black finish, and dishwasher-safe baffle filters.

Image 3.2: The range hood installed in a kitchen setting, demonstrating its aesthetic integration. Features like 500 CFM airflow, 3-speed fan, and noise level below 66 dB are indicated.

Image 3.3: Close-up view of the bright LED lights providing illumination over a stovetop, emphasizing energy-saving, eco-friendly, and flicker-free operation.
4. Installation
Proper installation is crucial for the performance and safety of your range hood. It can be installed under a cabinet or as a wall-mounted unit.
4.1 Pre-Installation Checklist
- Ensure you have all necessary tools and hardware.
- Verify the mounting surface is strong enough to support the weight of the range hood.
- Confirm electrical requirements (120V/60Hz) are met and a 3-prong outlet is available.
- Determine your preferred venting method (ducted or ductless).
4.2 Venting Options
This range hood offers three venting options:
- Top Round Venting: For connecting to a 6-inch round duct to exhaust air through the roof.
- Top Rectangle Venting: For connecting to a 10" x 3 1/4" rectangular duct to exhaust air through the roof or wall.
- Rear Rectangle Venting: For connecting to a 10" x 3 1/4" rectangular duct to exhaust air through the rear wall.
For ductless (recirculating) operation, a carbon filter (Part # CF-0475, sold separately) is required. This option is suitable when external venting is not feasible.

Image 4.1: Technical diagram illustrating the three available venting configurations: top round, top rectangular, and rear rectangular. Dimensions are provided for each option.

Image 4.2: View of the range hood's internal mechanism, demonstrating the optional charcoal filter for ductless ventilation. The filter (CF-0475) is sold separately.
4.3 Mounting Instructions (Under Cabinet)
- Prepare the Cabinet: Measure and mark the location for the range hood under the cabinet. Ensure sufficient clearance above the cooking surface as per local codes.
- Drill Holes: Drill pilot holes for mounting screws and for the chosen venting option (if ducted) and electrical wiring access.
- Install Damper: If using ducted venting, install the appropriate damper (round or rectangular) onto the range hood's exhaust opening.
- Mount the Hood: Lift the range hood into position and secure it to the underside of the cabinet using the provided mounting screws. Ensure it is level and firmly attached.
- Connect Ductwork: If ducted, connect the ductwork to the range hood's exhaust and seal all connections with duct tape to prevent leaks.
- Electrical Connection: Connect the 3-prong power plug to a grounded electrical outlet.
- Install Filters: Insert the baffle filters into their designated slots.
Important: The back of the hood is slightly thicker than the front, resulting in a slight downward tilt after installation. This is a design feature, not a defect. Refer to the dimension drawing for details.
5. Operating Instructions
The SNDOAS Range Hood features simple push-button controls for easy operation of the fan and lights.
Control Panel Functions

Image 5.1: Detailed view of the push-button control panel, showing icons for light, fan speeds (low, medium, high), and power.
- Light Button (☼): Press to turn the LED lights ON or OFF.
- Fan Speed Buttons (☽, ☾, ☿):
- Press the first fan button for Low speed.
- Press the second fan button for Medium speed.
- Press the third fan button for High speed.
- Power Button (⏻): Press to turn the fan OFF.
Recommended Usage
- Turn on the range hood a few minutes before cooking to establish airflow.
- Use lower fan speeds for light cooking (simmering, boiling).
- Use higher fan speeds for heavy cooking (frying, grilling) to effectively remove smoke and odors.
- Allow the fan to run for a few minutes after cooking to clear any remaining fumes.
6. Maintenance
Regular maintenance ensures optimal performance and extends the lifespan of your range hood.
6.1 Cleaning Baffle Filters
The stainless steel baffle filters should be cleaned regularly (ideally every 3-6 weeks, depending on cooking frequency) to prevent grease buildup.
- Disconnect Power: Always turn off the range hood and unplug it from the power outlet before cleaning.
- Remove Filters: Locate the release latches on the filters and carefully pull them down to remove them.
- Clean Filters:
- Dishwasher: Place the filters in a dishwasher on a hot cycle.
- Hand Wash: Soak filters in hot water with a mild detergent. Use a soft brush to scrub away grease. Rinse thoroughly.
- Dry and Reinstall: Allow filters to dry completely before reinstalling them. Ensure they click securely into place.
6.2 General Cleaning
- Exterior: Wipe the exterior surfaces with a soft cloth dampened with mild soap and water. Do not use abrasive cleaners or scouring pads, as they can damage the finish.
- LED Lights: The LED lights are designed for long life and typically do not require replacement. If a light fails, contact customer support.
6.3 Carbon Filter Replacement (Ductless Models)
If your range hood is configured for ductless operation with carbon filters, these filters need to be replaced periodically (typically every 3-6 months, depending on usage) as they cannot be cleaned.
- Disconnect Power: Turn off and unplug the range hood.
- Remove Baffle Filters: Remove the metal baffle filters to access the carbon filters.
- Replace Carbon Filters: Follow the instructions provided with the replacement carbon filters (Part # CF-0475) to remove old filters and install new ones.
- Reinstall Baffle Filters: Once carbon filters are in place, reinstall the baffle filters.
7. Troubleshooting
Before contacting customer service, review the following common issues and solutions.
| Problem | Possible Cause | Solution |
|---|---|---|
| Range hood does not operate. | No power supply. Power cord not properly connected. Circuit breaker tripped. | Check if the unit is plugged in. Ensure the power cord is securely connected. Reset the circuit breaker. |
| Poor suction performance. | Grease filters are clogged. Incorrect fan speed selected. Ductwork obstruction (ducted models). Carbon filters saturated (ductless models). | Clean the baffle filters. Select a higher fan speed. Check ductwork for blockages. Replace carbon filters (CF-0475). |
| Excessive noise during operation. | Loose components. Obstruction in fan blades. Improper installation. Filters vibrating. | Check for loose screws or parts and tighten them. Turn off power and inspect fan for foreign objects. Ensure the unit is securely mounted and level. Ensure baffle filters are correctly seated. If using carbon filters, ensure they are properly installed as they can sometimes reduce vibration. |
| LED lights not working. | Light switch is off. Faulty LED module. | Press the light button to turn on. Contact customer support for assistance. |
8. Specifications
| Feature | Detail |
|---|---|
| Model Number | US0475BPB |
| Dimensions (W x D x H) | 29.8" x 19.7" x 5.9" |
| Material | 430 Stainless Steel (Black Painted Finish) |
| Air Flow Capacity | 500 CFM |
| Fan Speeds | 3 |
| Controls Type | Push Button |
| Lighting | LED Lights |
| Filter Type | Baffle Filters (Dishwasher Safe) |
| Venting Options | Ducted (Top Round, Top Rectangle, Rear Rectangle) / Ductless (with optional Carbon Filter CF-0475) |
| Electrical Requirements | 120V / 60Hz |
| Installation Type | Under Cabinet Mount / Wall Mount |
| Item Weight | 29.7 pounds |
9. Warranty and Support
SNDOAS is committed to providing quality products. For warranty information, technical support, or replacement parts, please contact SNDOAS customer service.
Please have your model number (US0475BPB) and purchase date available when contacting support.
For further assistance, visit the official SNDOAS store or contact their customer service department.

