
Introduction
This manual provides detailed instructions for the setup, operation, and maintenance of your Dododuck Corded Big Button Phone, Model TF265. Designed for ease of use, this phone features large buttons, an extra loud ringer, adjustable volume, and an SOS emergency button, making it ideal for seniors and individuals with hearing or visual impairments. Please read these instructions carefully to ensure proper functionality and to maximize your phone's features.
What's in the Box
- Dododuck Corded Big Button Phone (Base Unit)
- Handset
- Coiled Handset Cord
- Telephone Line Cord (RJ11C)
- User Manual
Product Overview
The Dododuck Corded Big Button Phone is designed with user convenience in mind. Below are key features and components.
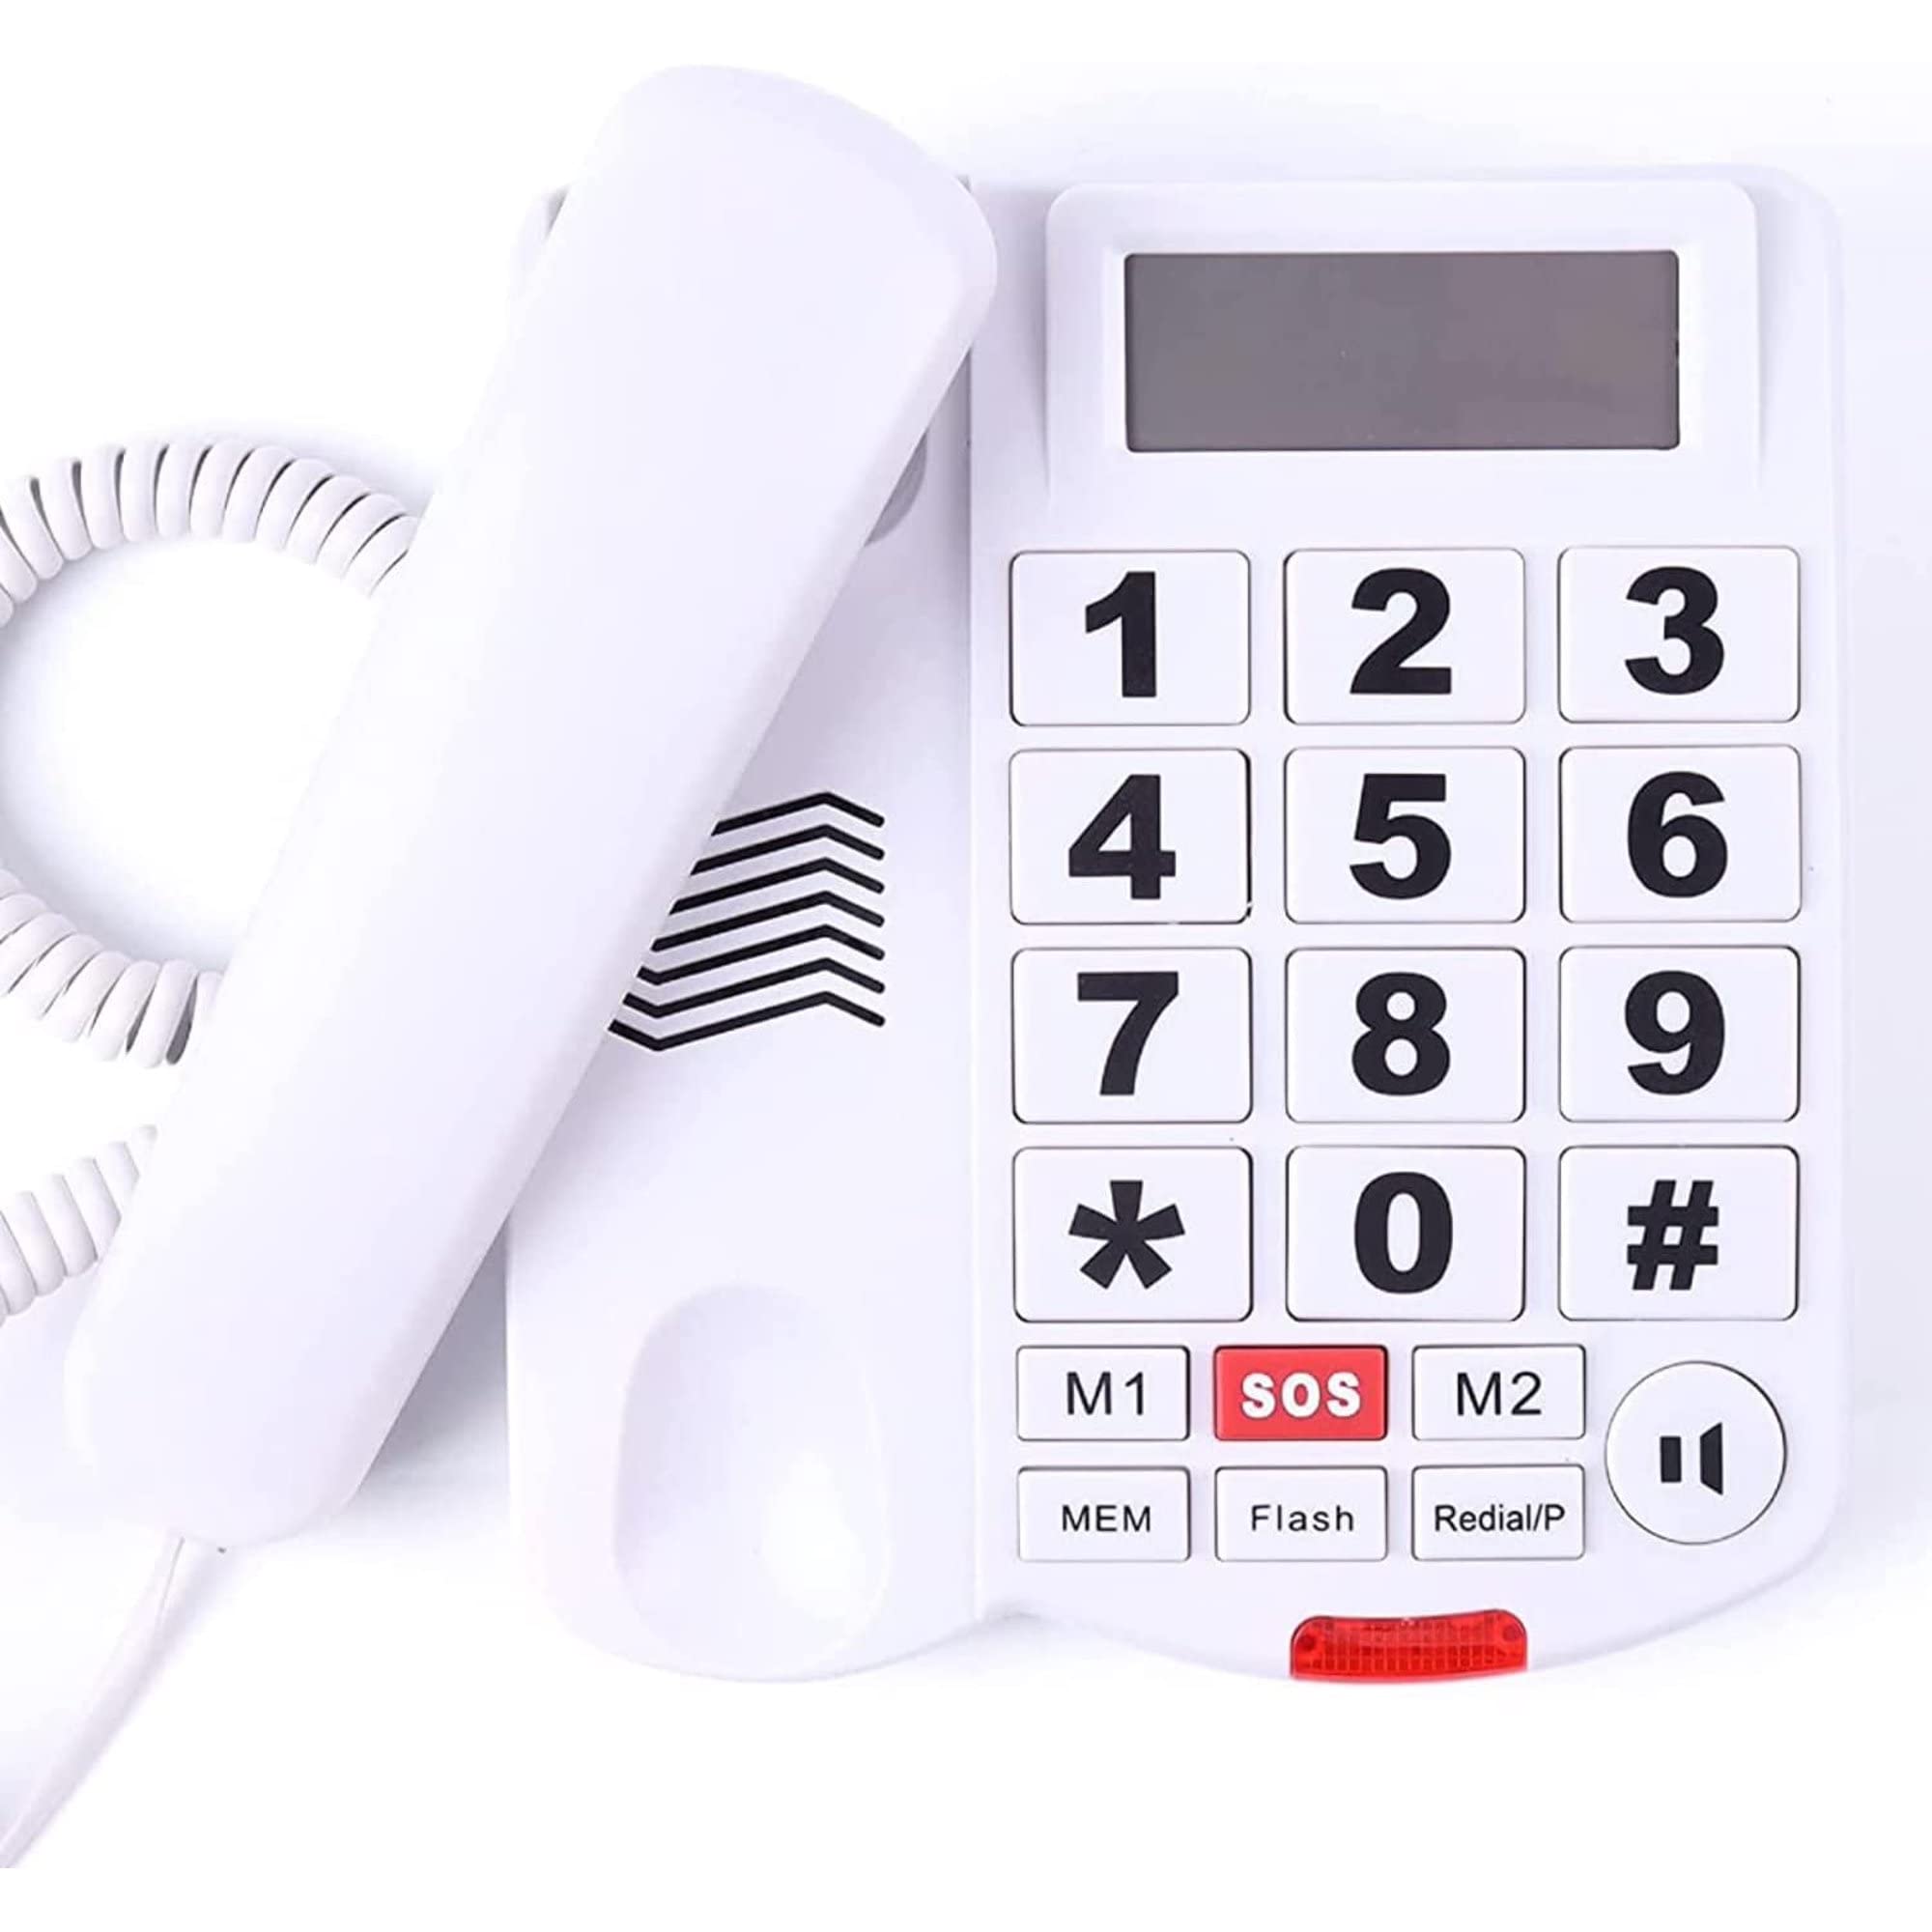
Figure 1: Front view of the Dododuck Corded Big Button Phone, showcasing the large keypad, display, and overall design.
Key Features:
- Large Number Buttons: Easy to see and press for accurate dialing.
- Caller ID: Displays incoming call information.
- Extra Loud Ringer: Adjustable ringer volume to ensure calls are not missed.
- Adjustable Handset Volume: Multiple levels for clear conversation.
- SOS Button: One-touch emergency dialing.
- Memory Buttons (M1, M2, MEM): For quick dialing of frequently used numbers.
- Speakerphone: Hands-free communication.
- Redial/Pause Function: For convenience.
Components:

Figure 2: Side view of the phone, indicating the ringer high/low switch and handset volume switch (Med/Hi/VHi) for personalized audio settings. The telephone line cord port is also visible.

Figure 3: The handset is ergonomically designed for comfortable holding and enhanced sound clarity during calls.

Figure 4: The back of the phone features integrated holes for optional wall mounting and rubber feet for stable desk placement.
Setup
Follow these steps to set up your Dododuck Corded Big Button Phone.
- Connect the Handset: Insert one end of the coiled handset cord into the modular jack located on the left side of the phone's base unit. Insert the other end into the modular jack on the handset.
- Connect the Telephone Line: Insert one end of the straight telephone line cord (RJ11C) into the 'LINE' port on the rear side of the phone's base unit. Insert the other end of the telephone line cord into your wall jack.

Figure 5: Illustration of connecting the telephone line cord to the 'LINE' port on the phone's base unit.
Setting the Date and Time:
To ensure Caller ID and other features function correctly, set the date and time:
- With the handset on-hook (phone not in use), press the FLASH key. The LCD will display "SET12345678".
- Press the number 1 key. The LCD will show "1--DATE--2--CL".
- Press the number 1 key again.
- Enter the current two-digit month (MM), two-digit day (DD), and the last two digits of the year (YY). For example, for January 20, 2026, enter 012026.
- Press the SPEAKER key to confirm and save the settings.
Adjusting LCD Brightness:
To adjust the display brightness:
- With the handset on-hook, press the FLASH key. The LCD will display "SET12345678".
- Press the number 2 key. The LCD will show "LCD con 4" (default level).
- Use the DOWN (▼) or UP (▲) keys to adjust the brightness level (5 levels available).
- Press the SPEAKER key to confirm and save the setting.
Operating Instructions
Making a Call:
- Lift the handset or press the SPEAKER key to activate the speakerphone.
- Dial the desired telephone number using the large keypad. The number will appear on the LCD display.
- If using the handset, the call will connect automatically. If using speakerphone, the call will connect after dialing.
Receiving a Call:
When the phone rings, lift the handset or press the SPEAKER key to answer the call.
Memory Dialing (M1, M2, and MEM Keys):
Your phone supports one-touch dialing for M1, M2, and SOS keys, and two-touch dialing for 10 additional memory locations (0-9).
To Program M1, M2, or SOS Keys:
- Ensure the handset is on-hook.
- Enter the telephone number you wish to store (including area code if needed).
- Press and hold the desired memory key (M1, M2, or SOS) for approximately 5 seconds until a confirmation tone or display change occurs.
To Program MEM Keys (0-9):
- Ensure the handset is on-hook.
- Enter the telephone number you wish to store.
- Press the MEM key.
- Press the desired number key (0-9) where you want to store the number.
To Dial a Stored Memory Number:
- Lift the handset or press the SPEAKER key.
- For M1, M2, or SOS: Press the corresponding key (M1, M2, or SOS). The number will be dialed automatically, and speakerphone will activate if the handset is not lifted.
- For MEM (0-9): Press the MEM key, then press the number key (0-9) where the number is stored.
Adjusting Volume:
Handset Volume: Use the HANDSET VOLUME SWITCH on the side of the phone (refer to Figure 2) to select between MED (Medium), HI (High), and VHI (Very High) levels during a call.
Ringer Volume: Use the RINGER SWITCH on the side of the phone (refer to Figure 2) to select between LOW and HI (High) ringer volumes. If the switch is in the LOW position, the ringer LED will still flash for visual notification of incoming calls.
Caller ID:
When an incoming call is received, the caller's number (and name, if available and subscribed to Caller ID service) will be displayed on the LCD screen.
Redial/Pause:
Press the Redial/P button to automatically redial the last number called. This button can also be used as a pause key when programming numbers, if required by your telephone system (e.g., for accessing an outside line).
Flash Key:
The FLASH key is used to get a new dial tone or to answer a call waiting if you have subscribed to call waiting service.
Maintenance
To ensure the longevity and optimal performance of your phone:
- Clean the phone's surface with a soft, damp cloth. Avoid using harsh chemicals or abrasive cleaners.
- Keep the phone away from excessive moisture, heat, and direct sunlight.
- Do not attempt to disassemble or repair the phone yourself. Refer to qualified service personnel for any repairs.
Troubleshooting
If you encounter issues with your phone, refer to the following common problems and solutions:
| Problem | Possible Cause / Solution |
|---|---|
| No dial tone | Check that the telephone line cord is securely connected to both the phone and the wall jack. Ensure your telephone service is active. |
| Cannot hear caller / Caller cannot hear me | Adjust the handset volume switch (MED/HI/VHI). Ensure the handset cord is securely connected. If using speakerphone, ensure it is activated correctly. |
| Memory numbers are lost | This phone may not retain stored memory numbers if power to the phone line is interrupted. Reprogram essential numbers after any power outage. |
| Ringer is too quiet or too loud | Adjust the ringer switch (LOW/HI) on the side of the phone. |
| Caller ID not displaying | Ensure you have subscribed to Caller ID service from your telephone provider. Verify the date and time are set correctly on the phone. |
| Cannot switch to speakerphone during a call | This model requires speakerphone to be activated at the start of a call. It cannot be switched mid-call. |
Specifications
| Feature | Detail |
|---|---|
| Brand | DODODUCK |
| Model Number | TF265 |
| Telephone Type | Corded |
| Power Source | Corded Electric (Line Powered) |
| Dialer Type | Keypad |
| Caller Identification | Yes |
| Multiline Operation | Single-Line Operation |
| Item Weight | 1.39 pounds |
| Package Dimensions | 8.19 x 7.17 x 3.5 inches |
| Color | Red |
Product Video Overview
Video 1: This video provides an overview of the Dododuck Big Button Phone, demonstrating its components and basic setup, including how to connect the cords and navigate the user manual.
Warranty and Support
For warranty information or technical support, please refer to the contact details provided with your purchase documentation or visit the official DODODUCK website. Keep your purchase receipt as proof of purchase for any warranty claims.