
1. Introduction
This manual provides detailed instructions for the setup, operation, and maintenance of your KECAG 10.1 Inch Digital Picture Frame. Please read this manual thoroughly before using the device to ensure proper functionality and to maximize your user experience. Keep this manual for future reference.
2. Product Overview
2.1 Key Features
- 10.1 Inch 1080P HD IPS Screen: Features a 1920x1080 resolution with a 180° wide-angle IPS display for clear viewing from various angles.
- Multimedia Playback: Supports photo slideshows, video playback, and music playback.
- Motion Sensor: Automatically turns the frame on/off based on detected movement to conserve energy.
- Timing On/Off Function: Allows scheduled power on and off times.
- Versatile Media Support: Compatible with SD cards and USB flash drives.
- User-Friendly Interface: Simple main menu for easy navigation.
- Remote Control: Provides convenient operation from a distance.
- Additional Functions: Includes calendar and alarm features.
2.2 Package Contents
- KECAG 10.1 Inch Digital Picture Frame
- 32GB USB Flash Drive
- Remote Control
- Power Adapter
- User Manual

Figure 2.2.1: The KECAG 10.1 Inch Digital Picture Frame displaying a family photo, accompanied by its remote control.
3. Setup
3.1 Power Connection
- Locate the power adapter included in the package.
- Connect the small end of the power adapter cable to the DC IN port on the back of the digital picture frame.
- Plug the other end of the power adapter into a standard electrical outlet.
- The frame will automatically power on or enter standby mode.
3.2 Inserting Media (USB Drive or SD Card)
The digital picture frame supports both USB flash drives and SD cards for media playback.
- Identify the USB port and SD card slot on the side or back of the frame.
- For a USB drive: Carefully insert the USB flash drive into the USB port.
- For an SD card: Insert the SD card into the SD card slot with the metal contacts facing down, until it clicks into place.
- Ensure the media is inserted correctly to avoid damage.

Figure 3.2.1: Illustrated steps for connecting media (USB/SD card) and power to the digital picture frame.
3.3 Initial Power On and Language Settings
- Once powered on, the frame may display a language selection screen.
- Use the remote control's navigation buttons (Up/Down/Left/Right) to select your preferred language.
- Press the ENTER button to confirm your selection.
4. Operating Instructions
4.1 Remote Control Functions
The remote control allows for convenient navigation and setting adjustments. Ensure the remote is aligned with the infrared sensor on the frame during use.
- MENU: Access the main menu or return to the previous menu.
- PHOTO: Directly enter photo playback mode.
- MUSIC: Directly enter music playback mode.
- MOVIE: Directly enter video playback mode.
- EXIT: Exit current function or menu.
- ENTER: Confirm selection or play/pause media.
- SETUP: Access system settings.
- Navigation Buttons (Up/Down/Left/Right): Navigate through menus and options.
- VOL+/VOL-: Adjust volume during video or music playback.
4.2 Main Menu Navigation
From the main menu, you can select different functions:
- Picture: View photos in a slideshow.
- Music: Play audio files.
- Calendar: Display calendar and set alarms.
- Settings: Configure device preferences.

Figure 4.2.1: The digital picture frame's interface showing options for Calendar, Photo/Video, and Music playback.
4.3 Photo Playback
- From the main menu, select Picture or press the PHOTO button on the remote.
- The frame will automatically start a slideshow of photos found on the inserted media.
- Playback Order: In settings, you can choose between Shuffle, Sequential, or Repeat All.
- Transition Effects: Select from various effects like Up/Down, Mosaic, Left/Right, or Random.
- Image Preview: Access a thumbnail view of your photos.
- Image Rotation: Adjust the orientation of images (vertical/horizontal).
- Screen Brightness: Adjust the display brightness in the settings menu.
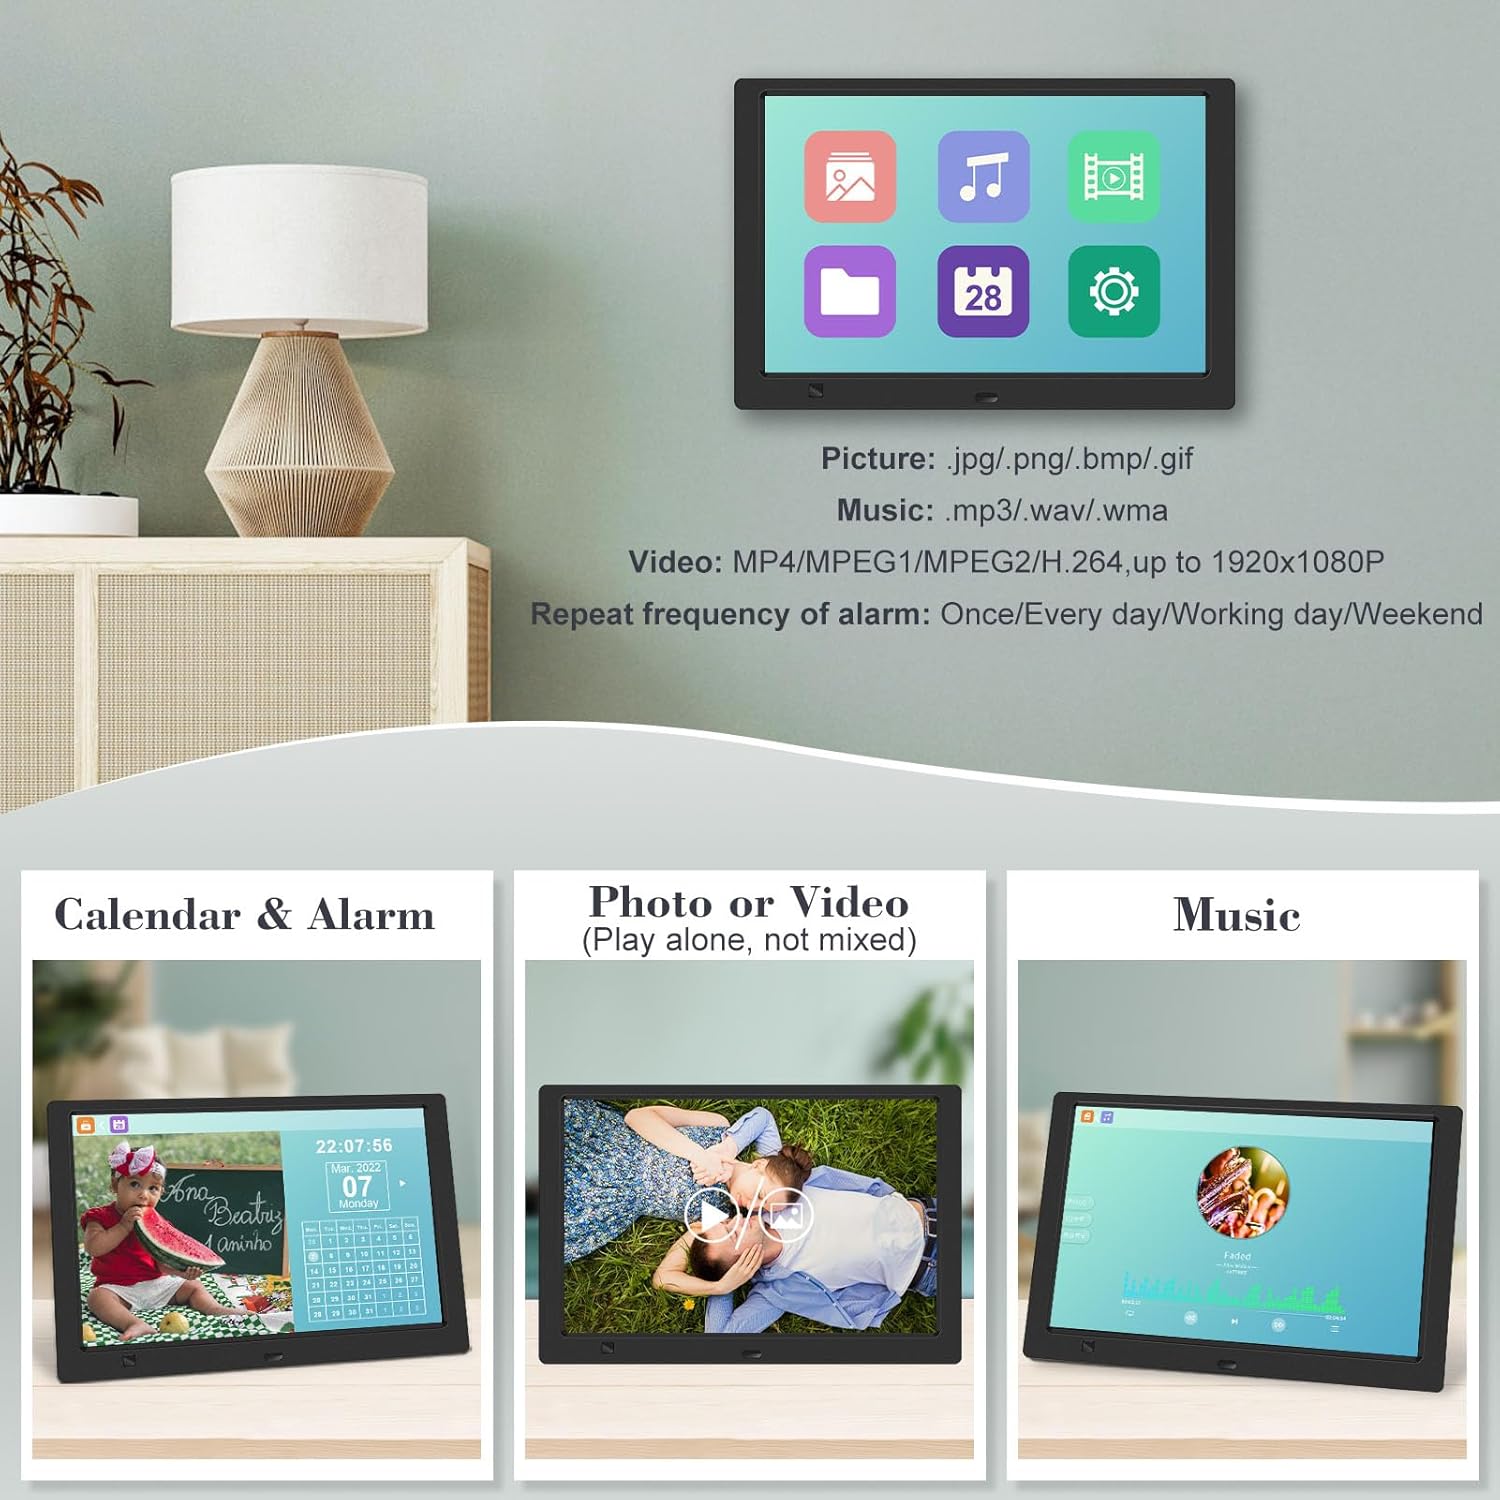
Figure 4.3.1: The digital picture frame displaying a photo slideshow with background music and various image transition options.

Figure 4.3.2: Visual representation of slideshow and image preview options, including settings for playback order, display scale, picture rotation, time window, and screen brightness adjustment.
4.4 Video and Music Playback
- From the main menu, select Movie or Music, or use the corresponding buttons on the remote.
- Navigate to the desired file using the remote control and press ENTER to play.
- Supported video formats: MP4/MPEG1/MPEG2/H.264 up to 1920x1080.
- Supported music formats: MP3/WAV/WMA.
4.5 Motion Sensor Function
The motion sensor helps save energy by automatically turning the frame on or off.
- To enable/disable the motion sensor, go to the Settings menu.
- Select the motion sensor option and toggle it On or Off.
- When enabled, the frame will power on when movement is detected and turn off after a period of inactivity.
4.6 Timing On/Off Function
Set specific times for the frame to automatically power on and off.
- Access the Settings menu.
- Locate the Timing On/Off function.
- Set your desired power-on time and power-off time. You can also configure this for specific days (e.g., weekdays, weekends, every day).

Figure 4.6.1: Demonstrates the smart motion sensor turning on the frame when movement is detected and the timing on/off function for scheduled operation.
5. Maintenance
5.1 Cleaning the Screen
To clean the screen, gently wipe it with a soft, dry, lint-free cloth. For stubborn marks, slightly dampen the cloth with water or a screen-safe cleaning solution. Avoid using harsh chemicals or abrasive materials.
5.2 General Care
- Keep the frame away from direct sunlight, heat sources, and excessive moisture.
- Avoid dropping the device or subjecting it to strong impacts.
- Do not attempt to disassemble the frame; this will void the warranty.
- Ensure proper ventilation around the device.
6. Troubleshooting
If you encounter issues with your digital picture frame, please refer to the following common problems and solutions:
| Problem | Possible Cause | Solution |
|---|---|---|
| Frame does not power on. | Power adapter not connected or faulty outlet. | Ensure the power adapter is securely connected to the frame and a working electrical outlet. Try a different outlet. |
| No photos/videos/music displayed. | No media inserted, media not recognized, or unsupported file format. | Ensure a USB drive or SD card is properly inserted. Check if files are in supported formats (JPG/PNG/BMP/GIF for photos; MP4/MPEG1/MPEG2/H.264 for video; MP3/WAV/WMA for music). Try reformatting the media (backup data first). |
| Remote control not working. | Battery depleted, remote not aimed correctly, or sensor obstructed. | Replace the remote control battery. Ensure the remote is pointed directly at the frame's infrared sensor. Remove any obstructions between the remote and the frame. |
| Screen is blank or frozen. | Temporary software glitch. | Unplug the power adapter, wait 10 seconds, then plug it back in to restart the frame. |
7. Specifications
| Feature | Specification |
|---|---|
| Screen Size | 10.1 Inches |
| Resolution | 1920 x 1080 (1080p HD IPS) |
| Aspect Ratio | 16:9 |
| Viewing Angle | 180° |
| Compatible Devices | SD Card, USB Drive |
| Supported Photo Formats | JPG, PNG, BMP, GIF |
| Supported Video Formats | MP4, MPEG1, MPEG2, H.264 (up to 1920x1080) |
| Supported Music Formats | MP3, WAV, WMA |
| Motion Sensor | Yes |
| Item Model Number | KECAG-CA-001 |
| Product Dimensions | 6.4 x 9.7 x 0.99 inches |
| Item Weight | 1.59 pounds |
| Batteries (Remote) | 1 Lithium Metal battery (included) |
| Manufacturer | KECAG |
8. Warranty and Support
For warranty information, please refer to the documentation included with your product packaging. KECAG provides 24-hour customer service to assist with any issues or questions you may have regarding your digital picture frame. Please contact customer support for assistance.