
Introduction
This manual provides essential information for the safe and efficient operation, maintenance, and troubleshooting of your INGCO 20V Cordless Pressure Washer, model CPWLI2008. Please read this manual thoroughly before using the product to ensure proper handling and to prevent damage or injury.
Note: This pressure washer is a bare unit and does not include a battery or charger. It is designed to be powered exclusively by INGCO 20V lithium-ion batteries, which are compatible across all INGCO Li-ion 20V products.
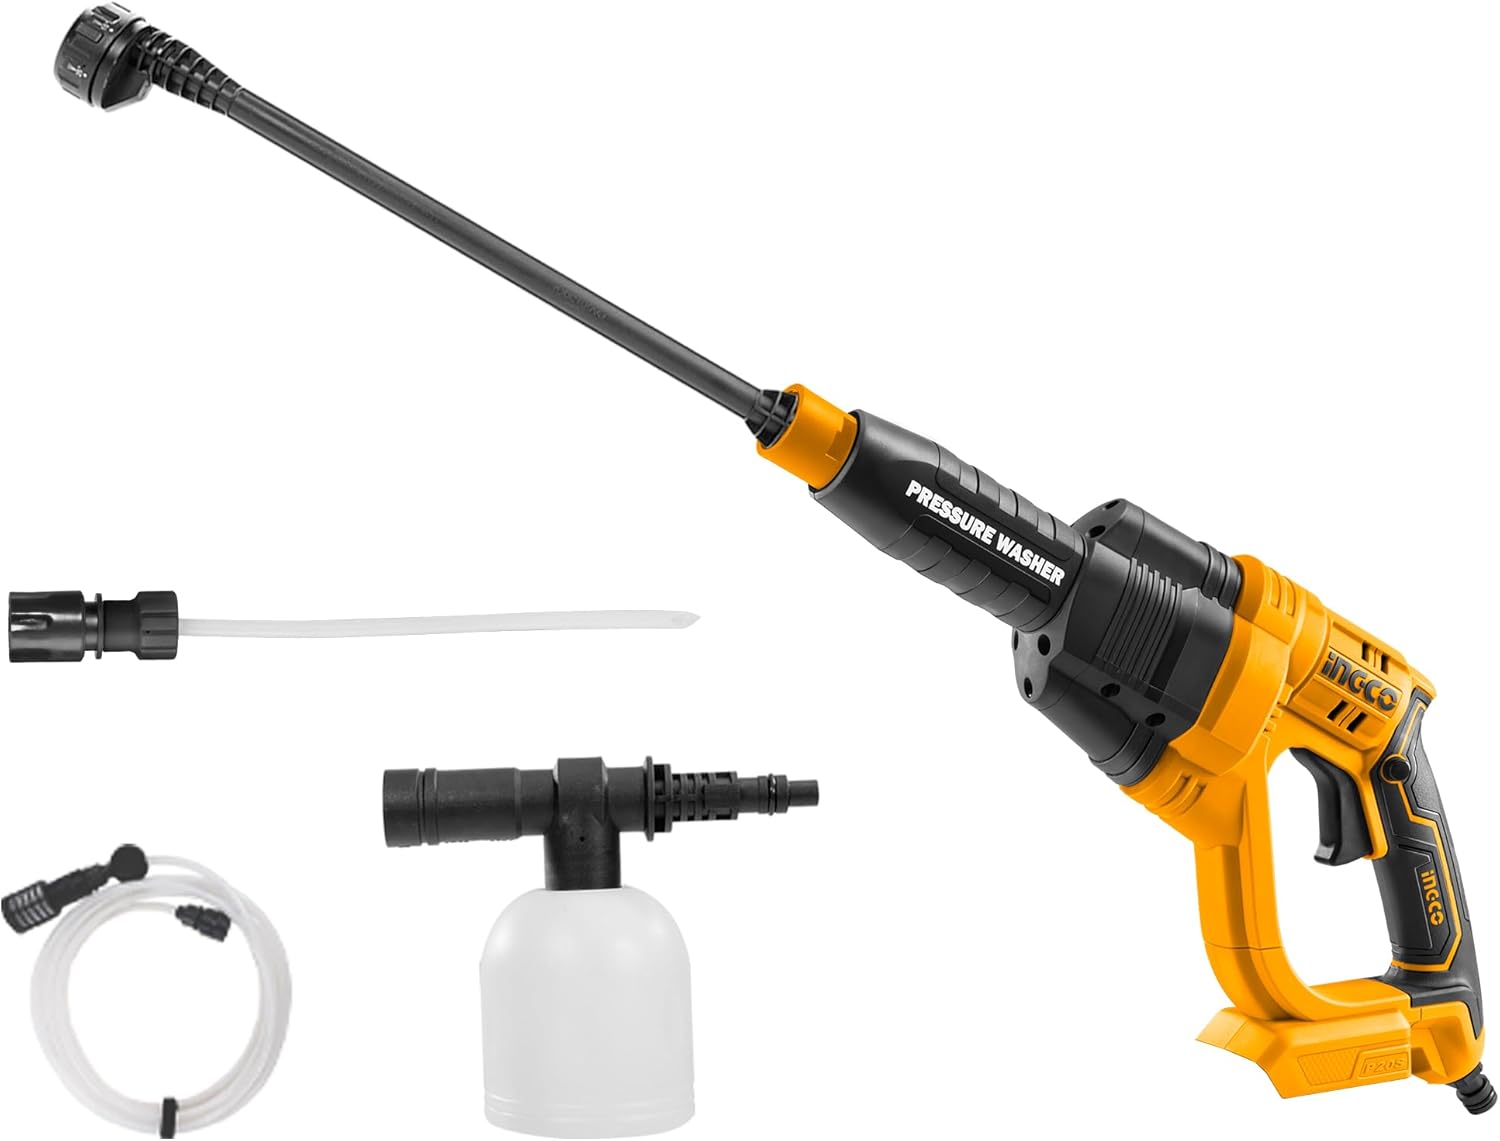
Figure 1: INGCO 20V Cordless Pressure Washer (CPWLI2008) with included accessories.

Figure 2: Important notice indicating that battery and charger are sold separately and are not included with the pressure washer unit.
Product Components
The INGCO 20V Cordless Pressure Washer comes with several key components designed for versatile cleaning tasks. Familiarize yourself with each part before operation.

Figure 3: Labeled diagram of the pressure washer showing its main components including the 6-pattern nozzle, motor, safety lock, anti-slip handle, water intake, lithium-ion battery slot, pump, and switch.
Included Accessories:
- 1 x High-pressure washer unit (CPWLI2008)
- 1 x 6-pattern spray gun
- 1 x 6m water inlet hose with quick connector
- 1 x Self-suction connector
- 1 x 400ml foam producer
- 1 x Mesh bag for storage
Setup
- Battery Installation: Ensure the pressure washer is turned off. Insert a fully charged INGCO 20V lithium-ion battery into the battery slot until it clicks into place.
- Hose Connection: Connect the 6-meter water inlet hose to the water intake port on the pressure washer. Use the quick connector for a secure fit. Ensure the self-suction connector is properly attached to the other end of the hose if drawing water from a bucket or tank.
- Nozzle Attachment: Attach the 6-pattern spray gun to the front of the pressure washer. Twist to secure it firmly.
- Water Source: For optimal performance, connect the water inlet hose to a reliable water source, such as a garden hose, or place the self-suction connector into a bucket of clean water.
- Foam Producer (Optional): If using the foam producer, fill it with appropriate cleaning solution and attach it to the spray gun as directed.
Operating Instructions
Starting the Pressure Washer:
- Ensure all connections are secure and the water source is active.
- Point the nozzle away from yourself and others.
- Press and hold the trigger switch to start the motor. The auto-stop system will engage when the trigger is released.
Using the 6-in-1 Spray Nozzle:
The 6-pattern spray nozzle allows for various cleaning applications. Rotate the nozzle head to select the desired spray pattern:
- 0° (Pencil Jet): For concentrated, powerful cleaning on tough stains. Use with caution.
- 15° (Fan Spray): For intensive cleaning of smaller areas.
- 25° (Fan Spray): General purpose cleaning for moderate dirt.
- 40° (Wide Fan Spray): For gentle cleaning of larger surfaces, such as vehicles or delicate items.
- UP (Upward Spray): For cleaning hard-to-reach areas, like vehicle underbodies.
- Foam (Soap Spray): For applying detergent or foam using the foam producer.

Figure 4: Illustration of the 6-in-1 nozzle and its various spray patterns, including 0°, 15°, 25°, 40°, upward spray, and foam setting.

Figure 5: Demonstrates the spraying function, particularly useful for cleaning car roofs and underbodies with a 40-degree spray angle.
General Usage Tips:
- Always start with a wider spray pattern and lower pressure on delicate surfaces to avoid damage.
- Maintain a safe distance from the surface being cleaned.
- For stubborn dirt, apply cleaning solution with the foam producer, allow it to soak, then rinse with a high-pressure setting.

Figure 6: Examples of the pressure washer being used for various cleaning tasks, including washing a bicycle, watering plants, and cleaning patio furniture.
Maintenance
Regular maintenance ensures the longevity and optimal performance of your pressure washer.
- Cleaning the Nozzle: If the spray pattern becomes irregular or pressure drops, the nozzle may be clogged. Use a small pin or the included nozzle cleaning tool to clear any debris from the nozzle opening.
- Water Filter: Regularly check and clean the water inlet filter to prevent debris from entering the pump. A clogged filter can reduce performance and damage the unit.
- Hose Inspection: Inspect the 6m suction hose for kinks, cuts, or damage before each use. Replace if necessary.
- Storage: After each use, disconnect the water supply and run the pressure washer for a few seconds to clear any remaining water from the pump and hose. Store the unit in a dry, frost-free area. Remove the battery if storing for extended periods.
- Battery Care: Always use and store INGCO 20V batteries according to their specific instructions. Do not expose batteries to extreme temperatures or moisture.
Troubleshooting
| Problem | Possible Cause | Solution |
|---|---|---|
| Unit does not start. | Battery not charged or improperly inserted. | Ensure battery is fully charged and correctly inserted. |
| Low pressure or no water flow. | Clogged nozzle; water inlet filter blocked; insufficient water supply; air in pump. | Clean nozzle; clean water filter; ensure adequate water supply; prime the pump by running unit with water for a few seconds. |
| Motor runs but no water sprays. | Nozzle blocked; water supply disconnected; air in system. | Clear nozzle; check water hose connection; allow air to purge from system. |
| Unit stops frequently. | Overheating (auto-stop system); low battery. | Allow unit to cool down; recharge battery. |
Specifications
| Parameter | Value |
|---|---|
| Model Number | CPWLI2008 |
| Voltage | 20V |
| Maximum Pressure | 24.8 Bar |
| Flow Rate | 2.2 L/min |
| Hose Length | 6 Metres |
| Item Weight | 0.21 Kilograms |
| Power Source | Battery Powered |
| Color | Yellow, Black |
| Manufacturer | INGCO |

Figure 7: Visual summary of the main technical parameters and included accessories for the INGCO pressure washer.
Warranty and Support
For warranty information and customer support, please refer to the official INGCO website or contact your local distributor. Keep your purchase receipt as proof of purchase for any warranty claims.
For further assistance or technical inquiries, please visit the Official Ingco Store on Amazon.


