1. Product Overview
The Steinwhale Home Security Door Reinforcement Lock (Model SW1-01) is designed to provide additional security for inward-swinging doors. Constructed from durable aluminum, this lock is engineered to withstand significant force, helping to prevent unauthorized entry. It features a childproof design and a smooth sand-blasting oxidation surface for enhanced durability and aesthetics.

This image displays four units of the Steinwhale Home Security Door Reinforcement Lock, each featuring a silver aluminum construction. These locks are designed to enhance door security.
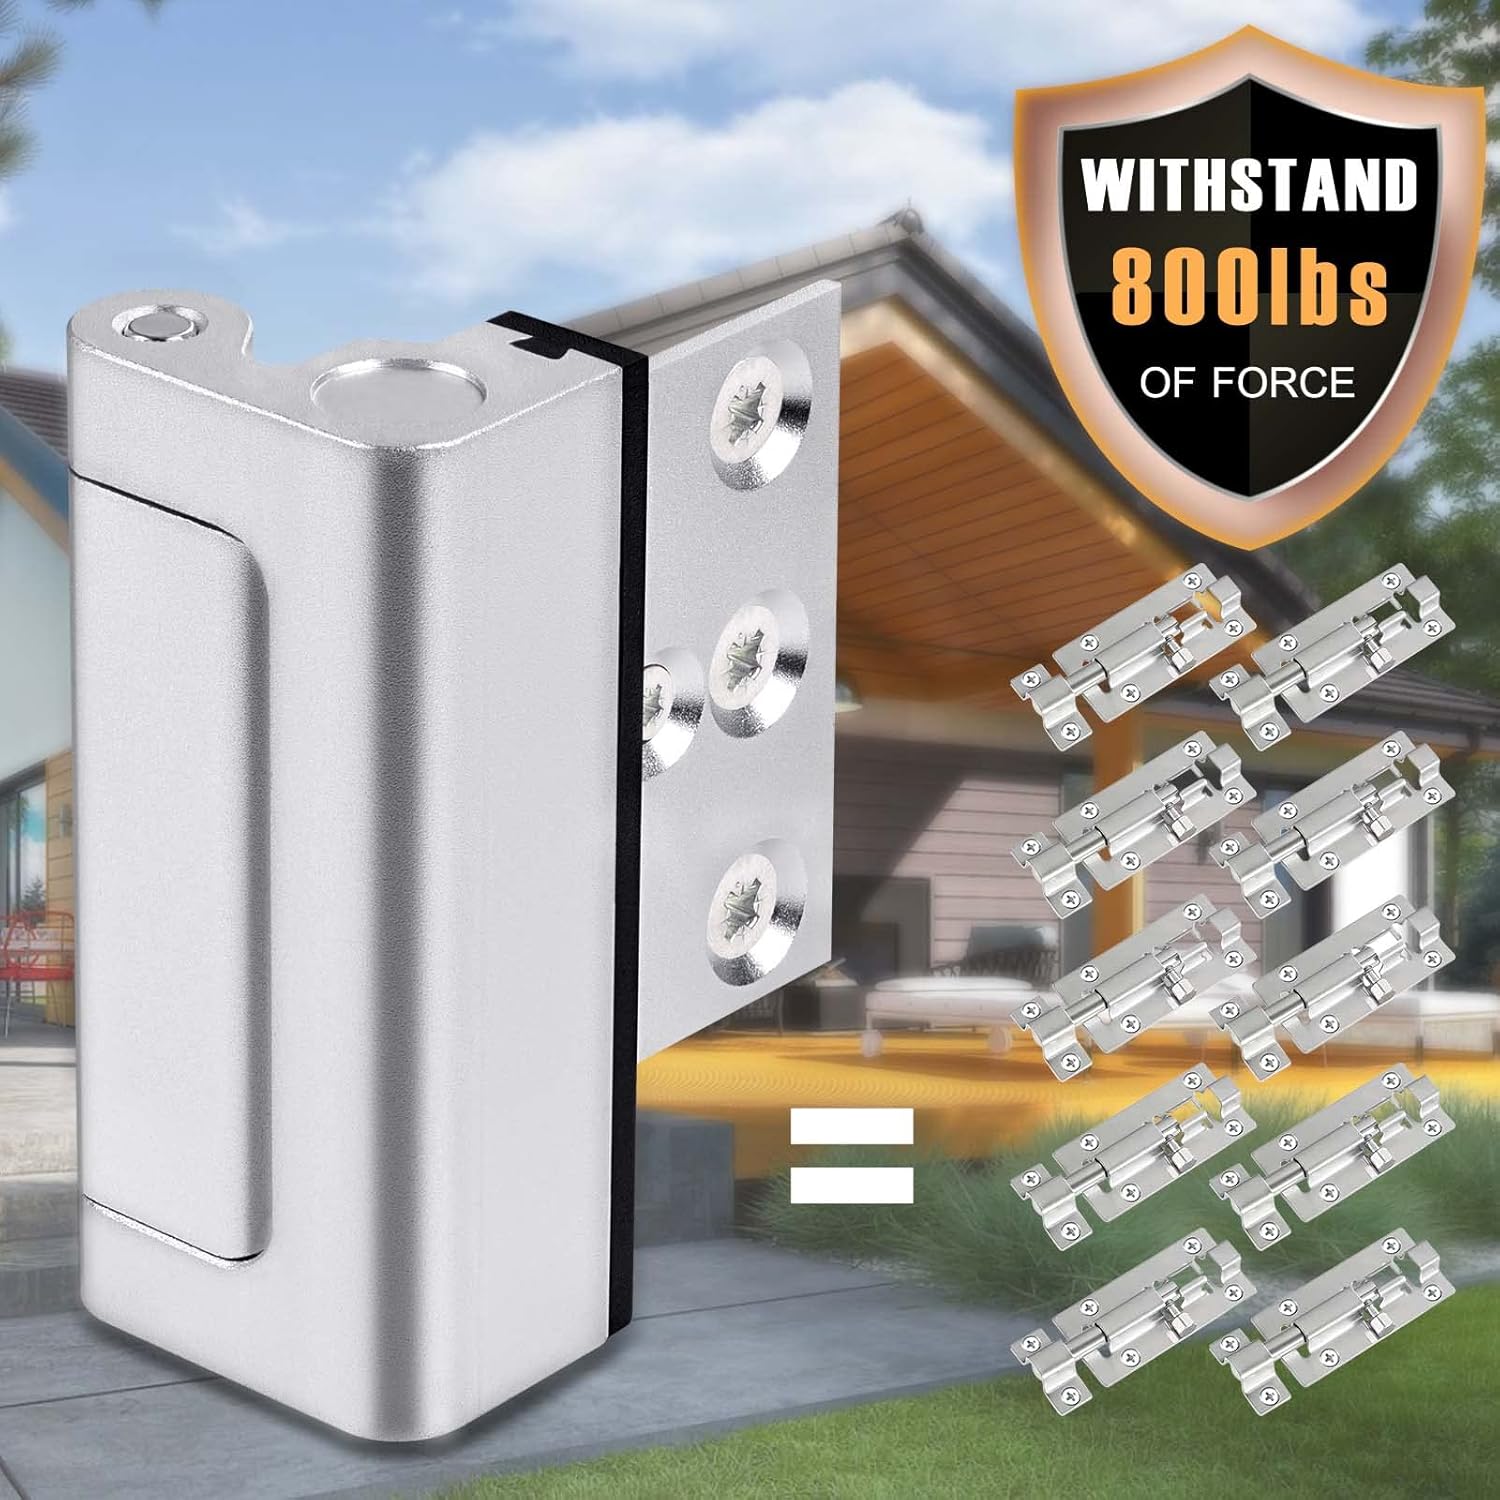
A close-up of the Steinwhale door reinforcement lock, highlighting its robust construction and the claim that it can withstand up to 800 pounds of force, indicating high security.
2. Important Compatibility Information
This door reinforcement lock is specifically designed for inward-swinging doors only. It is not compatible with double doors, sliding doors, or French doors. Ensure there is a gap of at least 0.08 inches (2mm) between your door and the frame for proper installation and operation. The door trim must be flush with the door or less than 0.2 inches (5mm) higher.

This diagram clarifies that the Steinwhale door reinforcement lock is exclusively for inward-swinging doors. It explicitly states that it is not suitable for double doors, sliding doors, or French doors, and requires a gap of at least 0.08 inches (2mm) between the door and frame.
3. Setup and Installation
Installation of the Steinwhale door reinforcement lock is designed to be straightforward. The package includes all necessary screws for mounting.
Required Tools:
- Screwdriver or Power Drill
- Pencil
- 1/8" Drill Bit (for pre-drilling)
Installation Steps:
- Position the Latch: Place the door reinforcement lock on your door frame at the desired height. For childproof safety, install it higher than the doorknob, out of reach of children. Ensure the latch mechanism aligns correctly with the door edge when closed.
- Mark Drilling Centers: Use the provided 3/4" screw to temporarily position the latch (using the oval-shaped hole). Once positioned, mark the centers for all screw holes with a pencil.
- Pre-drill Holes: Using a 1/8" drill bit, carefully pre-drill pilot holes at each marked center. This helps prevent wood splitting and ensures secure screw placement.
- Secure the Latch: Drive in the long screws (2.75 inches) into the pre-drilled holes using a screwdriver or power drill. Ensure the latch is firmly attached to the door frame.
- Test Operation: After installation, test the latch to ensure it operates smoothly and securely locks the door. Adjust the positioning screw if necessary to achieve optimal function.
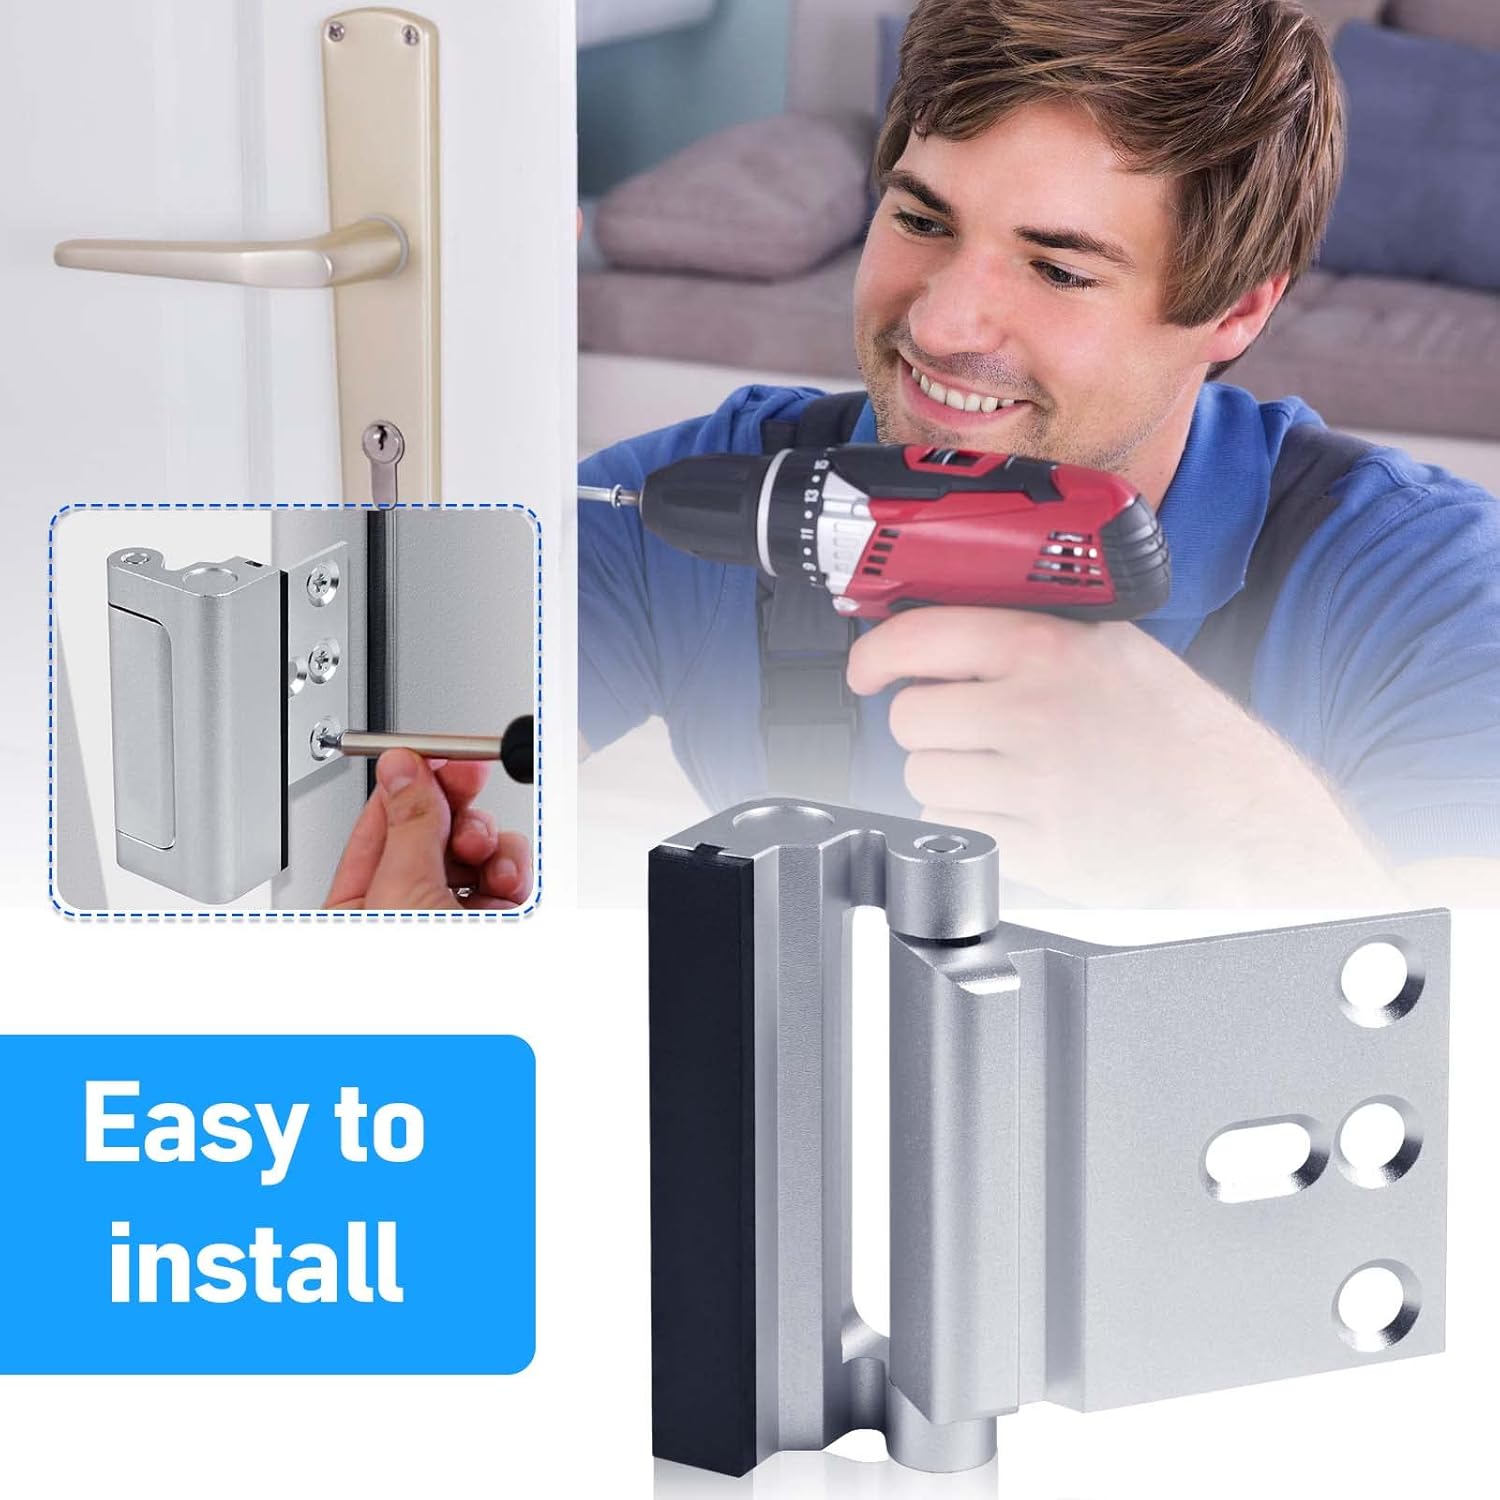
An image depicting a person using a power drill to install the Steinwhale door reinforcement lock onto a door frame, illustrating the ease of installation.
This video demonstrates the installation process and operation of the Steinwhale Home Security Door Reinforcement Lock. It shows how to position the latch, mark drilling centers, pre-drill, drive in screws, and engage the lock for added security.
4. Operating Instructions
The Steinwhale door reinforcement lock is designed for simple and quick operation.
To Lock the Door:
- Close the door completely.
- Flip the reinforcement lock into the closed position, ensuring the solid bar engages with the door frame.
To Unlock the Door:
- Pinch the door lock from the top and bottom with your fingers.
- Slide the lock sideways along the door towards the direction of the hinges until it disengages.
- Pull the lock outward to fully open the door.

A sequence of four images demonstrating the simple steps to operate the Steinwhale door lock: pinch the top and bottom, pull aside, flip the lock, and the door is opened.
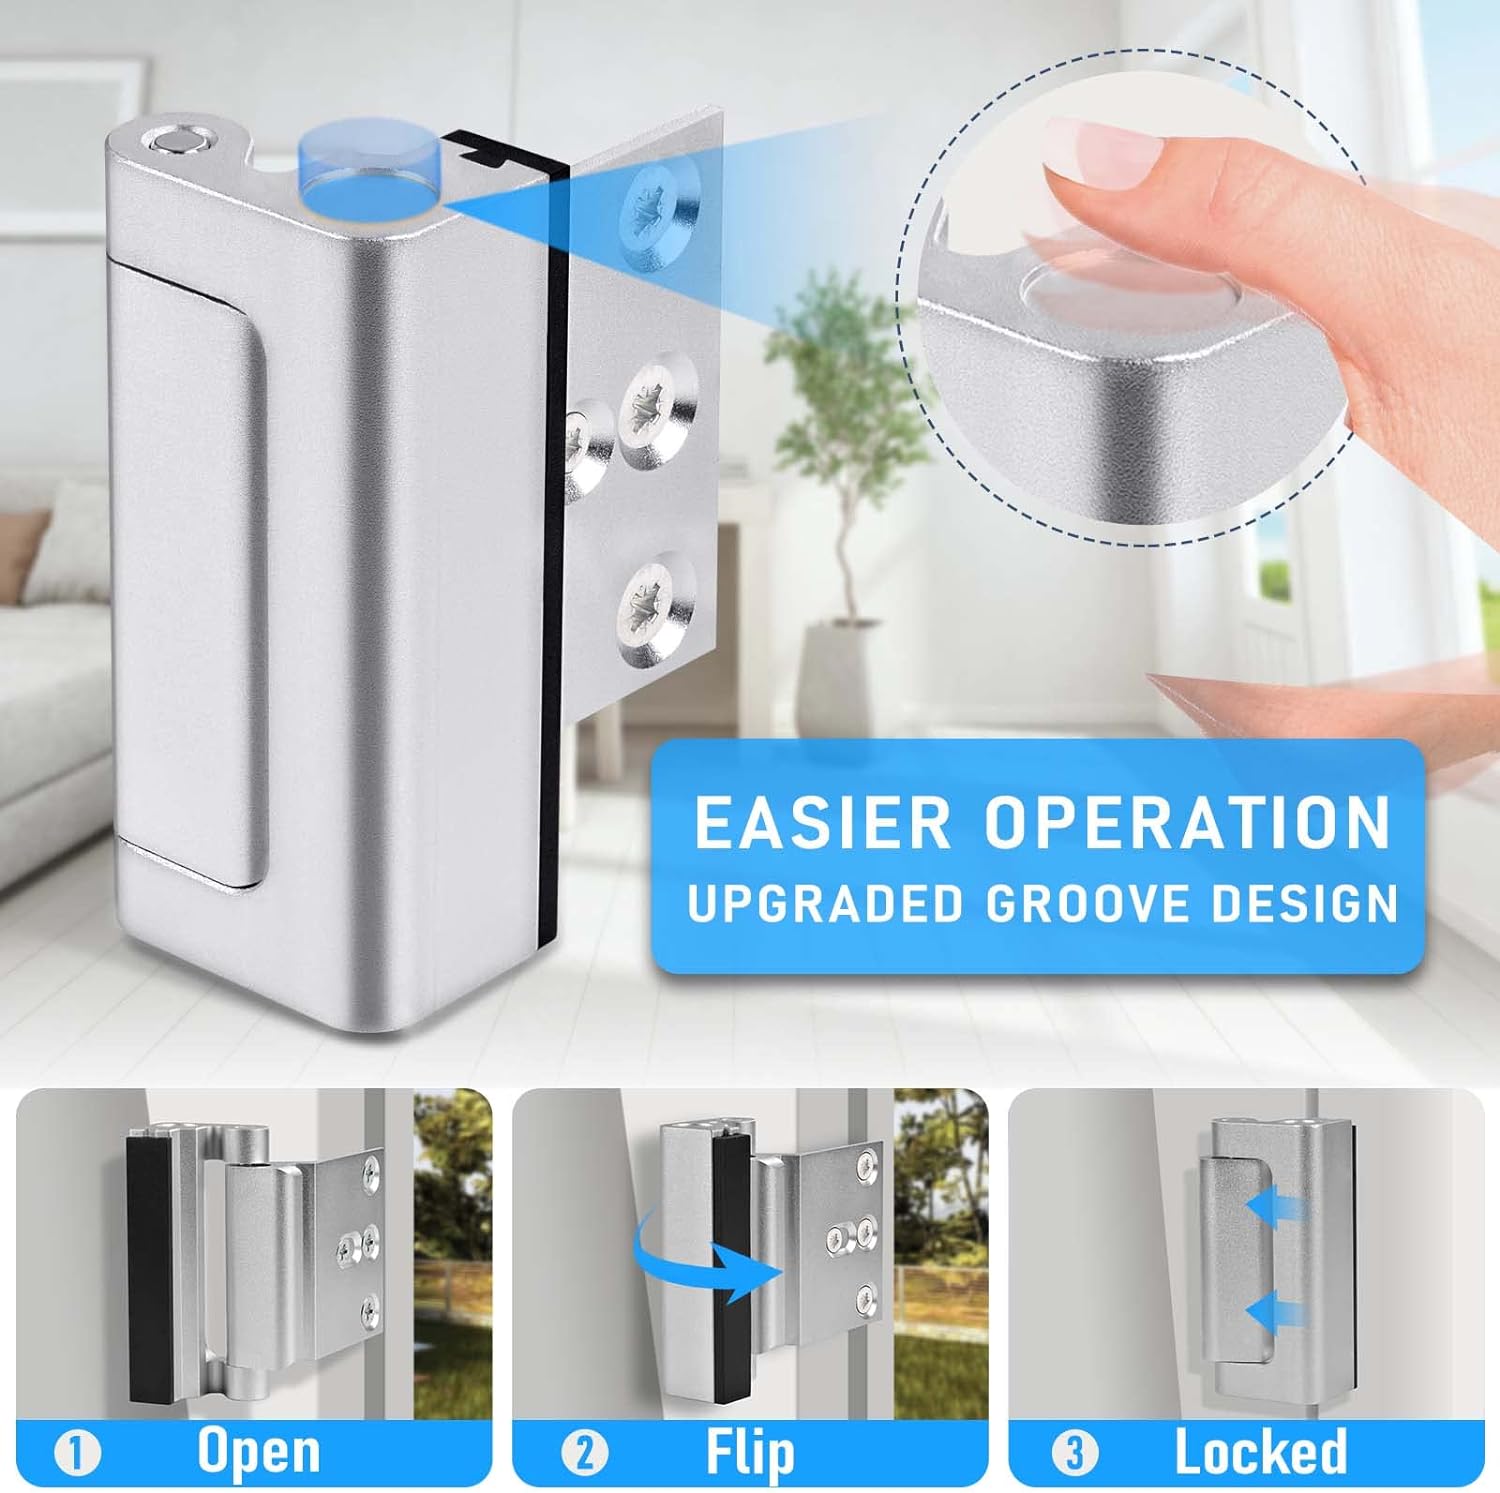
A detailed view of the Steinwhale door lock, showcasing its upgraded groove design which facilitates easier gripping and operation for locking and unlocking.
5. Maintenance
The Steinwhale door reinforcement lock requires minimal maintenance to ensure long-lasting performance.
- Cleaning: Wipe the lock periodically with a soft, damp cloth to remove dust and grime. Avoid using abrasive cleaners or solvents, as these may damage the finish.
- Inspection: Regularly check all screws to ensure they remain tight. If any screws become loose, tighten them immediately to maintain optimal security.
- Lubrication: No lubrication is typically required for the moving parts of this lock.
6. Troubleshooting
If you encounter issues with your Steinwhale door reinforcement lock, consider the following:
- Lock is Stiff or Difficult to Operate:
- Check if the screws are overtightened. Loosen the positioning screw slightly and test operation.
- Ensure there is no debris obstructing the moving parts. Clean the lock thoroughly.
- Lock Does Not Engage Securely:
- Verify that the lock is installed on an inward-swinging door and that the door closes flush with the frame.
- Confirm that the gap between the door and frame meets the minimum requirement (at least 0.08 inches / 2mm).
- Check if all mounting screws are securely fastened.
- Damage to Lock or Door Frame:
- If the lock or door frame is damaged, discontinue use and consider replacement or professional repair.
7. Specifications
| Feature | Detail |
|---|---|
| Brand | Steinwhale |
| Model Number | SW1-01 |
| Mounting Type | Surface Mount |
| Material | Aluminum |
| Color | Silver |
| Style | Modern |
| Finish Type | Smooth Sand-blasting Oxidation Surface |
| Number of Pieces | 4 (as per product variant) |
| Item Weight | 1.39 pounds |
| Package Dimensions | 4.21 x 3.66 x 2.83 inches |
| Size | 3 Inch |
| Power Source | Hand-powered |
| Included Components | 3 x 2.75 inch screws and 4 x 0.75 inch screws for each lock |

A technical illustration providing the precise dimensions of the Steinwhale door reinforcement lock, including its length, width, and height measurements.
8. Warranty and Support
For warranty information or technical support, please contact Steinwhale customer service directly. Details can typically be found on the product packaging or the official Steinwhale brand store.
Visit the Steinwhale Store for more products and information.


