
Introduction
Thank you for choosing the Outvita 80 Quart Rolling Ice Chest. This portable bar drink cooler is designed for convenience and durability, perfect for patio parties, BBQs, beach activities, and other outdoor events. With an 80-quart capacity, it can hold a significant number of beverages and keep them cold for extended periods. This manual provides detailed instructions for assembly, operation, maintenance, and troubleshooting to ensure optimal performance and longevity of your ice chest.
Package Contents
Before beginning assembly, please ensure all parts are present and undamaged. If any parts are missing or damaged, do not proceed with assembly and contact customer support.
- Cooler Body (1)
- Lids (2)
- Legs (4)
- Wheels (4, including 2 with locking mechanism)
- Side Handles (2)
- Bottle Opener (1)
- Cap Catcher (1)
- Bottom Storage Tray (1)
- Assembly Hardware (Screws, washers, wrench)
Setup Instructions
Follow these steps to assemble your Outvita Rolling Ice Chest.
Step 1: Attach the Legs to the Cooler Body
Carefully place the cooler body upside down on a soft, clean surface to prevent scratches. Attach each of the four legs to the designated corners on the underside of the cooler using the provided screws and a screwdriver or power drill. Ensure they are securely fastened.

Image: The cooler body with its four legs securely attached, illustrating the overall dimensions.
Step 2: Install the Bottom Storage Tray
Once the legs are attached, position the bottom storage tray between the lower sections of the legs. Secure the tray to the legs using the appropriate hardware. This tray provides additional space for storing items like snacks or extra bottles.

Image: A view of the cooler's lower section, highlighting the installed bottom storage tray and the drain plug.
Step 3: Attach the Wheels
Attach the four multi-directional wheels to the bottom of each leg. Two of these wheels are equipped with a locking mechanism. It is recommended to place the locking wheels on the same side for easier access and stability when securing the cooler. Use the provided wrench to tighten the nuts securely.
Image: Detail of the caster wheels, showing the locking mechanism for stability.
Step 4: Mount Side Handles, Bottle Opener, and Cap Catcher
Attach the two side handles to the cooler body using the provided screws. Then, mount the bottle opener and the cap catcher to the front side of the cooler. Ensure all components are firmly attached.
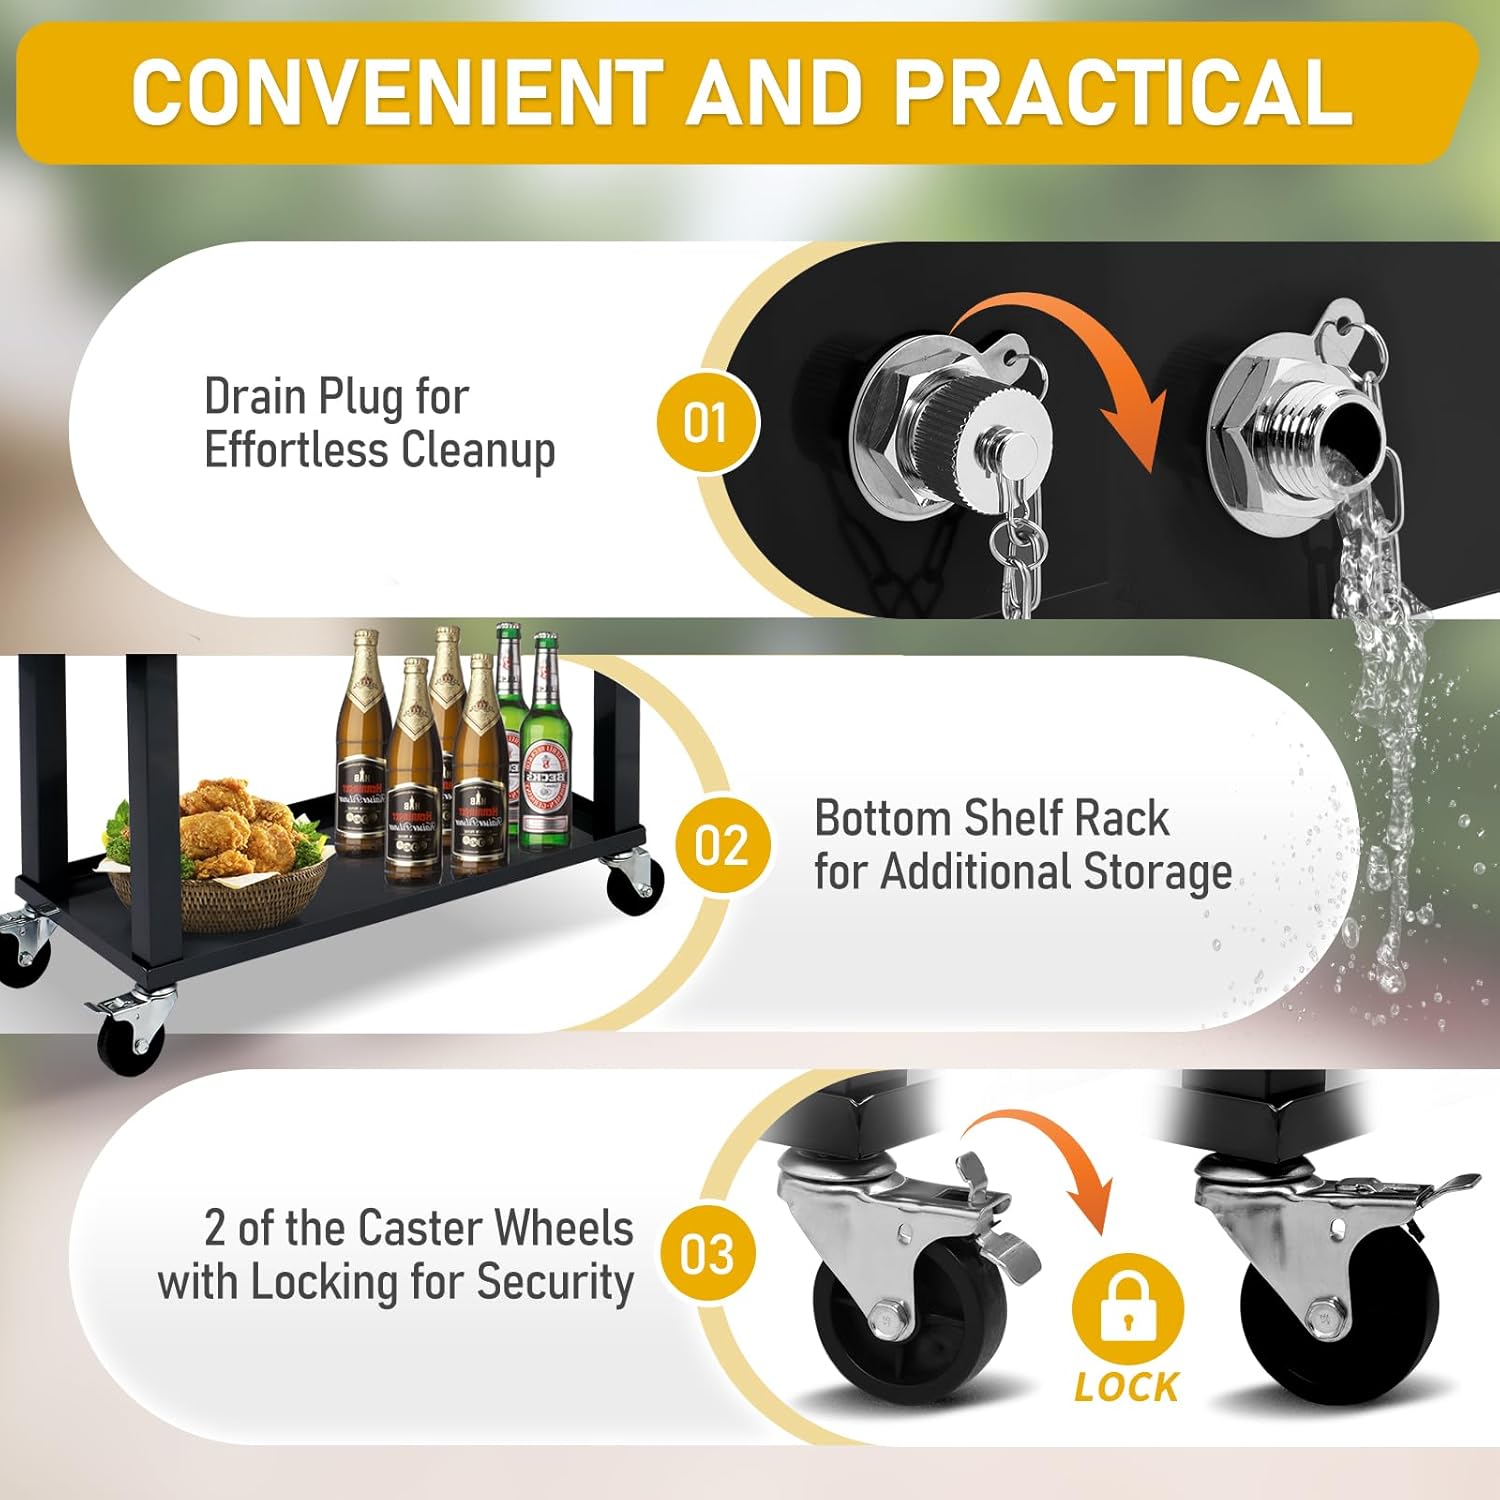
Image: A close-up showing the integrated bottle opener, the cap catcher, and the dual-lid design.
Step 5: Place the Lids
Position the two stainless steel lids on top of the cooler. These lids are designed for easy opening from either side and can also be completely removed for full access or cleaning.

Image: The cooler with one lid partially open, demonstrating its removable design for easy access.
Operating Instructions
Filling the Cooler
Open the lids and fill the cooler with ice. The 80-quart capacity can accommodate over 80 aluminum cans or 50 bottles. Arrange your beverages and food items within the ice for optimal cooling. The PP lined injection-foam-unitized interior is designed to keep contents cool for up to 48 hours or warm for up to 8 hours.

Image: The cooler filled with ice and a selection of bottles and cans, ready for use.
Using the Bottle Opener
The integrated bottle opener on the front of the cooler allows for convenient opening of bottled beverages. Simply place the bottle cap under the opener and leverage it to remove the cap. The attached cap catcher will collect the removed caps for easy disposal.
Moving and Securing the Cooler
Utilize the solid metal handles and the four multi-directional wheels to easily push or pull the cooler to your desired location. Once positioned, engage the locking mechanism on the two designated wheels to prevent the cooler from moving, ensuring stability during use.

Image: A person effortlessly moving the cooler using its ergonomic side handles.
Video: An official product video showcasing the Outvita Rolling Ice Chest's features and portability in various outdoor settings.
Maintenance
Draining Water
After use, remove the drain plug located at the back of the cooler to easily remove melted ice water. This feature simplifies cleanup and prevents water from accumulating inside the cooler.
Image: A detailed view of the drain plug, designed for effortless water removal.
Cleaning Instructions
The cooler's smooth powder-coated steel exterior and PP-lined interior are designed for easy cleaning. It is recommended to hand wash the cooler with mild soap and water. Avoid abrasive cleaners or scouring pads that could damage the finish. Ensure the cooler is thoroughly dried before storage to prevent mold or mildew.
Troubleshooting
Ice Melts Too Quickly
- Ensure lids are securely closed when not in use.
- Pre-chill the cooler with a small amount of ice before adding full contents.
- Keep the cooler in a shaded area, especially during hot weather, to maximize ice retention.
Wheels Not Rolling Smoothly or Locking
- Check for any debris or obstructions in the wheel mechanisms.
- Ensure the wheels are securely tightened to the legs.
- Verify that the locking levers are fully engaged or disengaged as intended.
Drain Plug Leaks
- Ensure the drain plug is tightly screwed in.
- Check the rubber gasket on the drain plug for any damage or misalignment.
Product Specifications
| Brand | Outvita |
| Model Number | B09XH9KQ3X |
| Capacity | 80 Quarts (20 Gallons) |
| Material | Iron, PP, Steel |
| Product Dimensions (D x W x H) | 18.9" x 35.8" x 34.3" |
| Item Weight | 242.51 Pounds |
| Cooling Retention | Up to 48 hours |
| Warming Retention | Up to 8 hours |
| Wheels | 4 multi-directional, 2 lockable |
| Product Care | Hand Wash Only |
Warranty and Support
For any questions, concerns, or warranty inquiries regarding your Outvita 80 Quart Rolling Ice Chest, please refer to the product packaging for specific warranty details or contact Outvita customer support directly. Keep your purchase receipt as proof of purchase for any warranty claims.