
1. Introduction
Thank you for purchasing the THINKWARE Q1000 QHD Dash Cam. This device is designed to record high-quality video footage of your journeys, providing crucial evidence in case of incidents and enhancing your driving safety with advanced features. The Q1000 offers front and rear QHD recording, built-in Wi-Fi and GPS, STARVIS Night Vision, 24-hour parking surveillance, and G-Sensor capabilities.
This manual provides detailed instructions on how to install, operate, and maintain your dash cam. Please read this manual thoroughly before using the product to ensure proper and safe operation.
2. Safety Information
- Do not disassemble, repair, or modify the device yourself. This may void the warranty and cause damage.
- Ensure the device is securely mounted and does not obstruct the driver's view or interfere with vehicle controls.
- Avoid exposing the device to direct sunlight for extended periods, especially in hot weather, as this may cause overheating.
- Use only genuine THINKWARE accessories and power cables to prevent damage and ensure optimal performance.
- Keep the device away from strong magnetic fields, which can interfere with its operation.
- Do not operate the device while driving. Adjust settings or review footage only when the vehicle is safely parked.
3. Package Contents
Verify that all items are present in your product package:

Image: THINKWARE Q1000 Dash Cam package contents.
- Q1000 Front Dash Cam
- Rear View Camera
- Adhesive Windshield Mount
- Spare Mounting Tape
- 12V Power Cable
- Rear Cam Cable
- 32GB MicroSD Card (included by default)
- Adhesive Wire Clips
- Heat Blocking Film
- CS Info / Quick Start Guide
- Hardwiring Cable (included)

Image: Genuine THINKWARE 32GB MicroSD card included with the dash cam.
Note: The included 32GB MicroSD card is a genuine THINKWARE product, rigorously tested for compatibility and reliability. Using incompatible memory cards may lead to recording failures or power issues.
4. Product Overview
4.1 Front Camera

Image: Front and rear cameras of the THINKWARE Q1000.

Image: Front view of the Q1000 dash cam.
The main unit houses the front camera, processor, GPS module, and control buttons. It records QHD (2560x1440) resolution video with a 156° wide-angle lens.
4.2 Controls and Indicators

Image: Top view of the Q1000 with controls and indicators.
- REC Button: Manually start/stop event recording.
- Mic Button: Toggle audio recording on/off.
- Format Button: Format the MicroSD card.
- Wi-Fi Button: Activate Wi-Fi for app connection.
- Power Button: Turn the device on/off.
- LED Indicators: Display recording status, GPS signal, and Wi-Fi connection.
4.3 Ports and Connections

Image: Rear view of the Q1000 with ports.
- DC-IN: Power input port.
- RADAR: For optional radar module connection.
- V-IN: Video input for the rear camera.
- MicroSD Card Slot: For inserting the memory card.
5. Setup and Installation
5.1 Choosing an Installation Location
Select a location on your windshield that does not obstruct your view or interfere with airbags. The ideal position is typically behind the rearview mirror.

Image: Front camera installed on the windshield.

Image: Side view of the front camera installation.
5.2 Installing the Front Camera
- Clean the installation area on the windshield thoroughly.
- Attach the adhesive mounting tape to the dash cam mount.
- Remove the protective film from the adhesive tape and firmly press the mount onto the chosen location on the windshield for at least 30 seconds.
- Slide the dash cam onto the mounted bracket until it clicks into place.
5.3 Installing the Rear Camera
- Clean the installation area on the rear window.
- Attach the adhesive mounting tape to the rear camera.
- Remove the protective film and firmly press the rear camera onto the center of the rear window, ensuring the lens has a clear view.
- Connect the rear camera to the front camera using the provided rear cam cable. Route the cable neatly along the vehicle's headliner and pillars using the included wire clips.
5.4 Power Connection
The Q1000 supports both 12V cigarette lighter power and hardwire installation for continuous parking mode recording.
- 12V Power Cable: Plug the 12V power cable into your vehicle's cigarette lighter socket and connect the other end to the DC-IN port on the front dash cam.
- Hardwiring Cable: For 24-hour parking mode, connect the hardwiring cable to your vehicle's fuse box. Professional installation is recommended for hardwiring to ensure correct connection to constant and accessory power sources.
5.5 MicroSD Card Insertion
Insert the included 32GB MicroSD card into the MicroSD card slot on the side of the front dash cam until it clicks into place. Ensure the card is inserted correctly with the gold contacts facing the correct direction as indicated on the device.
6. Operating the Dash Cam
6.1 Recording Modes
- Continuous Recording: Automatically starts recording when the vehicle's ignition is turned on. Footage is saved in one-minute segments.
- Event Recording: Triggered by impacts (G-Sensor) or manual button press. These recordings are saved in a separate folder to prevent overwriting.
- Parking Mode Recording: When hardwired, the dash cam automatically switches to parking mode when the ignition is off. It records motion and impact events to protect your vehicle while parked.
6.2 Video Quality and Night Vision
The Q1000 records in QHD (2560x1440) resolution for clear and detailed footage. It features STARVIS Night Vision and High Dynamic Range (HDR) for enhanced clarity in low-light conditions.
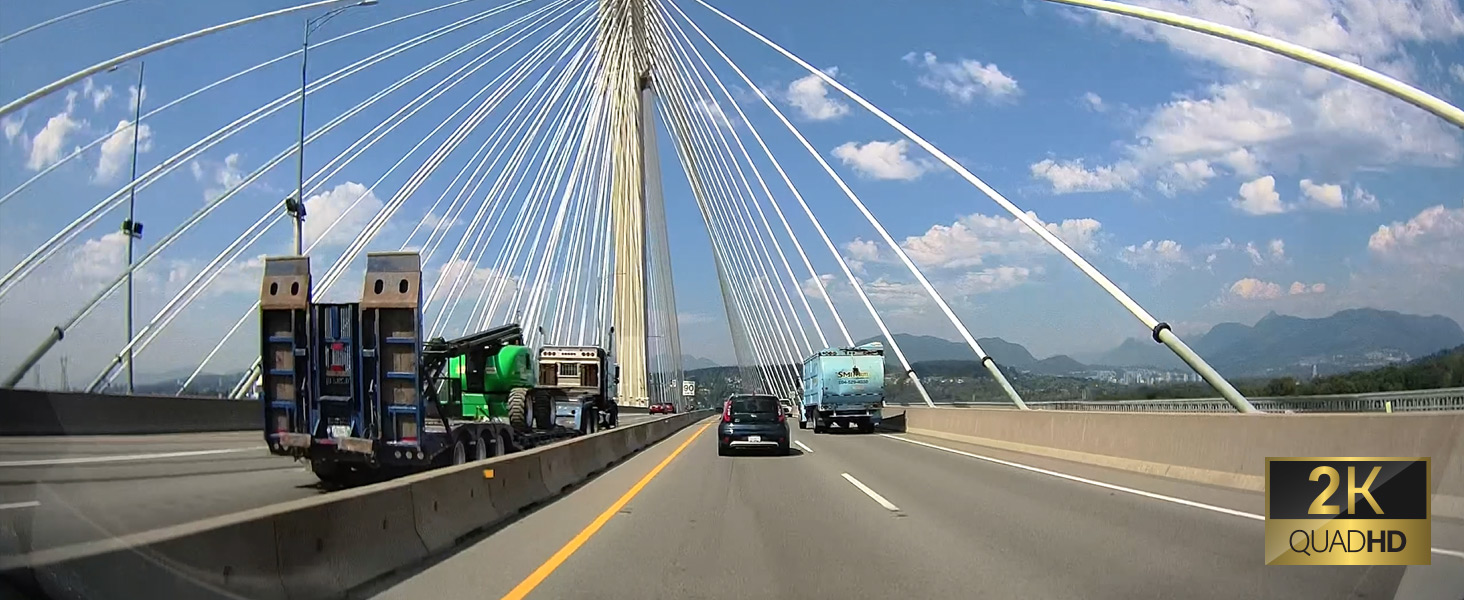
Image: Example of 2K Quad HD video quality.

Image: Comparison of standard vs. wide-angle view.

Image: Night vision comparison (OFF vs. ON with HDR).
6.3 GPS and Wi-Fi Features
The built-in GPS module records vehicle speed and location data, which can be viewed during playback. Integrated Wi-Fi allows you to connect the dash cam to your smartphone via the THINKWARE DASH CAM LINK app.

Image: 5GHz Wi-Fi connectivity for faster downloads.
6.4 Advanced Driver Assistance System (ADAS)
The Q1000 includes ADAS features to assist drivers and enhance safety:
- Lane Departure Warning System (LDWS): Alerts you if your vehicle drifts out of its lane.
- Forward Collision Warning System (FCWS): Warns you of an impending collision with a vehicle ahead.
- Front Vehicle Departure Warning (FVDW): Notifies you when the vehicle in front starts to move from a standstill.
- Speed Camera and Red Light Camera Alerts: Provides audible warnings for upcoming speed and red light cameras (requires GPS signal).

Image: ADAS features in action.

Image: Speed and red light camera alerts.
6.5 Using the THINKWARE DASH CAM LINK App
The THINKWARE DASH CAM LINK app allows you to conveniently manage settings, monitor live footage, and download videos directly to your smartphone.

Image: THINKWARE DASH CAM LINK app interface.

Image: THINKWARE CONNECTED app features.
Download the app from:
7. Maintenance
7.1 MicroSD Card Management
Regularly format the MicroSD card (at least once a month) to prevent recording errors and ensure optimal performance. You can format the card via the dash cam's button or through the THINKWARE DASH CAM LINK app.
7.2 Firmware Updates
Keep your dash cam's firmware updated to ensure the latest features and bug fixes. Firmware updates can typically be downloaded from the THINKWARE website and installed via the MicroSD card.
7.3 Cleaning the Device
Wipe the dash cam's lens and body with a soft, dry cloth. Do not use harsh chemicals or abrasive cleaners, as they may damage the device.
7.4 High-Temperature Protection
The Q1000 is equipped with a high-temperature protection system. If the internal temperature exceeds a certain limit, the device may automatically shut down to prevent damage. This is a normal safety feature.

Image: High-temperature protection feature.
8. Troubleshooting
| Problem | Possible Cause | Solution |
|---|---|---|
| Dash cam does not power on. | Loose power connection, vehicle's power outlet issue, fuse blown. | Check power cable connection. Test power outlet with another device. Check vehicle's fuse box. |
| Recording stops or footage is corrupted. | MicroSD card error, incompatible MicroSD card, card needs formatting. | Format the MicroSD card. Ensure you are using a genuine THINKWARE card or a compatible Class10 U3 card. Replace card if necessary. |
| Wi-Fi connection issues with app. | Incorrect Wi-Fi password, app not updated, dash cam Wi-Fi not activated. | Ensure Wi-Fi is activated on dash cam. Re-enter password. Update the app to the latest version. |
| GPS signal not acquired. | Device not in open area, GPS module obstructed. | Move vehicle to an open area. Ensure no obstructions are blocking the GPS signal. |
| Parking mode not working. | Not hardwired, low vehicle battery voltage. | Ensure dash cam is hardwired correctly. Check vehicle battery voltage. |
If you encounter issues not listed here, please refer to the official THINKWARE support resources.
9. Specifications
| Feature | Detail |
|---|---|
| Model Name | Q1000 |
| Item Model Number | TW-Q1000D32CH |
| Product Dimensions | 1.18 x 3.94 x 2.83 inches |
| Item Weight | 5.4 ounces |
| Video Capture Resolution | 1440p (QHD) |
| Wide Angle | 156° |
| Special Features | Night Vision (STARVIS), G-Sensor, HDR, 24H Parking Mode, ADAS, GPS, Wi-Fi |
| Connectivity Technology | Bluetooth, Wireless (Wi-Fi) |
| Included Components | Memory Card (32GB), Front & Rear Cam, 12V & Hardwire Cables |
| Mounting Type | Windshield Mount |
| Color | Black |
10. Warranty and Support
THINKWARE products are designed for reliability and performance. For specific warranty terms and conditions, please refer to the warranty information provided with your product at the time of purchase. Warranty details can also typically be found on the official THINKWARE website.
For technical support, firmware updates, or frequently asked questions, please visit the official THINKWARE support page or contact their customer service directly. Keep your product's model number and purchase information ready when seeking support.
Official User Guide (PDF): Download Here


