
Flylinktech JF-H-42H
FLYLINKTECH Folding Treadmill User Manual
Model: JF-H-42H | Brand: Flylinktech
1. Introduction
Thank you for choosing the FLYLINKTECH Folding Treadmill. This manual provides essential information for the safe and effective use, assembly, operation, and maintenance of your new fitness equipment. Please read this manual thoroughly before initial use and retain it for future reference.

Image: The FLYLINKTECH Folding Treadmill in an active running state.
2. Important Safety Information
To reduce the risk of serious injury, read all important precautions and instructions in this manual before using the treadmill. The manufacturer assumes no responsibility for personal injury or property damage sustained by or through the use of this product.
- Always consult with a physician before beginning any exercise program.
- Keep children and pets away from the treadmill at all times.
- Place the treadmill on a level surface with at least 2 meters (6.5 feet) of clear space behind it and 0.6 meters (2 feet) on each side.
- Ensure the safety key is properly attached to both the treadmill and your clothing before starting any workout.
- The maximum user weight capacity for this treadmill is 180 kg (approximately 396 lbs). Do not exceed this limit.
- Wear appropriate athletic footwear. Avoid using slippers or going barefoot.
- Connect the treadmill to a grounded outlet using a good quality surge protector to protect the electronics.
- Do not operate the treadmill if it has a damaged cord or plug, or if it is not working properly.
3. Package Contents
Verify that all components are present and undamaged before assembly.
- FLYLINKTECH Folding Treadmill Unit
- Power Cord
- User Manual (this document)
- Safety Key
4. Setup and Assembly
The FLYLINKTECH Folding Treadmill is designed for easy assembly. Most of the unit comes pre-assembled, requiring minimal setup before first use.
- Carefully remove all packaging materials and place the treadmill on a flat, stable surface.
- Lift the upright console frame into the vertical position.
- Secure the console frame using the provided bolts and tools. Typically, this involves screwing in two main bolts.
- Insert the mobile device holder into its designated slot on the console.
- Adjust the manual incline to your desired level (see Section 5.3 for details).
- Plug the power cord into a grounded electrical outlet.

Image: Visual guide for the simple assembly process.
Folding and Storage
This treadmill features a hydraulic folding system and built-in transport wheels for convenient storage and portability.
- To fold: Gently lift the running deck until it locks into the upright position. The hydraulic system will assist in the process.
- To unfold: Gently push the release mechanism and lower the running deck slowly until it rests on the floor.
- To move: Tilt the folded treadmill and use the transport wheels to roll it to your desired storage location.

Image: Demonstrates the hydraulic folding system and transport wheels for easy storage.
5. Operating Instructions
5.1 Control Panel and LED Display
The multi-function LED display provides real-time workout data. The console features intuitive controls for speed, programs, and more.

Image: The LED display showing various workout metrics and control buttons.
- Display Metrics: Shows Distance, Speed, Time, and Calories burned.
- Start/Stop: Press to begin or end your workout.
- Speed Adjustment: Use the '+' and '-' buttons to increase or decrease speed. Quick speed buttons (e.g., 2, 4, 6, 8) are also available for rapid changes. The speed range is 0.6 to 10 MPH.
- Program Selection: Cycle through the 12 preset programs using the 'P' button.
5.2 Smart App Control
Enhance your workout experience by connecting your treadmill to fitness apps via Bluetooth. The treadmill is compatible with FitShow, Zwift, and Kinomap.
- Download the 'FitShow' app from the App Store or Google Play.
- Enable Bluetooth on your mobile device.
- Open the FitShow app and follow the on-screen instructions to connect to your treadmill.
- Explore various workout modes, scenic routes, and fitness tips within the app.
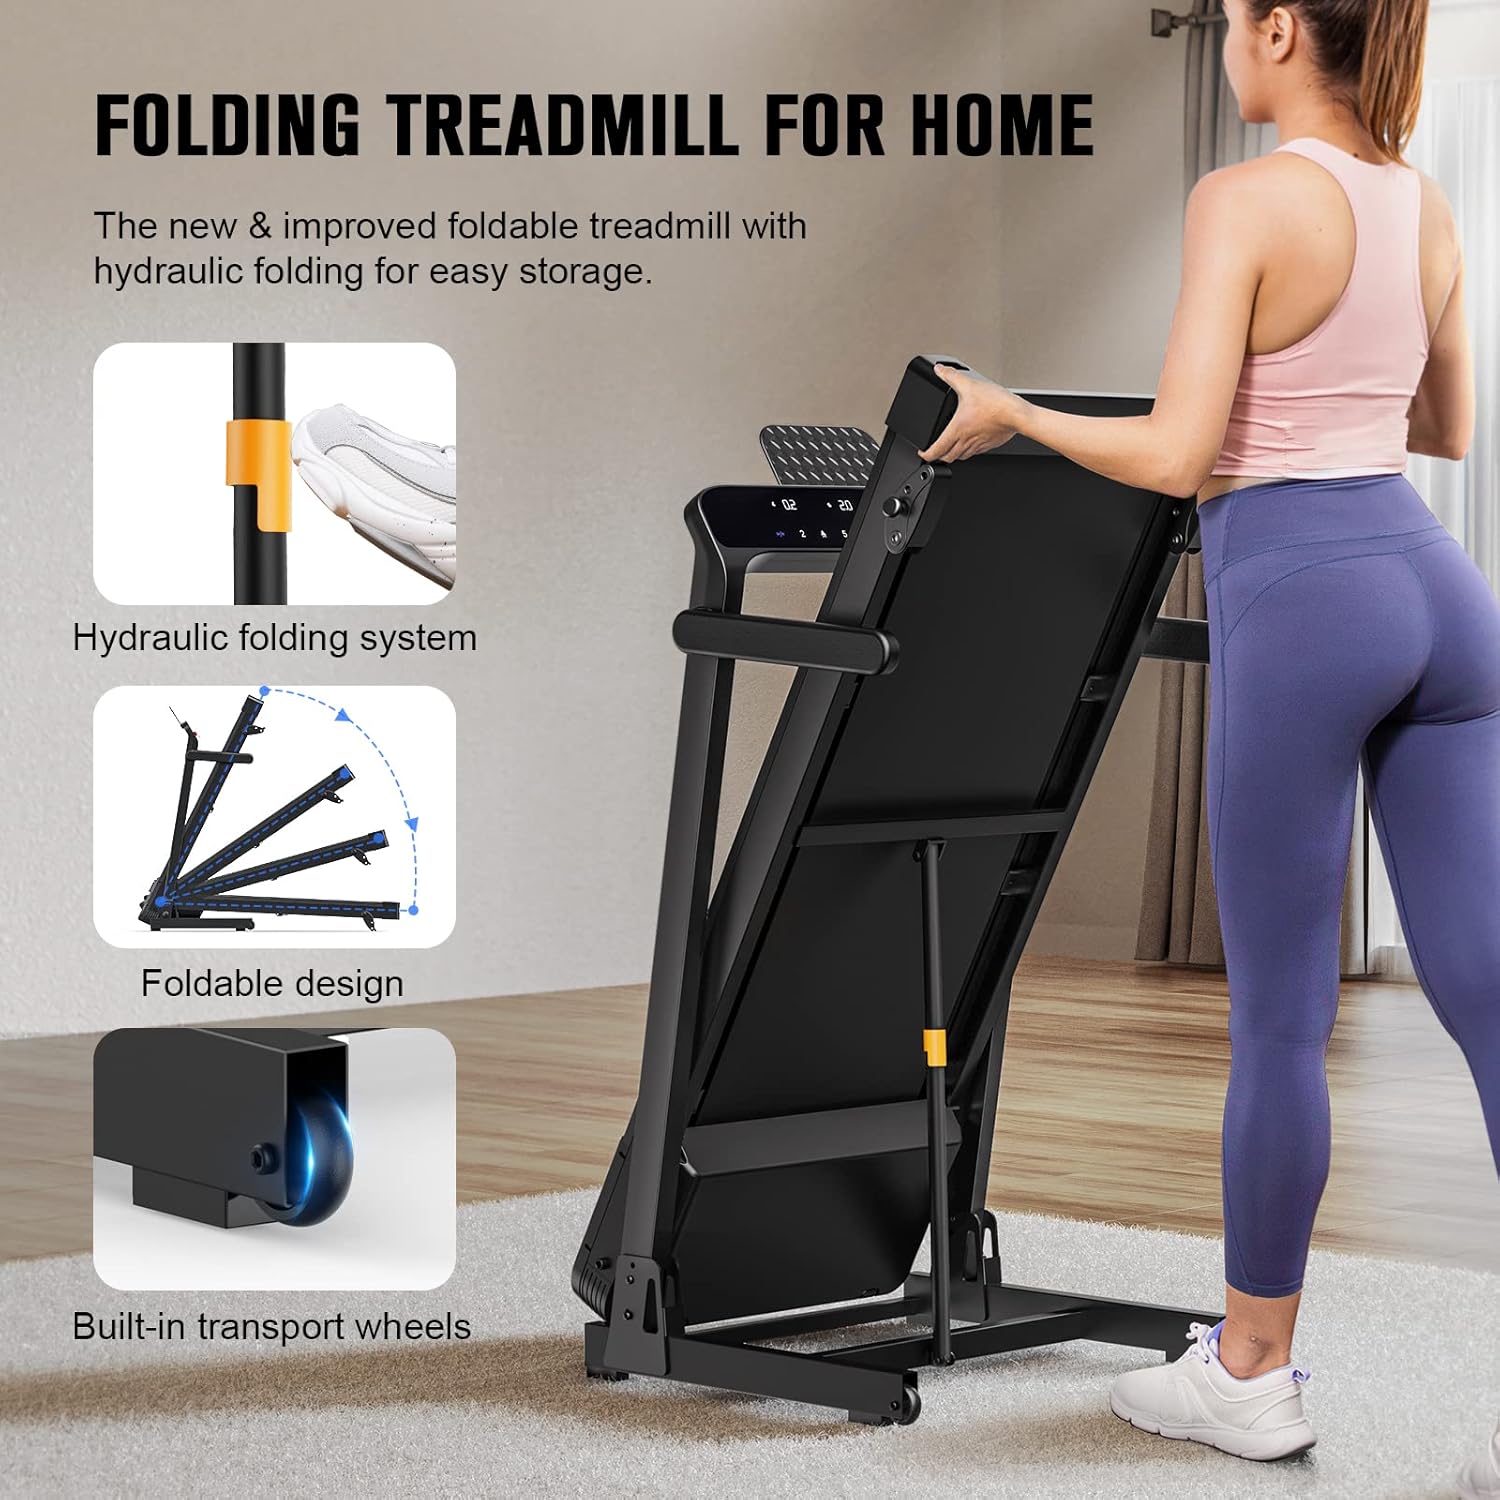
Image: The treadmill's smart app control feature, showing compatibility with fitness applications.
5.3 Manual Incline Adjustment
The treadmill offers 3 levels of manual incline to vary your workout intensity.
- To adjust the incline, power off the treadmill and locate the incline adjustment pins at the rear base of the running deck.
- Lift the rear of the treadmill slightly and reposition the pins into the desired slots for a higher or lower incline.
- Ensure both sides are adjusted to the same level before resuming your workout.

Image: Illustration of the 3 manual incline levels available on the treadmill.
5.4 Running Belt Features
The treadmill is equipped with a 7-layer shock-absorbing running belt designed for comfort and joint protection.

Image: Detailed view of the 7-layer shock-absorbing running belt.
6. Maintenance
Regular maintenance ensures the longevity and optimal performance of your treadmill.
- Cleaning: Wipe down the treadmill surfaces with a damp cloth after each use. Avoid abrasive cleaners. Keep the area around the treadmill clean from dust, hair, and debris.
- Belt Lubrication: The running belt requires periodic lubrication to reduce friction and extend its lifespan. Refer to the specific instructions in your separate lubrication guide or contact customer support for details on recommended lubricants and frequency.
- Belt Tension and Alignment: Check the running belt tension and alignment regularly. Adjust if the belt slips or drifts to one side. Consult the troubleshooting section or customer support for adjustment procedures.
- Power Cord Inspection: Periodically inspect the power cord for any damage.
7. Troubleshooting
If you encounter issues with your treadmill, refer to the following common problems and solutions.
| Problem | Possible Cause | Solution |
|---|---|---|
| Treadmill does not power on. | Power cord not plugged in; circuit breaker tripped; safety key not inserted. | Ensure power cord is securely plugged in. Check household circuit breaker. Insert the safety key fully into its slot. |
| Running belt slips or hesitates. | Belt too loose; belt needs lubrication. | Adjust belt tension (refer to maintenance section or contact support). Lubricate the running belt as per instructions. |
| Unusual noise during operation. | Loose parts; belt misalignment; motor issue. | Check for and tighten any loose bolts. Adjust belt alignment. If noise persists, discontinue use and contact customer support. |
| Inaccurate calorie calculation. | Calibration needed; individual metabolic differences. | Calorie burn is an estimate. For precise tracking, use a personal fitness tracker. Ensure user profile settings in connected apps are accurate. |
If the problem persists after attempting these solutions, please contact Flylinktech customer support.
8. Specifications
Detailed technical specifications for the FLYLINKTECH Folding Treadmill.
| Feature | Specification |
|---|---|
| Model Number | JF-H-42H |
| Product Dimensions (L x W x H) | 149.86 x 74.93 x 137.92 cm (59 x 29.5 x 54.3 inches) |
| Folded Dimensions (L x W x H) | 77.9 x 74.9 x 127 cm (30.7 x 29.5 x 50 inches) |
| Item Weight | 45 kg (99.2 lbs) |
| Maximum User Weight Capacity | 180 kg (396 lbs) |
| Horsepower | 2.5 HP |
| Speed Range | 0.6 - 10 MPH (1 - 16 km/h) |
| Incline Levels | 3 Manual Incline Levels |
| Display Type | LCD |
| Number of Programs | 12 Preset Programs |
| Running Belt Dimensions | 110 cm x 43 cm (43.3 x 17 inches) |
| Assembly Required | Yes (Minimal) |

Image: Detailed dimensions of the treadmill in both operational and folded configurations.
9. Warranty and Support
For warranty information, technical support, or any inquiries regarding your FLYLINKTECH Folding Treadmill, please refer to the warranty card included with your purchase or contact Flylinktech customer service directly through the retailer where the product was purchased.
Please have your model number (JF-H-42H) and purchase details ready when contacting support.
No official product videos were found that meet the specified criteria for inclusion in this manual.
Ask a question about this manual
Ask about setup, troubleshooting, compatibility, parts, safety, or missing instructions. Manuals+ will review the question and use this page’s manual context to help answer it.