
FLYLINKTECH fdghbn-1871
FLYLINKTECH Professional Treadmill User Manual
Model: fdghbn-1871
1. Important Safety Instructions
Please read all instructions carefully before using this treadmill. Keep this manual for future reference.
- Always place the treadmill on a flat, stable surface.
- Keep children and pets away from the treadmill during operation.
- Ensure the safety key is properly attached before starting the treadmill.
- Do not operate the treadmill if it has a damaged cord or plug, or if it is not working properly.
- Wear appropriate athletic footwear during use.
- Consult a physician before starting any exercise program.
2. Product Overview
The FLYLINKTECH Professional Treadmill (Model: fdghbn-1871) is designed for home use, offering a versatile and efficient workout experience. It features a powerful motor, a multi-layer running belt, and smart app connectivity.

Figure 2.1: A user running on the FLYLINKTECH Professional Treadmill, showcasing its design and integrated display.
Key Features:
- Powerful and Quiet Motor: Equipped with a 2.5 HP DC motor, allowing for walking or running without disturbing others.
- Adjustable Incline: Designed with 3 manual incline positions to vary workout intensity.
- Multi-function LED Display: Clearly shows time, speed, distance, and calories in real-time.
- 7-Layer Non-Slip Running Belt: A wider (1100 x 430 mm) and anti-slip belt for a superior running experience.
- Shock Absorption System: Enhanced platform provides effective and safe cushioning for knees and muscles.
- Smart APP Support: Links to the FitShow app for structured workouts, data recording, and sharing.
- Foldable Design: Features a hydraulic folding system and built-in transport wheels for easy storage and mobility.
- Safety Key: For immediate shutdown of the treadmill in case of emergency.

Figure 2.2: A detailed view of the treadmill's 7-layer non-slip and shock-absorbing running belt, emphasizing its construction and generous running area.

Figure 2.3: An internal view illustrating the powerful and quiet 2.5 HP DC motor, designed for home use.

Figure 2.4: A user on the treadmill, highlighting its 3 manual incline positions and robust 180 kg weight capacity.
3. Assembly and Setup
The treadmill is 95% pre-installed for quick and easy setup. Assembly typically takes less than 10 minutes for one person.
3.1 Unpacking
- Carefully remove the treadmill from its packaging. Note that the unit weighs approximately 39 kg (86 lbs) and may require two people for safe handling.
- Remove all packing materials and check for any damage.
- Ensure all components are present according to the packing list.
3.2 Folding and Unfolding
The treadmill features a hydraulic folding system for convenient storage.
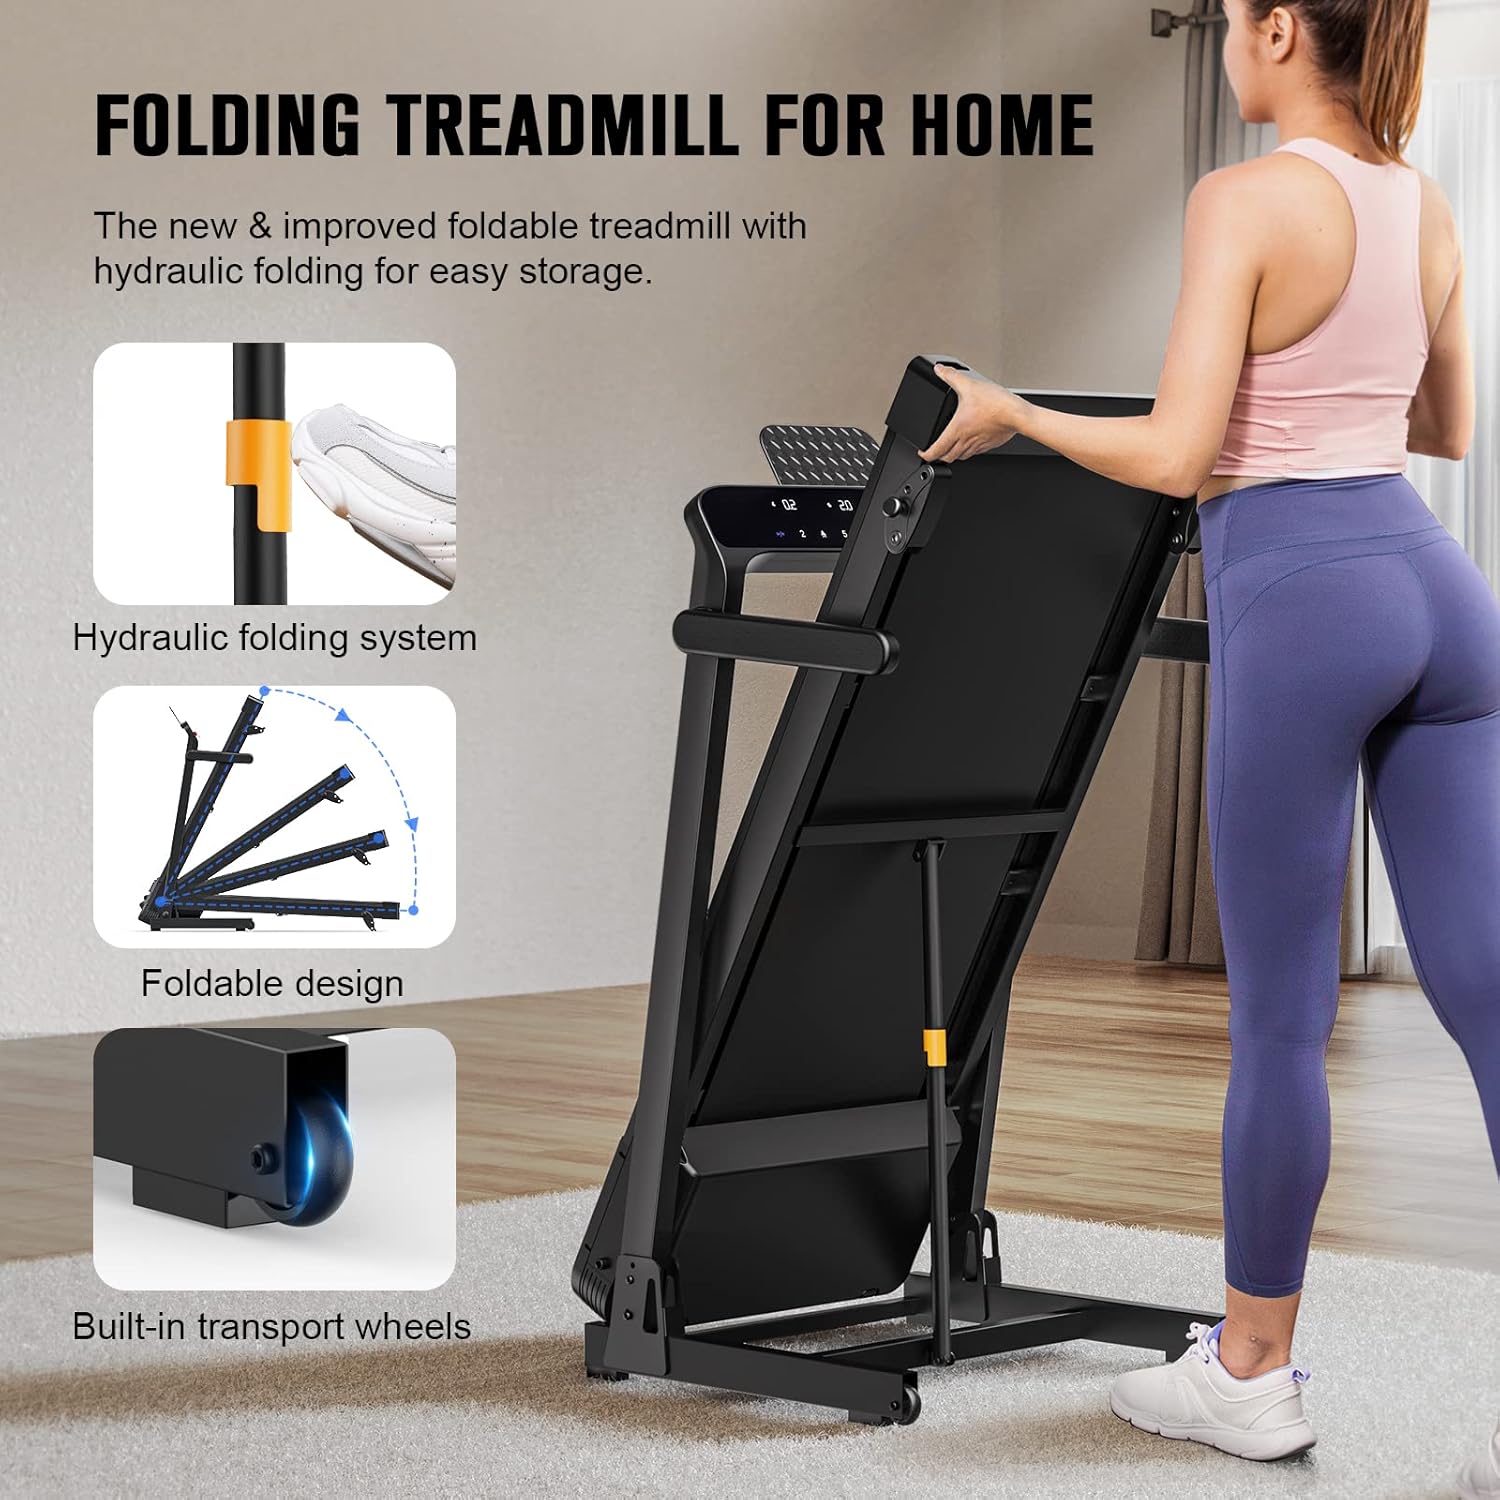
Figure 3.1: The treadmill's hydraulic folding system and built-in transport wheels for easy storage and movement.
- To Unfold: Gently push the hydraulic cylinder release mechanism and allow the running deck to slowly lower to the floor.
- To Fold: Lift the running deck until it locks into the upright position. The hydraulic cylinder will assist in the movement.
3.3 Initial Assembly Steps
- Raise the display support and secure it with the two provided screws using the included hex key.
- Insert the tablet/phone holder into its designated slot.
- Adjust the armrests if necessary.
- Set the desired manual incline position using the dedicated feet at the rear of the treadmill. There are 3 positions available.
- Connect the power cord to a grounded outlet.
4. Operating Instructions
4.1 Control Panel Overview

Figure 4.1: The multi-function LED display showing various metrics and control buttons.
The LED display provides real-time feedback on your workout. It typically shows:
- Distance: Total distance covered.
- Speed: Current speed in km/h.
- Time: Duration of your workout.
- Calories: Estimated calories burned.
Control buttons allow for speed adjustment, program selection, and start/stop functions.
4.2 Starting a Workout
- Ensure the treadmill is plugged in and the safety key is securely attached to the console and your clothing.
- Step onto the treadmill belt, placing your feet on the side rails.
- Press the "Start" button. The treadmill will typically begin with a low speed (e.g., 1 km/h) after a short countdown.
- Gradually increase the speed using the speed adjustment buttons (+/-) or preset speed buttons on the console. The treadmill supports speeds from 1 to 16 km/h.
- To stop, press the "Stop" button or pull the safety key.
4.3 Using Preset Programs
The treadmill comes with 12 preset programs designed to offer varied workout routines.
- To select a program, press the "Program" button (or similar, based on typical treadmill controls) repeatedly until your desired program number is displayed.
- Press "Start" to begin the selected program. The treadmill will automatically adjust speed and potentially incline (if applicable to the program) according to the program's profile.
4.4 Smart APP Control (FitShow)
Enhance your workout experience by connecting your treadmill to the FitShow app via Bluetooth.

Figure 4.2: The treadmill's compatibility with the FitShow app for smart control and workout tracking.
- Download the "FitShow" app from your mobile device's app store (Google Play Store or Apple App Store).
- Enable Bluetooth on your mobile device.
- Open the FitShow app and follow the on-screen instructions to connect to your treadmill.
- Once connected, you can control the treadmill, track your exercise data, and access additional workout programs directly from the app.
5. Maintenance and Care
Regular maintenance ensures the longevity and optimal performance of your treadmill.
5.1 Cleaning
- Wipe down the treadmill surfaces with a damp cloth after each use to remove sweat and dust.
- Do not use abrasive cleaners or solvents, as they may damage the finish.
5.2 Belt Lubrication
The running belt requires periodic lubrication to reduce friction and extend its lifespan.
- Check the belt for dryness every few months, or after approximately 50 hours of use.
- Apply silicone lubricant (not included) under the belt as per the lubricant's instructions.
5.3 Belt Adjustment
The running belt may shift or loosen over time. Adjust it if it feels loose or is off-center.
- To Center the Belt: If the belt drifts to one side, use the provided hex key to turn the adjustment bolt on the side it's drifting towards, in small increments (e.g., quarter turns). Run the treadmill for a minute and re-check.
- To Tighten the Belt: If the belt slips during use, turn both rear adjustment bolts clockwise in small, equal increments until the slipping stops. Do not overtighten.
6. Troubleshooting
This section addresses common issues you might encounter with your treadmill.
| Problem | Possible Cause | Solution |
|---|---|---|
| Treadmill does not start. |
|
|
| Running belt slips or hesitates. |
|
|
| Unusual noise during operation. |
|
|
| Display not working correctly. |
|
|
7. Specifications
Detailed technical specifications for the FLYLINKTECH Professional Treadmill.

Figure 7.1: Dimensions of the treadmill in both operational and folded configurations.
| Feature | Detail |
|---|---|
| Model Number | fdghbn-1871 |
| Brand | FLYLINKTECH |
| Motor Power | 2.5 HP DC Motor |
| Speed Range | 1 - 16 km/h |
| Running Area (L x W) | 1100 x 430 mm (approx. 43.3 x 17 inches) |
| Max User Weight | 180 kg (approx. 396 lbs) |
| Incline Levels | 3 Manual Incline Positions |
| Preset Programs | 12 |
| Product Dimensions (L x W x H) | 138 x 75 x 105 cm (approx. 54.3 x 29.5 x 41.3 inches) |
| Folded Dimensions (L x W x H) | Approx. 78 x 75 x 127 cm (30.7 x 29.5 x 50 inches) |
| Product Weight | 39 kg (approx. 86 lbs) |
| Connectivity | Bluetooth (for FitShow App) |
| Certifications | CE, ROHS, CB, EN957, IEC (from SGS) |
8. Warranty and Support
FLYLINKTECH provides comprehensive support for your product.
- Warranty: The product comes with a 12-month after-sales service warranty.
- Customer Support: For any questions, issues, or warranty claims, please contact FLYLINKTECH customer service. Refer to the product packaging or the official FLYLINKTECH website for contact details.
Ask a question about this manual
Ask about setup, troubleshooting, compatibility, parts, safety, or missing instructions. Manuals+ will review the question and use this page’s manual context to help answer it.