Introduction
The OLIGHT Warrior 3S is a powerful and versatile tactical flashlight designed for various applications, including emergency use, everyday carry (EDC), and searching. It features a high lumen output, dual-switch operation, magnetic charging, and an advanced proximity sensor for enhanced safety.

Image: The OLIGHT Warrior 3S Tactical Flashlight, showcasing its sleek black aluminum body and blue accents.
Safety Information
Please read and understand all safety instructions before using the Warrior 3S flashlight. Failure to follow these instructions may result in injury or damage to the product.
- Do not shine the light directly into eyes. The intense beam can cause temporary vision impairment or permanent eye damage.
- Keep out of reach of children.
- Do not disassemble the flashlight. This will void the warranty and may cause damage.
- Use only the specified customized battery and charging cable provided by OLIGHT.
- Ensure the magnetic charging port is clean and free of debris before charging.
- The flashlight may become warm during prolonged use at high output levels. This is normal.
- The proximity sensor is designed to reduce brightness when an object is too close to the lens. Do not intentionally block the sensor.
Package Contents
Verify that all items are present in your package:
- OLIGHT Warrior 3S Flashlight (with customized battery)
- MCC3 Magnetic Charging Cable
- Nylon Holster
- User Manual (this document)
Product Overview
The Warrior 3S features a robust aluminum body with a textured grip, a side switch for general operation, and a tactical tail switch for quick access to high output modes.

Image: Detailed view of the side switch area, showing the brightness and battery level indicators.
Key components include:
- Side Switch: Used for general mode changes and accessing lockout. Features integrated battery and brightness level indicators.
- Tactical Tail Switch: Provides quick access to Turbo and Strobe modes. Also serves as the magnetic charging port.
- Proximity Sensor: Located near the lens, it automatically dims the light when an object is too close to prevent overheating or accidental ignition.
- Pocket Clip: Reversible for flexible carrying options.
- TIR Optic Lens: Ensures a balanced beam profile.
Setup
Battery Installation
The Warrior 3S comes with a customized rechargeable lithium-ion battery pre-installed. Before first use, ensure the insulating film is removed from the battery if present. To do this, unscrew the tailcap, remove the battery, remove the film, and reinsert the battery with the positive (+) end facing the head of the flashlight. Screw the tailcap back on tightly.
Initial Charging
For optimal performance, fully charge the flashlight before its first use.
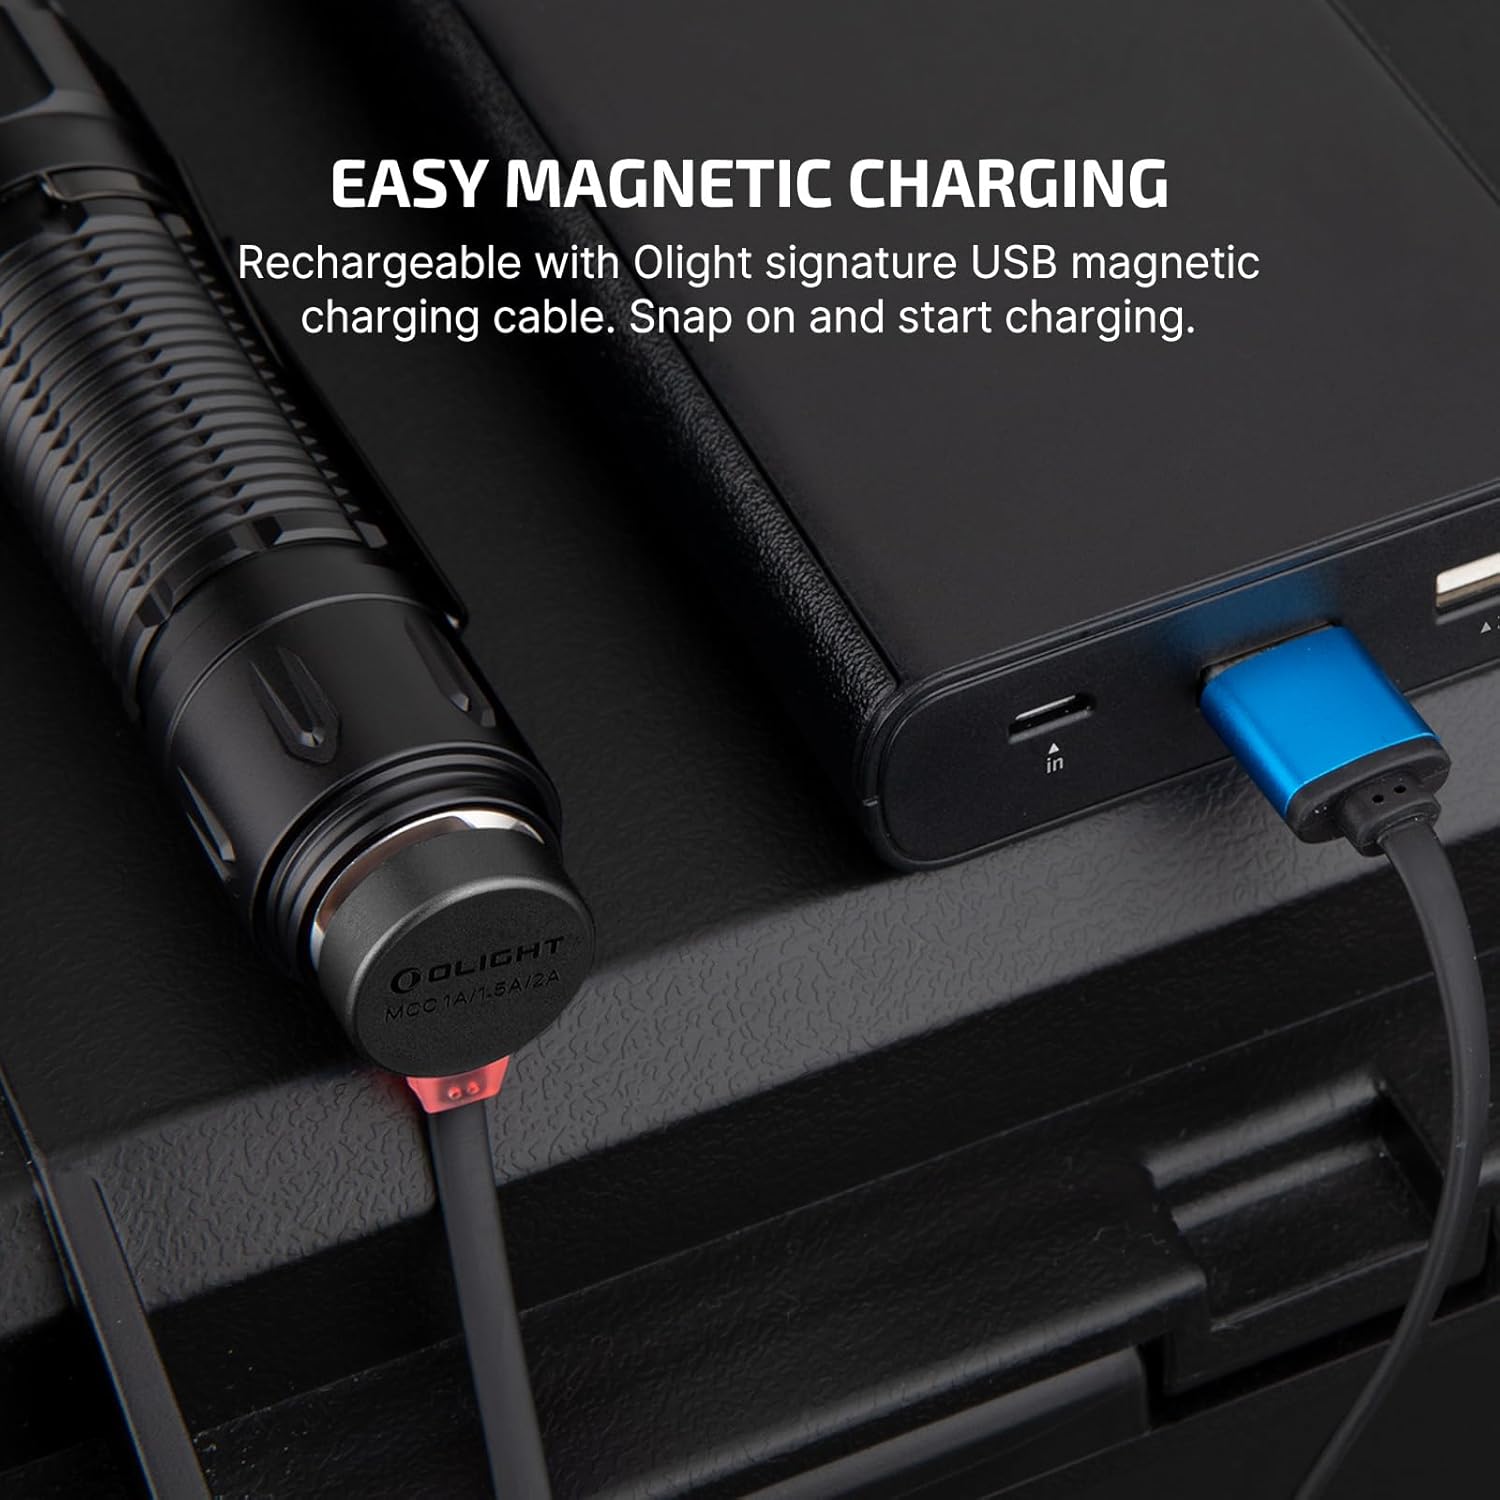
Image: The magnetic charging cable (MCC3) attached to the tailcap of the Warrior 3S.
To charge:
- Connect the USB end of the MCC3 magnetic charging cable to a USB power source (e.g., computer, USB wall adapter).
- Attach the magnetic end of the cable to the tailcap of the flashlight. The indicator on the charging cable will glow red while charging and turn green when fully charged.
- A full charge typically takes approximately 4 hours.
Operating Instructions
Side Switch Operation
The side switch controls general lighting modes and provides battery and brightness level indications.
Image: Visual representation of the side switch and its associated modes: Moon, Low, Mid, High, Turbo, Strobe, and Lockout.
- Turn ON/OFF: Single click the side switch to turn the light ON/OFF.
- Change Brightness Level: When the light is ON, press and hold the side switch to cycle through Low, Mid, and High modes. Release the switch to select the desired mode.
- Moonlight Mode: When the light is OFF, press and hold the side switch for approximately 1 second to activate Moonlight mode.
- Turbo Mode: Double click the side switch to activate Turbo mode. Double click again to return to the previous mode.
- Strobe Mode: Triple click the side switch to activate Strobe mode. Single click to exit.
- Lockout Mode: When the light is OFF, press and hold the side switch for approximately 2 seconds until the indicator lights up red for two seconds. This prevents accidental activation. To unlock, press and hold the side switch for approximately 1 second until the light activates in Moonlight mode.

Image: Illustration demonstrating how to engage and disengage the lockout function using the side switch.
Tactical Tail Switch Operation
The tail switch provides quick, momentary or constant access to high output modes, ideal for tactical situations.

Image: A hand in a tactical glove operating the two-stage tail switch for direct strobe or turbo.
- Half Press: Half press the tail switch for momentary Mid mode. Release to turn OFF.
- Full Press: Full press the tail switch for momentary Turbo mode. Release to turn OFF.
- Constant ON: Half press and hold the tail switch for constant Mid mode. Full press and hold for constant Turbo mode.
- Strobe: Quickly double half-press the tail switch for Strobe mode.
Proximity Sensor
The Warrior 3S is equipped with a built-in proximity sensor that automatically reduces the brightness level when the light detects an obstruction nearby, especially in High, Turbo, or Strobe modes. This feature helps prevent accidental overheating or damage to objects.

Image: The proximity sensor automatically dimming the light when the flashlight is close to a surface, preventing excessive heat buildup.
Note: The proximity sensor can be temporarily disabled by double-pressing the side switch within 5 seconds of auto-dimming.
Brightness and Battery Indicators
The indicators around the side switch provide real-time information:
- Brightness Level Indicator: Shows the current output level.
- Battery Level Indicator: Displays the remaining battery power.
Maintenance
Proper maintenance ensures the longevity and optimal performance of your Warrior 3S flashlight.
- Cleaning: Use a soft, clean cloth to wipe the flashlight body. For the lens, use a lens cleaning cloth. Do not use abrasive materials or harsh chemicals.
- Lubrication: Apply a thin layer of silicone grease to the O-rings periodically to maintain water resistance.
- Storage: If storing the flashlight for an extended period, remove the battery to prevent potential leakage. Store in a cool, dry place.
- Charging Port: Keep the magnetic charging port on the tailcap clean. Avoid metal debris or conductive materials from sticking to it.
Troubleshooting
If you encounter issues with your Warrior 3S, refer to the table below for common problems and solutions.
| Problem | Possible Cause | Solution |
|---|---|---|
| Light does not turn ON | Battery low or depleted Insulating film not removed Flashlight in lockout mode Loose tailcap | Charge the battery Remove insulating film Exit lockout mode (press and hold side switch for ~1s) Tighten tailcap |
| Light dims unexpectedly | Proximity sensor activated Overheating protection | Ensure no objects are blocking the lens Allow flashlight to cool down |
| Magnetic charging not working | Charging cable not properly connected Charging port dirty Faulty cable or power source | Ensure firm connection Clean charging port Try a different USB power source or cable |
| Tail switch unresponsive | Tailcap not fully tightened Debris in tail switch mechanism | Tighten tailcap Clean tail switch area |
Specifications
Detailed technical specifications for the OLIGHT Warrior 3S Tactical Flashlight:
| Feature | Specification |
|---|---|
| Max Output | 2300 Lumens |
| Max Throw | 300 Meters |
| Power Source | Customized Lithium-Ion Battery (included) |
| Charging Type | Magnetic Charging (MCC3) |
| Material | Aluminum Alloy |
| Water Resistance | Waterproof (IPX8) |
| Dimensions (L x W x H) | 6.18" x 2.32" x 2.72" (approx.) |
| Weight | 6.2 ounces (approx.) |
| Special Features | Magnetic, Waterproof, Rechargeable, Proximity Sensor |

Image: A table detailing the output levels (Turbo, High, Med, Low, Moon) with corresponding lumens, runtime, and throw distance.
Warranty and Support
OLIGHT provides a lifetime warranty for the Warrior 3S flashlight, covering defects in material and workmanship under normal use. For warranty claims or technical support, please contact OLIGHT customer service through their official website or the retailer where the product was purchased.

Image: The OLIGHT Lifetime Warranty logo, signifying commitment to product quality.
For additional resources, visit the official OLIGHT website: www.olightstore.com
Official Product Videos
Watch the official product video for a visual guide on the OLIGHT Warrior 3S Tactical Flashlight:
Video: An official product video showcasing the features and capabilities of the OLIGHT Warrior 3S Tactical Flashlight.


