
1. Introduction
This manual provides detailed instructions for the installation, operation, and maintenance of the Dayton Audio KABD-250 amplifier board. The KABD-250 is an integrated audio solution featuring a 2 x 50W Class D amplifier, an ADAU1701 Digital Signal Processor (DSP), and Bluetooth 5.0 with aptX HD support. It is designed for DIY audio projects requiring high-quality sound and flexible customization.
2. Safety Information
- Power Supply: Use only a DC power supply within the specified voltage range of 12V to 24V. Exceeding this range can damage the board.
- Polarity: Ensure correct power polarity when connecting the power supply. Incorrect polarity will cause damage.
- Ventilation: Ensure adequate ventilation around the amplifier board to prevent overheating, especially during prolonged operation at high power.
- Static Electricity: Handle the board with care to avoid damage from electrostatic discharge.
- Moisture: Keep the board away from moisture and liquids.
- Professional Installation: If you are unfamiliar with electronic components, consider seeking assistance from a qualified professional for installation.
3. Product Overview
The Dayton Audio KABD-250 integrates several key components into a compact design, offering a versatile platform for audio enthusiasts.
3.1 Key Features
- Efficient 2 x 50W Class D amplification (TPA3116 chip).
- Integrated ADAU1701 DSP for advanced audio customization via SigmaStudio software.
- Bluetooth 5.0 with aptX HD for high-quality wireless audio streaming.
- Plug-and-play solderless configuration with included wire harnesses.
- Optimized for low power consumption, suitable for battery-powered projects.
- External potentiometer ports for volume, tone control, and other functions.
- DSP controlled line-level output for connecting external amplifiers or subwoofers.
3.2 Board Components
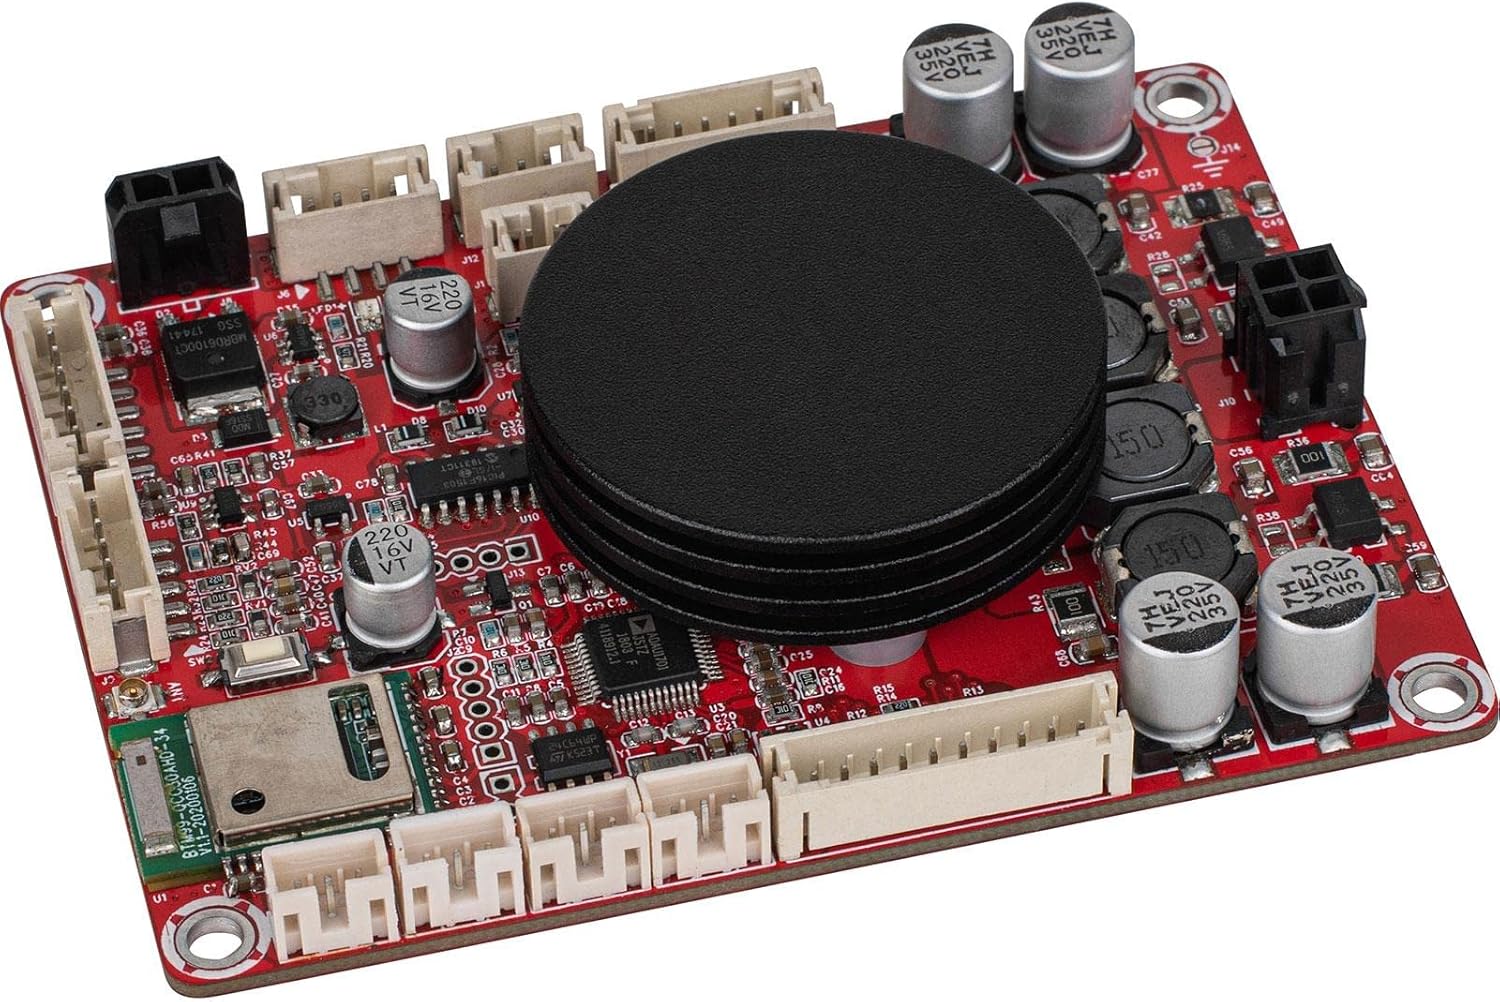


Key Integrated Circuits:


4. Setup
4.1 Power Connection
- Identify the power input connector on the KABD-250 board.
- Connect the included power harness to the board.
- Connect the other end of the power harness to a DC power source (12V to 24V). Ensure correct polarity: red wire for positive (+), black wire for negative (-).
- The board can be powered by either a battery or a direct DC input.
4.2 Speaker Connection
- Locate the speaker output connectors on the board.
- Connect your speakers using the provided speaker wire harnesses.
- Ensure correct polarity for each speaker channel (Left Out +, Left Out -, Right Out +, Right Out -) to maintain proper audio phasing.
4.3 Audio Input Options
- Bluetooth Input: The primary input method is Bluetooth 5.0. No physical connection is needed for this.
- Line-Level AUX Input: For wired audio sources, connect your device to the AUX input ports on the board.
4.4 Optional Connections
- Bluetooth Reset Button: Connect the included Bluetooth reset button harness to the designated port on the board. This button can be used to clear paired devices and initiate pairing mode.
- External Potentiometers: The board features ports for external potentiometers (POT1, POT2, POT3, POT4). These can be configured via SigmaStudio for various controls like volume, tone, or filter adjustments.
- DSP Programming: For advanced DSP customization, connect the Dayton Audio ICP1 programmer (sold separately) to the dedicated DSP programming port.
5. Operating Instructions
5.1 Powering On/Off
Once the power supply is connected, the board will power on automatically. There is no dedicated power switch on the board itself. Disconnect the power supply to turn off the unit.
5.2 Bluetooth Pairing
- Ensure the KABD-250 board is powered on.
- On your Bluetooth-enabled device (e.g., smartphone, tablet), navigate to the Bluetooth settings.
- Search for available devices. The KABD-250 will typically appear as 'Dayton Audio KABD-250' or a similar identifier.
- Select the KABD-250 to initiate pairing. A confirmation tone or LED indicator may signal successful pairing.
- If pairing fails or you wish to pair a new device, press the Bluetooth reset button (if connected) or power cycle the board.
5.3 DSP Programming with SigmaStudio
The integrated ADAU1701 DSP allows for extensive audio customization. This requires the Analog Devices SigmaStudio software and the Dayton Audio ICP1 programmer (sold separately).
- Download and install the SigmaStudio software from the Analog Devices website.
- Connect the Dayton Audio ICP1 programmer to your computer via USB and to the KABD-250 board's DSP programming port.
- Launch SigmaStudio and establish communication with the ADAU1701 chip.
- Utilize the graphical interface of SigmaStudio to design and implement various audio processing functions, such as equalization, crossovers, dynamic range compression, and more.
- Upload your DSP program to the KABD-250 board. Refer to the SigmaStudio documentation and Dayton Audio resources for detailed programming guides.

Figure 8: SigmaStudio Dynamic Bass Control Interface. An example of a DSP control module within SigmaStudio for adjusting dynamic bass parameters. 
Figure 9: SigmaStudio Crossover Frequency Control. Illustrates a module for setting crossover frequencies and intensity within the DSP environment. 
Figure 10: SigmaStudio Advanced Dynamic Bass Controls. A more detailed view of dynamic bass settings, including lowpass frequency, thresholds, and compression ratio.
6. Maintenance
- Cleaning: Use a soft, dry cloth to clean the board. Avoid using liquids or abrasive cleaners.
- Dust: Periodically inspect the board for dust accumulation, especially around the heatsink. Use compressed air to gently remove dust.
- Connections: Ensure all wire harnesses and connections remain secure. Loose connections can lead to intermittent performance or damage.
- Storage: When not in use for extended periods, store the board in a dry, cool environment, protected from dust and static.
7. Troubleshooting
| Problem | Possible Cause | Solution |
|---|---|---|
| No power/No indicator light | Incorrect power supply voltage; Reversed polarity; Loose power connection; Faulty power supply. | Verify power supply is 12V-24V DC. Check power harness polarity. Ensure connections are secure. Test with a known good power supply. |
| No sound output | Incorrect speaker wiring; Loose speaker connections; Bluetooth not paired; AUX input not selected (if applicable); DSP settings muted or volume low. | Check speaker polarity and connections. Ensure Bluetooth is paired or AUX source is active. Verify volume levels on both the source device and via DSP settings. |
| Bluetooth pairing issues | Device too far; Interference; Board already paired to another device; Bluetooth module error. | Ensure device is within range. Minimize interference from other wireless devices. Press the Bluetooth reset button or power cycle the board to clear previous pairings. Try pairing with a different device. |
| Distorted audio | Input signal too high (clipping); Speaker impedance mismatch; Faulty speaker; DSP settings causing distortion. | Reduce input volume from the source device. Ensure speakers are compatible with the amplifier's output. Test with different speakers. Review DSP settings for any extreme equalization or gain settings. |
| Board overheating | Insufficient ventilation; Excessive load on amplifier; Prolonged high-volume operation. | Ensure adequate airflow around the board. Reduce output volume. Verify speaker impedance is not too low. |
8. Specifications
| Feature | Specification |
|---|---|
| Output Power | 2 x 50W |
| Amplifier Chip | TPA3116 |
| DSP Chip | ADAU1701 |
| Bluetooth Version | 5.0 with aptX HD |
| Minimum Supply Voltage | 12 Volts DC |
| Maximum Supply Voltage | 24 Volts DC |
| Number of Channels | 2 |
| Product Dimensions (L x W x H) | 5.25 x 3.5 x 1.25 inches |
| Item Weight | 5.6 ounces |
| Certifications | CE, FCC |
| Model Number | KABD-250 |
| UPC | 848791007934 |
9. Warranty and Support
For warranty information, technical support, or further assistance, please contact Dayton Audio customer service. Refer to the official Dayton Audio website for the most current contact details and support resources.
Dayton Audio Website: www.daytonaudio.com


