
Important Safety Instructions
Please read the instruction manual carefully before using the product. Always follow basic safety precautions when operating electrical appliances to reduce the risk of electric shock, burns, fire, or injury to persons.
- Ensure the chair is placed on a hard, level surface.
- Keep children and pets away from the chair during operation.
- Do not use the chair if you have any medical conditions that may be aggravated by massage. Consult a physician before use.
- Unplug the chair from the power outlet when not in use or before cleaning.
- Do not attempt to repair the chair yourself. Contact qualified service personnel.
Product Overview
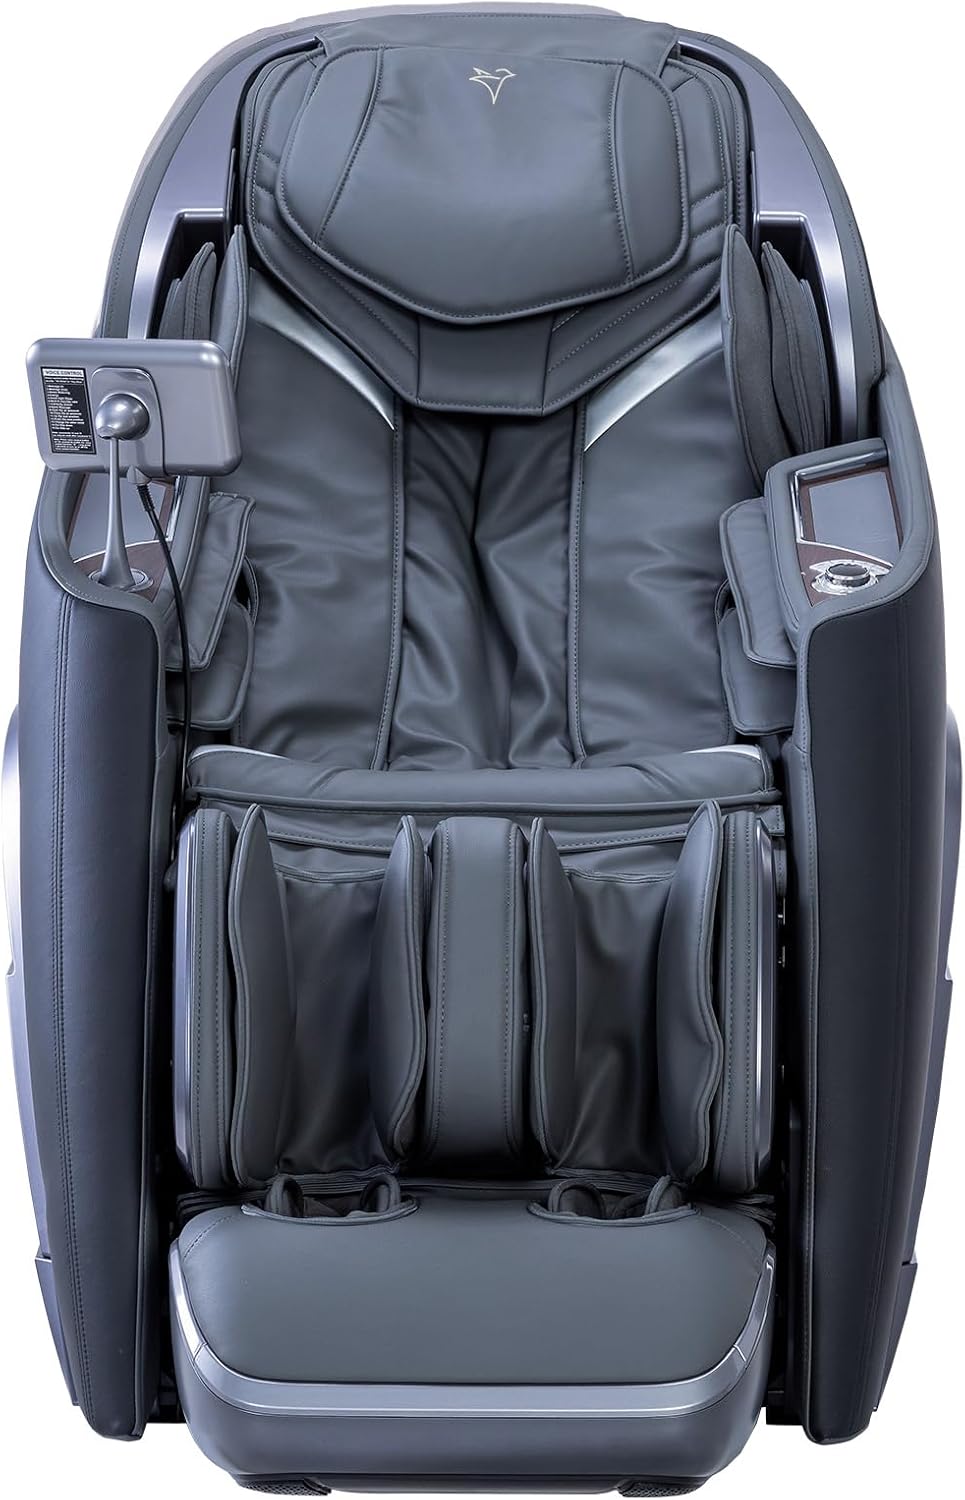
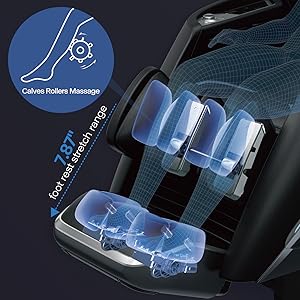
The iRest A710 4D Massage Chair, named Alfine, offers an advanced full-body shiatsu massage experience with innovative features designed for ultimate relaxation and therapeutic benefits. This chair incorporates advanced 4D technology, Zero Gravity positioning, an SL Track design, and automatic calfrest extension for a personalized massage.
Setup & Installation
Proper setup and installation are crucial for the safe and optimal operation of your iRest A710 Massage Chair. Please follow these steps carefully.
Unboxing and Initial Setup
- Prepare the Area: Ensure you have enough space around the chair for assembly and full recline.
- Cut Straps: Carefully cut the five straps on the packaging box using scissors.
- Remove Outer Box: Lift the main body of the packaging box and remove the protective packaging material.
- Remove Internal Packaging: Take out any foam, plastic bags, and cardboard inserts protecting the chair components.
- Position the Main Unit: Carefully lift the main unit of the massage chair and place it in its desired location. Pay attention to the front armrests and the groove of the back cover when moving.
Footrest Installation
- Retrieve Footrest: Take out the footrest from the abdomen of the main body.
- Remove Pearl Cotton: Remove the pearl cotton from the bottom of the footrest.
- Flip Seat Cushion: Flip the seat cushion down to the horizontal position.
- Connect Air Hose: Locate the calf air hose and the anti-fold spring. Place the spring on the calf air hose. Remove the screw from the upper part of the air hose connector on the main unit. Connect the footrest air hose with the spring to the air hose connector on the main unit according to the color coding. Adjust the spring mounting hole and secure it with two screws.
- Connect Harness Terminals: Plug the footrest harness terminals into the main body's terminal socket.
- Tidy Fabric Cover: Tidy up the fabric cover around the connections.
- Cut Cable Ties: Cut off the cable ties on both sides of the calf and remove the protective cover.
- Flip Plastic Cover: Flip the plastic cover on the ear hook to the open position.
- Lift Legs & Place Hooks: Lift the legs and place both ear hooks on the arc groove of the main unit.
- Close Hanger Cover: Close the hanger cover and secure it tightly with two M5x10 screws.
- Lift Footrest: Lift the footrest, insert the connecting tubes and wiring into the gap between the main body and the footrest.
- Open Seat Cushion & Zip: Open the seat cushion, pull up the zipper on both sides to connect it with the backrest cushion. Then pull up the zippers on the footrest and backrest cushions. Neatly arrange the seat cushion.
Hand Controller Setup
- Remove Hand Control Bracket: Remove the hand control bracket, install the rubber sleeve on the base, then place the washer on the screw of the bracket base.
- Rotate Bracket: Rotate the hand control bracket clockwise to secure it to the base.
- Unpack Hand Controller: Unpack the hand controller and attach it to the bracket securely.
Power Connection
- Unfasten Power Cord: Unfasten the bundled power cord from the accessory bag.
- Plug in Power Cord: Plug one end of the power cord into the socket on the main control box of the host, plug the other end into a household power outlet.
- Turn On Power: Turn on the power switch and press the power button on the control panel to start the massage chair.
Installation Videos
Operating Instructions
Your iRest A710 4D Massage Chair is equipped with an intuitive control panel and various features for a personalized massage experience. Familiarize yourself with the controls and functions below.
Control Panel Overview

Starting a Massage
- Power On: Press the power button on the control panel to turn on the massage chair.
- Select Auto Mode: From the main screen, choose an automatic massage mode (e.g., 4D Massage, Comfort, Good-night Sleep, Relax, Neck & Shoulder).
- Automatic Recline: The chair will automatically recline, adjusting the backrest and footrest to the preset angles for the selected mode.
Automatic Body Scanning System

After the initial recline, the massage chair will perform an automatic body shape detection. During this process, lean your neck against the rollers. Once your shoulder position is detected, a confirmation dialog will appear. You can adjust the shoulder position using the up/down arrows if needed.
Massage Modes and Techniques

The iRest A710 offers 15 automatic massage programs and various manual techniques:
- Automatic Modes: Comfort Massage, Quick Massage, Stretch Massage, Good-night Sleep, Shoulder & Neck Massage, Airbag Massage, Sport Recovery, Stress Relieving, Thai Massage, Waist & Hip Massage, Spine Care, Energy, Shiatsu Massage, Office Regimen, and TV Mode.
- Manual Techniques: Kneading, Tapping, Simultaneous Kneading & Tapping, Shiatsu, 4D, and Knocking. The speed and width of these techniques can be adjusted.
Adjusting Massage Intensity and Area

- 4D Massage Intensity: Use the '+' or '-' buttons next to the 4D icon to adjust the massage roller intensity (5 levels).
- Customize Back Massage Area: In manual mode, you can select specific areas for massage, including fixed point, partial, full back, upper back, and lower back. Use the up/down buttons to adjust the back roller to the desired area.
Airbag and Foot Roller Massage



- Airbag Massage: Upper and lower body airbag functions can be controlled separately. Airbag intensity is adjustable in 3 levels.
- Foot Rollers: Foot roller intensity is also adjustable in 3 levels.
Voice Control Function

Click the voice key on the control panel to enable or disable the voice function. Use commands like "Hi Alice" to activate the system, then issue commands such as "Massage on" or "Full-body stretch".
Heating Function
Click the heat button to turn on or off the heating function. The heating shawl provides therapeutic warmth to the shoulders, back, waist, and abdomen.
Program Customization and Memory Function
Click the 'Customize' icon to access storage and recall functions. You can save your personal massage programs and recall them later using the memory button.
Zero Gravity and Recline Adjustment


Click the 'Angle' icon to access the angle adjustment interface. Here you can:
- Zero Gravity: Select from multiple Zero Gravity positions to achieve a weightless sensation.
- Footrest Adjustment: Adjust the footrest position.
- Seat Up/Down: Adjust the seat's vertical position.
- Calf Up/Down: Adjust the calfrest's vertical position.
Connectivity and Convenience

- Bluetooth: Click the Bluetooth icon to enable or disable the Bluetooth function. Connect your audio device to enjoy music through the chair's 3D HIFI speakers.
- Time Adjustment: Click the time icon to adjust the massage duration. Each press increases the duration by 5 minutes, up to a maximum of 30 minutes.
- USB Charging: The chair includes a USB charging port to keep your devices powered during your massage.
- Wireless Charging: A wireless charging pad is integrated for compatible devices.
Maintenance
To ensure the longevity and optimal performance of your iRest A710 Massage Chair, regular maintenance is recommended.
- Cleaning: Wipe clean with a soft, damp cloth. Avoid harsh chemicals or abrasive cleaners.
- Storage: Store the chair in a cool, dry place away from direct sunlight and extreme temperatures.
- Power Off: Always turn off the power switch and unplug the chair when not in use.
Troubleshooting
If you encounter any issues with your iRest A710 Massage Chair, please refer to the following common troubleshooting tips:
- Chair Not Powering On: Ensure the power cord is securely plugged into both the chair and a working electrical outlet. Check the power switch on the chair's main control box.
- Massage Rollers Not Moving: Verify that an automatic program is selected or that manual mode settings are correctly configured. Ensure the body scanning process completed successfully.
- Airbags Not Inflating: Check airbag intensity settings in the control panel.
- No Heat: Ensure the heating function is turned on via the control panel.
- Remote Control Unresponsive: Check the remote's connection and ensure the chair is powered on.
For persistent issues or complex problems, please contact customer support.
Specifications
| Feature | Detail |
|---|---|
| Brand | iRest |
| Model Name | iRest A710 (SL-A710) |
| Color | Black |
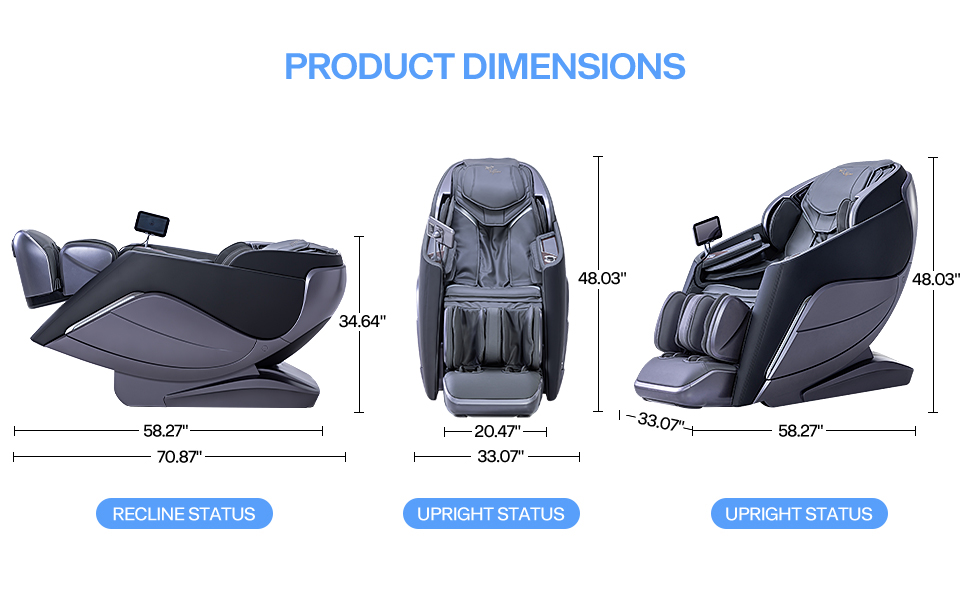
| Product Dimensions | 58.27"D x 48.03"W x 33.07"H |
| Item Weight | 338 pounds |
| Maximum Weight Recommendation | 330 Pounds |
| Material | Faux Leather, Foam |
| Special Features | 4D Technology, Zero Gravity, SL Track, Yoga Stretching, Automatic Calfrest Extension, Calf Kneading, Foot Roller Scraping, AI Voice Control, TFT Touch Screen, Quick Button Access, Full Body Heating, Bluetooth Speaker, Wireless Charging, USB Charging |
| UPC | 850037299188 |
Warranty & Support
Your iRest A710 4D Massage Chair is backed by a 3-year coverage with expert support. For any inquiries or assistance, please contact our 24/7 customer support team. You can also visit one of our 50+ showrooms across the states for in-person support.


