
Introduction
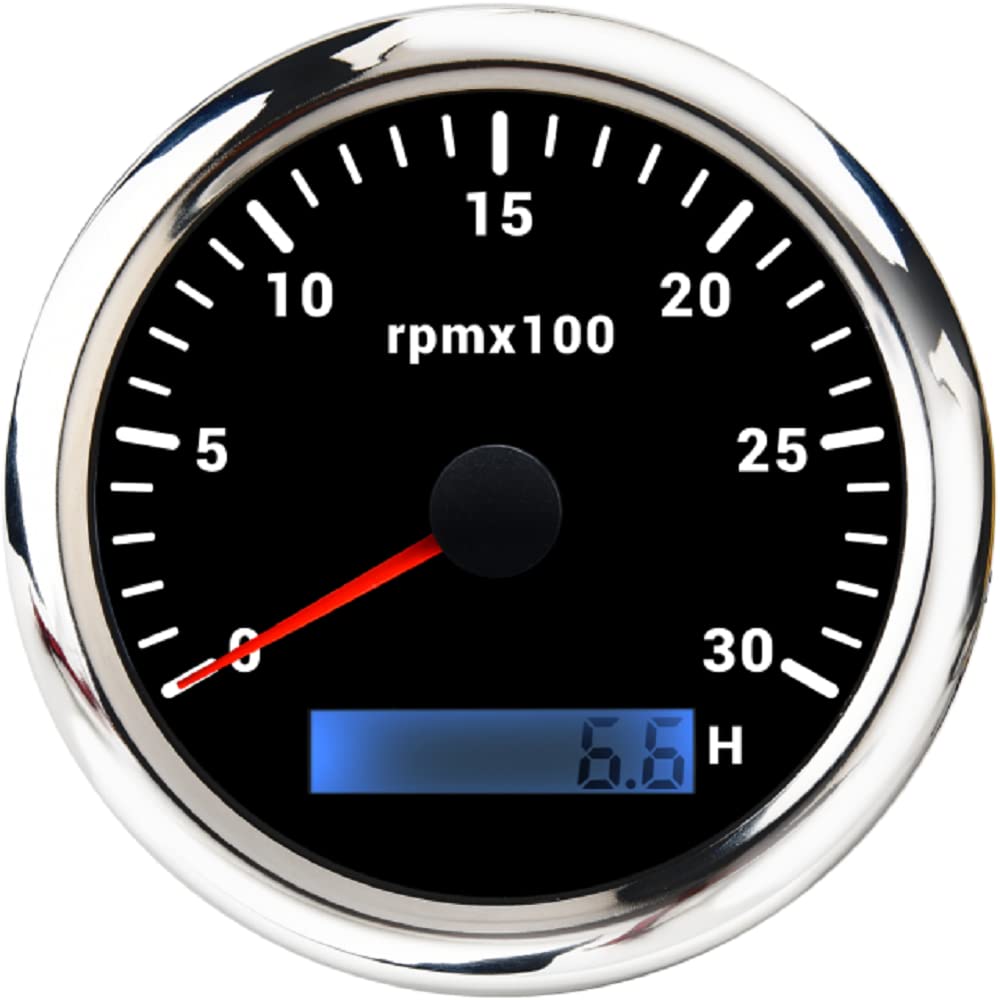
This manual provides detailed instructions for the installation, operation, and maintenance of your ELING 85mm 0-3000 RPM Tachometer with LCD Hour Meter. Please read these instructions carefully before use to ensure proper function and longevity of the device. This tachometer is designed for use in various applications, including tractors, marine vessels, and other vehicles requiring RPM and hour tracking.
Product Overview
Key Features:
- 85mm (3 3/8 inch) diameter for standard dashboard openings.
- RPM range: 0-3000 RPM.
- Integrated LCD hour meter: 0.0-99999.9 hours.
- 7-color adjustable backlight (Red, Green, Blue, White, Yellow, Cyan, Purple, and automatic cycle).
- Adjustable speed ratio from 1.0 to 360.
- Signal input: Pulse.
Package Contents:
- 1x Tachometer
- 1x Multi-plug socket (wiring harness)
- 1x Installation instruction manual

Installation Instructions
1. Panel Cutout:
Before installation, create a hole of 85mm (3 3/8 inches) in the dashboard. Ensure there is a minimum clearance of 55mm (2 3/16 inches) behind the panel for the meter to fit properly.

Once the hole is prepared, insert the gauge and secure it with the provided screws.
2. Wiring Connection:
Connect the wiring harness according to the diagram below. Ensure all connections are secure and correct to prevent damage to the device or vehicle electrical system.
- 1 Black: Ground (-)
- 2 Red: 9-32VDC (Power Supply)
- 3 Blue: RPM Signal
- 4 Yellow: Backlight
- 5 White: NC (Not Connected)

Operating Instructions
1. Setting the Speed Ratio (Gear Ratio):
- To enter setting mode, press and hold the rubber button on the backside of the tachometer for 3 seconds. Releasing the button for more than 3 seconds will exit setting mode.
- While in setting mode, press the button briefly to increase the value. Release and press again to decrease the value. Holding the button down will change the value more quickly. The minimum step is 0.1, and the adjustable range is 1.0-360.
- Once the desired speed ratio is set, release the button. The tachometer will automatically save the setting after 3 seconds. If the setting is incorrect, repeat the process.
Refer to the table below for common speed ratio settings based on engine type:
| Engine Type | Poles / Cylinders | Speed Ratio |
|---|---|---|
| Outboard (Diesel Engine) | 4 Poles | 2 |
| 6 Poles | 3 | |
| 8 Poles | 4 | |
| 10 Poles | 5 | |
| 12 Poles | 6 | |
| Inboard or Gas Engine | 4 Cylinders | 2 |
| 6 Cylinders | 3 | |
| 8 Cylinders | 4 | |
| 10 Cylinders | 5 | |
| 12 Cylinders | 6 |
2. Adjusting Backlight Color:
To change the backlight color, short press the rubber button on the backside. The backlight will cycle through the following colors:
Red (default) → Green → Blue → White → Yellow → Cyan → Purple → Automatic Cycle
In 'Automatic Cycle' mode, the backlight color will change automatically every 1 minute, following the sequence above.


Maintenance
The ELING tachometer is designed for durability and requires minimal maintenance. To ensure optimal performance and longevity:
- Keep the display clean using a soft, dry cloth. Avoid abrasive cleaners or solvents.
- Regularly check all wiring connections for tightness and corrosion, especially in marine environments.
- Ensure the device is protected from extreme temperatures and direct prolonged exposure to harsh weather conditions if not rated for such use.
Troubleshooting
If you encounter issues with your tachometer, consider the following common troubleshooting steps:
- No Power/Display: Check the power (Red wire) and ground (Black wire) connections. Ensure the voltage supply is within the 9-32VDC range.
- Incorrect RPM Reading: Verify that the RPM signal wire (Blue wire) is correctly connected to the engine's signal output. Re-check the speed ratio setting as per the operating instructions.
- Backlight Not Working: Check the backlight wire (Yellow wire) connection. If the backlight is set to a specific color, try cycling through the colors by short-pressing the button.
- Intermittent Operation: Inspect all wiring for loose connections, frayed wires, or signs of corrosion. Ensure the mounting is secure and free from excessive vibration.
If problems persist after performing these checks, please contact ELING customer support for further assistance.
Specifications
| Feature | Detail |
|---|---|
| Manufacturer | ELING |
| Product Dimensions (L x W x H) | 8.5 x 8.5 x 5.5 cm |
| Weight | 400 grams |
| Model Reference | EL0849 |
| Size | 0-3000RPM (85mm) |
| Color | Black + Stainless Steel |
| Items in Package | 1 |
| Measurement Accuracy | 97% |
| Backlight Colors | 7 colors (Red, Green, Blue, White, Yellow, Cyan, Purple) |
| Hour Meter Range | 0.0-99999.9 hours |
| Speed Ratio Adjustment | 1.0 to 360 |
Warranty and Support
ELING products are manufactured with quality and reliability in mind. For any questions, technical support, or warranty inquiries, please refer to the seller's return policy or contact ELING customer service directly.
You can visit the official ELING brand store for more information and contact options: ELING Brand Store