
FLEXISPOT F8L
FLEXISPOT Gas Spring Monitor Arm F8L User Manual
Model: F8L | Brand: FLEXISPOT
1. Introduction
Thank you for choosing the FLEXISPOT F8L Gas Spring Monitor Arm. This manual provides detailed instructions for the safe and efficient installation, operation, and maintenance of your new monitor arm. Please read this manual thoroughly before use and keep it for future reference.
Key Features:
- Detachable VESA plate for easy monitor attachment.
- Adjustable height for ergonomic viewing, reducing neck, eye, and back strain.
- Wide range of motion for tilt, swivel, and rotation, allowing optimal viewing angles.
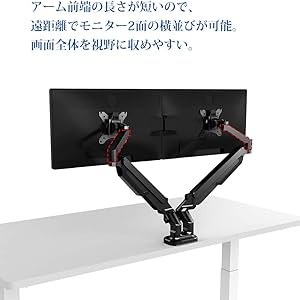
- Compact design suitable for narrow desks, enabling side-by-side monitor placement at a distance.
- Supports VESA standards: 75x75mm and 100x100mm.
- Compatible with monitors from 17" to 36" and weighing between 2-9kg.

This image shows the FLEXISPOT F8L Gas Spring Monitor Arm in white, supporting a monitor. The arm is extended, demonstrating its adjustable nature and sleek design.
2. Safety Instructions
- Ensure all parts are present and undamaged before assembly. Do not use if any parts are missing or defective.
- Do not exceed the maximum weight capacity of 9kg (19.8 lbs) or the maximum screen size of 36 inches. Overloading can cause instability and potential injury.
- Install the monitor arm on a stable and sturdy desk surface that can support the combined weight of the arm and your monitor.
- Perform all adjustments slowly and carefully. Avoid sudden movements that could cause the monitor to swing or fall.
- Keep children and pets away from the installation area.
- If you encounter any difficulties during installation or operation, refer to the troubleshooting section or contact customer support.
3. Package Contents
Please verify that all components are included in your package:
- Monitor Arm Assembly
- Desk Clamp Base
- Grommet Mount Base
- VESA Plate
- Hardware Kit (screws, washers, Allen wrenches)
- Cable Management Clips
- Instruction Manual
4. Setup and Installation
The FLEXISPOT F8L monitor arm supports two installation methods: C-clamp and Grommet mount. Choose the method suitable for your desk.
4.1 Choosing Your Mounting Method

This diagram illustrates the two primary ways to attach the monitor arm to your desk: the C-clamp method (bottom right) for desk edges and the grommet mount method (top right) for desks with existing cable holes. The grommet mount requires a hole size of 8.5-70mm, and both methods support a desk thickness of 20-100mm.
- C-Clamp Mount: Ideal for desks with edges. Supports desk thickness from 20mm to 100mm.
- Grommet Mount: Requires an existing hole in your desk (diameter 8.5mm to 70mm). Supports desk thickness from 20mm to 100mm.
4.2 Attaching the Monitor Arm to Your Desk
- For C-Clamp Mount:
- Attach the C-clamp base to the main pole of the monitor arm.
- Position the clamp on the edge of your desk and tighten the knob until it is securely fastened.
- For Grommet Mount:
- Assemble the grommet mount base and insert it through the hole in your desk.
- Secure it from underneath the desk using the provided plate and nut.
4.3 Attaching the Monitor to the Arm

This image demonstrates the detachable VESA plate feature. The VESA plate can be easily removed from the monitor arm, allowing you to attach it to the back of your monitor first, and then slide the monitor with the plate onto the arm for a simpler installation process.
- Attach VESA Plate to Monitor:
- Remove the VESA plate from the monitor arm by lifting it upwards.
- Align the VESA plate with the mounting holes on the back of your monitor (75x75mm or 100x100mm).
- Secure the plate to the monitor using the appropriate screws from the hardware kit. Do not overtighten.
- Mount Monitor to Arm:
- Carefully slide the monitor (with the attached VESA plate) onto the arm's mounting head until it clicks into place.
- Ensure the monitor is securely seated before releasing it.
5. Operating and Adjustments
The FLEXISPOT F8L monitor arm offers a wide range of adjustments to achieve your optimal viewing experience.
5.1 Gas Spring Tension Adjustment
The gas spring tension needs to be adjusted according to your monitor's weight to ensure smooth and stable movement. If the monitor sags or springs up too easily, adjust the tension screw located on the arm joint (often covered by a plastic cap).
- Use the provided Allen wrench to turn the screw.
- Turn clockwise to increase tension (for heavier monitors).
- Turn counter-clockwise to decrease tension (for lighter monitors).
- Adjust gradually until the monitor stays in position when released.
5.2 Monitor Position Adjustments

This diagram illustrates the extensive range of motion for the monitor arm, including 360° rotation, 180° horizontal swivel, and tilt adjustment from -90° to 15°. These features allow for precise positioning of your monitor.
- Height Adjustment: Gently push or pull the monitor up or down to adjust its vertical position. The gas spring will hold it in place.
- Tilt Adjustment: Tilt the monitor screen up or down from -90° to 15° to reduce glare and optimize viewing angle.
- Swivel Adjustment: Swivel the monitor arm horizontally up to 180° to share your screen or change viewing direction.
- Rotation Adjustment: Rotate the monitor 360° between landscape and portrait orientations.
This illustration compares typical poor posture when using a fixed monitor stand (left) versus the improved ergonomic posture achievable with a monitor arm (right). By allowing flexible height and angle adjustments, the monitor arm helps reduce strain on the neck, eyes, and back.
6. Maintenance
- Regularly check all screws and connections to ensure they are tight and secure. Retighten if necessary.
- Clean the monitor arm with a soft, damp cloth. Avoid abrasive cleaners or solvents that could damage the finish.
- Do not lubricate the gas spring mechanism. It is designed to be maintenance-free.
7. Troubleshooting
| Problem | Possible Cause | Solution |
|---|---|---|
| Monitor sags or does not stay at desired height. | Gas spring tension is too low for the monitor's weight. | Increase gas spring tension by turning the adjustment screw clockwise with the provided Allen wrench. |
| Monitor is difficult to push down or springs up too quickly. | Gas spring tension is too high for the monitor's weight. | Decrease gas spring tension by turning the adjustment screw counter-clockwise with the provided Allen wrench. |
| Monitor wobbles or feels unstable. | Mounting clamp/grommet is not tight enough, or VESA screws are loose. | Ensure the desk clamp/grommet mount is securely tightened. Check and tighten all VESA mounting screws on the back of the monitor. |
| Cannot attach VESA plate to monitor. | Incorrect VESA pattern or screw size. | Verify your monitor's VESA pattern (75x75mm or 100x100mm). Use the correct screws from the hardware kit. |
8. Specifications
| Feature | Detail |
|---|---|
| Model | F8L |
| VESA Compatibility | 75x75mm, 100x100mm |
| Screen Size Compatibility | 17" - 36" |
| Load Capacity | 2 - 9 kg (4.4 - 19.8 lbs) |
| Tilt Range | -90° to +15° |
| Swivel Range | 180° |
| Rotation | 360° (Landscape to Portrait) |
| Mounting Type | C-Clamp or Grommet Mount |
| Desk Thickness (Clamp/Grommet) | 20mm - 100mm |
| Max Arm Extension | Approx. 62 cm (24.4 inches) |
| Max Height from Desk | Approx. 51 cm (20.1 inches) |

This diagram provides key dimensions of the monitor arm, including a maximum height of approximately 51cm and a maximum horizontal extension of approximately 62cm, illustrating its reach and adjustability.
9. Warranty and Customer Support
FLEXISPOT provides a 1-year warranty from the date of purchase for this product. This warranty covers manufacturing defects and material flaws under normal use.
For any questions, concerns, or issues regarding your FLEXISPOT F8L Gas Spring Monitor Arm, please contact our customer support team:
- Email: contact@flexispot.jp
- Please provide your purchase details and a description of the issue for faster assistance.
Related documentsF8L


Ask a question about this manual
Ask about setup, troubleshooting, compatibility, parts, safety, or missing instructions. Manuals+ will review the question and use this page’s manual context to help answer it.