
1. Introduction
Thank you for choosing the Furmax Electric Height Adjustable Standing Desk. This desk is designed to promote a healthier work environment by allowing you to seamlessly switch between sitting and standing positions. This manual provides essential information for the safe assembly, operation, and maintenance of your new desk.

Image 1.1: The Furmax Electric Height Adjustable Standing Desk in a typical office setup.
2. Safety Information
Please read all safety instructions carefully before assembly and use. Failure to follow these instructions may result in injury or damage to the product.
- Weight Limit: Do not exceed the maximum weight recommendation of 145 pounds (65.77 kg). Exceeding this limit may cause damage to the desk or pose a risk of injury.
- Stability: Always ensure the desk is properly assembled and stable before placing items on it or adjusting its height.
- Motor Safety: The electric motor system includes safety features such as anti-collision and overheat protection. Do not attempt to bypass or disable these features.
- Power Disconnection: Always unplug the desk from the power outlet when not in use, during cleaning, or during maintenance.
- Children and Pets: Keep children and pets away from the desk during operation to prevent accidents.
- Clearance: Ensure there is adequate clearance around the desk during height adjustments to avoid pinching or crushing hazards.
3. Package Contents
Before beginning assembly, verify that all components are present and undamaged. If any parts are missing or damaged, please contact customer support.
- Desktop (40 x 24 Inches, typically in two pieces)
- Desk Legs (Metal Frame)
- Electric Motor and Control Box
- Digital Control Panel
- Power Adapter and Cable
- Assembly Hardware (Screws, Bolts, Washers)
- Assembly Tools (Allen Key, Screwdriver)
- Headphone Hook
- Cable Hole Cover
- Cable Management Clips
4. Assembly Instructions
Assembly typically takes around 30 minutes. While one person can assemble the desk, a second person is recommended for flipping the assembled desk upright.

Image 4.1: Quick installation overview of desk components.
- Unpack Components: Carefully remove all parts from the packaging and lay them out on a clean, soft surface to prevent scratches.
- Assemble Desktop: The desktop typically comes in two pieces. Use the provided bracing plates and screws to join the two desktop sections. When tightening the small wood screws, use the correct size screwdriver and tighten both screws gradually to ensure a flush fit and prevent stripping. Avoid using power tools unless experienced.
- Attach Legs to Desktop: Secure the desk legs to the underside of the desktop using the provided hardware. Ensure all screws are tightened securely.
- Install Rotating Shaft: Carefully install the rotating shaft that connects the two leg mechanisms. It is crucial that both legs are set to the exact same height before attaching the shaft to ensure proper synchronization. Use the leveling screws at the bottom of the feet to make minor adjustments if needed.
- Mount Control Box and Panel: Attach the control box and digital control panel to the designated locations under the desktop or on the front edge.
- Connect Cables: Connect all motor and control panel cables to the control box according to the wiring diagram in the detailed manual (if provided).
- Install Accessories: Attach the headphone hook and cable hole cover. Use the included cable management clips to organize wires neatly under the desk.
- Flip Desk Upright: With assistance, carefully flip the assembled desk upright onto its feet.
- Level Desk: Adjust the leveling feet at the bottom of the desk legs to ensure the desk is stable and does not wobble on uneven floors.
5. Operating Instructions
Your Furmax Electric Standing Desk features smooth and quiet height adjustment with memory presets for convenience.

Image 5.1: The desk offers a height adjustment range from 28.7 inches to 46.4 inches.
Height Adjustment
- Raise Desk: Press and hold the UP (▲) key on the control panel. The desk will move upwards at approximately 1 inch per second.
- Lower Desk: Press and hold the DOWN (▼) key on the control panel. The desk will move downwards at approximately 1 inch per second.
- Release the button at any time to stop the desk at your desired height. The motor operates with low noise, typically under 50 dB.
Memory Presets
The desk features 1 or 2 memory keys (labeled '1' and '2') to save and quickly recall your preferred sitting and standing heights.
- Set a Memory Height: Adjust the desk to your desired height using the UP or DOWN keys.
- Press and hold the 1/2 Key (or 'M' key if present) until the LED display flashes or beeps, indicating it's ready to save.
- Immediately press the desired memory button (e.g., '1' for sitting height, '2' for standing height). The height is now saved.
- Recall a Memory Height: Simply press the corresponding memory button (e.g., '1' or '2'). The desk will automatically move to the saved height.
Safety Features
- Anti-Collision Function: If the desk encounters an obstruction during adjustment, it will automatically stop and reverse slightly to prevent damage.
- Overheat Protection: The motor is equipped with overheat protection. If the motor is used continuously for an extended period, it may temporarily stop to cool down. Operation will resume once the motor has cooled.
- Safety Lock Function: Consult your detailed manual for instructions on activating or deactivating the safety lock, which prevents accidental adjustments.
6. Control Panel Functions
The digital control panel provides intuitive control over your desk's height adjustments and memory settings.
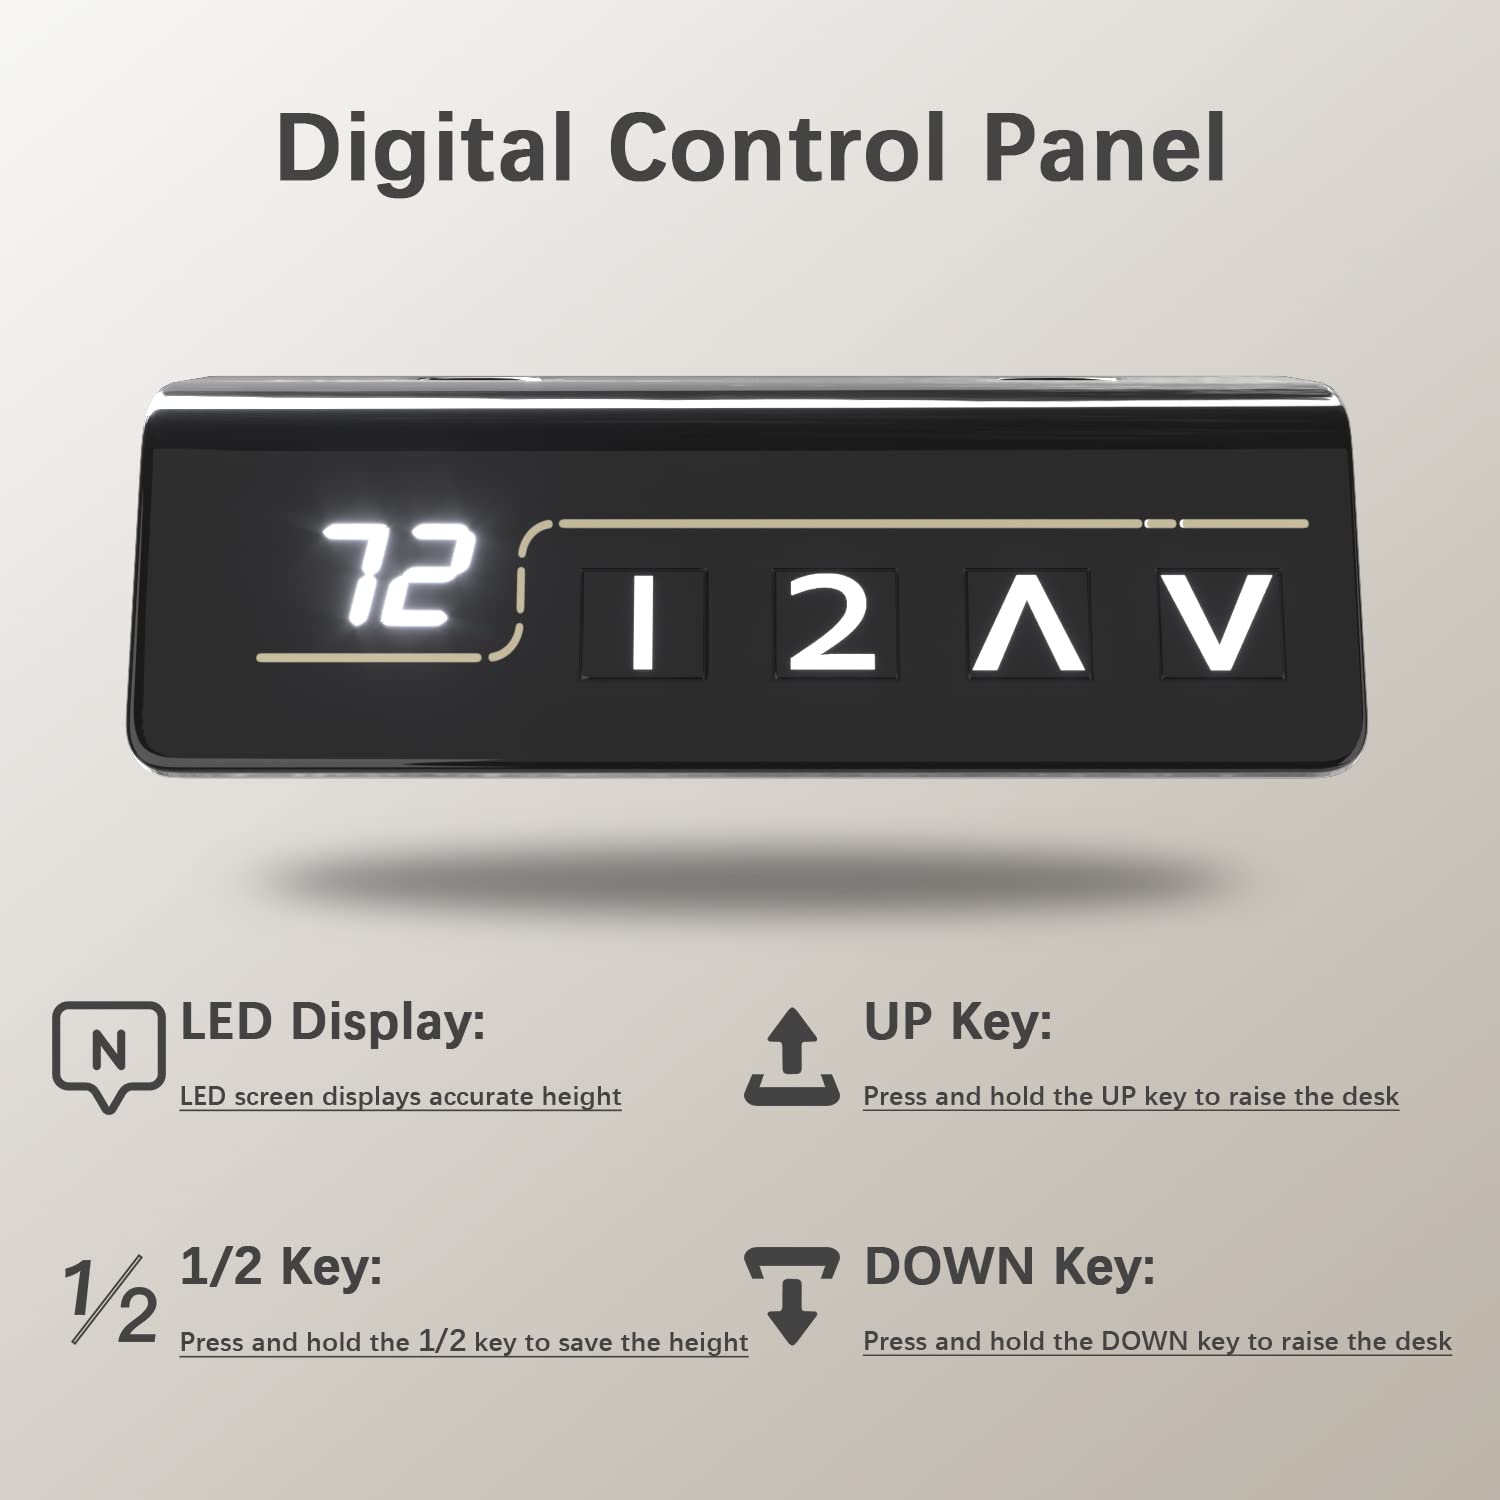
Image 6.1: Digital Control Panel with LED display and control buttons.
- LED Display: Shows the current desk height in inches.
- UP Key (▲): Press and hold to raise the desk.
- DOWN Key (▼): Press and hold to lower the desk.
- 1/2 Key (Memory Presets): Used to save and recall preset heights. Follow the instructions in Section 5 for setting and recalling memory positions.
7. Maintenance
Regular maintenance helps ensure the longevity and smooth operation of your Furmax standing desk.
- Cleaning: Wipe the desktop and frame with a soft, damp cloth. Avoid using harsh chemicals or abrasive cleaners that could damage the finish.
- Check Connections: Periodically inspect all screws and bolts to ensure they remain tight. Retighten if necessary.
- Cable Management: Ensure cables are neatly organized and not pinched or tangled, which could affect desk operation or cause damage.
- Lubrication: The motor and lifting mechanisms are generally maintenance-free. Do not attempt to lubricate internal components unless specifically instructed by Furmax support.
8. Troubleshooting
If you encounter issues with your desk, refer to the following common troubleshooting steps:
- Desk Not Moving:
- Check if the power cable is securely plugged into both the desk and the wall outlet.
- Ensure the wall outlet is functional by testing it with another device.
- If the motor has been used continuously, it might be in overheat protection mode. Allow it to cool down for 20-30 minutes.
- Check for any obstructions that might be triggering the anti-collision system.
- Uneven Height:
- Ensure the rotating shaft connecting the legs is correctly installed and both legs were at the same height during assembly.
- Perform a reset (refer to your detailed manual for specific reset procedures, if available). A common reset involves holding the DOWN button for several seconds until the desk reaches its lowest point and slightly rises.
- Error Codes on Display:
- If an error code appears on the LED display, consult the detailed product manual or contact customer support for specific interpretations and solutions.
If these steps do not resolve the issue, please contact Furmax customer support.
9. Specifications
Key technical specifications for the Furmax Electric Height Adjustable Standing Desk (Model ST241).

Image 9.1: Desk dimensions and weight capacity.
| Feature | Specification |
|---|---|
| Model Number | ST241 |
| Desktop Dimensions (W x D) | 40 x 24 Inches (101.6 x 61 cm) |
| Height Adjustment Range | 28.7 to 46.4 Inches (72.9 to 117.8 cm) |
| Maximum Weight Capacity | 145 lbs (65.77 kg) |
| Adjustment Speed | Approx. 1 inch/second |
| Noise Level | Under 50 dB |
| Desktop Material | Wood (Laminated) |
| Frame Material | Alloy Steel |
| Color | White |
| Item Weight | 19 Kilograms |
| Assembly Required | Yes |
| Recommended People for Assembly | 1 (2 recommended for lifting) |
10. Warranty and Support
Please note that this product does not come with a standard manufacturer's warranty. Any protection plans, such as the '1 Year Damage Protection by Sencov', are typically separate purchases and not included with the product itself. For specific details regarding any purchased protection plans, please refer to the terms and conditions provided by the plan provider.
For technical assistance, missing parts, or any questions not covered in this manual, please contact Furmax customer support through your retailer's platform or the official Furmax website. When contacting support, please have your product model number (ST241) and purchase information readily available.


